HarmonyOS 鸿蒙Next体验官#5行代码渲染出3D悟空!
HarmonyOS 鸿蒙Next体验官#5行代码渲染出3D悟空!
<markdown _ngcontent-axj-c237="" class="markdownPreContainer">
1 简介
在一些购物或者游戏应用开发中常用到3D模型,立体效果给用户更直观的体验。HarmonyOS NEXT支持3D模型渲染,本篇将介绍如何使用HarmonyOS NEXT提供的ArkGraphics 3D (方舟3D图形服务)渲染一个3D悟空模型。通过本篇文章你将学到:
- 如何使用Component3D组件。
- 如何对3D场景进行操作:
- 加载模型,目前仅支持glft格式,7行代码即可加载一个3D模型!
- 创建光源,可获取或定义光源
- 创建相机,可获取或自定义观察者视角(相机)
- 改变光源位置、模型坐标和转动
- 动画控制,模型有动画时可控制其播放、停止
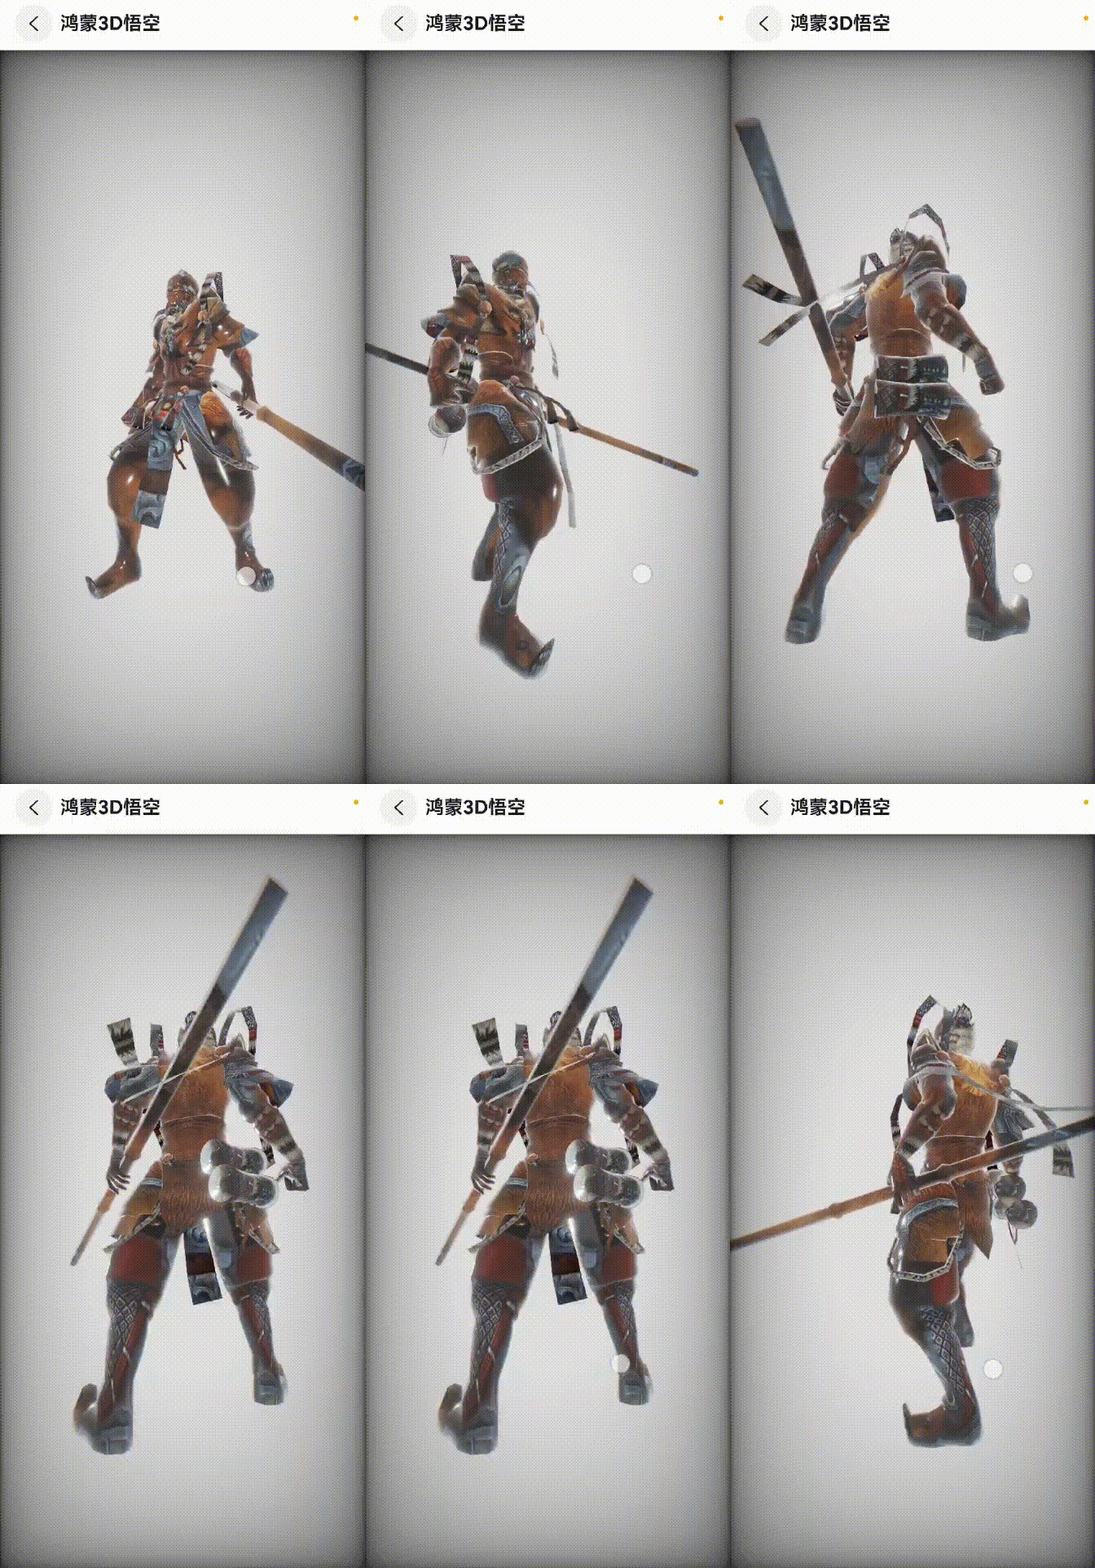
使用ArkGraphics 3D渲染3D悟空模型效果如下:

2 环境搭建
我们首先需要完成HarmonyOS开发环境搭建,可参考(开发一个BLE低功耗蓝牙调试助手(一)连接蓝牙服务设备-华为开发者论坛)中的第二章进行操作。
3 代码结构解读
本篇文档只对核心代码进行讲解,全部代码可看仓库地址HelloKun - Gitee.com。
. entry/src
|-- common // 常用工具库
|   |-- CommonConstants.ets
|   |-- Logger.ets
|   `-- PermissionUtil.ets
|-- entryability
|   `-- EntryAbility.ets // 入口,设置全屏
`-- pages
    |-- Index.ets      // 首页
    |-- NodeBase.ets   // 模型操作页面
    `-- Render3D.ets   // 7行代码实现渲染3D模型
<button style="position: absolute; padding: 4px 8px 0px; cursor: pointer; top: 4px; right: 8px; font-size: 14px;">复制</button>
4 构建应用主界面
后续计划将3D模型与传感器结合起来,实现游戏中陀螺仪操作人物模型的效果,所以首页面使用Navigation组件实现布局,先将需要展示的3D渲染页面单独存放在一个页面中。Navigation组件在#体验官系列教程#中多次使用,具体实现步骤总结如下1-5点:
 // Index.ets
[@Entry](/user/Entry)
[@Component](/user/Component)
struct Index {
// 1. 导航页面列表
@Builder
PageMap(name: string) {
…
else if (name === “Render3D”) {
Render3D();
}
…
}
// 2.导航页面栈信息
@Provide(‘pageInfos’) pageInfos: NavPathStack = new NavPathStack()
build() {
Navigation(this.pageInfos) {
// 3.List显示需要导航的页面列表
List({ space: 10 }) {
ForEach(SensorSources, (data: IconItem, index: number) => {
ListItem() {
Column()
{
…
}.justifyContent(FlexAlign.Start)
.width(‘95%’)
.onClick(() => { // 点击对应设备,获取子页面title
this.clickNum = index;
this.LingDongName = data.title
if(this.clickNum === 1)
{ // 4.点击后导航到指定页面
this.pageInfos.pushPath({ name: “Render3D”})
}
…
})
Divider()
…
}
.title(“灵动传感”)
.mode(NavigationMode.Auto)
.navDestination(this.PageMap) // 5.绑定页面列表
}
}
<button style="position: absolute; padding: 4px 8px 0px; cursor: pointer; top: 4px; right: 8px; font-size: 14px;">复制</button>
5 Graphic3D渲染模型
5.1 什么是Graphic3D?
ArkGraphics 3D (方舟3D图形服务)基于轻量级的3D引擎以及渲染管线为开发者提供基础3D场景绘制能力,供开发者便捷、高效地构建3D场景并完成渲染。更多请参考ArkGraphics 3D简介- 华为HarmonyOS开发者
简单来说,方舟图形服务支持3D场景绘制中模型、光源、相机三个关键组成部分的加载与管理。
模型:加载需要渲染的3D模型到应用文件沙盒中,例如本案例中的3D悟空,目前ArkGraphics 3D支持的模型描述格式为glTF。
光源:可自定义整个3D场景光照,使得3D场景中的模型变得可见。没有光源得到的渲染结果也就是全黑色。
相机:用户看到的3D场景图像其实是相机提供一个观察者视角。3D渲染本质上是从一个角度观察3D场景并投影到一张2D图片上。
场景管理:提供自定义灯光(Light)、相机(Camera)节点以及通用节点(Node)的能力,支撑开发者自定义场景灯光、渲染视角等信息。用户可以动态地调整场景树结构以及节点属性进而调整3D场景。例如通过动态的修改Node,可以实现旋转、拖动、缩放模型的效果。具体可见Scene (场景管理)以及SceneNode (节点管理)。
3D资源管理:提供创建图片(Image)、材质(Material)、环境(Environment)以及自定义着色器(Shader)的能力,具体见SceneResource (资源管理)。
动画控制:能控制动画的开始、暂停、结束、播放到指定位置等控制3D场景动画状态,具体可见SceneResource (资源管理)。
5.2 如何使用Component3D组件
在HarmonyOS NEXT(API 12+)中,通过Component3D组件即可使用方舟3D图形服务,基本使用步骤如下:
- 引入@kit.ArkGraphics3D,包括相机、光源、节点、动画等。
import {
  Animation,
  Environment,
  LayerMask,
  NodeType,
  Node,
  Geometry,
  LightType,
  Light,
  Camera,
  Scene  } from '@kit.ArkGraphics3D';
<button style="position: absolute; padding: 4px 8px 0px; cursor: pointer; top: 4px; right: 8px; font-size: 14px;">复制</button>
定义场景,两个参数:
scene模型路径(3D模型可以自行在各glft模型网站中下载)
modelType渲染类型(TEXTURE渲染到纹理、渲染到表面(需要硬件支持))
scene: SceneOptions = { scene: $rawfile('scene_wukong_big.gltf'), modelType: ModelType.TEXTURE};
<button style="position: absolute; padding: 4px 8px 0px; cursor: pointer; top: 4px; right: 8px; font-size: 14px;">复制</button>- 配置渲染参数,加载场景。7行关键代码,即可渲染出3D模型!
- 组件需要传入场景参数scene
- 设置渲染高宽
- 设置模型所处的环境
 // 在Index.ets中直接使用这个子组件即可显示3D模型
[@Component](/user/Component)
export struct WuKong {
  scene: SceneOptions = { scene: $rawfile('scene_wukong_big.gltf'), modelType: ModelType.TEXTURE};
  build() {
    Column() {
      Component3D(this.scene)
        .environment($rawfile('scene_wukong_big.gltf'))
        .renderWidth('100%').renderHeight('100%')
    }.width('100%')
     .height('100%')
  }
}
<button style="position: absolute; padding: 4px 8px 0px; cursor: pointer; top: 4px; right: 8px; font-size: 14px;">复制</button>
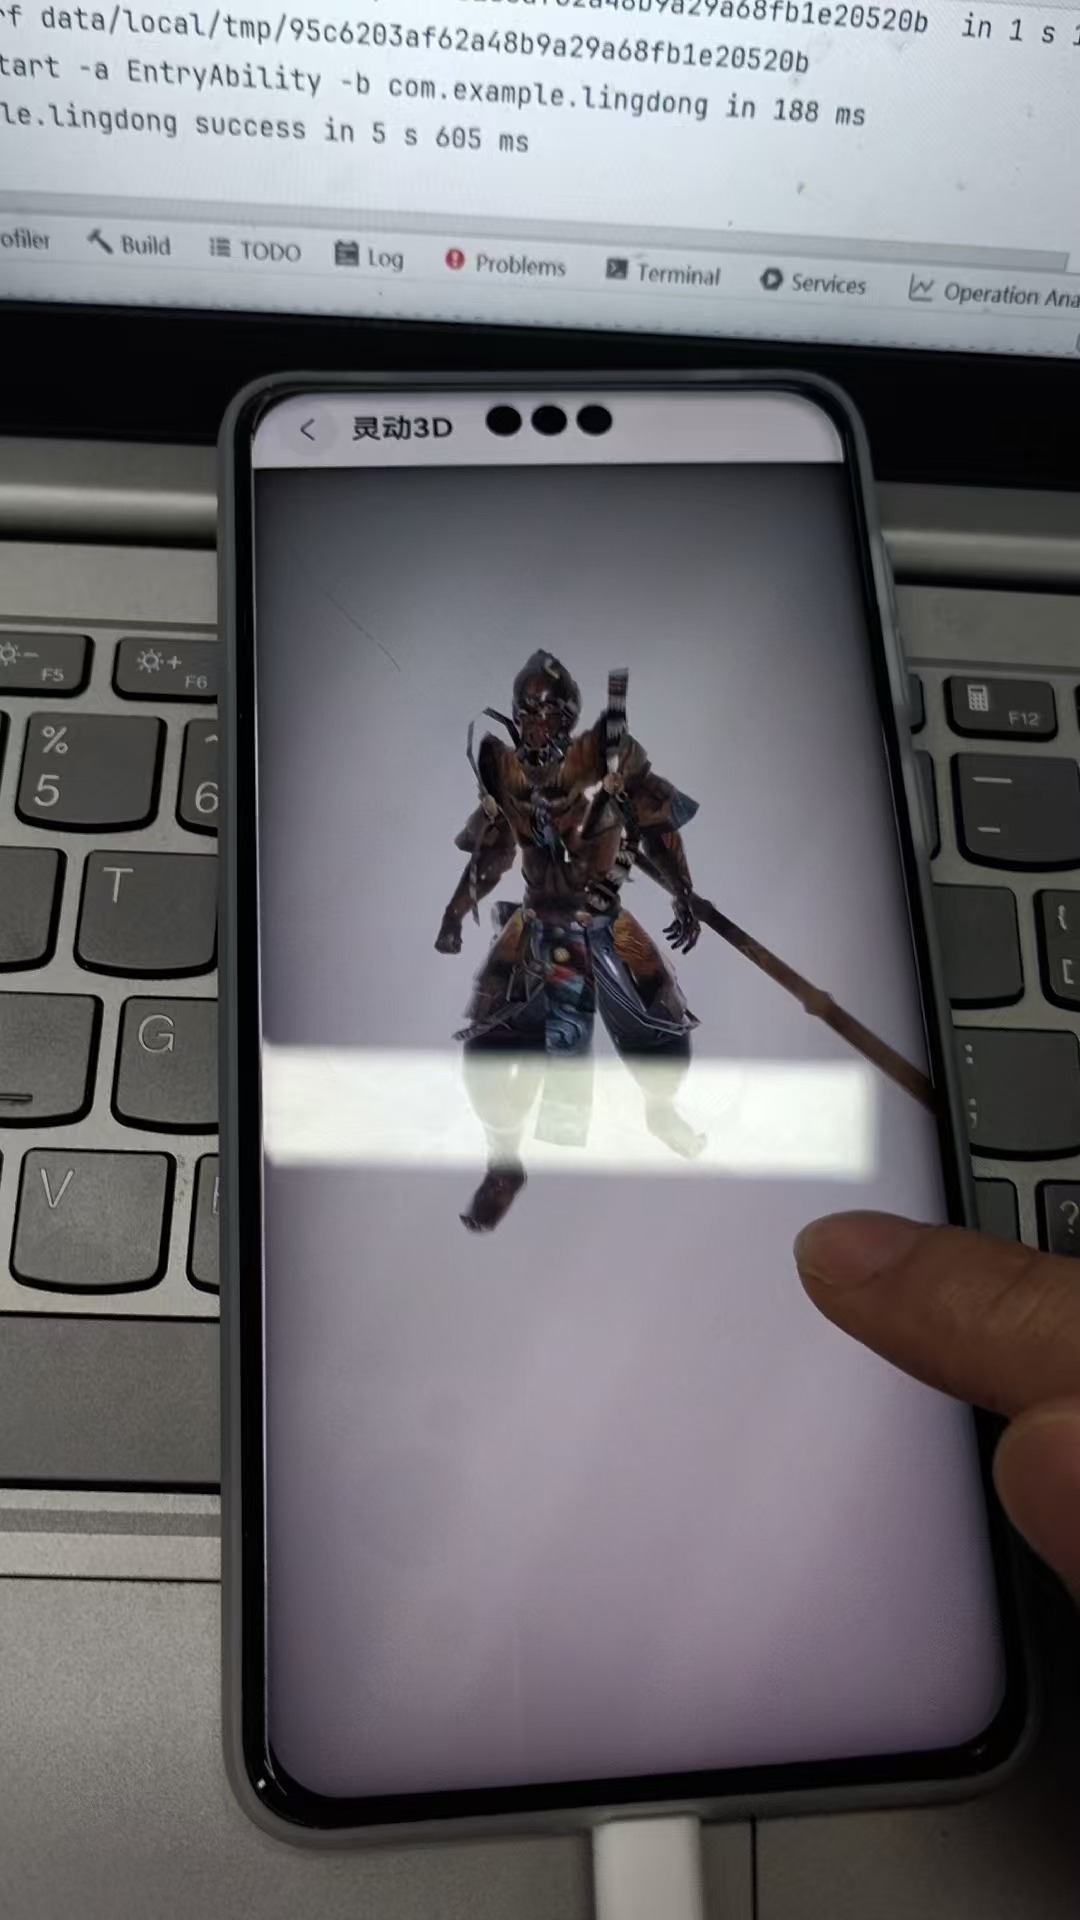
渲染效果如下:

5.3 如何构建3D场景
5.1-5.2节介绍了Graphic3D以及Component3D组件的基本使用方法。下面介绍如何精细化的管理我们的3D场景。例如获取并自定义模型中的相机、光源、背景等。
5.3.1 异步加载模型
管理3D场景之前先需要加载模型。3D模型通常较大,使用异步方式加载模型,加载成功后即可在其中获取3D场景元素。加载方式如下:
scene: Scene | null = null;
[@State](/user/State) sceneOpt: SceneOptions | null = null;
IinitModle(): void {
    if (this.scene === null) {
      Scene.load($rawfile('scene_wukong_big.gltf'))
        .then(async (result: Scene) => {
          if (!result) {
            return;
          }
          this.scene = result;
          // 模型渲染选项
    this.sceneOpt = { scene: this.scene, modelType: ModelType.TEXTURE} as SceneOptions;
          ...
     }).catch((reason: string) => {
        Logger.error(TAG, `init error: ${reason}`);
      });
    }
  }
<button style="position: absolute; padding: 4px 8px 0px; cursor: pointer; top: 4px; right: 8px; font-size: 14px;">复制</button>
5.3.2 配置相机
一个glTF模型可以包含相机要素。成功加载模型后,如果一个glTF模型中包含相机,可以使用ArkGraphics 3D提供的接口获取相机,自定义相机参数后加载场景,也可以直接完成该相机视角下3D场景的渲染。如果不包含相机,也可以利用ArkGraphics 3D创建一个相机完成渲染。以下代码展示如何从模型中获取并配置相机:
cam: Camera | null = null;
IinitModle(): void {
    if (this.scene === null) {
      Scene.load($rawfile('scene_wukong.gltf.glb'))
        .then(async (result: Scene) => {
          if (!result) {
            return;
          }
          this.scene = result;
          let sceneFactory: SceneResourceFactory = this.scene.getResourceFactory();
          // 从加载的模型中获取相机
          this.cam = await sceneFactory.createCamera({ 'name': 'Camera1' });
          // 配置星际
          this.cam.enabled = true;
          this.cam.position.z = 10;
          this.cam.clearColor ={r:10,g:10,b:20,a:1};
          ...
     }).catch((reason: string) => {
        Logger.error(TAG, `init error: ${reason}`);
      });
    }
  }
<button style="position: absolute; padding: 4px 8px 0px; cursor: pointer; top: 4px; right: 8px; font-size: 14px;">复制</button>
5.3.3 光源的管理
成功加载模型后,如果一个glTF模型中包含光源,可以使用ArkGraphics 3D提供的接口获取光源,自定义光源参数后再渲染场景。如果不包含光源,也可以利用ArkGraphics 3D创建光源。
光源的属性参数有:
- 光类型:平行光(DIRECTIONAL)、点光源(SPOT)
- 光颜色:RGBA参数
- 强度:intensity
- 阴影:shadowEnabled
- 光源开关:enabled,关闭光源后场景一片漆黑
light: Light | null = null;
IinitModle(): void {
    if (this.scene === null) {
      Scene.load($rawfile('scene_wukong.gltf.glb'))
        .then(async (result: Scene) => {
          if (!result) {
            return;
          }
          this.scene = result;
          ...
          // 创建平行光
  this.light = await sceneFactory.createLight( { name: "light" },LightType.DIRECTIONAL);
          // 设置平行光的属性
          this.light.color = { r: 0.8, g: 0.1, b: 0.2, a: 1.0 };
          this.light.intensity = 100000;
          ...
     }).catch((reason: string) => {
        Logger.error(TAG, `init error: ${reason}`);
      });
    }
  }
<button style="position: absolute; padding: 4px 8px 0px; cursor: pointer; top: 4px; right: 8px; font-size: 14px;">复制</button>
5.3.4 获取节点
加载模型后可以通过路径获取结点,可以自定义节点属性:
- 节点大小scale。控制模型的显示大小
- 节点位置position,控制模型的摆放角度
- 节点方向rotation,控制模型旋转的方向
- 节点可见性,是否显示该节点(模型的可见性)
以下示例代码展示获取节点后,拿到其z坐标(改变其大小可让模型在场景中移动):
node: Node | null | undefined = null;
[@State](/user/State) zAxis: number = 0;
IinitModle(): void {
    if (this.scene === null) {
      Scene.load($rawfile('scene_wukong.gltf.glb'))
        .then(async (result: Scene) => {
          if (!result) {
            return;
          }
          this.scene = result;
          ...
         // 获取节点,节点名根据具体的glft模型确定
         this.node = this.scene.getNodeByPath('rootNode_');
          if (this.node) {
            this.zAxis = this.node.position.z; // 获取节点z坐标
            console.info(TAG,'this.node.position.z',this.node.position.z.toString())
          }else{
            console.info(TAG,'this.node is NULL')
          }
          ...
     }).catch((reason: string) => {
        Logger.error(TAG, `init error: ${reason}`);
      });
    }
  }
<button style="position: absolute; padding: 4px 8px 0px; cursor: pointer; top: 4px; right: 8px; font-size: 14px;">复制</button>
5.3.5 加载场景
有了光源、相机等要素,我们可以直接渲染自定义后的模型。
  build() {
    Column({ space:20 }) {
      Column() {
        if (this.sceneOpt) {
          Component3D(this.sceneOpt)
            .renderWidth('60%')
            .renderHeight('60%')
        } else {
          Text('loading');
        }
        // 可以使用基础控件操作模型场景参数,如改变模型位置:
        Slider({
          value: this.value,
          min: this.value - 100,
          max: this.value + 100,
          step: 10,
          style: SliderStyle.OutSet
        })
          .showTips(false)
          .onChange((value: number, mode: SliderChangeMode) => {
            this.zAxis = value;
            if (mode === SliderChangeMode.End) {
              if (!this.node) {
                return;
              }
              this.node.position.z = this.zAxis;
              console.info(TAG,'this.node.position.z'+this.node.position.z.toString())
            }
          })
          .width('100%')
          .height(20)
      }
    }
 }
<button style="position: absolute; padding: 4px 8px 0px; cursor: pointer; top: 4px; right: 8px; font-size: 14px;">复制</button>关于HarmonyOS 鸿蒙Next体验官#5行代码渲染出3D悟空!的问题,您也可以访问:https://www.itying.com/category-93-b0.html 联系官网客服。
更多关于HarmonyOS 鸿蒙Next体验官#5行代码渲染出3D悟空!的实战教程也可以访问 https://www.itying.com/category-93-b0.html


