HarmonyOS 鸿蒙Next基于RichEditor的评论编辑
HarmonyOS 鸿蒙Next基于RichEditor的评论编辑
场景描述
RichEditor是支持图文混排和文本交互式编辑的组件,在我们使用的APP中是很常见的,比如评论区编辑内容发布、对话框或者聊天室。下面列举一些遇到的场景需求:
场景一:基于文字图片以及@信息的好友评论
场景二:右下角的剩余字数
场景三:评论中携带所@的用户的附属信息
场景四:文本选择区域发生变化或编辑状态下光标位置发生变化回调
场景五:自由切换系统键盘和自定义键盘。
方案描述
场景一:基于文字图片以及@信息的好友评论
效果图
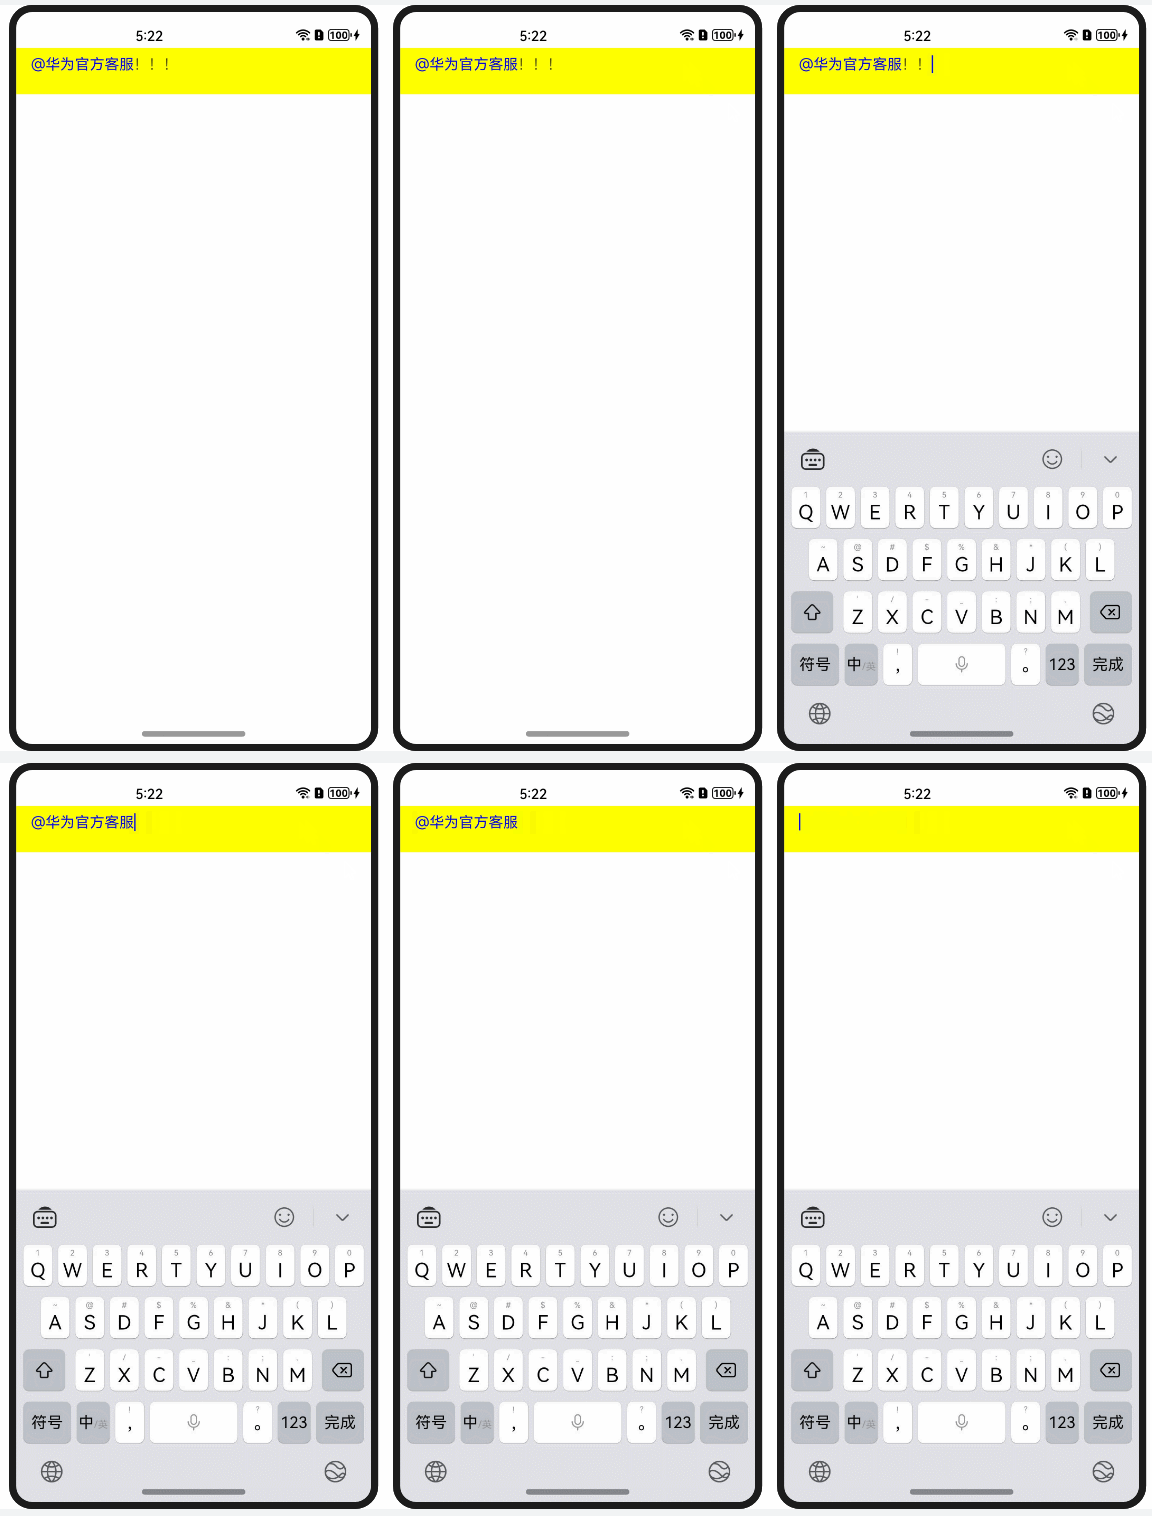
方案
1、通过addTextSpan来添加文字,2、通过addImageSpan来添加图片3、通过addBuilderSpan来实现一段内容光标不可插入的效果4、addTextSpan等支持gesture等手势操作,比如onClick点击和onLongPress长按事件
核心代码
1、由于RichEditor是支持图文混排的,所以RichEditor里面的内容也就是由Text和Image组成的,分别通过addTextSpan和addImageSpan添加,而且还可以设置字体和图片样式,如下代码1:
@Entrystruct getSpans {
editorController = new RichEditorController()
build() {
Column() {
RichEditor({ controller: this.editorController })
.width(‘100%’)
.backgroundColor(Color.Yellow)
.onReady(() => {
this.editorController.addImageSpan($r(“app.media.icon”),
{
imageStyle:
{
size: [“100px”, “100px”]
}
})
this.editorController.addTextSpan(‘男生女生向前冲’,
{
style:
{
fontColor: Color.Blue,
fontSize: 30
}
})
})
Button(‘getSpans-图片’).onClick((event: ClickEvent) => {
let getSpans = this.editorController.getSpans({ start: 0 })
console.log(‘getSpans0’ + JSON.stringify(getSpans[0]))
// 必须进行强转才能获取文字信息或者图片信息
let span0 = getSpans[0] as RichEditorTextSpanResult
console.log('图片相关的信息: ’ + JSON.stringify(span0))
})
Button(‘getSpans-文字’).onClick((event: ClickEvent) => {
let getSpans = this.editorController.getSpans({ start: 0 })
console.log(‘getSpans1’ + JSON.stringify(getSpans[1]))
let span1 = getSpans[1] as RichEditorImageSpanResult
console.log('文字相关的信息: ’ + JSON.stringify(span1))
})
}
}
}<button style="position: absolute; padding: 4px 8px 0px; cursor: pointer; top: 8px; right: 8px; font-size: 14px;">复制</button>
2、在常见的评论区艾特好友时,会将“@华为官方客服”视作一个整体,光标无法插入其中,且第一次按删除键时整体会高亮选中,第二次再按删除键才会删除。**需要注意的是,如果使用的全局@Builder,则需要配合bind(this)使用。**后续也可以通过事件阻止“即RichEditor控件ClickEvent/TouchEvent支持preventDefault”。
@Entrystruct BuilderSpan {
editorController = new RichEditorController()
At(str: string) {
Stack() {
Text(’@’ + str).fontColor(Color.Blue)
}
}
build() {
Column() {
RichEditor({ controller: this.editorController })
.width(‘100%’)
.height(50)
.backgroundColor(Color.Yellow)
.onReady(() => {
this.editorController.addBuilderSpan(() => {
this.At(‘华为官方客服’)
})
this.editorController.addTextSpan(’!!!’)
})
}
}
}<button style="position: absolute; padding: 4px 8px 0px; cursor: pointer; top: 8px; right: 8px; font-size: 14px;">复制</button>
3、发微博的时候可以输入表情、超链接、文字等一起的内容
代码3:
@Componentstruct Index {
@State message: string = ‘#超话社区#’;
controller: RichEditorController = new RichEditorController();
@State show: boolean = false;
build() {
Column() {
RichEditor({controller: this.controller})
.height(56)
.width(“90%”)
.borderStyle(BorderStyle.Solid)
.borderColor(Color.Black)
.borderWidth(1)
.onReady(() => {
})
Button(‘输入表情’).onClick((event: ClickEvent) => {
this.controller.addImageSpan($r(‘app.media.app_icon’), {
imageStyle: {
size: [“80px”, “80px”]
}
})
})
Button(‘超链接’).onClick((event: ClickEvent) => {
this.controller.addTextSpan(this.message, {
offset: this.controller.getCaretOffset(),
style:
{
fontColor: Color.Orange,
fontSize: 16
},
gesture:
{
onClick: () => {
console.log(‘要跳转链接了哦’)
},
onLongPress: () => {
console.log(‘我被长按了’)
}
}
})
this.controller.setCaretOffset(this.controller.getCaretOffset() + this.message.length)
})
}
.width(‘100%’)
}
}<button style="position: absolute; padding: 4px 8px 0px; cursor: pointer; top: 8px; right: 8px; font-size: 14px;">复制</button>
场景二:右下角的剩余字数
效果图
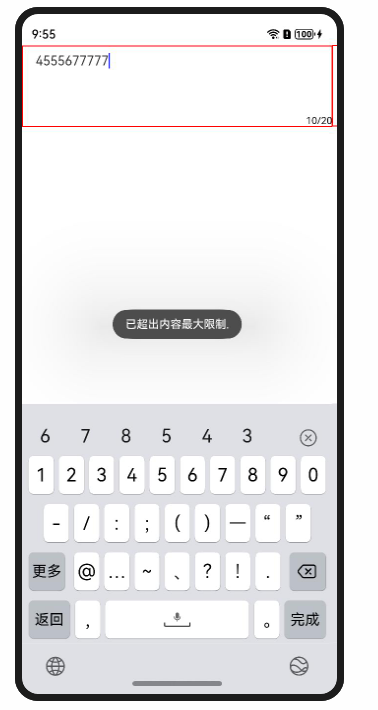
方案
使用overlay浮层,显示“0/20”字数提示符在组件的右下角。再通过aboutToIMEInput回调(输入法输入内容前),获取插入的文本偏移位置,对输入内容进行限制。
核心代码
import promptAction from ‘@ohos.promptAction’;struct MaxDemo {
@State message: string = ‘蜡笔小新’;
controller: RichEditorController = new RichEditorController();
@State getContentLength: number = 0;
@State BOnSt:promptAction.ShowToastOptions = {‘message’: ‘已超出内容最大限制.’}
build() {
Column() {
RichEditor({ controller: this.controller })
.height(100)
.borderWidth(1)
.borderColor(Color.Red)
.width(“100%”)
.overlay(this.getContentLength + “/20”, {
align: Alignment.BottomEnd
})
.aboutToIMEInput((value: RichEditorInsertValue) => {
console.log(“insertOffset:” + JSON.stringify(value.insertValue)) // 插入的文本偏移位置。
if (this.getContentLength < 20) {
this.getContentLength = this.getContentLength + value.insertValue.length
console.log(‘实时的内容长度:’ + this.getContentLength)
return true
}
promptAction.showToast(this.BOnSt)
return false
})
.aboutToDelete((value: RichEditorDeleteValue) => {
console.log(‘删除:’ + JSON.stringify(value))
this.getContentLength = this.getContentLength - value.length
return true
})
}
.width(‘100%’)
}
}<button style="position: absolute; padding: 4px 8px 0px; cursor: pointer; top: 8px; right: 8px; font-size: 14px;">复制</button>
场景三:评论中携带所@的用户的附属信息
效果图
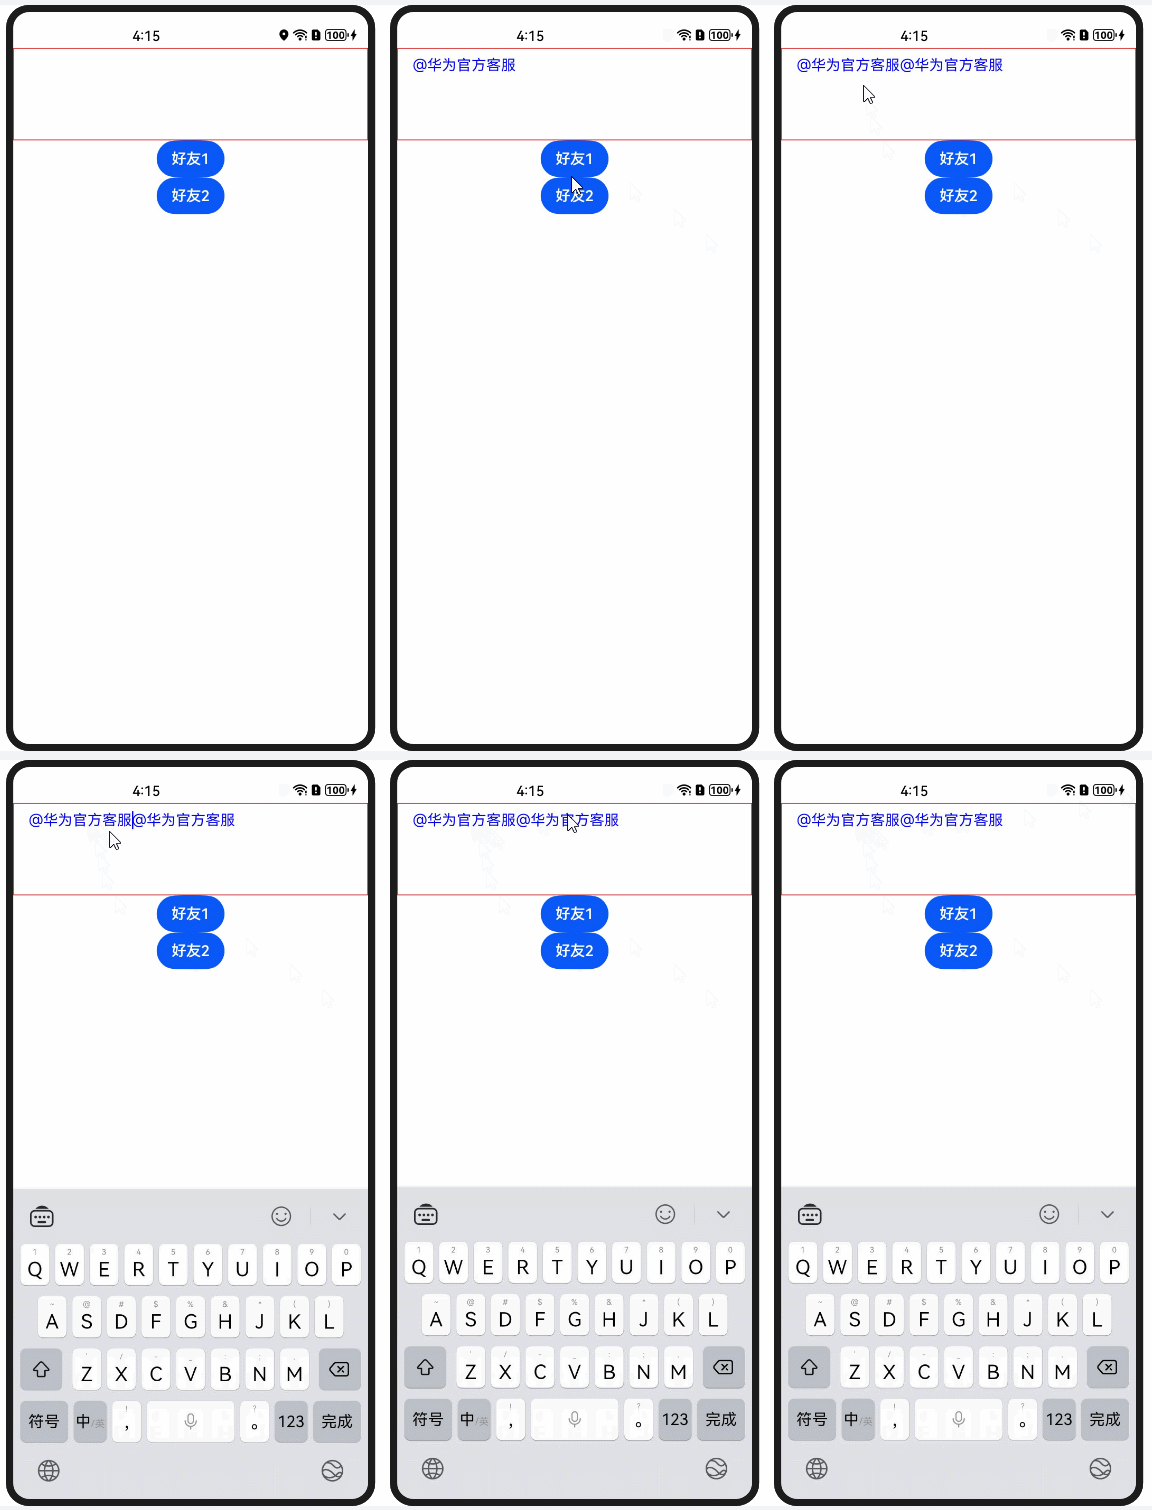

方案
使用HashMap的set向HashMap中添加或更新一组数据,使用get方法获取指定key所对应的value。
核心代码
@Entrystruct SameNameDemo {
controller: RichEditorController = new RichEditorController();
At(str: string) {
Stack() {
Text(’@’ + str).fontColor(Color.Blue)
}
.onClick(() => {
// 添加不同的身份信息
const hashMap: HashMap<string, number> = new HashMap();
hashMap.set(“friend1”, 123);
let result = hashMap.get(“friend1”);
console.log('result: ’ + result)
})
}
build() {
Column() {
RichEditor({ controller: this.controller })
.height(100)
.borderWidth(1)
.borderColor(Color.Red)
.width(“100%”)
Button(‘好友1’).onClick((event: ClickEvent) => {
this.controller.addBuilderSpan(() => {
this.At(‘华为官方客服’)
})
})
Button(‘好友2’).onClick((event: ClickEvent) => {
this.controller.addBuilderSpan(() => {
this.At(‘华为官方客服’)
})
})
}
.width(‘100%’)
}
}<button style="position: absolute; padding: 4px 8px 0px; cursor: pointer; top: 8px; right: 8px; font-size: 14px;">复制</button>
场景四:文本选择区域发生变化或编辑状态下光标位置发生变化回调
效果图
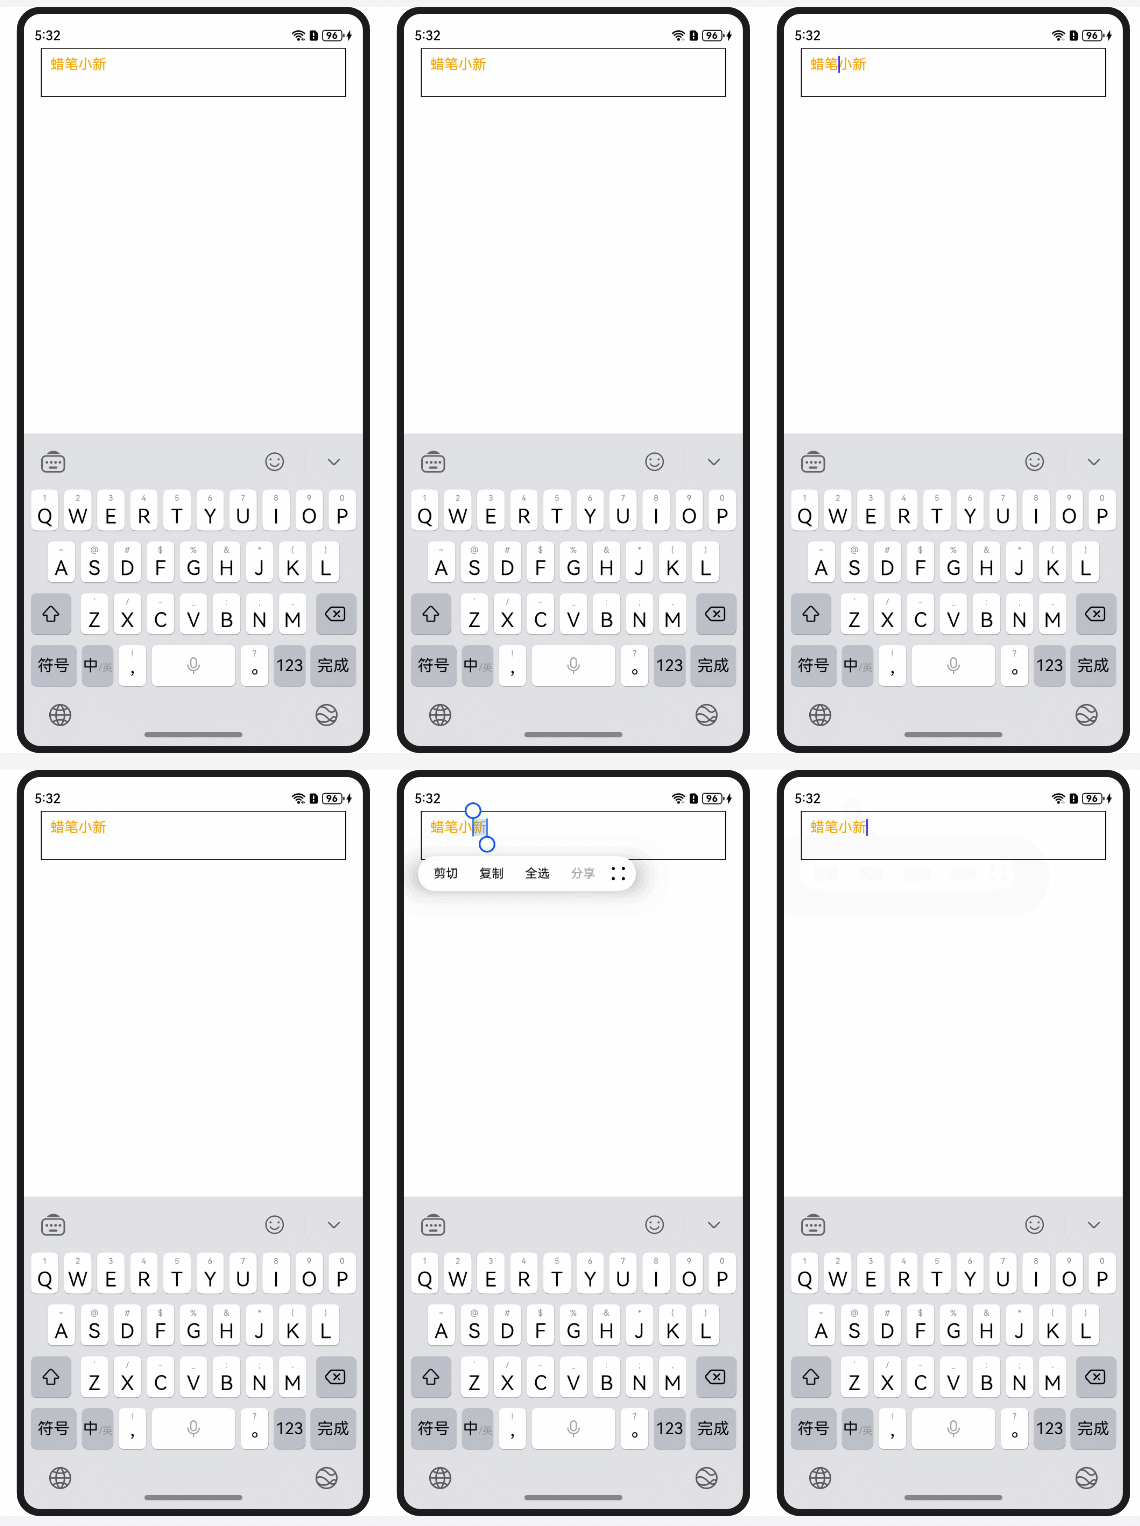
方案
使用RichEditor组件在API 12支持的新接口 onSelectionChange,在文本选择区域发生变化或编辑状态下光标位置发生变化时触发该回调。光标位置发生变化回调时,选择区域的起始位置等于终止位置(即start = end)。
核心代码
@Entrystruct Index {
@State message: string = ‘蜡笔小新’;
controller: RichEditorController = new RichEditorController();
@State show: boolean = false;
build() {
Column() {
RichEditor({controller: this.controller})
.defaultFocus(true)
.padding(0)
.height(56)
.width(“90%”)
.borderStyle(BorderStyle.Solid)
.borderColor(Color.Black)
.borderWidth(1)
.padding({left: 10})
.onReady(() => {
this.controller.addTextSpan(this.message, {
offset: this.controller.getCaretOffset(),
style:
{
fontColor: Color.Orange,
fontSize: 16
}
})
this.controller.setCaretOffset(this.controller.getCaretOffset() + this.message.length)
})
.onSelectionChange((value:RichEditorRange) => {
console.log(‘光标位置改变了’)
console.log('start: ’ + value.start)
console.log('end: ’ + value.end)
})
}
.width(‘100%’)
}
}<button style="position: absolute; padding: 4px 8px 0px; cursor: pointer; top: 8px; right: 8px; font-size: 14px;">复制</button>
场景五:自由切换系统键盘和自定义键盘
效果图
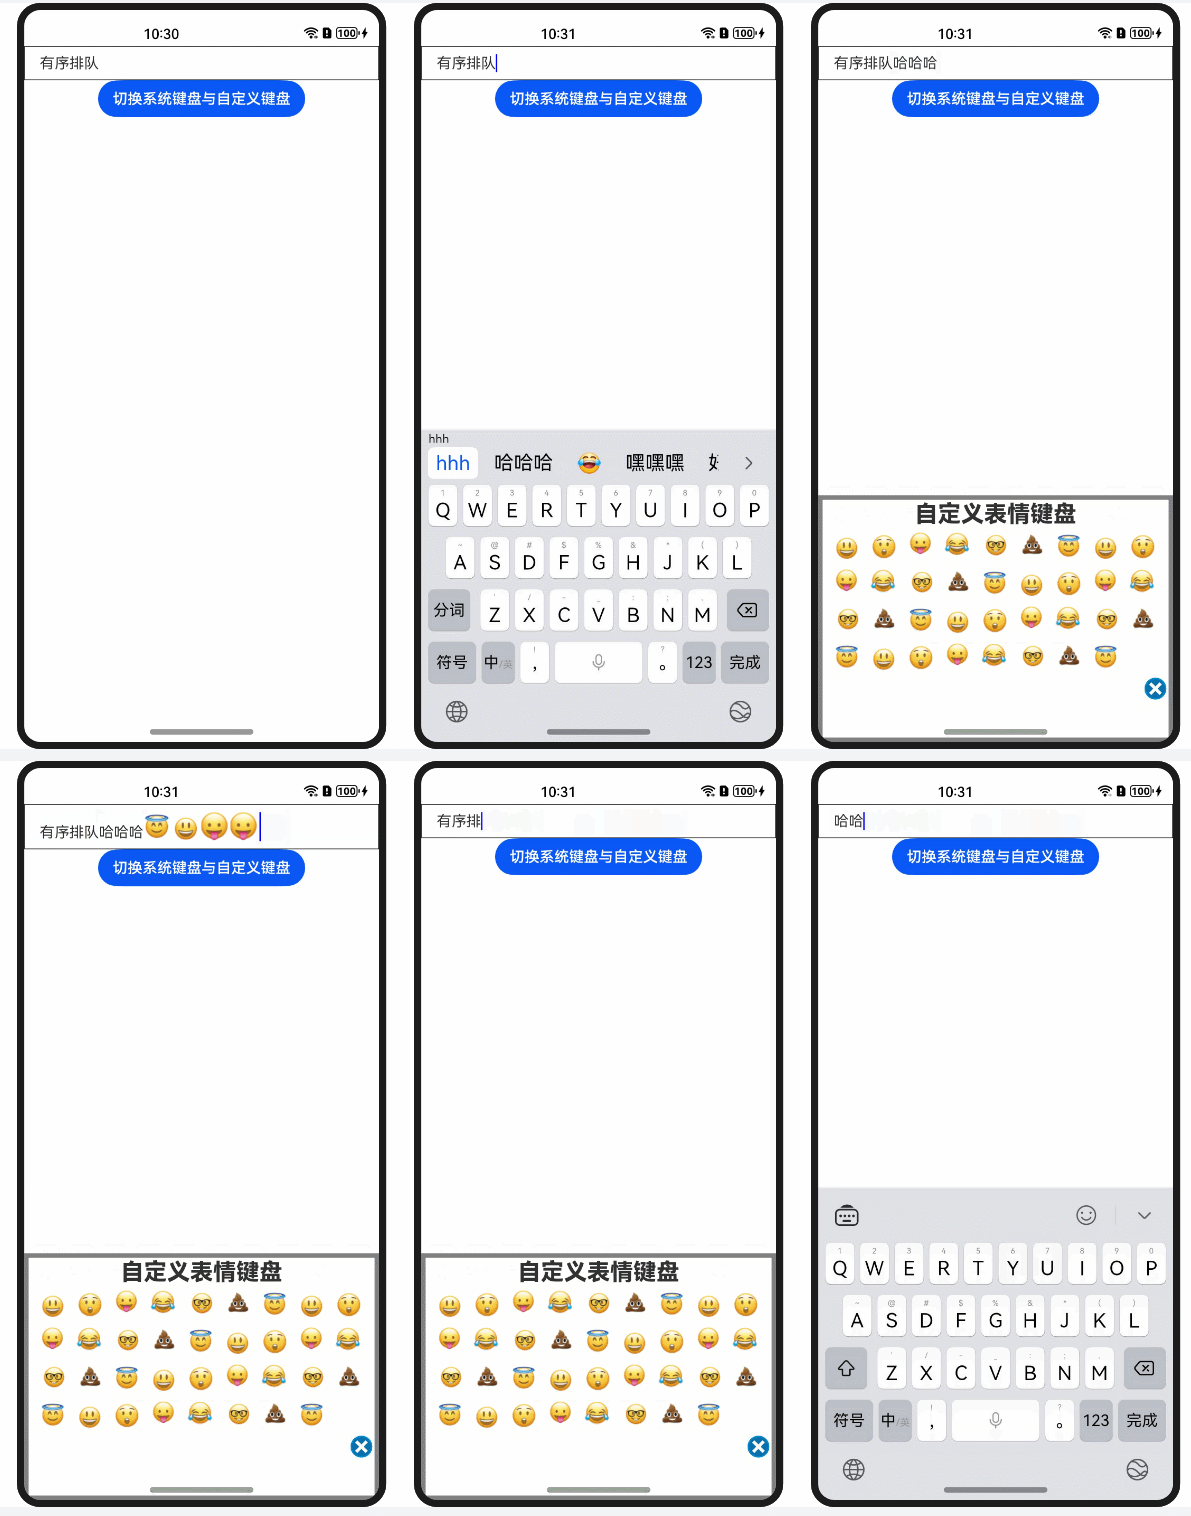
方案
使用RichEditor的属性customKeyboard控制切换系统键盘还是自定义键盘,添加表情使用addImageSpan,删除内容使用deleteSpans,并通过获取光标所在位置进行删除。
核心代码
@Entrystruct Index {
@State message: string = ‘Hello World’;
controller = new RichEditorController()
@State showKeyboard:boolean = false;
private listData: (string | number | Resource)[] = [
$r(‘app.media.img’), $r(‘app.media.img_1’), $r(‘app.media.img_2’), $r(‘app.media.img_3’), $r(‘app.media.img_4’), $r(‘app.media.img_5’), $r(‘app.media.img_6’),
$r(‘app.media.img’), $r(‘app.media.img_1’), $r(‘app.media.img_2’), $r(‘app.media.img_3’), $r(‘app.media.img_4’), $r(‘app.media.img_5’), $r(‘app.media.img_6’),
$r(‘app.media.img’), $r(‘app.media.img_1’), $r(‘app.media.img_2’), $r(‘app.media.img_3’), $r(‘app.media.img_4’), $r(‘app.media.img_5’), $r(‘app.media.img_6’),
$r(‘app.media.img’), $r(‘app.media.img_1’), $r(‘app.media.img_2’), $r(‘app.media.img_3’), $r(‘app.media.img_4’), $r(‘app.media.img_5’), $r(‘app.media.img_6’),
$r(‘app.media.img’), $r(‘app.media.img_1’), $r(‘app.media.img_2’), $r(‘app.media.img_3’), $r(‘app.media.img_4’), $r(‘app.media.img_5’), $r(‘app.media.img_6’),
];
// 自定义键盘组件
@Builder CustomKeyboardBuilder() {
Column() {
Text(‘自定义表情键盘’)
.fontSize(25)
.fontWeight(900)
Grid() {
ForEach(this.listData, (item: string | number | Resource) => {
GridItem() {
if (typeof item !== ‘number’ && typeof item !== ‘string’) {
Image(item)
.width(30).onClick(() => {
this.controller.addImageSpan(item, { imageStyle: { size: [‘110px’, ‘110px’] } })
})
}
}
})
}.columnsGap(10).rowsGap(10).padding(5)
Row() {
Image($r(‘app.media.img_7’))
.width(30)
.onClick(() => {
this.controller.deleteSpans({start: this.controller.getCaretOffset() - 1, end: this.controller.getCaretOffset()})
})
}
.width(‘100%’)
.justifyContent(FlexAlign.End)
.margin({ bottom: 40 })
}
.borderColor(Color.Gray)
.borderWidth(5)
}
build() {
Column() {
RichEditor({ controller: this.controller })
.width(‘100%’)
.borderWidth(1)
.borderColor(Color.Black)
.onReady(() => {
this.controller.addTextSpan(‘有序排队’)
})
.customKeyboard(this.showKeyboard ? this.CustomKeyboardBuilder() : undefined)
Button(‘切换系统键盘与自定义键盘’).onClick((event: ClickEvent) => {
this.showKeyboard = ! this.showKeyboard
})
}
.height(‘100%’)
}
}<button style="position: absolute; padding: 4px 8px 0px; cursor: pointer; top: 8px; right: 8px; font-size: 14px;">复制</button>
关于HarmonyOS 鸿蒙Next基于RichEditor的评论编辑的问题,您也可以访问:https://www.itying.com/category-93-b0.html 联系官网客服。
更多关于HarmonyOS 鸿蒙Next基于RichEditor的评论编辑的实战系列教程也可以访问 https://www.itying.com/category-93-b0.html
群主有demo没
您好,当前技术文章配套的demo工程正在外发中,后续会发布至gitee上,敬请关注!
找HarmonyOS工作还需要会Flutter技术的哦,有需要Flutter教程的可以学学大地老师的教程,很不错,B站免费学的哦:https://www.bilibili.com/video/BV1S4411E7LY/?p=17
大佬,研究出怎么获取到了吗
这个东西确实不知道咋个获取内容和存储内容的哇


