


HarmonyOS 鸿蒙Next ArkTS 使用mqtt创建客户端失败
HarmonyOS 鸿蒙Next ArkTS 使用mqtt创建客户端失败
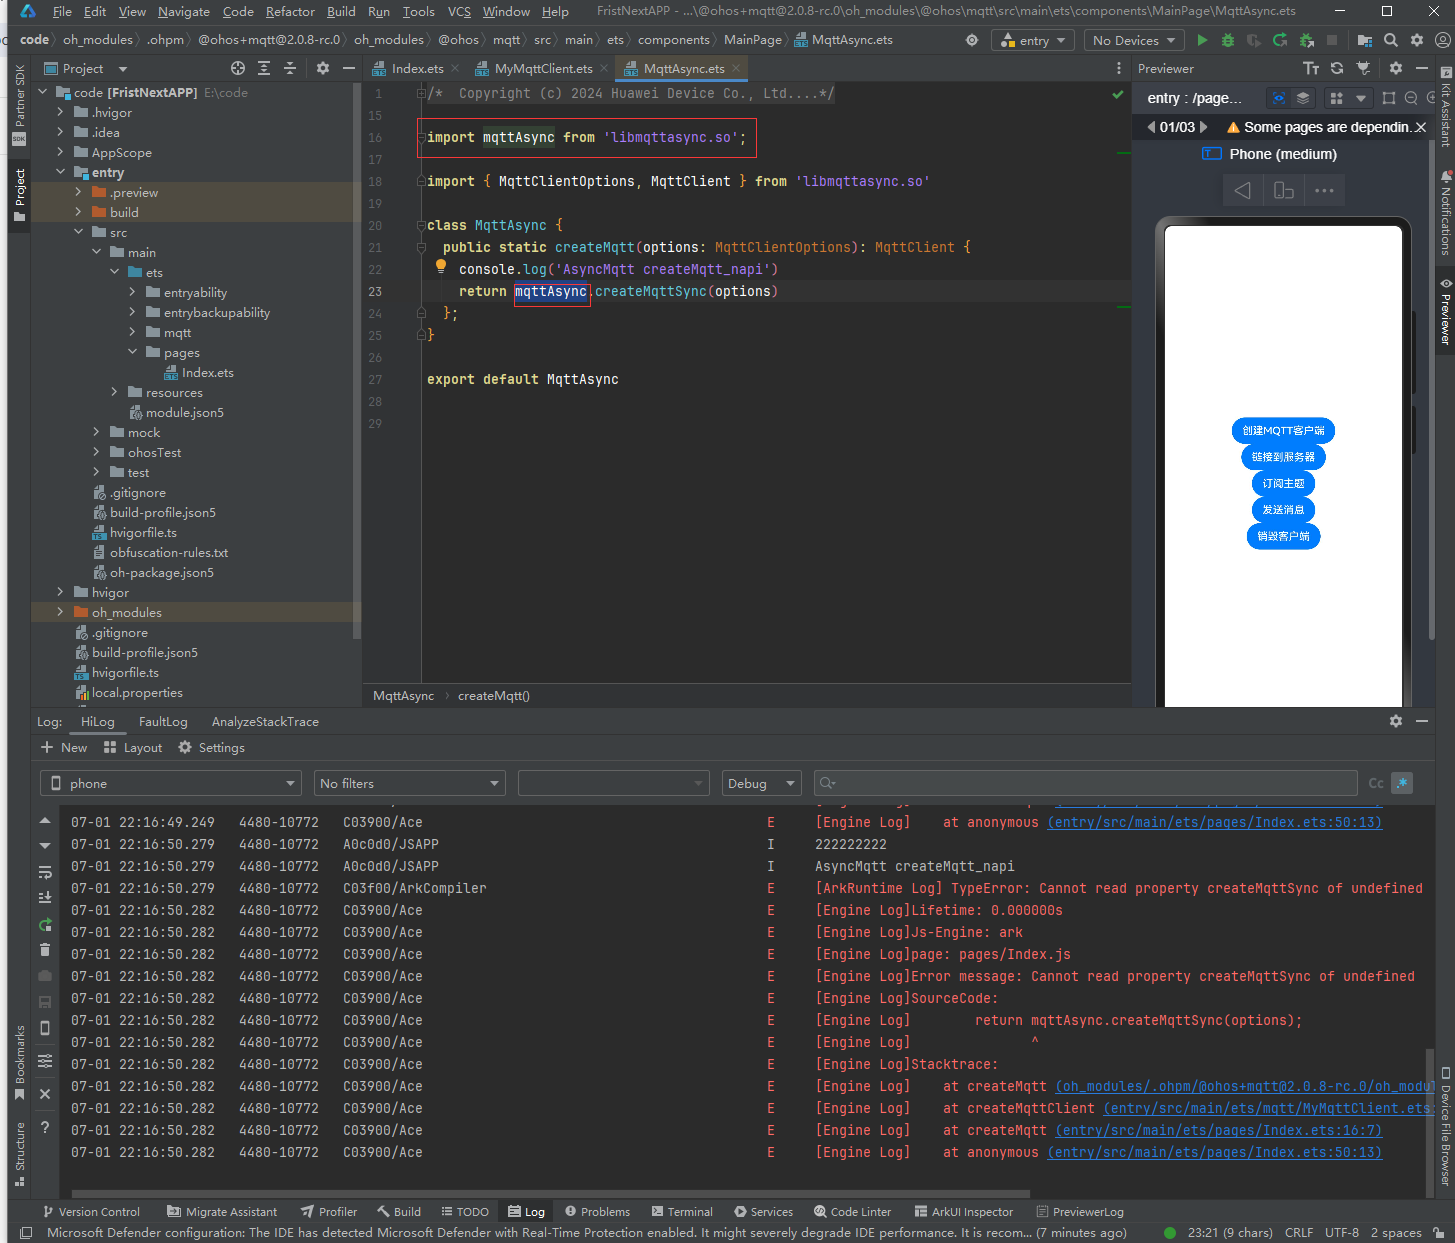
使用mqtt创建客户端失败,提示mqttAsync为null,如图
操作步骤:
1、安装使用mqtt插件
使用三方仓库mqtt插件,地址:https://ohpm.openharmony.cn/#/cn/detail/@ohos%2Fmqtt
安装命令:ohpm i @ohos/mqtt
2、mqtt函数简单封装
在src/main/ets下新建mqtt目录,新建文件MyMqttClient.ets
import { MqttAsync, MqttClient, MqttQos, MqttSubscribeOptions } from ‘@ohos/mqtt’export class MyMqttClient { private mqttClient: MqttClient|null=null
public createMqttClient() { let serverUrl: string =“http://192.168.0.1:18083” //‘你的MQTT服务器地址,例如:tcp://192.168.2.1:1883’ let clientId: string = “clientId_panda” //‘客户端,唯一就行’ if(MqttAsync==undefined){ console.log(“1111111”); }else{ console.log(“222222222”); } // return ;
<span class="hljs-keyword"><span class="hljs-keyword">this</span></span>.mqttClient = MqttAsync.createMqtt({ url: serverUrl, clientId: clientId, persistenceType: <span class="hljs-number"><span class="hljs-number">1</span></span> })}
public async connectMqtt() { let result: boolean // if(this.mqttClient){ // console.log(“1111111111111”); // }else { // console.log(“2222222222222”); // } if(this.mqttClient){ await this.mqttClient.connect({ userName: ‘MQTT用户名’, password: ‘连接密码’, connectTimeout: 30, MQTTVersion: 0 }).then(() => { result = true console.info(‘连接成功’) }).catch(() => { result = false console.warn(‘连接失败’) }) }
}
public async subscribe() { let subscribeOption: MqttSubscribeOptions = { topic: ‘你的主题’, qos: 0 } if(this.mqttClient){ await this.mqttClient.subscribe(subscribeOption).then((data) => { console.info(‘MQTT subscribe success ====>’, JSON.stringify(data)) }).catch((err: object) => { console.error(‘MQTT subscribe failed, Cause:’, JSON.stringify(err)) })
<span class="hljs-keyword"><span class="hljs-keyword">this</span></span>.mqttClient.messageArrived((err, data) => { <span class="hljs-keyword"><span class="hljs-keyword">if</span></span> (err) { console.error(<span class="hljs-string"><span class="hljs-string">'MQTT messageArrived failed, Cause:'</span></span>, <span class="hljs-built_in"><span class="hljs-built_in">JSON</span></span>.stringify(err)) }<span class="hljs-keyword"><span class="hljs-keyword">else</span></span> { console.error(<span class="hljs-string"><span class="hljs-string">'MQTT messageArrived success, 消息内容:'</span></span>, <span class="hljs-built_in"><span class="hljs-built_in">JSON</span></span>.stringify(data)) } }) }}
public pushMessage(pic: string, mes: string, qo: MqttQos) { if(this.mqttClient){ this.mqttClient.publish({ topic: pic, qos: qo, payload: mes }, (error, data) => { if (error) { console.error(“Push message failed, Cause:”, JSON.stringify(error)) }else { console.info(“Push message success”, JSON.stringify(data)) } }) }
} public destroy() { if(this.mqttClient){ this.mqttClient.destroy().then((data) => { console.debug(‘Destroy the mqtt client’, JSON.stringify(data)) }) }
} }<button style="position: absolute; padding: 4px 8px 0px; cursor: pointer; top: 8px; right: 8px; font-size: 14px;">复制</button>
3、页面按钮调用
在src/mamin/ets/pages下新建Index.ets文件
import { MyMqttClient } from ‘…/mqtt/MyMqttClient’@Entry @Component struct Index { private myMqttClient?: MyMqttClient
aboutToAppear() { this.myMqttClient = new MyMqttClient() }
private createMqtt() { this.aboutToAppear();
<span class="hljs-keyword"><span class="hljs-keyword">if</span></span>(<span class="hljs-keyword"><span class="hljs-keyword">this</span></span>.myMqttClient){ <span class="hljs-keyword"><span class="hljs-keyword">this</span></span>.myMqttClient.createMqttClient() }}
private connectMqtt() { if(this.myMqttClient) { this.myMqttClient.connectMqtt() } }
private subTopic() { if(this.myMqttClient) { this.myMqttClient.subscribe() } }
private pushMessage() { if(this.myMqttClient) { this.myMqttClient.pushMessage(‘目标主题’, ‘消息内容’, 0) } }
private destroy() { if(this.myMqttClient) { this.myMqttClient.destroy() } }
build() { Row() { Column() { Button(‘创建MQTT客户端’) .onClick(() => { this.createMqtt() }) Button(‘链接到服务器’) .onClick(() => { this.connectMqtt() }) Button(‘订阅主题’) .onClick(() => { this.subTopic() }) Button(‘发送消息’) .onClick(() => { this.pushMessage() }) Button(‘销毁客户端’) .onClick(() => { this.destroy() }) } .width(‘100%’) } .height(‘100%’) } }<button style="position: absolute; padding: 4px 8px 0px; cursor: pointer; top: 8px; right: 8px; font-size: 14px;">复制</button>
4、运行后点击“创建MQTT客户端”按钮报错
错误内容,如第一张图所示。
import mqttAsync from ‘libmqttasync.so’;
此处的mqttAsync为null,导致没有创建成功。
请问是什么原因呢?
更多关于HarmonyOS 鸿蒙Next ArkTS 使用mqtt创建客户端失败的实战系列教程也可以访问 https://www.itying.com/category-93-b0.html


如果问题还没解决,可以学学这个鸿蒙Next教程,上手快:https://www.itying.com/category-93-b0.html
更多关于HarmonyOS 鸿蒙Next ArkTS 使用mqtt创建客户端失败的实战系列教程也可以访问 https://www.itying.com/category-93-b0.html


针对HarmonyOS 鸿蒙Next ArkTS 使用mqtt创建客户端失败的问题,首先确认是否已正确安装并使用mqtt插件。插件安装命令为ohpm i @ohos/mqtt,请确保使用的是最新版本的插件,因为旧版本可能存在不兼容或已知错误。
其次,检查代码中的import语句是否正确。根据官方文档和社区反馈,应避免直接从源代码目录导入函数,而应使用标准导入路径。例如,应使用import { MqttAsync, MqttClient } from '@ohos/mqtt'而不是错误的路径。
此外,确保在代码中正确创建了MQTT实例,并配置了正确的连接参数,包括URL、客户端ID等。同时,检查网络连接权限是否已在module.json5中正确配置。
如果以上步骤均无误,但问题依旧存在,可能是由于系统环境或依赖库版本冲突导致。此时,建议清理项目依赖并重新构建,或尝试在不同的设备或模拟器上运行以排除环境问题。