


贡献一个使用 TypeScript 编写的支持 self host 并包含完整测试用例的 OIDC 身份认证库(Nodejs版)
🎉 🎉 🎉
做了一个基于 OIDC 流程的身份认证库,支持 GitHub 、微信、谷歌、推特、飞书、新浪等第三方平台,理论上也支持自部署的 OIDC 认证服务器。
https://github.com/chuck1in/nw-auth
它采用 node way 的理念进行开发,具备如下特点:
- 🍒 代码体积小
- 🍋 接口暴露少
- 🥝 无运行时依赖
最近利用业余时间给这个库添加了一个自测页面,方便大家通过可视化界面确认库的三方登录功能是否可以正常运行。这个页面是用 sveltekit 做的,由于我不是专业前端,花了蛮多时间和精力让它不要太丑。
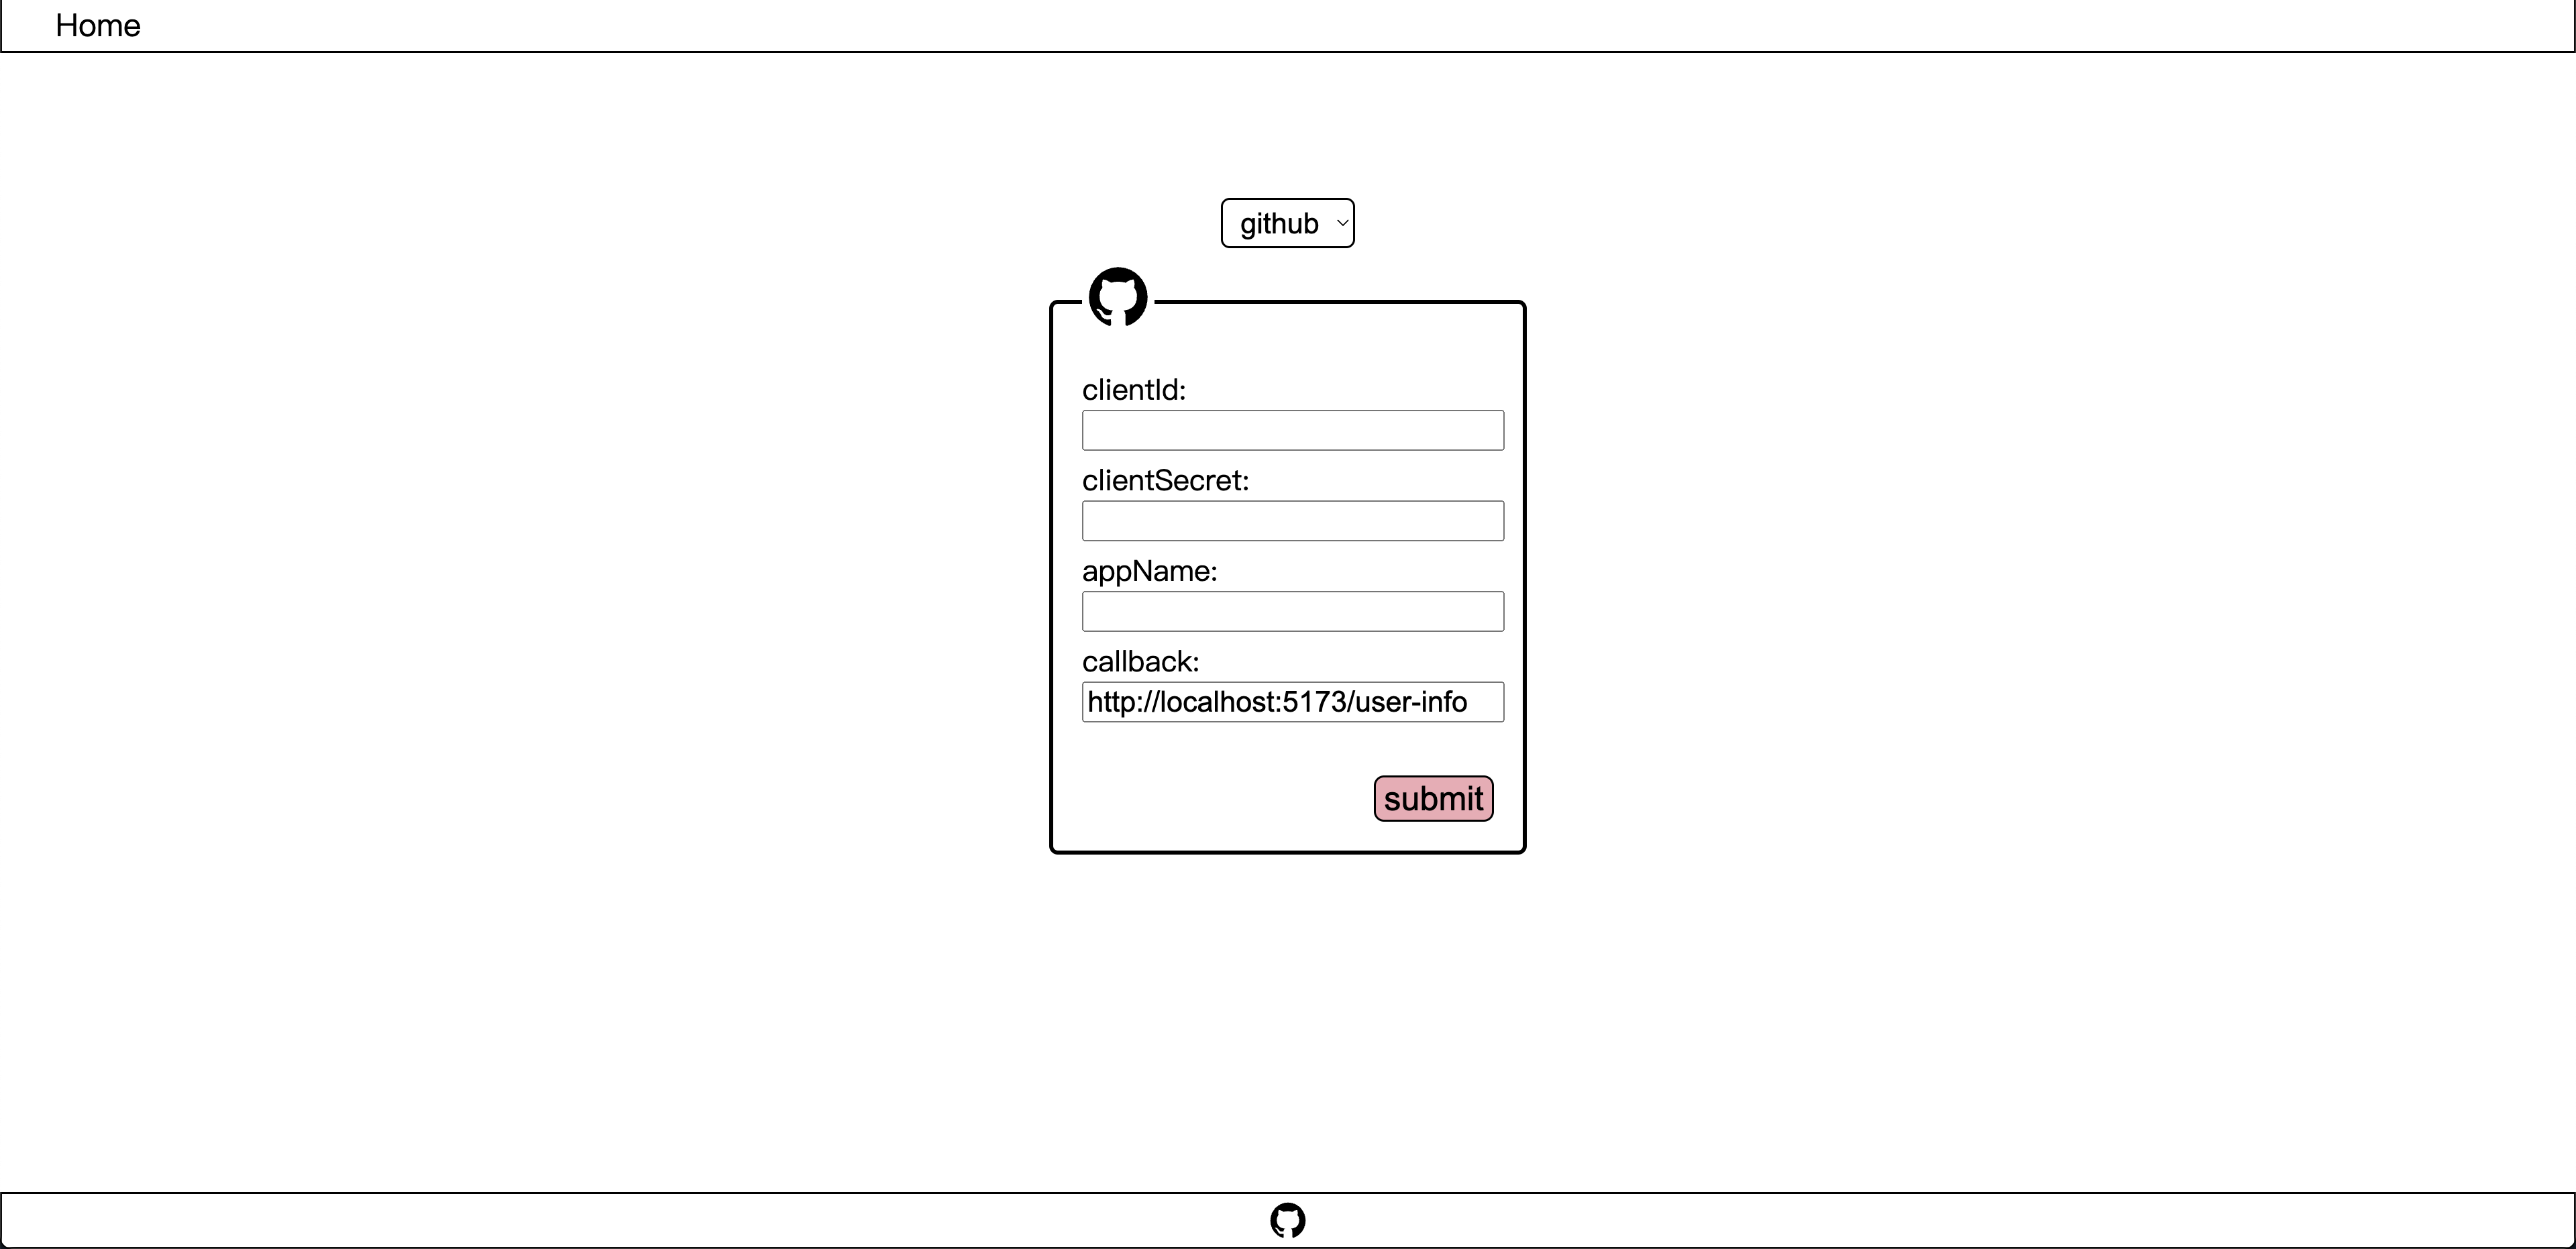
现在用户可以选择三种测试方式对库进行测试:
- 使用 unit test
- 使用 self test example
- 使用 self host test page

👏 👏 👏
如果你觉得这个库有用,可以给我一些 ⭐ 以资鼓励,如果你愿意为这个库贡献代码,你可以简单地在现有结构的基础上添加更多的第三方登录平台,谢谢大家的支持。
贡献一个使用 TypeScript 编写的支持 self host 并包含完整测试用例的 OIDC 身份认证库(Nodejs版)

1 回复

以下是一个使用 TypeScript 编写的支持 self-host 的 OIDC(OpenID Connect)身份认证库的简化示例,以及包含完整测试用例的 Node.js 版。为了保持简洁,这里仅展示核心部分和测试用例框架。
OIDC 身份认证库 (oidc-auth.ts)
import * as axios from 'axios';

interface TokenResponse {
  access_token: string;
  expires_in: number;
}

export class OIDCAuth {
  private clientId: string;
  private clientSecret: string;
  private tokenEndpoint: string;

  constructor(clientId: string, clientSecret: string, tokenEndpoint: string) {
    this.clientId = clientId;
    this.clientSecret = clientSecret;
    this.tokenEndpoint = tokenEndpoint;
  }

  async getToken(): Promise<TokenResponse> {
    const response = await axios.post(this.tokenEndpoint, `grant_type=client_credentials&client_id=${this.clientId}&client_secret=${this.clientSecret}`, {
      headers: { 'Content-Type': 'application/x-www-form-urlencoded' }
    });
    return response.data;
  }
}
测试用例 (oidc-auth.test.ts)
import { OIDCAuth } from './oidc-auth';
import * as chai from 'chai';
import * as chaiAsPromised from 'chai-as-promised';

chai.use(chaiAsPromised);
const { expect } = chai;

describe('OIDCAuth', () => {
  it('should get a token', async () => {
    const auth = new OIDCAuth('test-client-id', 'test-client-secret', 'http://example.com/token');
    const token = await auth.getToken();
    expect(token).to.have.property('access_token');
    expect(token).to.have.property('expires_in');
  });
});
这个示例展示了如何创建一个简单的 OIDC 认证库以及如何使用 Mocha 和 Chai 进行测试。实际项目中,应完善错误处理、配置管理以及更多的测试用例。