HarmonyOS 鸿蒙Next在ArtUI中的Flex弹性布局,如何使用类似CSS的弹性盒子中margin-left: auto的功能?
HarmonyOS 鸿蒙Next在ArtUI中的Flex弹性布局,如何使用类似CSS的弹性盒子中margin-left: auto的功能?
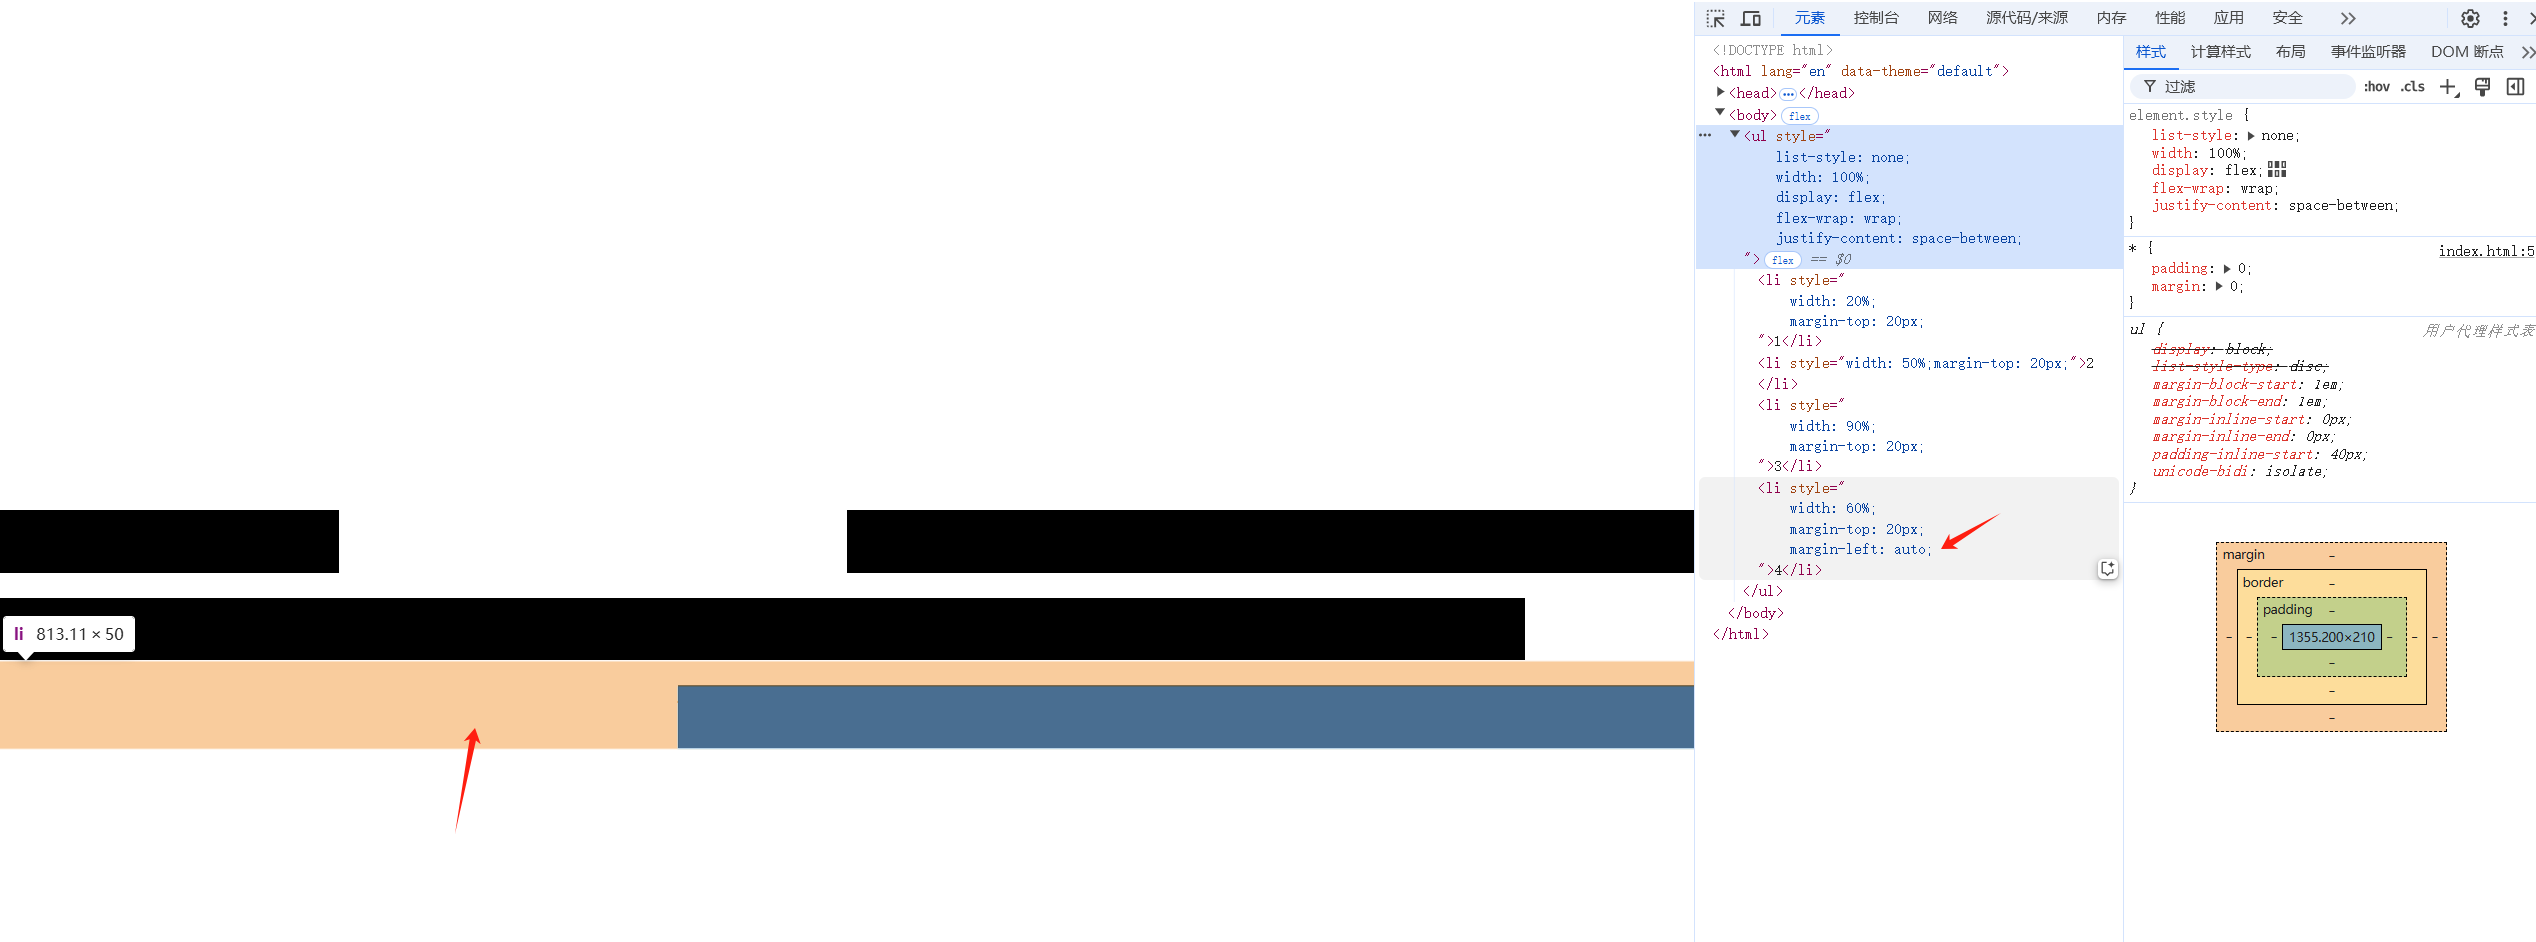
在css中flex弹性盒子布局中,父元素设置了display:flex;后,子元素设置margin-left: auto;会推开左侧元素,尽可能的向右侧靠近。
目前使用在ArkUI的margin中,left和right的值只有number | undefined;
类似css的margin-left:atuo;的操作是否可以在ArkUI中实现?
更多关于HarmonyOS 鸿蒙Next在ArtUI中的Flex弹性布局,如何使用类似CSS的弹性盒子中margin-left: auto的功能?的实战系列教程也可以访问 https://www.itying.com/category-93-b0.html
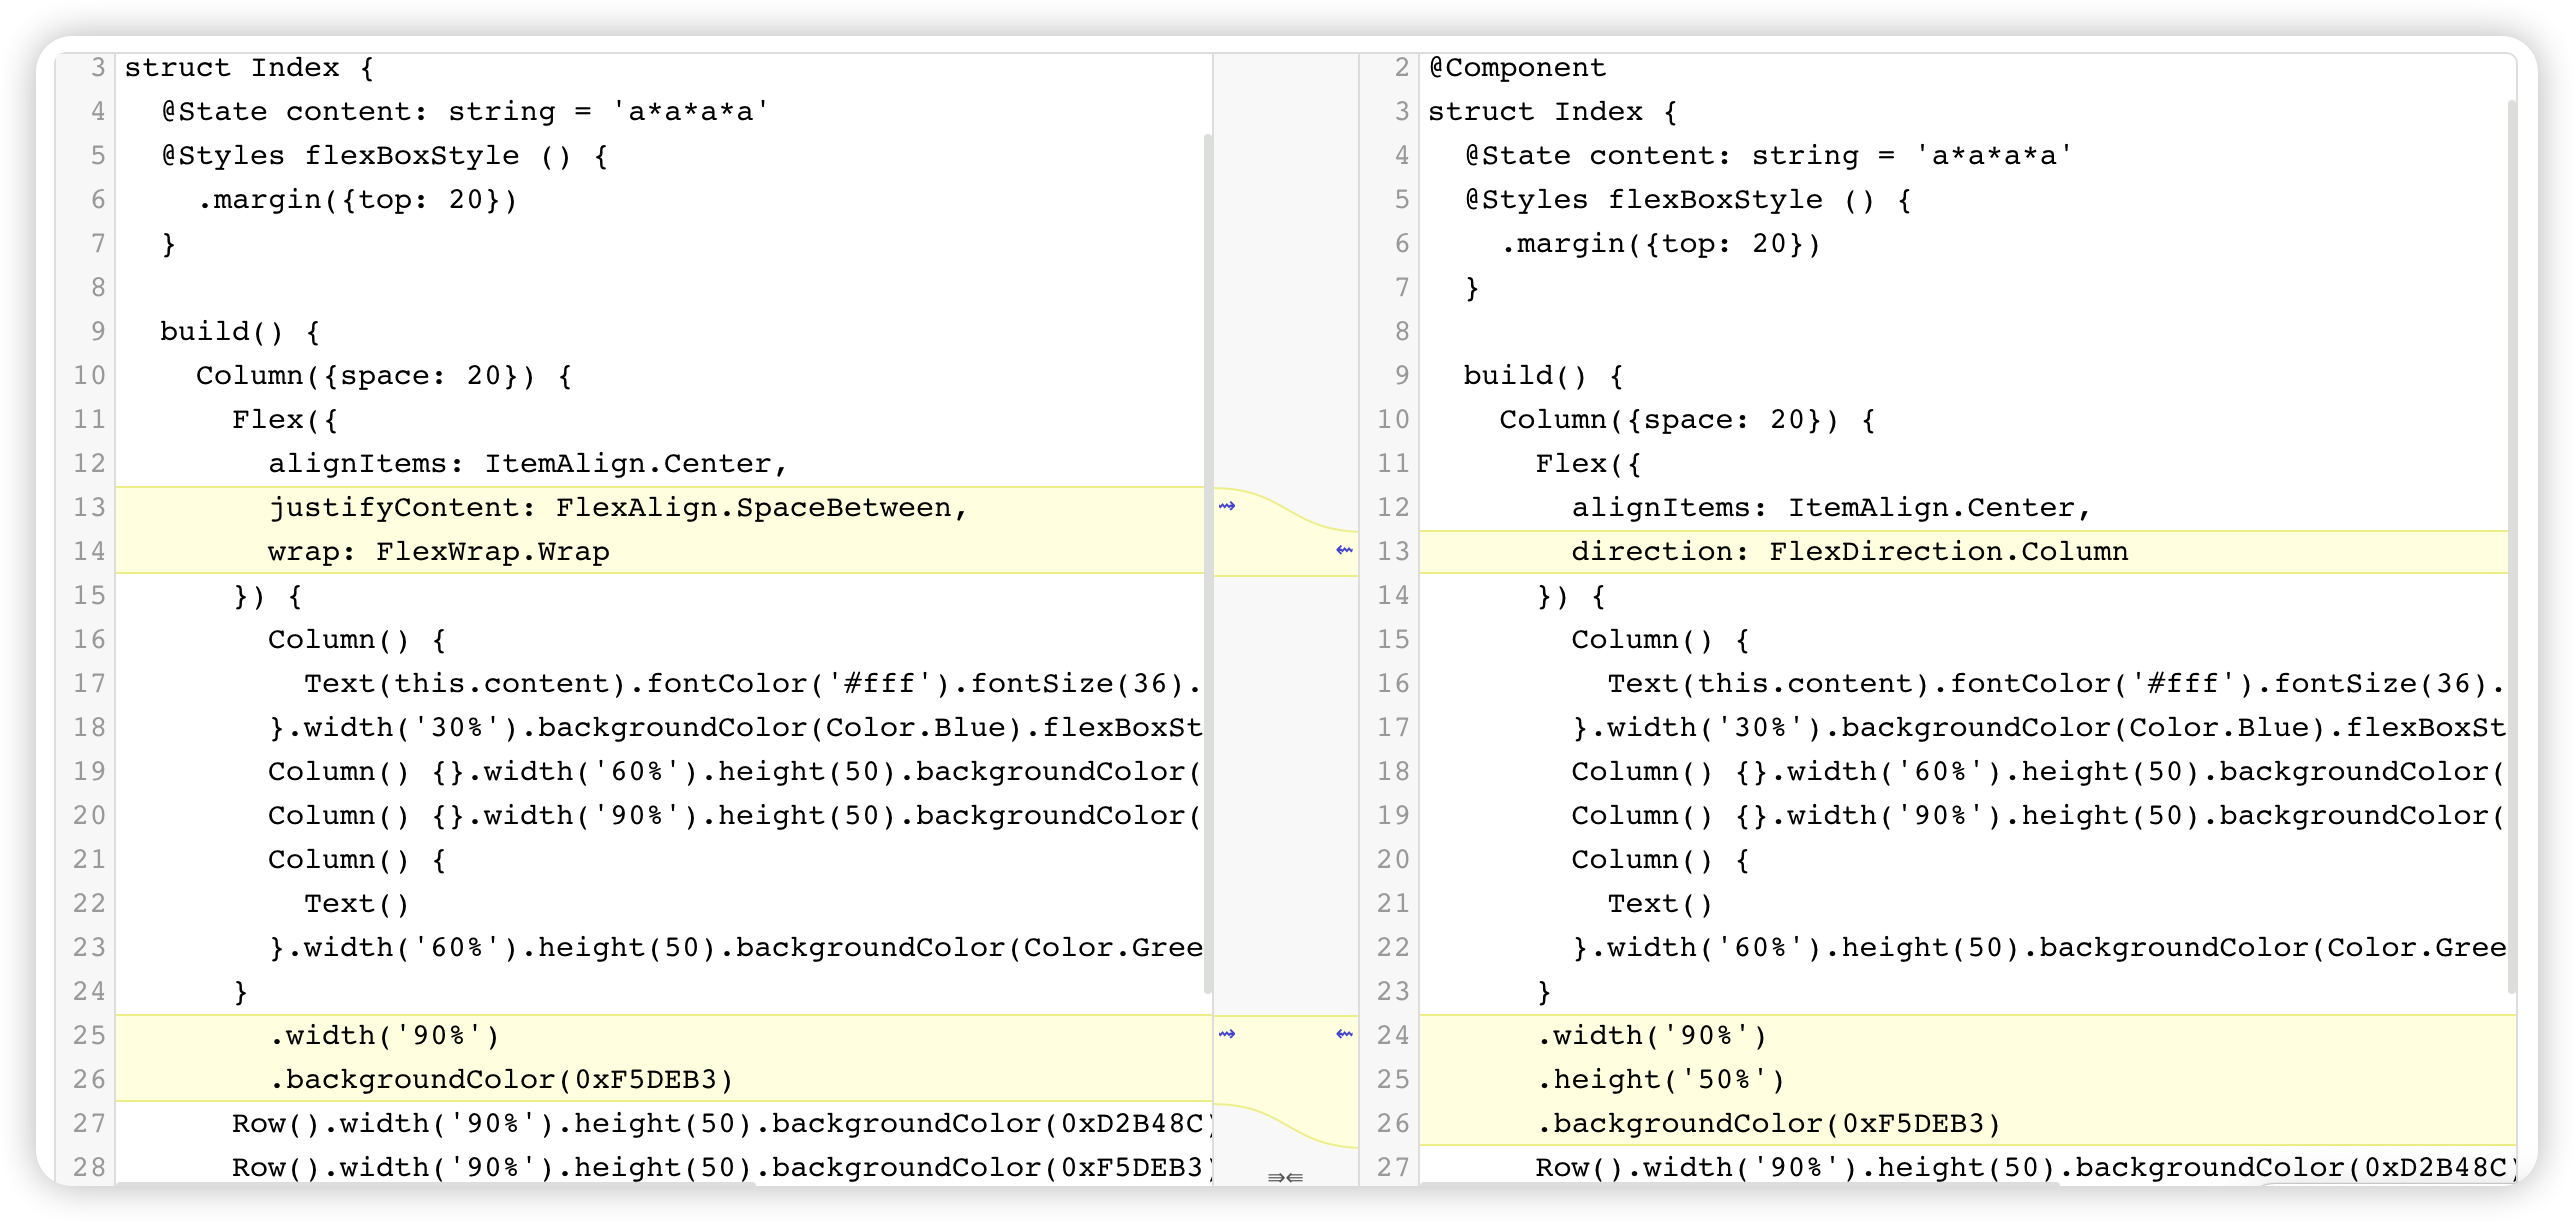
 左侧代码:
左侧代码:
@Entry
@Component
struct Index {
  @State content: string = 'a*a*a*a'
  @Styles flexBoxStyle () {
    .margin({top: 20})
  }

  build() {
    Column({space: 20}) {
      Flex({
        alignItems: ItemAlign.Center,
        justifyContent: FlexAlign.SpaceBetween,
        wrap: FlexWrap.Wrap
      }) {
        Column() {
          Text(this.content).fontColor('#fff').fontSize(36).textAlign(TextAlign.Center)
        }.width('30%').backgroundColor(Color.Blue).flexBoxStyle()
        Column() {}.width('60%').height(50).backgroundColor('#000').flexBoxStyle()
        Column() {}.width('90%').height(50).backgroundColor(Color.Green).flexBoxStyle()
        Column() {
          Text()
        }.width('60%').height(50).backgroundColor(Color.Green).flexBoxStyle().alignSelf(ItemAlign.End)
      }
        .width('90%')
        .backgroundColor(0xF5DEB3)
      Row().width('90%').height(50).backgroundColor(0xD2B48C)
      Row().width('90%').height(50).backgroundColor(0xF5DEB3)

    }.width('100%')
  }
}
右侧代码:
@Entry
@Component
struct Index {
  @State content: string = 'a*a*a*a'
  @Styles flexBoxStyle () {
    .margin({top: 20})
  }

  build() {
    Column({space: 20}) {
      Flex({
        alignItems: ItemAlign.Center,
        direction: FlexDirection.Column
      }) {
        Column() {
          Text(this.content).fontColor('#fff').fontSize(36).textAlign(TextAlign.Center)
        }.width('30%').backgroundColor(Color.Blue).flexBoxStyle()
        Column() {}.width('60%').height(50).backgroundColor('#000').flexBoxStyle()
        Column() {}.width('90%').height(50).backgroundColor(Color.Green).flexBoxStyle()
        Column() {
          Text()
        }.width('60%').height(50).backgroundColor(Color.Green).flexBoxStyle().alignSelf(ItemAlign.End)
      }
      .width('90%')
      .height('50%')
      .backgroundColor(0xF5DEB3)
      Row().width('90%').height(50).backgroundColor(0xD2B48C)
      Row().width('90%').height(50).backgroundColor(0xF5DEB3)

    }.width('100%')
  }
}
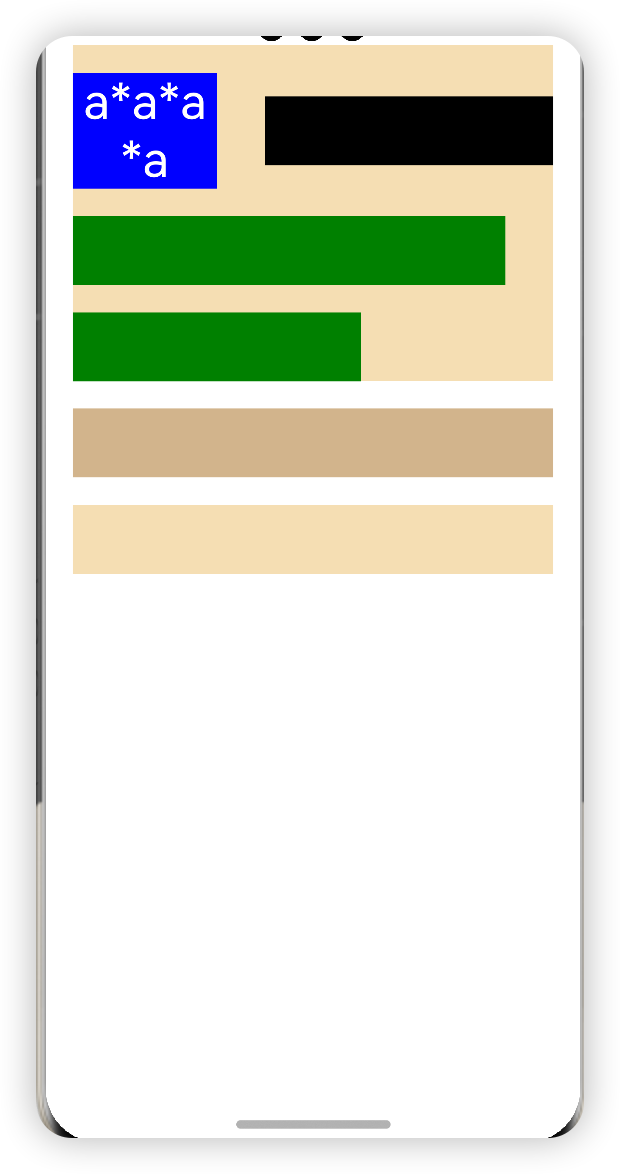
界面效果:

更多关于HarmonyOS 鸿蒙Next在ArtUI中的Flex弹性布局,如何使用类似CSS的弹性盒子中margin-left: auto的功能?的实战系列教程也可以访问 https://www.itying.com/category-93-b0.html
css中的margin-left:atuo,会使左边距尽可能大,实现右对齐。ArkUI中margin暂无atuo设置,对于flex,可以通过设置justifyContent子组件在主轴上的对齐格式或alignItems子组件在交叉轴上的对齐方式,来控制对齐方式,或者通过alignSelf单独设置子组件的对齐方式
@Entry
@Component
struct Index {
  @State content: string = 'a*a*a*a'
  @Styles flexBoxStyle () {
    .margin({top: 20})
  }

  build() {
    Column({space: 20}) {
      Flex({
        alignItems: ItemAlign.Center,
        direction: FlexDirection.Column
      }) {
        Column() {
          Text(this.content).fontColor('#fff').fontSize(36).textAlign(TextAlign.Center)
        }.width('30%').backgroundColor(Color.Blue).flexBoxStyle()
        Column() {}.width('60%').height(50).backgroundColor('#000').flexBoxStyle()
        Column() {}.width('90%').height(50).backgroundColor(Color.Green).flexBoxStyle()
        Column() {
          Text()
        }.width('60%').height(50).backgroundColor(Color.Green).flexBoxStyle().alignSelf(ItemAlign.End)
      }
      .width('90%')
      .height('50%')
      .backgroundColor(0xF5DEB3)
      Row().width('90%').height(50).backgroundColor(0xD2B48C)
      Row().width('90%').height(50).backgroundColor(0xF5DEB3)

    }.width('100%')
  }
}.alignSelf(ItemAlign.End) 这个可以达到你要的布局效果吧?
@Entry @Component struct Index { @State content: string = ‘aaa*a’ @Styles flexBoxStyle () { .margin({top: 20}) }
build() { Column({space: 20}) { Flex({ alignItems: ItemAlign.Center, justifyContent: FlexAlign.SpaceBetween, wrap: FlexWrap.Wrap }) { Column() { Text(this.content).fontColor(’#fff’).fontSize(36).textAlign(TextAlign.Center) }.width(‘30%’).backgroundColor(Color.Blue).flexBoxStyle() Column() {}.width(‘60%’).height(50).backgroundColor(’#000’).flexBoxStyle() Column() {}.width(‘90%’).height(50).backgroundColor(Color.Green).flexBoxStyle() Column() { Text() }.width(‘60%’).height(50).backgroundColor(Color.Green).flexBoxStyle().alignSelf(ItemAlign.End) } .width(‘90%’) .backgroundColor(0xF5DEB3) Row().width(‘90%’).height(50).backgroundColor(0xD2B48C) Row().width(‘90%’).height(50).backgroundColor(0xF5DEB3)
}.width('100%')} } 我用以上代码测试了下,并没有实现。查了下文档,这个方法改变子元素自身的交叉对齐方式,和自动占满左侧空间的功能还是有较大的差别的
在HarmonyOS 鸿蒙Next的ArtUI框架中,Flex弹性布局并不直接支持CSS中的margin-left: auto功能来自动对齐元素到右侧。然而,你可以通过组合其他Flexbox属性来实现类似的效果。
具体来说,你可以使用justify-content属性结合flex-grow和flex-shrink来间接实现类似的功能。以下是一个简化的示例:
-
设置Flex容器的
justify-content属性为space-between或flex-end,但这通常不会实现自动居中到右侧的效果。 -
更有效的方法是使用一个“占位”的Flex项目,它占用剩余的空间,然后将你想要右对齐的元素放在其后。例如:
<FlexContainer justify-content="flex-start">
    <FlexItem flex-grow="1"/> <!-- 占位元素,自动扩展以占用剩余空间 -->
    <FlexItem> <!-- 你的内容,将紧贴占位元素右侧,实现右对齐效果 -->
        <!-- 你的内容 -->
    </FlexItem>
</FlexContainer>在这个例子中,第一个FlexItem(占位元素)通过flex-grow="1"属性自动扩展,占用除第二个FlexItem之外的所有空间,从而实现第二个FlexItem(你的内容)右对齐的效果。
如果问题依旧没法解决请联系官网客服,官网地址是:https://www.itying.com/category-93-b0.html


