Flutter芯片列表展示插件chip_list的使用
Flutter芯片列表展示插件chip_list的使用
Features
chip_list 插件用于创建 ChoiceChips 列表。它允许同时选择多个芯片,并且可以与其他小部件同步使用。这个包旨在解决所有与芯片相关的困扰。
Getting Started
依赖安装
在你的 pubspec.yaml 文件中添加以下依赖:
dependencies:
  chip_list: ^3.0.0
导入包
在 Dart 文件中导入 chip_list 包:
import 'package:chip_list/chip_list.dart';
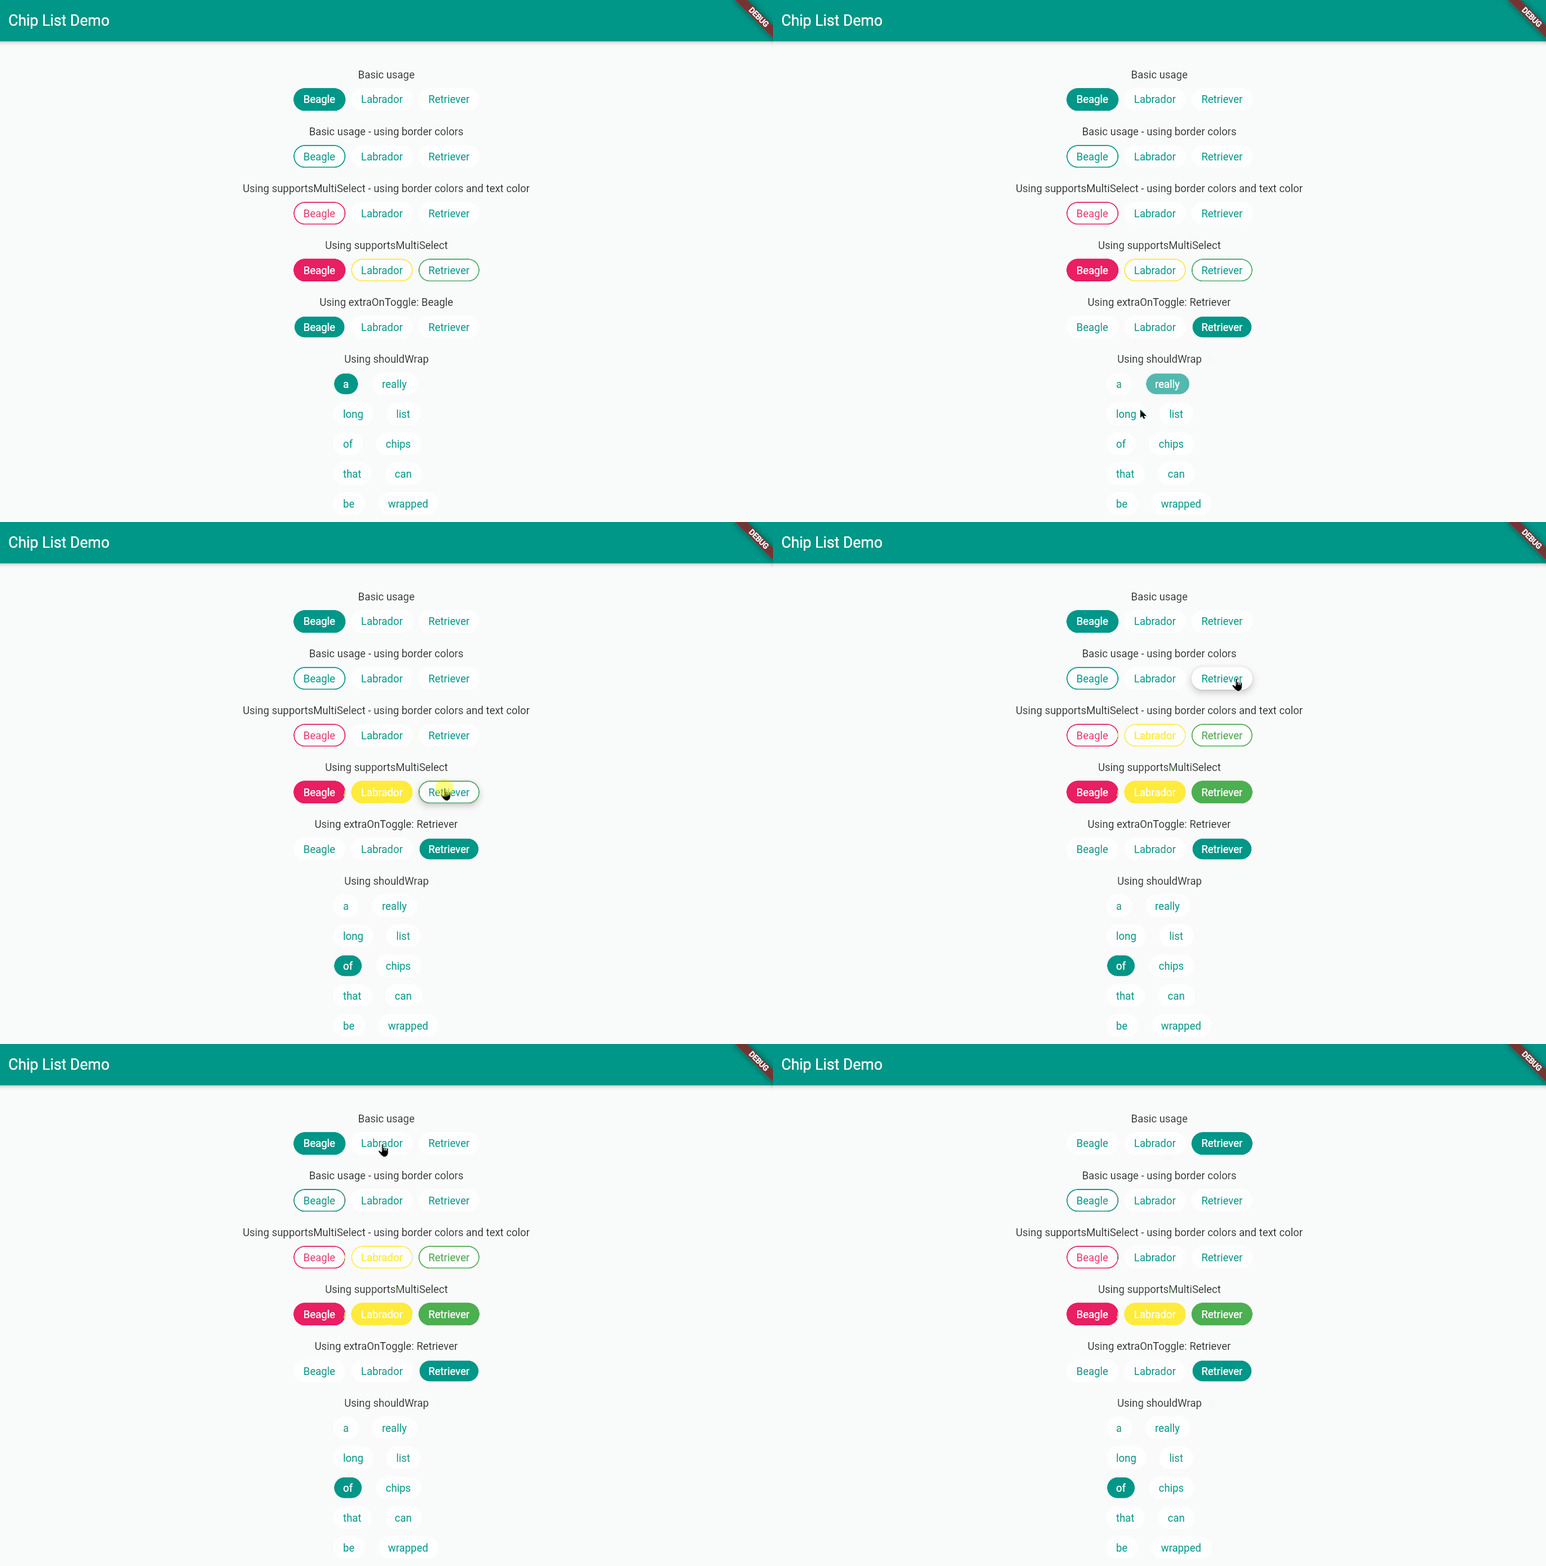
Demo

主要功能
包裹 ChipList 的内容
如果想要包裹 ChipList,可以将 shouldWrap 设置为 true,然后使用 Wrap 小部件的所有属性进一步自定义外观。
设置活动/非活动背景色、边框颜色和文本颜色
通过设置 activeBgColorList、inactiveBgColorList、activeTextColorList 和 inactiveTextColorList 来控制每个芯片的颜色。如果你希望对所有芯片使用相同的颜色,只需提供一个颜色值;否则,列表长度必须等于 listOfChipNames 的长度。
芯片之间的间距
无论你选择 Axis.vertical 或 Axis.horizontal,都可以通过调整 widgetSpacing 来设置间距。
使用 Material 3 样式
设置 useMaterial3 = true 可以启用新的自定义属性:
showCheckmark:启用或禁用芯片中的勾选标记。checkmarkColor:设置勾选标记的颜色(如果已启用)。
⚠ 警告:请勿将 listOfChipIndicesCurrentlySeclected 设置为常量,否则小部件将无法响应用户交互。
示例代码
下面是一个完整的示例,展示了如何使用 chip_list 插件:
import 'package:flutter/material.dart';
import 'package:chip_list/chip_list.dart';

void main() {
  runApp(const MyApp());
}

class MyApp extends StatelessWidget {
  const MyApp({Key? key}) : super(key: key);

  @override
  Widget build(BuildContext context) {
    return MaterialApp(
      title: 'Chip List Demo',
      theme: ThemeData(primarySwatch: Colors.teal, primaryColor: Colors.teal),
      home: const HomePage(),
    );
  }
}

class HomePage extends StatefulWidget {
  const HomePage({Key? key}) : super(key: key);

  @override
  State<HomePage> createState() => _HomePageState();
}

class _HomePageState extends State<HomePage> {
  final List<String> _dogeNames = [
    'Beagle',
    'Labrador',
    'Retriever',
  ];

  int _currentIndex = 0;

  @override
  Widget build(BuildContext context) {
    return Scaffold(
      appBar: AppBar(
        title: const Text('Chip List Demo'),
      ),
      body: SingleChildScrollView(
        child: Column(
          mainAxisAlignment: MainAxisAlignment.center,
          children: [
            // 基本用法
            const Text('Basic usage'),
            const SizedBox(height: 10),
            Center(
              child: ChipList(
                listOfChipNames: _dogeNames,
                activeBgColorList: [Theme.of(context).primaryColor],
                inactiveBgColorList: const [Colors.white],
                activeTextColorList: const [Colors.white],
                inactiveTextColorList: [Theme.of(context).primaryColor],
                listOfChipIndicesCurrentlySelected: [],
                activeBorderColorList: [Theme.of(context).primaryColor],
                inactiveBorderColorList: [Colors.brown, Colors.pink, Colors.teal],
              ),
            ),

            const SizedBox(height: 20),
            const Text('Basic usage - using border colors'),
            const SizedBox(height: 10),

            // 使用边框颜色
            Center(
              child: ChipList(
                listOfChipNames: _dogeNames,
                activeBgColorList: const [Colors.white],
                inactiveBgColorList: const [Colors.white],
                activeTextColorList: [Theme.of(context).primaryColor],
                inactiveTextColorList: [Theme.of(context).primaryColor],
                listOfChipIndicesCurrentlySelected: [0],
                activeBorderColorList: [Theme.of(context).primaryColor],
                tooltips: ["Colorful", "Plump", "Energetic"],
              ),
            ),

            // 使用 supportsMultiSelect
            const SizedBox(height: 20),
            const Text('Using supportsMultiSelect - using border colors and text color'),
            const SizedBox(height: 10),
            ChipList(
              listOfChipNames: _dogeNames,
              supportsMultiSelect: true,
              activeBgColorList: const [Colors.white],
              inactiveBgColorList: const [Colors.white],
              activeTextColorList: const [Colors.pink, Colors.yellow, Colors.green],
              inactiveTextColorList: [Theme.of(context).primaryColor],
              listOfChipIndicesCurrentlySelected: [0],
              inactiveBorderColorList: const [Colors.white],
              activeBorderColorList: const [Colors.pink, Colors.yellow, Colors.green],
            ),

            // 使用 extraOnToggle
            const SizedBox(height: 20),
            Text('Using extraOnToggle: ${_dogeNames[_currentIndex]}'),
            const SizedBox(height: 10),
            ChipList(
              listOfChipNames: _dogeNames,
              activeBgColorList: [Theme.of(context).primaryColor],
              inactiveBgColorList: const [Colors.white],
              activeTextColorList: const [Colors.white],
              inactiveTextColorList: [Theme.of(context).primaryColor],
              listOfChipIndicesCurrentlySelected: [_currentIndex],
              inactiveBorderColorList: const [Colors.teal],
              extraOnToggle: (val) {
                _currentIndex = val;
                setState(() {});
              },
            ),

            // 使用 shouldWrap
            const SizedBox(height: 20),
            const Text('Using shouldWrap'),
            const SizedBox(height: 10),
            SizedBox(
              width: 150,
              child: ChipList(
                listOfChipNames: const [
                  'a', 'really', 'long', 'list', 'of', 'chips', 'that', 'can', 'be', 'wrapped',
                ],
                activeBgColorList: [Theme.of(context).primaryColor],
                inactiveBgColorList: const [Colors.white],
                activeTextColorList: const [Colors.white],
                inactiveTextColorList: [Theme.of(context).primaryColor],
                listOfChipIndicesCurrentlySelected: [0],
                shouldWrap: true,
                runSpacing: 10,
                spacing: 10,
              ),
            ),
          ],
        ),
      ),
    );
  }
}
其他信息
如果你遇到问题或有改进建议,请访问 GitHub Issues 提交反馈或创建 PR。所有贡献都是欢迎的!
更多关于Flutter芯片列表展示插件chip_list的使用的实战系列教程也可以访问 https://www.itying.com/category-92-b0.html
更多关于Flutter芯片列表展示插件chip_list的使用的实战系列教程也可以访问 https://www.itying.com/category-92-b0.html
当然,以下是如何在Flutter中使用chip_list插件来展示芯片列表的一个简单示例。chip_list插件通常用于显示一系列的可选择或过滤的芯片(Chip)。首先,确保你已经在pubspec.yaml文件中添加了chip_list依赖:
dependencies:
  flutter:
    sdk: flutter
  chip_list: ^最新版本号  # 请替换为实际的最新版本号
然后,运行flutter pub get来安装依赖。
以下是一个完整的示例,展示如何使用chip_list插件来创建一个芯片列表:
import 'package:flutter/material.dart';
import 'package:chip_list/chip_list.dart'; // 导入chip_list插件

void main() {
  runApp(MyApp());
}

class MyApp extends StatelessWidget {
  @override
  Widget build(BuildContext context) {
    return MaterialApp(
      title: 'Chip List Demo',
      theme: ThemeData(
        primarySwatch: Colors.blue,
      ),
      home: ChipListScreen(),
    );
  }
}

class ChipListScreen extends StatefulWidget {
  @override
  _ChipListScreenState createState() => _ChipListScreenState();
}

class _ChipListScreenState extends State<ChipListScreen> {
  final List<String> chips = ['Chip 1', 'Chip 2', 'Chip 3', 'Chip 4'];
  final List<bool> selected = [false, false, false, false];

  void handleChipSelection(int index) {
    setState(() {
      selected[index] = !selected[index];
    });
  }

  @override
  Widget build(BuildContext context) {
    return Scaffold(
      appBar: AppBar(
        title: Text('Chip List Demo'),
      ),
      body: Padding(
        padding: const EdgeInsets.all(16.0),
        child: ChipList<String>(
          chips: chips,
          selectedChips: selected.asMap().entries
              .map((entry) => entry.value ? entry.key : null)
              .where((chip) => chip != null)
              .toList(),
          onChipSelected: (chip) {
            int index = chips.indexOf(chip);
            handleChipSelection(index);
          },
          chipBuilder: (chip, isSelected) {
            return Chip(
              label: Text(chip),
              selected: isSelected,
              onDeleted: () => handleChipSelection(chips.indexOf(chip)),
              deleteIcon: Icon(Icons.cancel),
            );
          },
        ),
      ),
    );
  }
}
代码解释
-
导入依赖:
import 'package:chip_list/chip_list.dart'; -
定义数据:
chips:包含芯片名称的列表。selected:用于跟踪每个芯片是否被选中的布尔值列表。
-
处理芯片选择:
handleChipSelection(int index):更新选中状态的函数。
-
构建UI:
- 使用
ChipList小部件来显示芯片列表。 chips:传递给ChipList的芯片数据。selectedChips:当前选中的芯片列表。onChipSelected:当芯片被选中时调用的回调。chipBuilder:用于自定义每个芯片的显示。
- 使用
在这个示例中,每个芯片可以被选中或取消选中,并且选中状态会被更新。你还可以自定义芯片的删除图标和删除行为。
希望这个示例能够帮助你理解如何在Flutter中使用chip_list插件来展示芯片列表。


