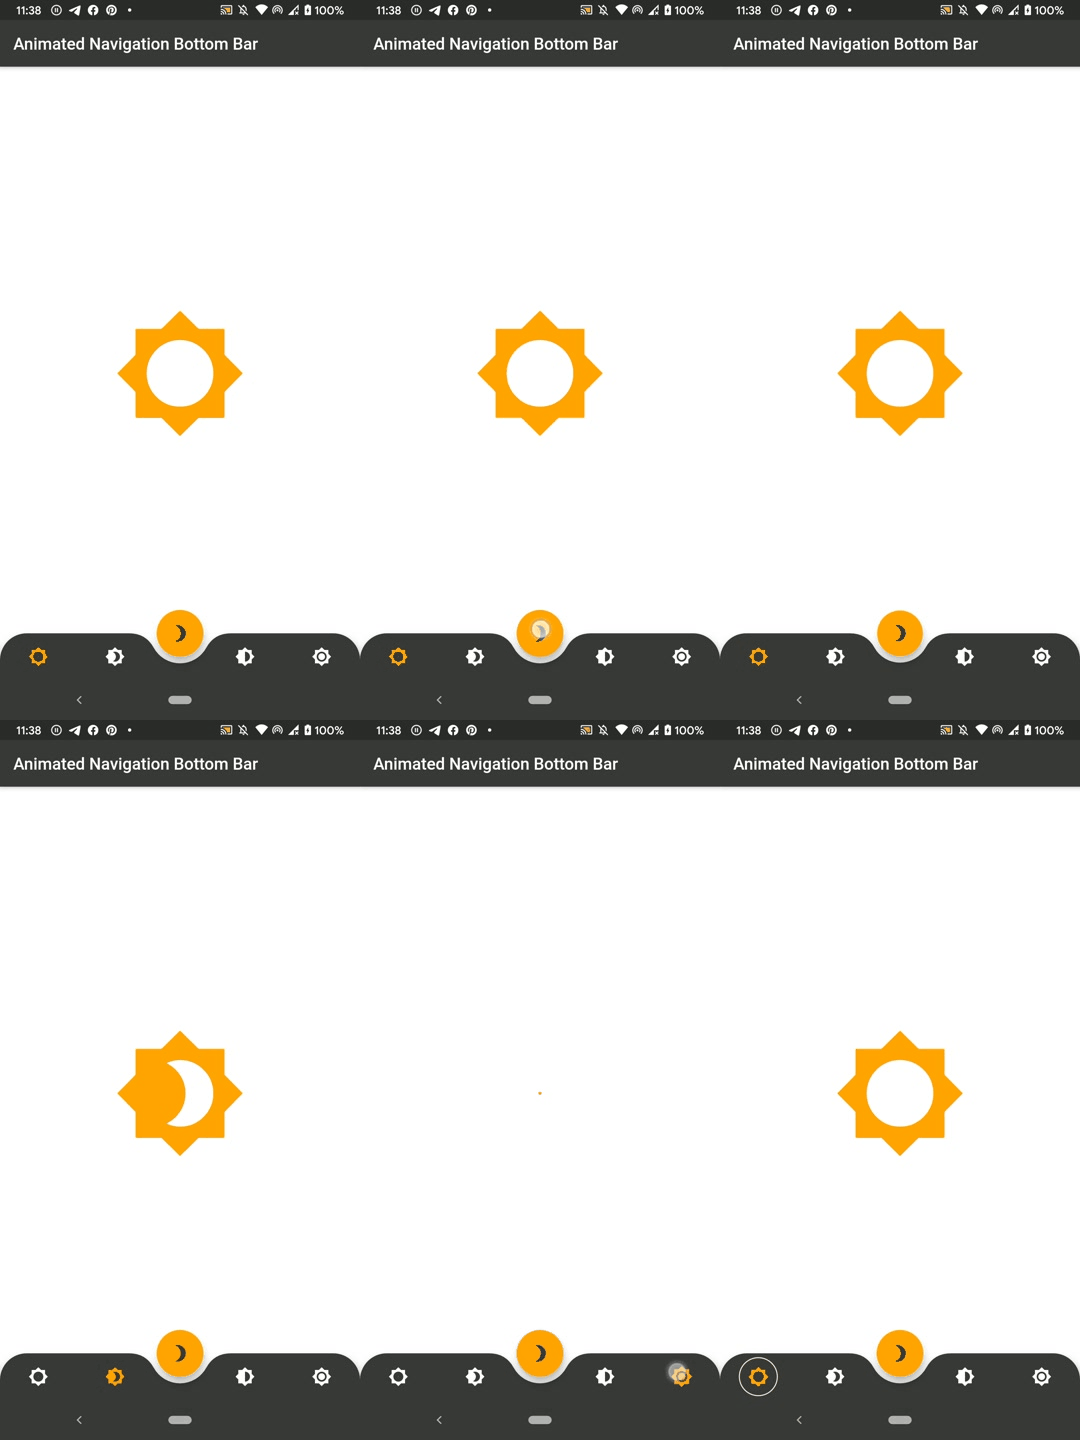
Flutter动画底部导航栏插件animated_bottom_navigation_bar的使用
Flutter动画底部导航栏插件animated_bottom_navigation_bar的使用
简介
AnimatedBottomNavigationBar 是一个可定制的小部件,灵感来自于 Dribbble上的设计。它提供了丰富的自定义选项,可以轻松创建带有动画效果的底部导航栏。

快速开始
要开始使用 AnimatedBottomNavigationBar,只需将其放置在 Scaffold 的 bottomNavigationBar 插槽中。它会自动尊重 FloatingActionButton 的位置。例如:
Scaffold(
  body: Container(), // 目标页面
  floatingActionButton: FloatingActionButton(
    onPressed: () {},
  ),
  floatingActionButtonLocation: FloatingActionButtonLocation.centerDocked,
  bottomNavigationBar: AnimatedBottomNavigationBar(
    icons: iconList,
    activeIndex: _bottomNavIndex,
    gapLocation: GapLocation.center,
    notchSmoothness: NotchSmoothness.verySmoothEdge,
    leftCornerRadius: 32,
    rightCornerRadius: 32,
    onTap: (index) => setState(() => _bottomNavIndex = index),
  ),
);
你还可以通过 AnimatedBottomNavigationBar.builder 构建更灵活的 bottomNavigationBar:
Scaffold(
  body: Container(), // 目标页面
  floatingActionButton: FloatingActionButton(
    onPressed: () {},
  ),
  floatingActionButtonLocation: FloatingActionButtonLocation.centerDocked,
  bottomNavigationBar: AnimatedBottomNavigationBar.builder(
    itemCount: iconList.length,
    tabBuilder: (int index, bool isActive) {
      return Icon(
        iconList[index],
        size: 24,
        color: isActive ? colors.activeNavigationBarColor : colors.notActiveNavigationBarColor,
      );
    },
    activeIndex: _bottomNavIndex,
    gapLocation: GapLocation.center,
    notchSmoothness: NotchSmoothness.verySmoothEdge,
    leftCornerRadius: 32,
    rightCornerRadius: 32,
    onTap: (index) => setState(() => _bottomNavIndex = index),
  ),
);
自定义
AnimatedBottomNavigationBar 支持 2、3、4 或 5 个导航元素,并且可以根据需要进行自定义。以下是一些常见的自定义示例:
平滑的圆角和缺口
Scaffold(
  floatingActionButton: FloatingActionButton(
    onPressed: () {},
  ),
  floatingActionButtonLocation: FloatingActionButtonLocation.centerDocked,
  bottomNavigationBar: AnimatedBottomNavigationBar(
    icons: iconList,
    activeIndex: _bottomNavIndex,
    gapLocation: GapLocation.center,
    notchSmoothness: NotchSmoothness.verySmoothEdge,
    leftCornerRadius: 32,
    rightCornerRadius: 32,
    onTap: (index) => setState(() => _bottomNavIndex = index),
  ),
);

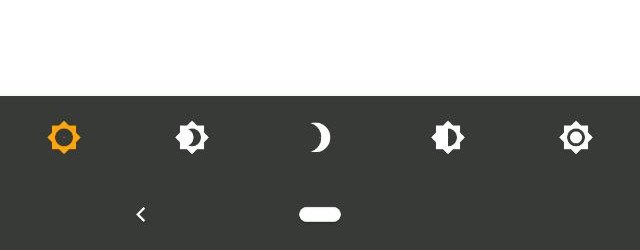
普通样式
Scaffold(
  bottomNavigationBar: AnimatedBottomNavigationBar(
    icons: iconList,
    activeIndex: _bottomNavIndex,
    onTap: (index) => setState(() => _bottomNavIndex = index),
  ),
);

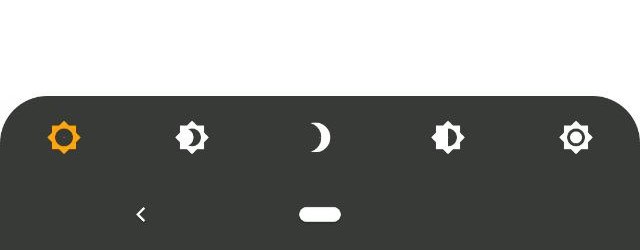
圆角样式
Scaffold(
  bottomNavigationBar: AnimatedBottomNavigationBar(
    icons: iconList,
    activeIndex: _bottomNavIndex,
    leftCornerRadius: 32,
    rightCornerRadius: 32,
    onTap: (index) => setState(() => _bottomNavIndex = index),
  ),
);

驱动导航栏变化
要程序化地更改活动的导航栏标签,可以通过传递新的 activeIndex 来实现:
class _MyAppState extends State<MyApp> {
  int activeIndex = 0;

  void _onTap(int index) {
    setState(() {
      activeIndex = index;
    });
  }

  @override
  Widget build(BuildContext context) {
    return Scaffold(
      bottomNavigationBar: AnimatedBottomNavigationBar(
        activeIndex: activeIndex,
        onTap: _onTap,
      ),
    );
  }
}
完整示例代码
以下是包含所有功能的完整示例代码:
import 'package:animated_bottom_navigation_bar/animated_bottom_navigation_bar.dart';
import 'package:flutter/material.dart';

void main() => runApp(MyApp());

class MyApp extends StatelessWidget {
  @override
  Widget build(BuildContext context) {
    return MaterialApp(
      title: 'Flutter Demo',
      theme: ThemeData.light(),
      darkTheme: ThemeData.dark(),
      home: MyHomePage(title: 'Animated Navigation Bottom Bar'),
    );
  }
}

class MyHomePage extends StatefulWidget {
  MyHomePage({Key? key, required this.title}) : super(key: key);

  final String title;

  @override
  _MyHomePageState createState() => _MyHomePageState();
}

class _MyHomePageState extends State<MyHomePage> with TickerProviderStateMixin {
  int _bottomNavIndex = 0;

  late AnimationController _fabAnimationController;
  late AnimationController _borderRadiusAnimationController;
  late Animation<double> fabAnimation;
  late Animation<double> borderRadiusAnimation;
  late CurvedAnimation fabCurve;
  late CurvedAnimation borderRadiusCurve;
  late AnimationController _hideBottomBarAnimationController;

  final iconList = <IconData>[
    Icons.brightness_5,
    Icons.brightness_4,
    Icons.brightness_6,
    Icons.brightness_7,
  ];

  @override
  void initState() {
    super.initState();

    _fabAnimationController = AnimationController(
      duration: Duration(milliseconds: 500),
      vsync: this,
    );
    _borderRadiusAnimationController = AnimationController(
      duration: Duration(milliseconds: 500),
      vsync: this,
    );
    fabCurve = CurvedAnimation(
      parent: _fabAnimationController,
      curve: Interval(0.5, 1.0, curve: Curves.fastOutSlowIn),
    );
    borderRadiusCurve = CurvedAnimation(
      parent: _borderRadiusAnimationController,
      curve: Interval(0.5, 1.0, curve: Curves.fastOutSlowIn),
    );

    fabAnimation = Tween<double>(begin: 0, end: 1).animate(fabCurve);
    borderRadiusAnimation = Tween<double>(begin: 0, end: 1).animate(borderRadiusCurve);

    _hideBottomBarAnimationController = AnimationController(
      duration: Duration(milliseconds: 200),
      vsync: this,
    );

    Future.delayed(Duration(seconds: 1), () => _fabAnimationController.forward());
    Future.delayed(Duration(seconds: 1), () => _borderRadiusAnimationController.forward());
  }

  bool onScrollNotification(ScrollNotification notification) {
    if (notification is UserScrollNotification && notification.metrics.axis == Axis.vertical) {
      switch (notification.direction) {
        case ScrollDirection.forward:
          _hideBottomBarAnimationController.reverse();
          _fabAnimationController.forward(from: 0);
          break;
        case ScrollDirection.reverse:
          _hideBottomBarAnimationController.forward();
          _fabAnimationController.reverse(from: 1);
          break;
        case ScrollDirection.idle:
          break;
      }
    }
    return false;
  }

  @override
  Widget build(BuildContext context) {
    return Scaffold(
      extendBody: true,
      appBar: AppBar(
        title: Text(widget.title),
      ),
      body: NotificationListener<ScrollNotification>(
        onNotification: onScrollNotification,
        child: NavigationScreen(iconList[_bottomNavIndex]),
      ),
      floatingActionButton: FloatingActionButton(
        child: Icon(Icons.brightness_3),
        onPressed: () {
          _fabAnimationController.reset();
          _borderRadiusAnimationController.reset();
          _borderRadiusAnimationController.forward();
          _fabAnimationController.forward();
        },
      ),
      floatingActionButtonLocation: FloatingActionButtonLocation.centerDocked,
      bottomNavigationBar: AnimatedBottomNavigationBar.builder(
        itemCount: iconList.length,
        tabBuilder: (int index, bool isActive) {
          final color = isActive ? Colors.blue : Colors.grey;
          return Column(
            mainAxisSize: MainAxisSize.min,
            mainAxisAlignment: MainAxisAlignment.center,
            children: [
              Icon(
                iconList[index],
                size: 24,
                color: color,
              ),
              const SizedBox(height: 4),
              Padding(
                padding: const EdgeInsets.symmetric(horizontal: 8),
                child: Text(
                  "brightness $index",
                  maxLines: 1,
                  style: TextStyle(color: color),
                ),
              )
            ],
          );
        },
        backgroundColor: Colors.white,
        activeIndex: _bottomNavIndex,
        splashColor: Colors.blue,
        notchAndCornersAnimation: borderRadiusAnimation,
        notchSmoothness: NotchSmoothness.defaultEdge,
        gapLocation: GapLocation.center,
        leftCornerRadius: 32,
        rightCornerRadius: 32,
        onTap: (index) => setState(() => _bottomNavIndex = index),
        hideAnimationController: _hideBottomBarAnimationController,
        shadow: BoxShadow(
          offset: Offset(0, 1),
          blurRadius: 12,
          spreadRadius: 0.5,
          color: Colors.blue.withOpacity(0.3),
        ),
      ),
    );
  }
}

class NavigationScreen extends StatelessWidget {
  final IconData iconData;

  NavigationScreen(this.iconData);

  @override
  Widget build(BuildContext context) {
    return Container(
      color: Theme.of(context).colorScheme.background,
      child: ListView(
        children: [
          SizedBox(height: 64),
          Center(
            child: Icon(
              iconData,
              color: Colors.blue,
              size: 160,
            ),
          ),
        ],
      ),
    );
  }
}
这个示例展示了如何使用 AnimatedBottomNavigationBar 创建一个带有动画效果的底部导航栏,并根据用户交互更新导航栏的状态。希望这些信息对你有所帮助!
更多关于Flutter动画底部导航栏插件animated_bottom_navigation_bar的使用的实战系列教程也可以访问 https://www.itying.com/category-92-b0.html
更多关于Flutter动画底部导航栏插件animated_bottom_navigation_bar的使用的实战系列教程也可以访问 https://www.itying.com/category-92-b0.html
当然,以下是如何在Flutter项目中使用animated_bottom_navigation_bar插件来创建带有动画效果的底部导航栏的示例代码。
首先,确保你已经在pubspec.yaml文件中添加了animated_bottom_navigation_bar依赖项:
dependencies:
  flutter:
    sdk: flutter
  animated_bottom_navigation_bar: ^x.y.z  # 请替换为最新版本号
然后运行flutter pub get来获取依赖项。
接下来是完整的示例代码,展示了如何使用animated_bottom_navigation_bar插件:
import 'package:flutter/material.dart';
import 'package:animated_bottom_navigation_bar/animated_bottom_navigation_bar.dart';

void main() {
  runApp(MyApp());
}

class MyApp extends StatelessWidget {
  @override
  Widget build(BuildContext context) {
    return MaterialApp(
      title: 'Flutter Animated Bottom Navigation Bar Example',
      theme: ThemeData(
        primarySwatch: Colors.blue,
      ),
      home: MyHomePage(),
    );
  }
}

class MyHomePage extends StatefulWidget {
  @override
  _MyHomePageState createState() => _MyHomePageState();
}

class _MyHomePageState extends State<MyHomePage> with SingleTickerProviderStateMixin {
  int _selectedIndex = 0;
  final List<Widget> _widgetOptions = <Widget>[
    Center(child: Text('Home')),
    Center(child: Text('Search')),
    Center(child: Text('Profile')),
  ];

  void _onItemTapped(int index) {
    setState(() {
      _selectedIndex = index;
    });
  }

  @override
  Widget build(BuildContext context) {
    return Scaffold(
      body: _widgetOptions.elementAt(_selectedIndex),
      bottomNavigationBar: AnimatedBottomNavigationBar(
        icons: [
          Icons.home,
          Icons.search,
          Icons.person,
        ],
        activeColor: Colors.blue,
        inactiveColor: Colors.grey,
        backgroundColor: Colors.white,
        notchSmoothness: NotchSmoothness.defaultEdge,
        notchWidth: 24.0,
        height: 56.0,
        animationDuration: 300,
        currentIndex: _selectedIndex,
        onTap: _onItemTapped,
      ),
    );
  }
}
代码解释
-
依赖项:
- 确保在
pubspec.yaml中添加了animated_bottom_navigation_bar依赖项。
- 确保在
-
MaterialApp:
- 使用
MaterialApp作为应用程序的根组件,并设置主题。
- 使用
-
MyHomePage:
- 创建一个包含三个页面的主页面,每个页面显示不同的文本。
- 使用
StatefulWidget来管理页面索引状态。
-
_onItemTapped:
- 定义一个方法来处理底部导航栏项的点击事件,并更新当前页面索引。
-
AnimatedBottomNavigationBar:
- 使用
AnimatedBottomNavigationBar作为底部导航栏,并配置以下属性:icons:底部导航栏项的图标。activeColor:选中项的颜色。inactiveColor:未选中项的颜色。backgroundColor:底部导航栏的背景颜色。notchSmoothness:切口的平滑度。notchWidth:切口的宽度。height:底部导航栏的高度。animationDuration:动画持续时间。currentIndex:当前选中的索引。onTap:点击事件处理函数。
- 使用
这样,你就可以在Flutter项目中实现带有动画效果的底部导航栏了。希望这个示例代码对你有所帮助!


