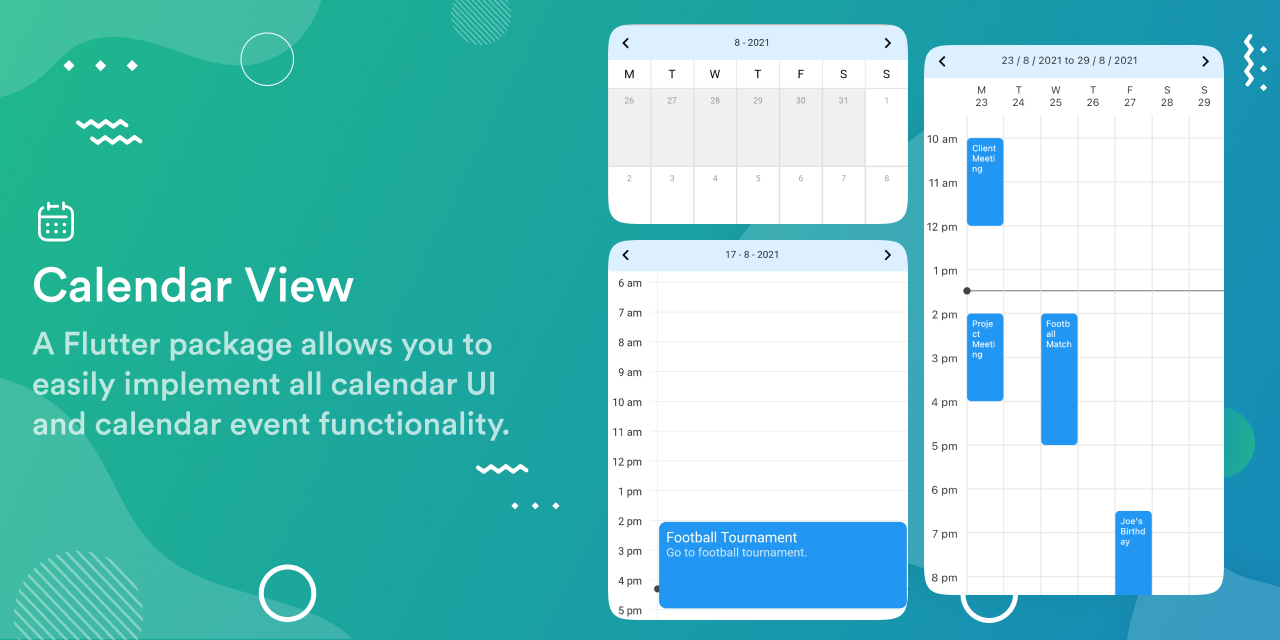
Flutter日历视图插件calendar_view的使用
Flutter日历视图插件calendar_view的使用
calendar_view 是一个Flutter包,允许您轻松实现所有日历UI和日历事件功能。本文将详细介绍如何安装、配置以及使用 calendar_view 插件。
预览


安装
-
添加依赖
在您的pubspec.yaml文件中添加以下依赖,并确保获取最新版本:dependencies: calendar_view: ^latest-version -
运行 pub get
flutter pub get -
导入包
import 'package:calendar_view/calendar_view.dart';
实现
1. 包裹 MaterialApp 使用 CalendarControllerProvider
CalendarControllerProvider(
  controller: EventController(),
  child: MaterialApp(
    // 您的MaterialApp初始化代码
  ),
)
2. 添加日历视图
根据需要选择不同的视图类型:
-
月视图
Scaffold( body: MonthView(), ); -
日视图
Scaffold( body: DayView(), ); -
周视图
Scaffold(
  body: WeekView(),
);
3. 使用 controller 添加或移除事件
添加事件
final event = CalendarEventData(
  date: DateTime(2021, 8, 10),
  title: "Event 1",
);

CalendarControllerProvider.of(context).controller.add(event);
移除事件
CalendarControllerProvider.of(context).controller.remove(event);
4. 使用 GlobalKey 切换页面或跳转到特定日期
通过定义 GlobalKey 来访问切换页面或跳转到特定日期的功能。
final GlobalKey<MonthViewState> monthViewKey = GlobalKey<MonthViewState>();

// 跳转到下一个月
monthViewKey.currentState?.nextPage();
更多配置选项
可选配置参数
月视图配置
MonthView(
  controller: EventController(),
  cellBuilder: (date, events, isToday, isInMonth, hideDaysNotInMonth) {
    return Container(); // 自定义月份单元格UI
  },
  minMonth: DateTime(1990),
  maxMonth: DateTime(2050),
  initialMonth: DateTime(2021),
  cellAspectRatio: 1,
  onPageChange: (date, pageIndex) => print("$date, $pageIndex"),
  onCellTap: (events, date) {
    print(events);
  },
  startDay: WeekDays.sunday,
  onEventTap: (event, date) => print(event),
  onEventDoubleTap: (events, date) => print(events),
  onEventLongTap: (event, date) => print(event),
  onDateLongPress: (date) => print(date),
  headerBuilder: MonthHeader.hidden,
  showWeekTileBorder: false,
  hideDaysNotInMonth: true,
  showWeekends: false,
);
日视图配置
DayView(
  controller: EventController(),
  eventTileBuilder: (date, events, boundry, start, end) {
    return Container(); // 自定义事件块UI
  },
  fullDayEventBuilder: (events, date) {
    return Container(); // 自定义全天事件UI
  },
  showVerticalLine: true,
  showLiveTimeLineInAllDays: true,
  minDay: DateTime(1990),
  maxDay: DateTime(2050),
  initialDay: DateTime(2021),
  heightPerMinute: 1,
  eventArranger: SideEventArranger(),
  onEventTap: (events, date) => print(events),
  onEventDoubleTap: (events, date) => print(events),
  onEventLongTap: (events, date) => print(events),
  onDateLongPress: (date) => print(date),
  startHour: 5,
  endHour: 20,
  hourLinePainter: (lineColor, lineHeight, offset, minuteHeight, showVerticalLine, verticalLineOffset) {
    return CustomPainter(); // 自定义小时线绘制
  },
  dayTitleBuilder: DayHeader.hidden,
  keepScrollOffset: true,
);
周视图配置
WeekView(
  controller: EventController(),
  eventTileBuilder: (date, events, boundry, start, end) {
    return Container(); // 自定义事件块UI
  },
  fullDayEventBuilder: (events, date) {
    return Container(); // 自定义全天事件UI
  },
  showLiveTimeLineInAllDays: true,
  width: 400,
  minDay: DateTime(1990),
  maxDay: DateTime(2050),
  initialDay: DateTime(2021),
  heightPerMinute: 1,
  eventArranger: SideEventArranger(),
  onEventTap: (events, date) => print(events),
  onEventDoubleTap: (events, date) => print(events),
  onDateLongPress: (date) => print(date),
  startDay: WeekDays.sunday,
  startHour: 5,
  endHour: 20,
  showVerticalLines: false,
  hourLinePainter: (lineColor, lineHeight, offset, minuteHeight, showVerticalLine, verticalLineOffset) {
    return CustomPainter(); // 自定义小时线绘制
  },
  weekPageHeaderBuilder: WeekHeader.hidden,
  fullDayHeaderTitle: 'All day',
  fullDayHeaderTextConfig: FullDayHeaderTextConfig(
    textAlign: TextAlign.center,
    textOverflow: TextOverflow.ellipsis,
    maxLines: 2,
  ),
  keepScrollOffset: true,
);
示例代码
以下是完整的示例代码,展示了如何在项目中集成 calendar_view 插件:
import 'dart:ui';

import 'package:calendar_view/calendar_view.dart';
import 'package:flutter/material.dart';

DateTime get _now => DateTime.now();

void main() {
  runApp(MyApp());
}

class MyApp extends StatelessWidget {
  @override
  Widget build(BuildContext context) {
    return CalendarControllerProvider(
      controller: EventController()..addAll(_events),
      child: MaterialApp(
        title: 'Flutter Calendar Page Demo',
        debugShowCheckedModeBanner: false,
        theme: ThemeData.light(),
        scrollBehavior: ScrollBehavior().copyWith(
          dragDevices: {
            PointerDeviceKind.trackpad,
            PointerDeviceKind.mouse,
            PointerDeviceKind.touch,
          },
        ),
        home: HomePage(),
      ),
    );
  }
}

List<CalendarEventData> _events = [
  CalendarEventData(
    date: _now,
    title: "Project meeting",
    description: "Today is project meeting.",
    startTime: DateTime(_now.year, _now.month, _now.day, 18, 30),
    endTime: DateTime(_now.year, _now.month, _now.day, 22),
  ),
  CalendarEventData(
    date: _now.subtract(Duration(days: 3)),
    recurrenceSettings: RecurrenceSettings.withCalculatedEndDate(
      startDate: _now.subtract(Duration(days: 3)),
    ),
    title: 'Leetcode Contest',
    description: 'Give leetcode contest',
  ),
  CalendarEventData(
    date: _now.subtract(Duration(days: 3)),
    recurrenceSettings: RecurrenceSettings.withCalculatedEndDate(
      startDate: _now.subtract(Duration(days: 3)),
      frequency: RepeatFrequency.daily,
      recurrenceEndOn: RecurrenceEnd.after,
      occurrences: 5,
    ),
    title: 'Physics test prep',
    description: 'Prepare for physics test',
  ),
  CalendarEventData(
    date: _now.add(Duration(days: 1)),
    startTime: DateTime(_now.year, _now.month, _now.day, 18),
    endTime: DateTime(_now.year, _now.month, _now.day, 19),
    recurrenceSettings: RecurrenceSettings(
      startDate: _now,
      endDate: _now.add(Duration(days: 5)),
      frequency: RepeatFrequency.daily,
      recurrenceEndOn: RecurrenceEnd.after,
      occurrences: 5,
    ),
    title: "Wedding anniversary",
    description: "Attend uncle's wedding anniversary.",
  ),
  CalendarEventData(
    date: _now,
    startTime: DateTime(_now.year, _now.month, _now.day, 14),
    endTime: DateTime(_now.year, _now.month, _now.day, 17),
    title: "Football Tournament",
    description: "Go to football tournament.",
  ),
  CalendarEventData(
    date: _now.add(Duration(days: 3)),
    startTime: DateTime(_now.add(Duration(days: 3)).year,
        _now.add(Duration(days: 3)).month, _now.add(Duration(days: 3)).day, 10),
    endTime: DateTime(_now.add(Duration(days: 3)).year,
        _now.add(Duration(days: 3)).month, _now.add(Duration(days: 3)).day, 14),
    title: "Sprint Meeting.",
    description: "Last day of project submission for last year.",
  ),
  CalendarEventData(
    date: _now.subtract(Duration(days: 2)),
    startTime: DateTime(
        _now.subtract(Duration(days: 2)).year,
        _now.subtract(Duration(days: 2)).month,
        _now.subtract(Duration(days: 2)).day,
        14),
    endTime: DateTime(
        _now.subtract(Duration(days: 2)).year,
        _now.subtract(Duration(days: 2)).month,
        _now.subtract(Duration(days: 2)).day,
        16),
    title: "Team Meeting",
    description: "Team Meeting",
  ),
  CalendarEventData(
    date: _now.subtract(Duration(days: 2)),
    startTime: DateTime(
        _now.subtract(Duration(days: 2)).year,
        _now.subtract(Duration(days: 2)).month,
        _now.subtract(Duration(days: 2)).day,
        10),
    endTime: DateTime(
        _now.subtract(Duration(days: 2)).year,
        _now.subtract(Duration(days: 2)).month,
        _now.subtract(Duration(days: 2)).day,
        12),
    title: "Chemistry Viva",
    description: "Today is Joe's birthday.",
  ),
];
通过以上步骤和代码示例,您可以快速上手并使用 calendar_view 插件来构建自己的日历应用。如果您有任何问题或需要进一步的帮助,请随时查阅官方文档或联系开发者社区。
更多关于Flutter日历视图插件calendar_view的使用的实战系列教程也可以访问 https://www.itying.com/category-92-b0.html
更多关于Flutter日历视图插件calendar_view的使用的实战系列教程也可以访问 https://www.itying.com/category-92-b0.html
当然,以下是如何在Flutter项目中使用calendar_view插件的示例代码。这个插件允许你在应用中展示一个可交互的日历视图。
首先,确保你已经将calendar_view插件添加到你的pubspec.yaml文件中:
dependencies:
  flutter:
    sdk: flutter
  calendar_view: ^x.y.z  # 替换为最新版本号
然后,运行flutter pub get来获取插件。
接下来是一个完整的示例,展示如何在Flutter中使用calendar_view插件:
import 'package:flutter/material.dart';
import 'package:calendar_view/calendar_view.dart';

void main() {
  runApp(MyApp());
}

class MyApp extends StatelessWidget {
  @override
  Widget build(BuildContext context) {
    return MaterialApp(
      title: 'Calendar View Example',
      theme: ThemeData(
        primarySwatch: Colors.blue,
      ),
      home: CalendarScreen(),
    );
  }
}

class CalendarScreen extends StatefulWidget {
  @override
  _CalendarScreenState createState() => _CalendarScreenState();
}

class _CalendarScreenState extends State<CalendarScreen> {
  // 用于存储选中的日期
  DateTime? selectedDate;

  @override
  Widget build(BuildContext context) {
    return Scaffold(
      appBar: AppBar(
        title: Text('Calendar View Example'),
      ),
      body: Padding(
        padding: const EdgeInsets.all(16.0),
        child: Column(
          crossAxisAlignment: CrossAxisAlignment.start,
          children: <Widget>[
            Text(
              'Selected Date: ${selectedDate?.toLocal()}',
              style: TextStyle(fontSize: 18),
            ),
            SizedBox(height: 20),
            Expanded(
              child: CalendarView(
                firstDayOfWeek: DayOfWeek.monday,
                currentMonth: DateTime.now(),
                onDateSelected: (date) {
                  // 每当日期被选中时,更新状态
                  setState(() {
                    selectedDate = date;
                  });
                },
                // 可选:自定义日期单元格样式
                dayBuilder: (context, date, state) {
                  // 自定义逻辑,例如根据日期显示不同颜色
                  Color color = Colors.transparent;
                  if (date.day == 1 || date.day == 15 || date.day == 30) {
                    color = Colors.grey.withOpacity(0.3);
                  } else if (date == selectedDate) {
                    color = Colors.blue.withOpacity(0.3);
                  }

                  return Container(
                    decoration: BoxDecoration(
                      color: color,
                      borderRadius: BorderRadius.circular(50),
                    ),
                    child: Center(
                      child: Text(
                        '${date.day}',
                        style: TextStyle(color: Colors.black),
                      ),
                    ),
                  );
                },
              ),
            ),
          ],
        ),
      ),
    );
  }
}
代码解释:
-
依赖项:确保在
pubspec.yaml中添加了calendar_view插件。 -
主应用:
MyApp类创建了一个基本的Flutter应用,设置了主题并将CalendarScreen作为首页。 -
日历屏幕:
CalendarScreen是一个有状态的Widget,用于处理日期选择。 -
状态管理:使用
selectedDate变量来存储选中的日期,并在UI中显示它。 -
日历视图:
CalendarView小部件用于显示日历。通过onDateSelected回调来处理日期选择事件,并更新selectedDate状态。 -
自定义日期单元格:通过
dayBuilder回调,你可以根据需求自定义每个日期单元格的样式。
这个示例展示了如何使用calendar_view插件来创建一个基本的日历视图,并处理日期选择事件。你可以根据需要进一步自定义和扩展这个示例。


