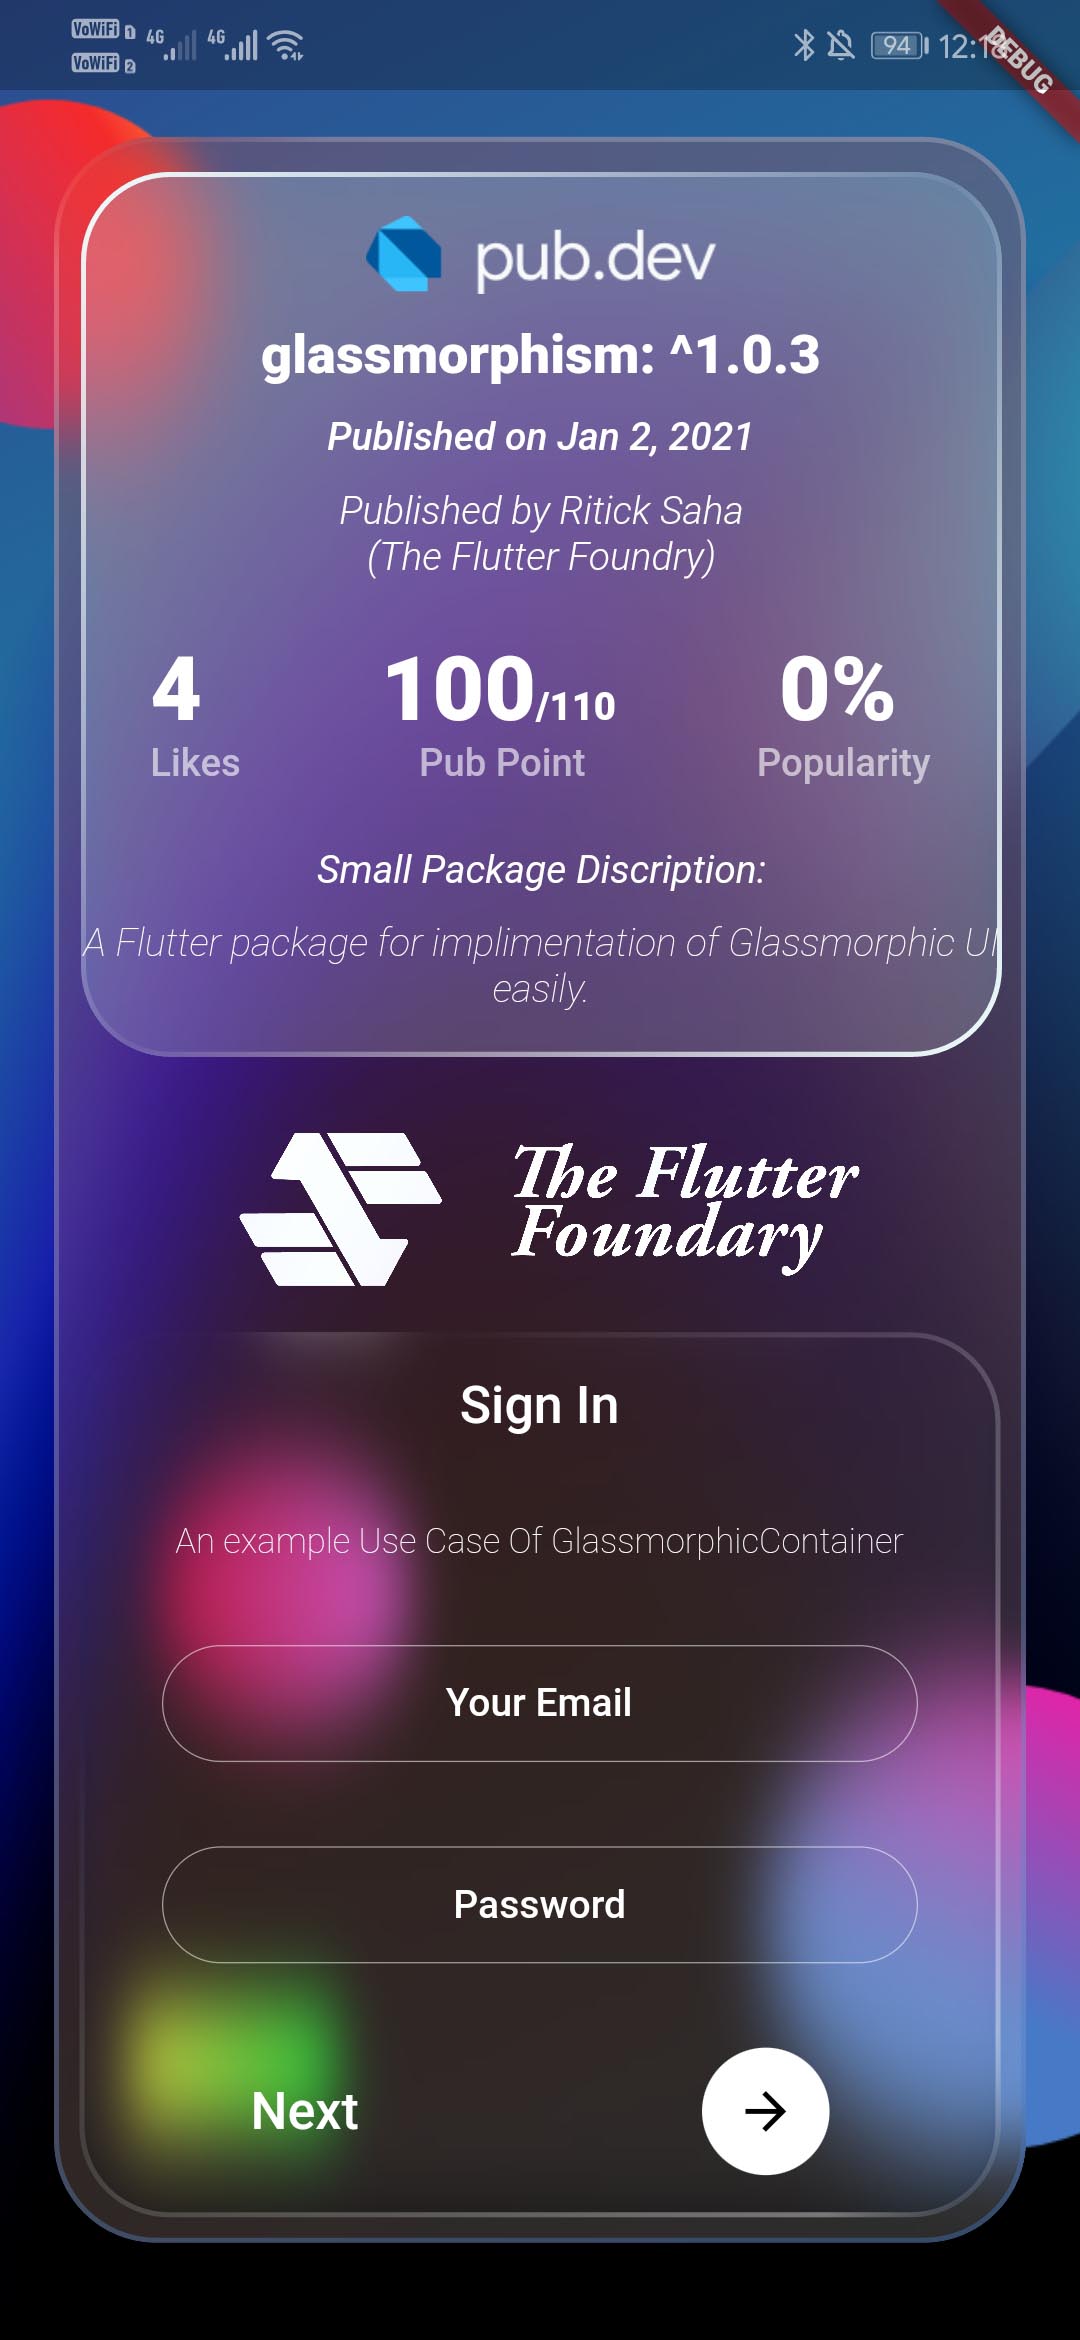
Flutter玻璃效果插件glassmorphism的使用
Flutter玻璃效果插件glassmorphism的使用
简介
Glassmorphism 是一种在UI设计中流行的半透明模糊效果,可以为应用带来现代感和深度。Flutter中的glassmorphism插件允许开发者轻松创建具有这种效果的容器。它支持iOS、Android、Web、Windows、macOS和Linux平台。

使用方法 💻
添加依赖
首先,在pubspec.yaml文件中添加glassmorphism作为依赖项:
dependencies:
  glassmorphism: ^latest_version # 替换为最新版本号
然后执行flutter pub get来安装该包。
示例代码
以下是一个完整的示例应用程序,展示了如何使用GlassmorphicContainer创建一个带有背景图片和玻璃效果的登录界面。
主文件 main.dart
import 'package:flutter/material.dart';
import 'package:glassmorphism/glassmorphism.dart';

void main() => runApp(MyApp());

class MyApp extends StatelessWidget {
  @override
  Widget build(BuildContext context) {
    return MaterialApp(
      title: 'GlassMorphic Example',
      theme: ThemeData(
        primarySwatch: Colors.blue,
      ),
      home: MyHomePage(title: 'GlassMorphic Login'),
    );
  }
}

class MyHomePage extends StatefulWidget {
  MyHomePage({Key? key, required this.title}) : super(key: key);
  final String title;

  @override
  _MyHomePageState createState() => _MyHomePageState();
}

class _MyHomePageState extends State<MyHomePage> {
  @override
  Widget build(BuildContext context) {
    return Scaffold(
      body: Container(
        decoration: BoxDecoration(
          image: DecorationImage(
            image: NetworkImage("https://example.com/background.jpg"), // 替换为你的背景图片链接
            fit: BoxFit.cover,
          ),
        ),
        child: Center(
          child: GlassmorphicContainer(
            width: 300,
            height: 400,
            borderRadius: 20,
            blur: 20,
            alignment: Alignment.bottomCenter,
            border: 2,
            linearGradient: LinearGradient(
              begin: Alignment.topLeft,
              end: Alignment.bottomRight,
              colors: [
                Color(0xFFffffff).withOpacity(0.1),
                Color(0xFFFFFFFF).withOpacity(0.05),
              ],
              stops: [0.1, 1],
            ),
            borderGradient: LinearGradient(
              begin: Alignment.topLeft,
              end: Alignment.bottomRight,
              colors: [
                Color(0xFFffffff).withOpacity(0.5),
                Color(0xFFFFFFFF).withOpacity(0.5),
              ],
            ),
            child: Padding(
              padding: const EdgeInsets.all(20.0),
              child: Column(
                mainAxisAlignment: MainAxisAlignment.center,
                children: <Widget>[
                  Text(
                    "Sign In",
                    style: TextStyle(
                      color: Colors.white,
                      fontSize: 24,
                      fontWeight: FontWeight.bold,
                    ),
                  ),
                  SizedBox(height: 20),
                  TextField(
                    decoration: InputDecoration(
                      filled: true,
                      fillColor: Colors.white.withOpacity(0.5),
                      labelText: "Email",
                      labelStyle: TextStyle(color: Colors.white),
                      enabledBorder: OutlineInputBorder(
                        borderSide: BorderSide(color: Colors.white),
                        borderRadius: BorderRadius.circular(10),
                      ),
                      focusedBorder: OutlineInputBorder(
                        borderSide: BorderSide(color: Colors.white),
                        borderRadius: BorderRadius.circular(10),
                      ),
                    ),
                  ),
                  SizedBox(height: 20),
                  TextField(
                    obscureText: true,
                    decoration: InputDecoration(
                      filled: true,
                      fillColor: Colors.white.withOpacity(0.5),
                      labelText: "Password",
                      labelStyle: TextStyle(color: Colors.white),
                      enabledBorder: OutlineInputBorder(
                        borderSide: BorderSide(color: Colors.white),
                        borderRadius: BorderRadius.circular(10),
                      ),
                      focusedBorder: OutlineInputBorder(
                        borderSide: BorderSide(color: Colors.white),
                        borderRadius: BorderRadius.circular(10),
                      ),
                    ),
                  ),
                  SizedBox(height: 20),
                  ElevatedButton(
                    onPressed: () {},
                    style: ButtonStyle(
                      backgroundColor: MaterialStateProperty.all(Colors.white),
                      foregroundColor: MaterialStateProperty.all(Colors.black),
                      shape: MaterialStateProperty.all<RoundedRectangleBorder>(
                        RoundedRectangleBorder(
                          borderRadius: BorderRadius.circular(18.0),
                        ),
                      ),
                    ),
                    child: Padding(
                      padding: const EdgeInsets.symmetric(vertical: 12.0),
                      child: Text('Login', style: TextStyle(fontSize: 18)),
                    ),
                  ),
                ],
              ),
            ),
          ),
        ),
      ),
    );
  }
}
参数说明 ⚙️
以下是GlassmorphicContainer的主要参数:
- height (double): 容器的高度(必需)。
- width (double): 容器的宽度(必需)。
- borderRadius (double): 圆角半径(必需)。
- linearGradient (LinearGradient): 渐变填充(必需)。
- border (double): 边框宽度(必需)。
- blur (double): 模糊程度(必需)。
- borderGradient (LinearGradient): 边框渐变(必需)。
- child (Widget): 子组件(可选)。
- alignment (Alignment): 对齐方式,默认为
Alignment.topLeft。 - padding (EdgeInsets): 内边距,默认无。
通过这些参数,你可以根据需要自定义玻璃效果容器的外观和行为。
更多信息
如果你有任何问题或建议,请随时提交Issue与作者交流。希望这个插件能帮助你创建出令人惊艳的应用界面!
更多关于Flutter玻璃效果插件glassmorphism的使用的实战系列教程也可以访问 https://www.itying.com/category-92-b0.html
更多关于Flutter玻璃效果插件glassmorphism的使用的实战系列教程也可以访问 https://www.itying.com/category-92-b0.html
当然,下面是一个关于如何在Flutter中使用glassmorphism效果的代码示例。我们将使用flutter_glassmorphism插件来实现这种效果。首先,你需要在你的pubspec.yaml文件中添加该插件的依赖项:
dependencies:
  flutter:
    sdk: flutter
  flutter_glassmorphism: ^0.3.3  # 请检查最新版本号
然后运行flutter pub get来安装依赖项。
接下来,你可以在你的Flutter项目中创建一个带有玻璃效果的组件。以下是一个简单的示例:
import 'package:flutter/material.dart';
import 'package:flutter_glassmorphism/flutter_glassmorphism.dart';

void main() {
  runApp(MyApp());
}

class MyApp extends StatelessWidget {
  @override
  Widget build(BuildContext context) {
    return MaterialApp(
      title: 'Flutter Glassmorphism Demo',
      theme: ThemeData(
        primarySwatch: Colors.blue,
      ),
      home: GlassmorphismDemo(),
    );
  }
}

class GlassmorphismDemo extends StatelessWidget {
  @override
  Widget build(BuildContext context) {
    return Scaffold(
      appBar: AppBar(
        title: Text('Glassmorphism Demo'),
      ),
      body: Center(
        child: Column(
          mainAxisAlignment: MainAxisAlignment.center,
          children: <Widget>[
            GlassCard(
              blur: 10.0,
              opacity: 0.5,
              borderRadius: BorderRadius.circular(20.0),
              child: Container(
                width: 200,
                height: 200,
                color: Colors.white.withOpacity(0.2),
                child: Center(
                  child: Text(
                    'Glassmorphism',
                    style: TextStyle(color: Colors.black, fontSize: 24),
                  ),
                ),
              ),
            ),
            SizedBox(height: 20),
            Glassmorphism(
              blur: 20.0,
              opacity: 0.6,
              borderRadius: BorderRadius.circular(15.0),
              background: Container(
                color: Colors.white.withOpacity(0.1),
                child: Center(
                  child: Text(
                    'Another Glassmorphism Example',
                    style: TextStyle(color: Colors.black, fontSize: 18),
                  ),
                ),
              ),
            ),
          ],
        ),
      ),
    );
  }
}

class GlassCard extends StatelessWidget {
  final double blur;
  final double opacity;
  final BorderRadius borderRadius;
  final Widget child;

  const GlassCard({
    Key key,
    @required this.blur,
    @required this.opacity,
    @required this.borderRadius,
    @required this.child,
  }) : super(key: key);

  @override
  Widget build(BuildContext context) {
    return BackdropFilter(
      filter: ImageFilter.blur(sigmaX: blur, sigmaY: blur),
      child: Container(
        decoration: BoxDecoration(
          borderRadius: borderRadius,
          color: Colors.white.withOpacity(opacity),
        ),
        child: child,
      ),
    );
  }
}
在这个示例中,我们定义了两个自定义组件:GlassCard和GlassmorphismDemo。GlassCard组件接受几个参数,包括模糊程度(blur)、不透明度(opacity)、边框半径(borderRadius)以及子组件(child)。它使用BackdropFilter和ImageFilter.blur来实现模糊效果,并通过调整Container的color属性来实现不透明度效果。
GlassmorphismDemo是我们的主页面,它展示了如何使用GlassCard和flutter_glassmorphism插件提供的Glassmorphism组件来创建玻璃效果。
请注意,flutter_glassmorphism插件的具体用法可能会随着版本的更新而有所变化,因此请参考最新的文档和示例代码。如果插件本身提供了更高级或更简单的API来实现玻璃效果,请优先考虑使用插件提供的API。
希望这个示例能帮助你理解如何在Flutter中实现glassmorphism效果!


