Flutter滑动卡片堆叠插件swipeable_card_stack的使用
Flutter滑动卡片堆叠插件swipeable_card_stack的使用
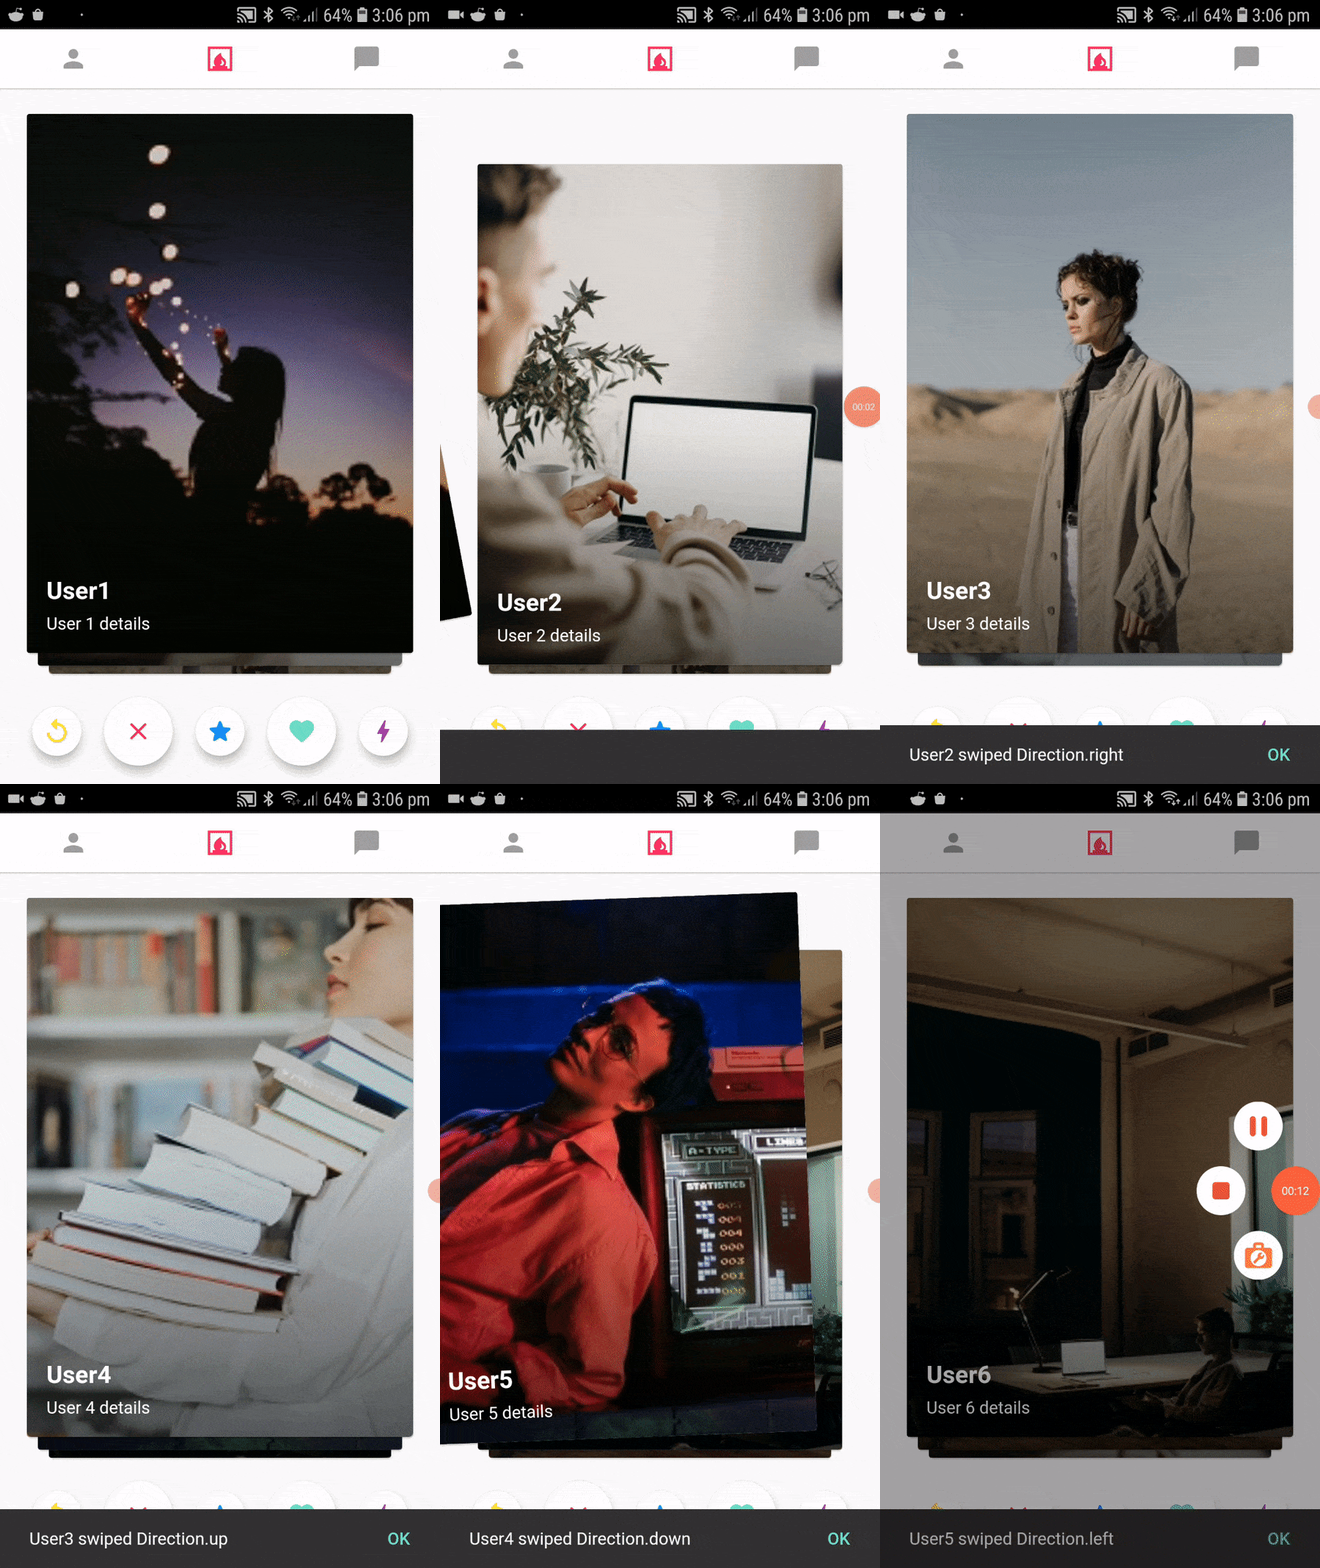
swipeable_card_stack 是一个类似 Tinder 的滑动卡片包。你可以将自定义的小部件添加到卡片堆中,并接收四个方向(左、右、上、下)的事件。你还可以为每个方向定义自己的业务逻辑。

文档
安装
在 pubspec.yaml 文件中添加 swipeable_card_stack 依赖:
dependencies:
  flutter:
    sdk: flutter

  # 添加以下行
  swipeable_card_stack: <latest version>
在应用中添加
使用包提供的 SwipeableCardsSection 小部件:
import 'package:flutter/material.dart';
import 'package:swipeable_card_stack/swipeable_card_stack.dart';

void main() {
  runApp(MyApp());
}

class MyApp extends StatelessWidget {
  @override
  Widget build(BuildContext context) {
    return MaterialApp(
      title: 'Flutter Demo',
      theme: ThemeData(
        primarySwatch: Colors.blue,
      ),
      home: MyHomePage(title: 'Flutter Demo Home Page'),
    );
  }
}

class MyHomePage extends StatefulWidget {
  MyHomePage({Key? key, required this.title}) : super(key: key);
  final String title;

  @override
  _MyHomePageState createState() => _MyHomePageState();
}

class CardView extends StatelessWidget {
  final String text;
  CardView({required this.text});

  @override
  Widget build(BuildContext context) {
    return Center(
      child: Text(text),
    );
  }
}

class _MyHomePageState extends State<MyHomePage> {
  int counter = 4;

  @override
  Widget build(BuildContext context) {
    // 创建一个 SwipeableCardSectionController
    SwipeableCardSectionController _cardController = SwipeableCardSectionController();

    return Scaffold(
      appBar: AppBar(
        title: Text(widget.title),
      ),
      body: Column(
        mainAxisAlignment: MainAxisAlignment.spaceBetween,
        children: [
          SwipeableCardsSection(
            cardController: _cardController,
            context: context,
            // 添加前3张卡片
            items: [
              CardView(text: "First card"),
              CardView(text: "Second card"),
              CardView(text: "Third card"),
            ],
            onCardSwiped: (dir, index, widget) {
              // 添加下一张卡片
              if (counter <= 20) {
                _cardController.addItem(CardView(text: "Card $counter"));
                counter++;
              }

              if (dir == Direction.left) {
                print('onDisliked ${(widget as CardView).text} $index');
              } else if (dir == Direction.right) {
                print('onLiked ${(widget as CardView).text} $index');
              } else if (dir == Direction.up) {
                print('onUp ${(widget as CardView).text} $index');
              } else if (dir == Direction.down) {
                print('onDown ${(widget as CardView).text} $index');
              }
            },
            enableSwipeUp: true,
            enableSwipeDown: true,
          ),
          Container(
            margin: EdgeInsets.symmetric(vertical: 20.0),
            child: Row(
              mainAxisAlignment: MainAxisAlignment.spaceEvenly,
              children: [
                FloatingActionButton(
                  child: Icon(Icons.chevron_left),
                  onPressed: () => _cardController.triggerSwipeLeft(),
                ),
                FloatingActionButton(
                  child: Icon(Icons.chevron_right),
                  onPressed: () => _cardController.triggerSwipeRight(),
                ),
                FloatingActionButton(
                  child: Icon(Icons.arrow_upward),
                  onPressed: () => _cardController.triggerSwipeUp(),
                ),
                FloatingActionButton(
                  child: Icon(Icons.arrow_downward),
                  onPressed: () => _cardController.triggerSwipeDown(),
                ),
              ],
            ),
          )
        ],
      ),
    );
  }
}
作者
CodeToArt Technology
- 关注我们的 Twitter: @codetoart
- 联系我们 Website: codetoart
这个示例展示了如何使用 swipeable_card_stack 插件来创建一个滑动卡片堆叠效果的应用。你可以通过手势或按钮触发卡片的滑动,并根据滑动的方向执行不同的操作。希望这个示例对你有所帮助!
更多关于Flutter滑动卡片堆叠插件swipeable_card_stack的使用的实战系列教程也可以访问 https://www.itying.com/category-92-b0.html
更多关于Flutter滑动卡片堆叠插件swipeable_card_stack的使用的实战系列教程也可以访问 https://www.itying.com/category-92-b0.html
当然,关于swipeable_card_stack这个Flutter插件的使用,下面是一个简单的代码示例,展示如何实现一个滑动卡片堆叠的效果。
首先,确保你的pubspec.yaml文件中已经添加了swipeable_card_stack依赖:
dependencies:
  flutter:
    sdk: flutter
  swipeable_card_stack: ^latest_version  # 替换为最新版本号
然后,运行flutter pub get来安装依赖。
接下来,在你的Flutter应用中,你可以这样使用SwipeableCardStack:
import 'package:flutter/material.dart';
import 'package:swipeable_card_stack/swipeable_card_stack.dart';

void main() {
  runApp(MyApp());
}

class MyApp extends StatelessWidget {
  @override
  Widget build(BuildContext context) {
    return MaterialApp(
      title: 'Swipeable Card Stack Demo',
      theme: ThemeData(
        primarySwatch: Colors.blue,
      ),
      home: Scaffold(
        appBar: AppBar(
          title: Text('Swipeable Card Stack Demo'),
        ),
        body: Center(
          child: MyCardStack(),
        ),
      ),
    );
  }
}

class MyCardStack extends StatefulWidget {
  @override
  _MyCardStackState createState() => _MyCardStackState();
}

class _MyCardStackState extends State<MyCardStack> {
  final List<String> cardTexts = [
    'Card 1',
    'Card 2',
    'Card 3',
    'Card 4',
    'Card 5',
  ];

  int _currentIndex = 0;

  @override
  Widget build(BuildContext context) {
    return SwipeableCardStack(
      cardCount: cardTexts.length,
      cardBuilder: (context, index) {
        return Card(
          elevation: 8.0,
          child: Container(
            decoration: BoxDecoration(
              color: Colors.white,
              borderRadius: BorderRadius.circular(12.0),
            ),
            child: Center(
              child: Text(
                cardTexts[index],
                style: TextStyle(fontSize: 24.0),
              ),
            ),
          ),
        );
      },
      onCardSwiped: (index) {
        setState(() {
          if (index < cardTexts.length - 1) {
            _currentIndex = index + 1;
          } else {
            // Handle the case when the last card is swiped
            // You can reset to the first card, show a message, etc.
            _currentIndex = 0;
          }
        });
      },
      onCardRemoved: (index) {
        // Handle the case when a card is removed from the stack
        // For simplicity, we'll just print the index here
        print('Card $index removed');
      },
      stackAlignment: StackAlignment.center,
      swipeThreshold: 0.3, // Adjust this value to change the swipe sensitivity
    );
  }
}
代码解释:
- 依赖引入:在
pubspec.yaml文件中添加swipeable_card_stack依赖。 - 主应用结构:在
MyApp中定义了一个简单的Flutter应用结构,包含一个Scaffold和一个居中的MyCardStack。 - 卡片堆叠组件:
MyCardStack是一个有状态的组件,它管理卡片的显示和滑动逻辑。cardCount:卡片的总数。cardBuilder:一个构建卡片的函数,根据索引返回不同的卡片。onCardSwiped:卡片被滑动时的回调,更新当前显示的卡片索引。onCardRemoved:卡片被移除时的回调,这里简单地打印了被移除卡片的索引。stackAlignment:卡片堆叠的对齐方式。swipeThreshold:滑动的灵敏度,值越小越难触发滑动。
通过这个示例,你可以看到如何使用swipeable_card_stack插件来实现一个基本的卡片滑动堆叠效果。你可以根据需要进一步定制卡片的样式和行为。


