Flutter活动圆环进度展示插件activity_ring的使用
Flutter活动圆环进度展示插件activity_ring的使用
activity_ring 是一个用于在Flutter中创建类似Apple Watch风格的进度圆环的插件。本文将详细介绍如何使用该插件,并提供完整的示例代码。
安装
首先,在你的 pubspec.yaml 文件中添加依赖:
dependencies:
  activity_ring: ^最新版本号
然后运行 flutter pub get 来安装依赖。
基本用法
导入 activity_ring 包:
import 'package:activity_ring/activity_ring.dart';
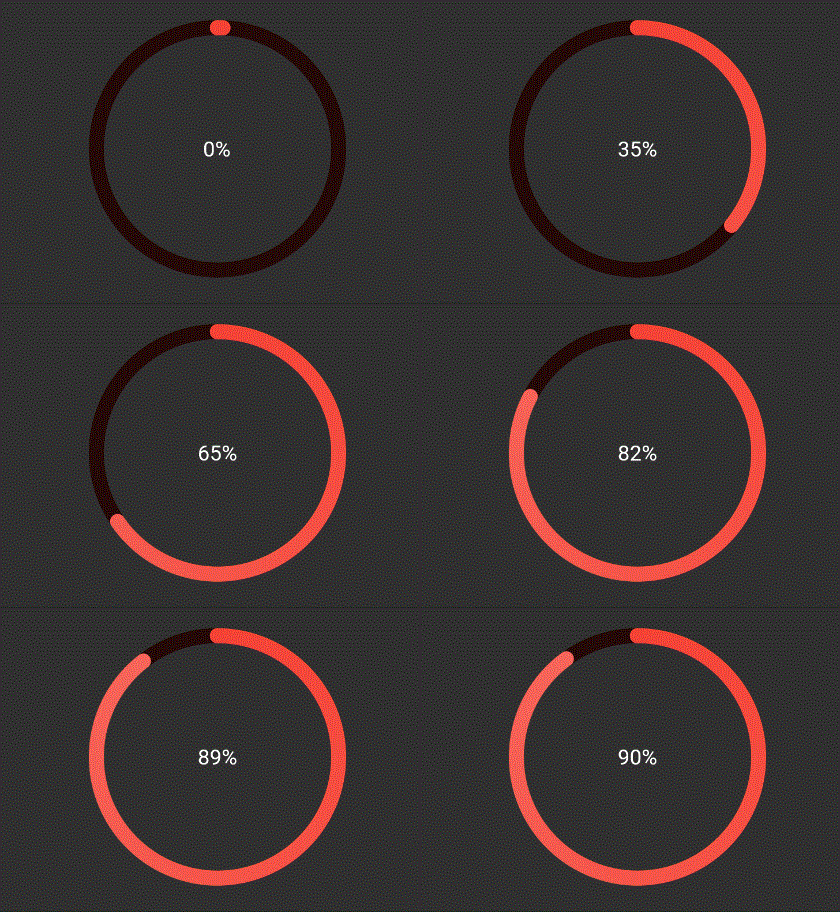
使用单一颜色
以下是如何使用单一颜色创建进度圆环的示例:
Ring(
  percent: 90,
  color: RingColorScheme(ringColor: Colors.red),
  radius: 80,
  width: 10,
  child: Center(child: Text('90%')),
)

如果你不希望自动应用渐变效果,可以传递 gradient: false 参数给 RingColorScheme。
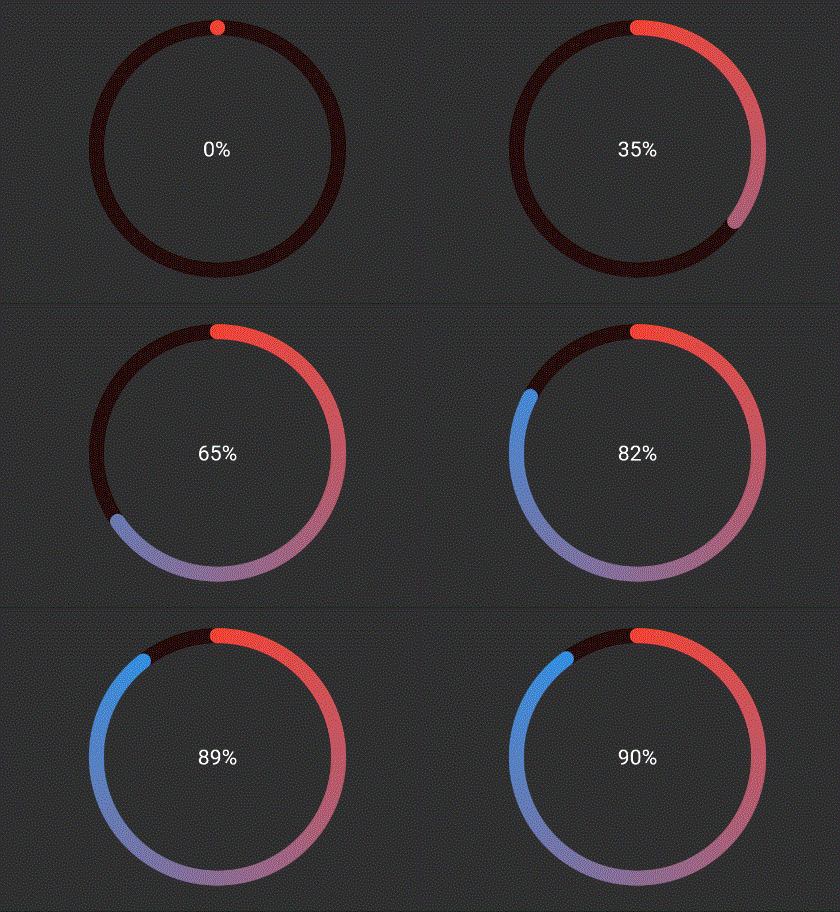
使用单一渐变
以下是使用渐变颜色创建进度圆环的示例:
Ring(
  percent: 90,
  color: RingColorScheme(ringGradient: [Colors.red, Colors.blue]),
  radius: 80,
  width: 10,
  child: Center(child: Text('90%')),
)

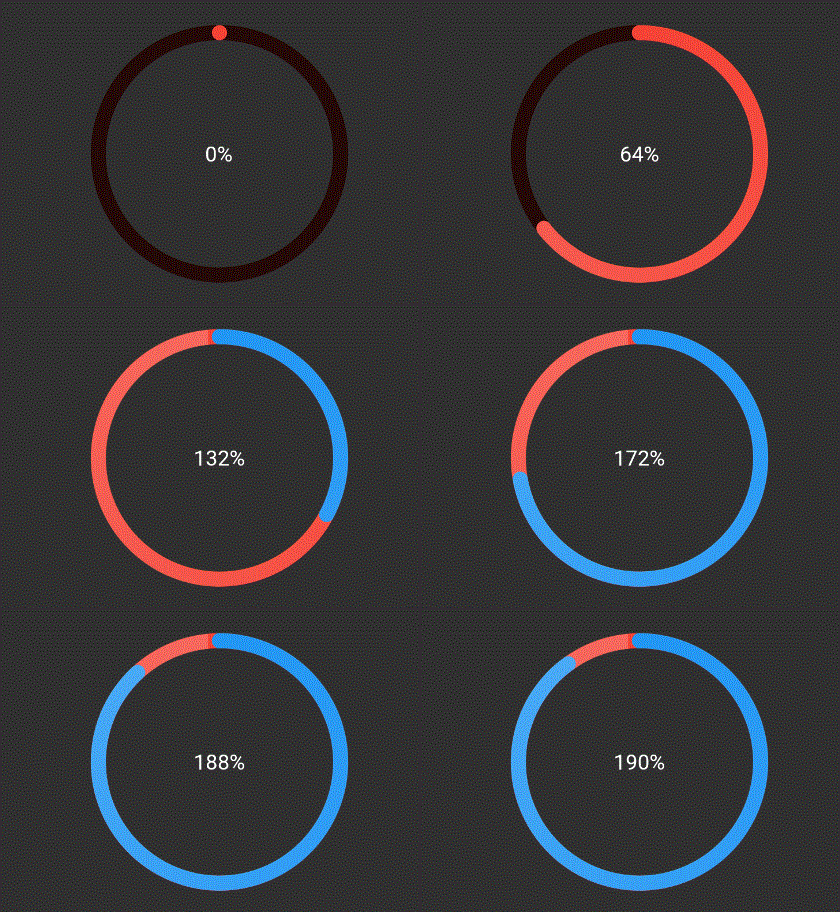
使用不同颜色的多个圆环
以下是使用不同颜色为每个圆环创建进度圆环的示例:
Ring(
  percent: 190,
  color: RingColorScheme(ringColors: [Colors.red, Colors.blue]),
  radius: 80,
  width: 10,
  child: Center(child: Text('190%')),
)

显式指定每个圆环的渐变
以下是显式指定每个圆环的渐变颜色的示例:
Ring(
  percent: 190,
  color: RingColorScheme(ringGradients: [[Colors.red, Colors.yellow], [Colors.yellow, Colors.green]]),
  radius: 80,
  width: 10,
  child: Center(child: Text('190%')),
)

完整示例
下面是一个完整的示例代码,展示了如何在一个应用程序中使用 activity_ring 插件:
import 'package:activity_ring/activity_ring.dart';
import 'package:flutter/material.dart';

void main() {
  runApp(const ExampleApp());
}

/// 示例小部件,展示 Ring 小部件
class RingExample extends StatelessWidget {
  const RingExample({Key? key}) : super(key: key);

  @override
  Widget build(BuildContext context) {
    return Column(
      children: <Widget>[
        const Divider(height: 50),
        const Text('一个圆环。百分比 = 75%'),
        const Divider(
          height: 100,
          color: Colors.transparent,
        ),
        Row(
          mainAxisAlignment: MainAxisAlignment.spaceAround,
          children: <Widget>[
            Ring(
              percent: 75,
              color: RingColorScheme(ringColor: Colors.red),
              radius: 80,
              width: 10,
              child: const Center(child: Text('75%')),
            ),
            Ring(
              percent: 75,
              color: RingColorScheme(ringGradient: [Colors.red, Colors.blue]),
              radius: 80,
              width: 10,
              child: const Center(child: Text('75%')),
            ),
            Ring(
              percent: 75,
              color: RingColorScheme(ringColors: [Colors.red, Colors.blue]),
              radius: 80,
              width: 10,
              child: const Center(child: Text('75%')),
            ),
            Ring(
              percent: 75,
              color: RingColorScheme(ringGradients: [[Colors.red, Colors.yellow], [Colors.yellow, Colors.green]]),
              radius: 80,
              width: 10,
              child: const Center(child: Text('75%')),
            ),
          ],
        ),
        const Divider(height: 80),
        const Text('两个圆环。百分比 = 120%'),
        const Divider(height: 50),
        Row(
          mainAxisAlignment: MainAxisAlignment.spaceAround,
          children: <Widget>[
            Ring(
              percent: 120,
              color: RingColorScheme(ringColor: Colors.red),
              radius: 80,
              width: 10,
              child: const Center(child: Text('120%')),
            ),
            Ring(
              percent: 120,
              color: RingColorScheme(ringGradient: [Colors.red, Colors.blue]),
              radius: 80,
              width: 10,
              child: const Center(child: Text('120%')),
            ),
            Ring(
              percent: 120,
              color: RingColorScheme(ringColors: [Colors.red, Colors.blue]),
              radius: 80,
              width: 10,
              child: const Center(child: Text('120%')),
            ),
            Ring(
              percent: 120,
              color: RingColorScheme(ringGradients: [[Colors.red, Colors.yellow], [Colors.yellow, Colors.green]]),
              radius: 80,
              width: 10,
              child: const Center(child: Text('120%')),
            ),
          ],
        ),
      ],
    );
  }
}

/// 主应用程序
class ExampleApp extends StatelessWidget {
  const ExampleApp({Key? key}) : super(key: key);

  @override
  Widget build(BuildContext context) {
    return MaterialApp(
      title: 'Activity Ring 示例',
      theme: ThemeData(
        brightness: Brightness.light,
      ),
      darkTheme: ThemeData(
        brightness: Brightness.dark,
      ),
      themeMode: ThemeMode.system,
      home: Scaffold(
        appBar: AppBar(title: const Text('Activity Ring 示例')),
        body: SafeArea(
          child: RingExample(),
        ),
      ),
    );
  }
}
这个示例展示了如何使用不同的颜色和渐变来创建进度圆环,并将其嵌入到一个简单的Flutter应用程序中。希望这对您有所帮助!
更多关于Flutter活动圆环进度展示插件activity_ring的使用的实战系列教程也可以访问 https://www.itying.com/category-92-b0.html
更多关于Flutter活动圆环进度展示插件activity_ring的使用的实战系列教程也可以访问 https://www.itying.com/category-92-b0.html
当然,以下是如何在Flutter项目中使用activity_ring插件来展示活动圆环进度的一个示例。activity_ring是一个用于创建环形进度指示器的Flutter插件。
首先,确保你已经在pubspec.yaml文件中添加了activity_ring依赖:
dependencies:
  flutter:
    sdk: flutter
  activity_ring: ^最新版本号  # 请替换为实际的最新版本号
然后运行flutter pub get来安装依赖。
接下来,你可以在你的Flutter应用中使用ActivityRing组件。以下是一个完整的示例,展示如何创建一个活动圆环进度指示器:
import 'package:flutter/material.dart';
import 'package:activity_ring/activity_ring.dart';

void main() {
  runApp(MyApp());
}

class MyApp extends StatelessWidget {
  @override
  Widget build(BuildContext context) {
    return MaterialApp(
      title: 'Activity Ring Demo',
      theme: ThemeData(
        primarySwatch: Colors.blue,
      ),
      home: Scaffold(
        appBar: AppBar(
          title: Text('Activity Ring Demo'),
        ),
        body: Center(
          child: ActivityRingDemo(),
        ),
      ),
    );
  }
}

class ActivityRingDemo extends StatefulWidget {
  @override
  _ActivityRingDemoState createState() => _ActivityRingDemoState();
}

class _ActivityRingDemoState extends State<ActivityRingDemo> with SingleTickerProviderStateMixin {
  double _progress = 0.0;

  @override
  void initState() {
    super.initState();
    // 模拟进度增加
    _startProgressAnimation();
  }

  void _startProgressAnimation() {
    Timer.periodic(Duration(milliseconds: 50), (Timer timer) {
      setState(() {
        if (_progress < 1.0) {
          _progress += 0.02;
        } else {
          timer.cancel();
        }
      });
    });
  }

  @override
  Widget build(BuildContext context) {
    return ActivityRing(
      lineWidth: 10.0,
      unfilledColor: Colors.grey[300]!,
      filledColor: Colors.blue,
      percentage: _progress,
      center: Text(
        '${(_progress * 100).toInt()}%',
        style: TextStyle(fontSize: 24, color: Colors.white),
      ),
    );
  }
}
代码解释:
-
依赖添加:
- 在
pubspec.yaml中添加activity_ring依赖。
- 在
-
主应用结构:
MyApp是一个无状态小部件,它设置了应用的主题和主页。
-
进度演示小部件:
ActivityRingDemo是一个有状态小部件,它包含进度值_progress。- 在
initState方法中,启动一个定时器来增加进度值,模拟进度变化。
-
ActivityRing组件:
ActivityRing组件接受多个参数,包括线条宽度(lineWidth)、未填充颜色(unfilledColor)、填充颜色(filledColor)、当前进度(percentage)以及圆环中心的文本(center)。
-
进度更新:
- 使用
setState方法更新进度值,从而触发UI重新构建。
- 使用
这个示例展示了如何使用activity_ring插件来创建一个简单的活动圆环进度指示器,并且模拟了一个进度增加的过程。你可以根据实际需求调整进度更新的逻辑和UI样式。


