Flutter图像处理插件image_filter_pro的使用
Flutter图像处理插件image_filter_pro的使用
Image Filter Pro
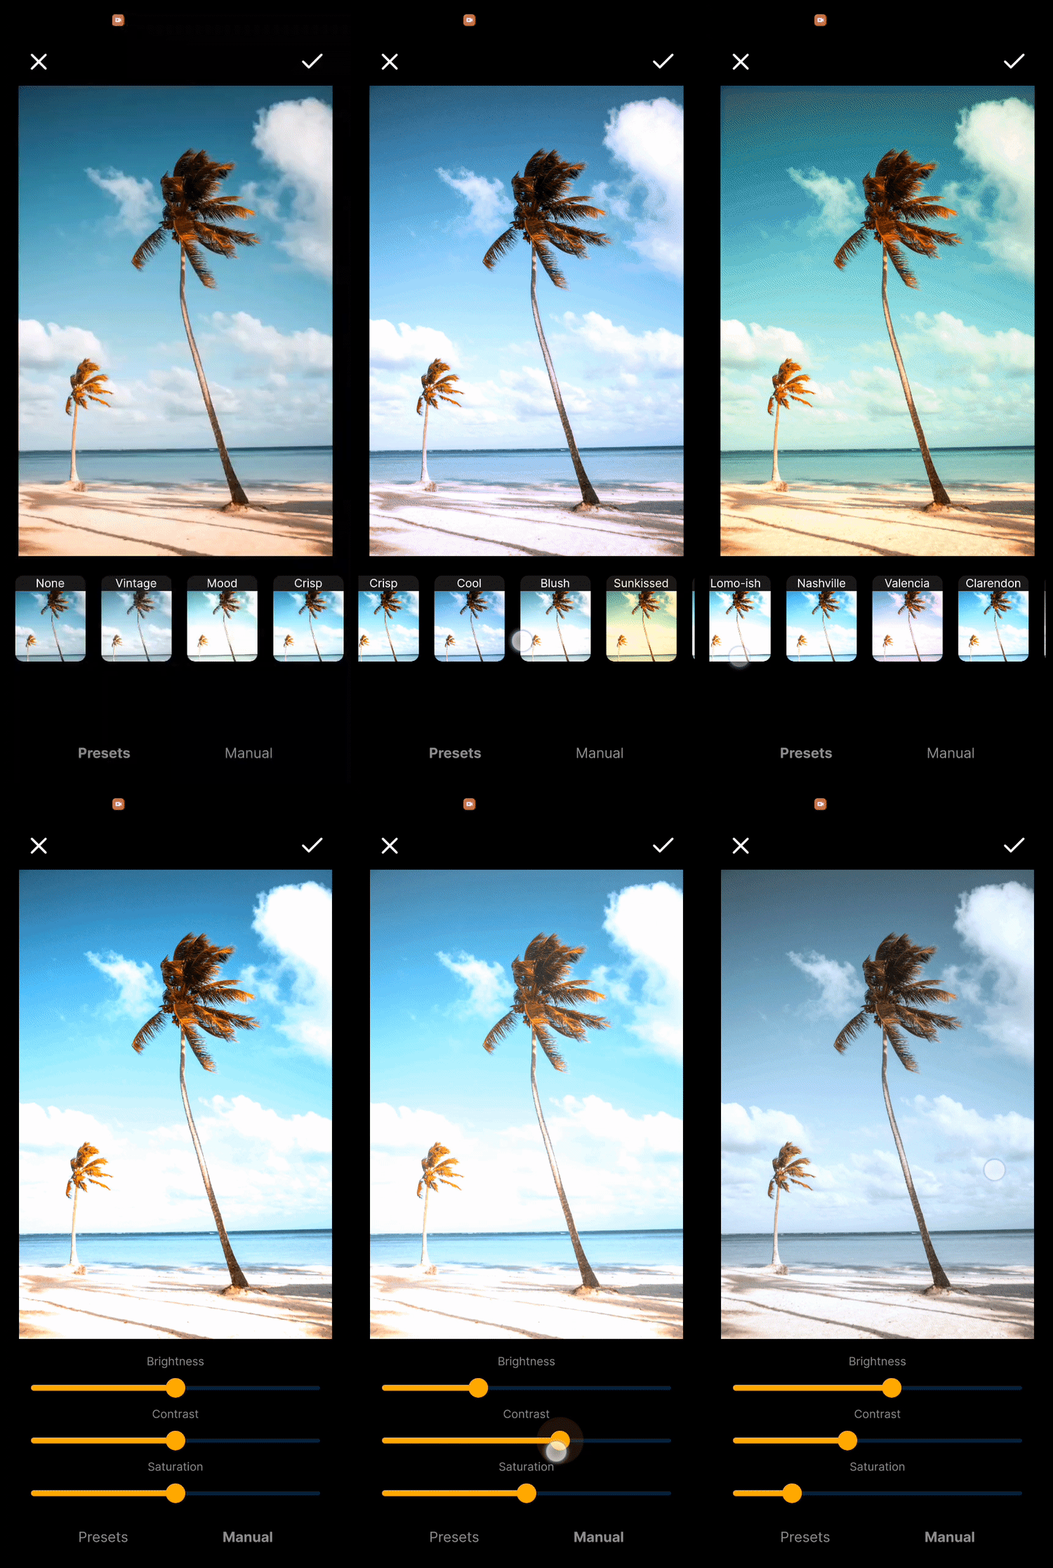
Hi! This is my first package published to help you out! Image Filter Pro is a Flutter package that provides a convenient way to apply color filters to images with preset filter options. The package is written purely in Dart, so no additional setup for specific platforms is required.
Features
- Apply various preset color filters to images.
- Easily integrate customisable filter UI into your Flutter app.
- Inspired by popular filter presets found in other image editing apps.
Installation
Add the following dependency to your pubspec.yaml file:
dependencies:
  image_filter_pro: ^0.1.11
Usage
导入包
在你的Dart文件中导入包:
import 'package:flutter/material.dart';
import 'package:image_filter_pro/image_filter_pro.dart';
使用 ImageFilterWidget
在你的 widget 树中使用 ImageFilterWidget:
class FilteredImageWidget extends StatefulWidget {
  @override
  _FilteredImageWidgetState createState() => _FilteredImageWidgetState();
}

class _FilteredImageWidgetState extends State<FilteredImageWidget> {
  File? image;

  void _showImagePicker() async {
    // 实现你的图片选择逻辑
    // 例如:
    // var pickedImage = await ImagePicker.pickImage(source: ImageSource.gallery);
    // setState(() {
    //   imageFile = pickedImage;
    // });

    var updatedImage = await Navigator.of(context).push(
      MaterialPageRoute(
        builder: (context) => PhotoFilter(
          image: image,
          presets: NamedColorFilter.defaultFilters(),
          cancelIcon: Icons.cancel,
          applyIcon: Icons.check,
          backgroundColor: Colors.black,
          sliderColor: Colors.blue,
          sliderLabelStyle: TextStyle(color: Colors.white),
          bottomButtonsTextStyle: TextStyle(color: Colors.white),
          presetsLabelTextStyle: TextStyle(color: Colors.white),
          applyingTextStyle: TextStyle(color: Colors.white),
        ),
      ),
    );

    if (updatedImage != null) {
      setState(() {
        this.image = updatedImage;
      });
    }
  }

  @override
  Widget build(BuildContext context) {
    return Scaffold(
      appBar: AppBar(
        title: Text('Image Filter App'),
      ),
      body: Center(
        child: Column(
          mainAxisAlignment: MainAxisAlignment.center,
          children: [
            ElevatedButton(
              onPressed: _showImagePicker,
              child: Text('Pick and Filter Image'),
            ),
            if (image != null)
              Image.file(image!),
          ],
        ),
      ),
    );
  }
}
自定义滤镜
你也可以提供自己的滤镜预设:
PhotoFilter(
  image: image,
  filters: [
    NamedColorFilter(
      colorFilterMatrix: [],
      name: "None",
    ),
    NamedColorFilter(
      colorFilterMatrix: [
        0.8, 0.1, 0.1, 0, 20,
        0.1, 0.8, 0.1, 0, 20,
        0.1, 0.1, 0.8, 0, 20,
        0, 0, 0, 1, 0,
      ],
      name: "Vintage",
    ),
    NamedColorFilter(
      colorFilterMatrix: [
        1.2, 0.1, 0.1, 0, 10,
        0.1, 1, 0.1, 0, 10,
        0.1, 0.1, 1, 0, 10,
        0, 0, 0, 1, 0,
      ],
      name: 'Mood',
    ),
  ],
)
扩展默认滤镜
你还可以扩展默认的滤镜预设:
PhotoFilter(
  image: image,
  filters: NamedColorFilter.defaultFilters().toList()
    ..addAll([
      NamedColorFilter(
        colorFilterMatrix: [
          0.8, 0.1, 0.1, 0, 20,
          0.1, 0.8, 0.1, 0, 20,
          0.1, 0.1, 0.8, 0, 20,
          0, 0, 0, 1, 0,
        ],
        name: "Vintage",
      ),
      NamedColorFilter(
        colorFilterMatrix: [
          1.2, 0.1, 0.1, 0, 10,
          0.1, 1, 0.1, 0, 10,
          0.1, 0.1, 1, 0, 10,
          0, 0, 0, 1, 0,
        ],
        name: 'Mood',
      ),
    ]),
)
回调函数
你可以在用户点击取消或应用滤镜时触发回调函数:
PhotoFilter(
  image: image,
  presets: NamedColorFilter.defaultFilters(),
  onCancel: () {
    // 取消操作
  },
  onStartApplyingFilter: () {
    // 显示加载器或其他类似的操作
  },
  onFinishApplyingFilter: (File? file) {
    // 处理编辑后的图片
  },
)
Screenshots

License
This package is distributed under the MIT License.
希望这些信息对你有帮助!如果你有任何问题或需要进一步的帮助,请随时提问。
更多关于Flutter图像处理插件image_filter_pro的使用的实战系列教程也可以访问 https://www.itying.com/category-92-b0.html
更多关于Flutter图像处理插件image_filter_pro的使用的实战系列教程也可以访问 https://www.itying.com/category-92-b0.html
当然,以下是如何在Flutter中使用image_filter_pro插件进行图像处理的示例代码。image_filter_pro插件提供了一些高级的图像处理功能,比如模糊、灰度、亮度调整等。以下是一个简单的示例,展示如何使用这个插件对图像进行模糊处理。
首先,确保你已经在pubspec.yaml文件中添加了image_filter_pro依赖:
dependencies:
  flutter:
    sdk: flutter
  image_filter_pro: ^最新版本号 # 请替换为实际的最新版本号
然后,运行flutter pub get来安装依赖。
接下来,在你的Flutter项目中,你可以像这样使用ImageFilterPro:
import 'package:flutter/material.dart';
import 'package:image_filter_pro/image_filter_pro.dart';

void main() {
  runApp(MyApp());
}

class MyApp extends StatelessWidget {
  @override
  Widget build(BuildContext context) {
    return MaterialApp(
      home: ImageFilterPage(),
    );
  }
}

class ImageFilterPage extends StatefulWidget {
  @override
  _ImageFilterPageState createState() => _ImageFilterPageState();
}

class _ImageFilterPageState extends State<ImageFilterPage> {
  final ImageProvider _image = NetworkImage('https://via.placeholder.com/600');

  @override
  Widget build(BuildContext context) {
    return Scaffold(
      appBar: AppBar(
        title: Text('ImageFilterPro Demo'),
      ),
      body: Center(
        child: Column(
          mainAxisAlignment: MainAxisAlignment.center,
          children: <Widget>[
            Image(
              image: _image,
              width: 300,
              height: 300,
              fit: BoxFit.cover,
            ),
            SizedBox(height: 20),
            ImageFilterPro(
              imageProvider: _image,
              filters: [
                ImageFilterProData(
                  filterType: ImageFilterType.blur,
                  level: 10, // 模糊级别,可以根据需要调整
                ),
              ],
              width: 300,
              height: 300,
              fit: BoxFit.cover,
            ),
          ],
        ),
      ),
    );
  }
}
在这个示例中,我们创建了一个简单的Flutter应用,其中包含一个原始图像和一个应用了模糊效果的图像。ImageFilterPro小部件接受一个imageProvider和一个filters列表。filters列表包含了一个或多个ImageFilterProData对象,每个对象定义了要应用的图像处理类型和级别。
在这个例子中,我们使用了ImageFilterType.blur类型,并将模糊级别设置为10。你可以根据需要调整模糊级别或尝试其他图像处理类型,如ImageFilterType.grayscale(灰度)、ImageFilterType.brightness(亮度)等。
请确保你已经正确导入了image_filter_pro包,并根据实际使用情况调整图像URL和图像处理参数。


