Flutter下拉刷新风格化插件stylish_pull_to_refresh的使用
Flutter下拉刷新风格化插件stylish_pull_to_refresh的使用
描述
stylish_pull_to_refresh 是一个Flutter包,它提供了多种动画样式的 RefreshIndicator。使用这个插件可以在你的项目中实现“下拉刷新”的功能,并且可以通过选择不同的样式来定制刷新指示器的外观。
代码示例
以下是一个简单的代码示例,展示了如何在项目中使用 StylishPullToRefresh 组件:
import 'package:flutter/material.dart';
import 'package:stylish_pull_to_refresh/stylish_pull_to_refresh.dart';

void main() {
  runApp(MyApp());
}

class MyApp extends StatelessWidget {
  @override
  Widget build(BuildContext context) {
    return MaterialApp(
      debugShowCheckedModeBanner: false,
      home: MyHome(),
    );
  }
}

class MyHome extends StatefulWidget {
  @override
  _MyHomeState createState() => _MyHomeState();
}

class _MyHomeState extends State<MyHome> {
  @override
  Widget build(BuildContext context) {
    return Scaffold(
      appBar: AppBar(
        title: Text('Wallet'),
        centerTitle: true,
      ),
      body: SafeArea(
        child: StylishPullToRefresh(
          style: Style.audioWave, // 可以选择其他提供的样式
          size: 50, // 设置下拉刷新指示器的大小
          onRefresh: () async {
            // 在这里添加刷新时要执行的代码
            await Future.delayed(Duration(seconds: 4)); // 模拟异步操作
          },
          child: bodyContent(), // 传递子组件
        ),
      ),
    );
  }

  SingleChildScrollView bodyContent() {
    return SingleChildScrollView(
      child: Center(
        child: Padding(
          padding: const EdgeInsets.all(16.0),
          child: Column(
            children: <Widget>[
              Container(
                width: double.infinity,
                height: 200,
                color: Colors.grey[300],
                child: Center(child: Text("模拟内容")),
              ),
              SizedBox(height: 20),
              Container(
                width: double.infinity,
                height: 200,
                color: Colors.grey[300],
                child: Center(child: Text("更多模拟内容")),
              ),
            ],
          ),
        ),
      ),
    );
  }
}
Demo
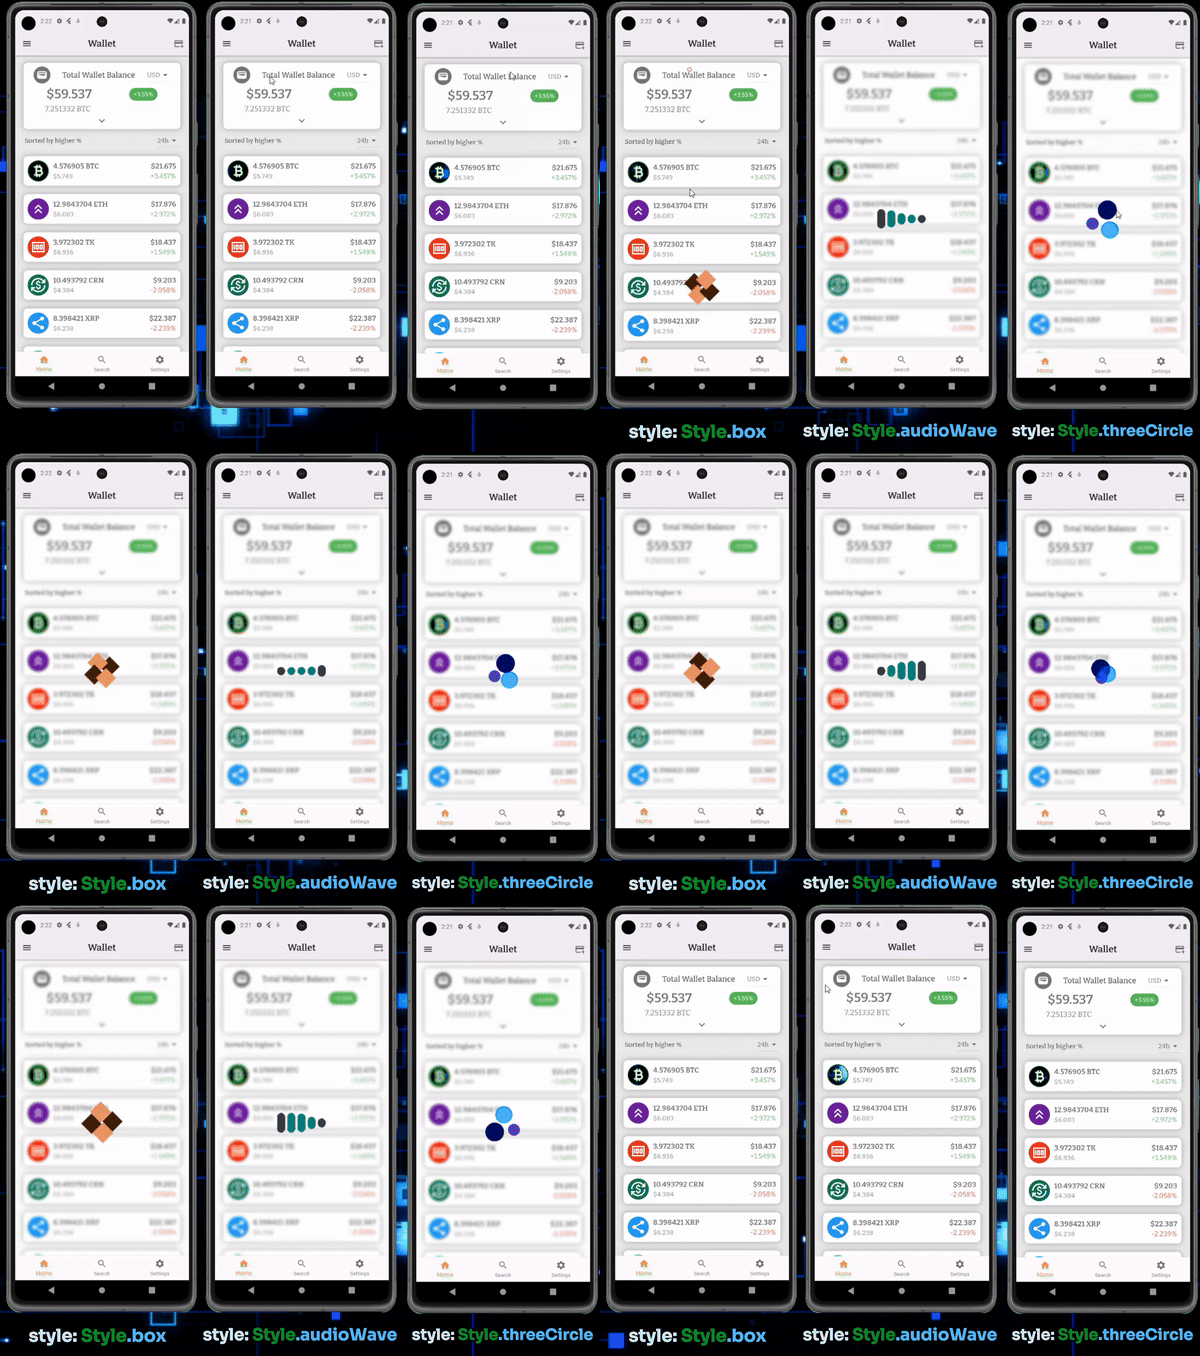
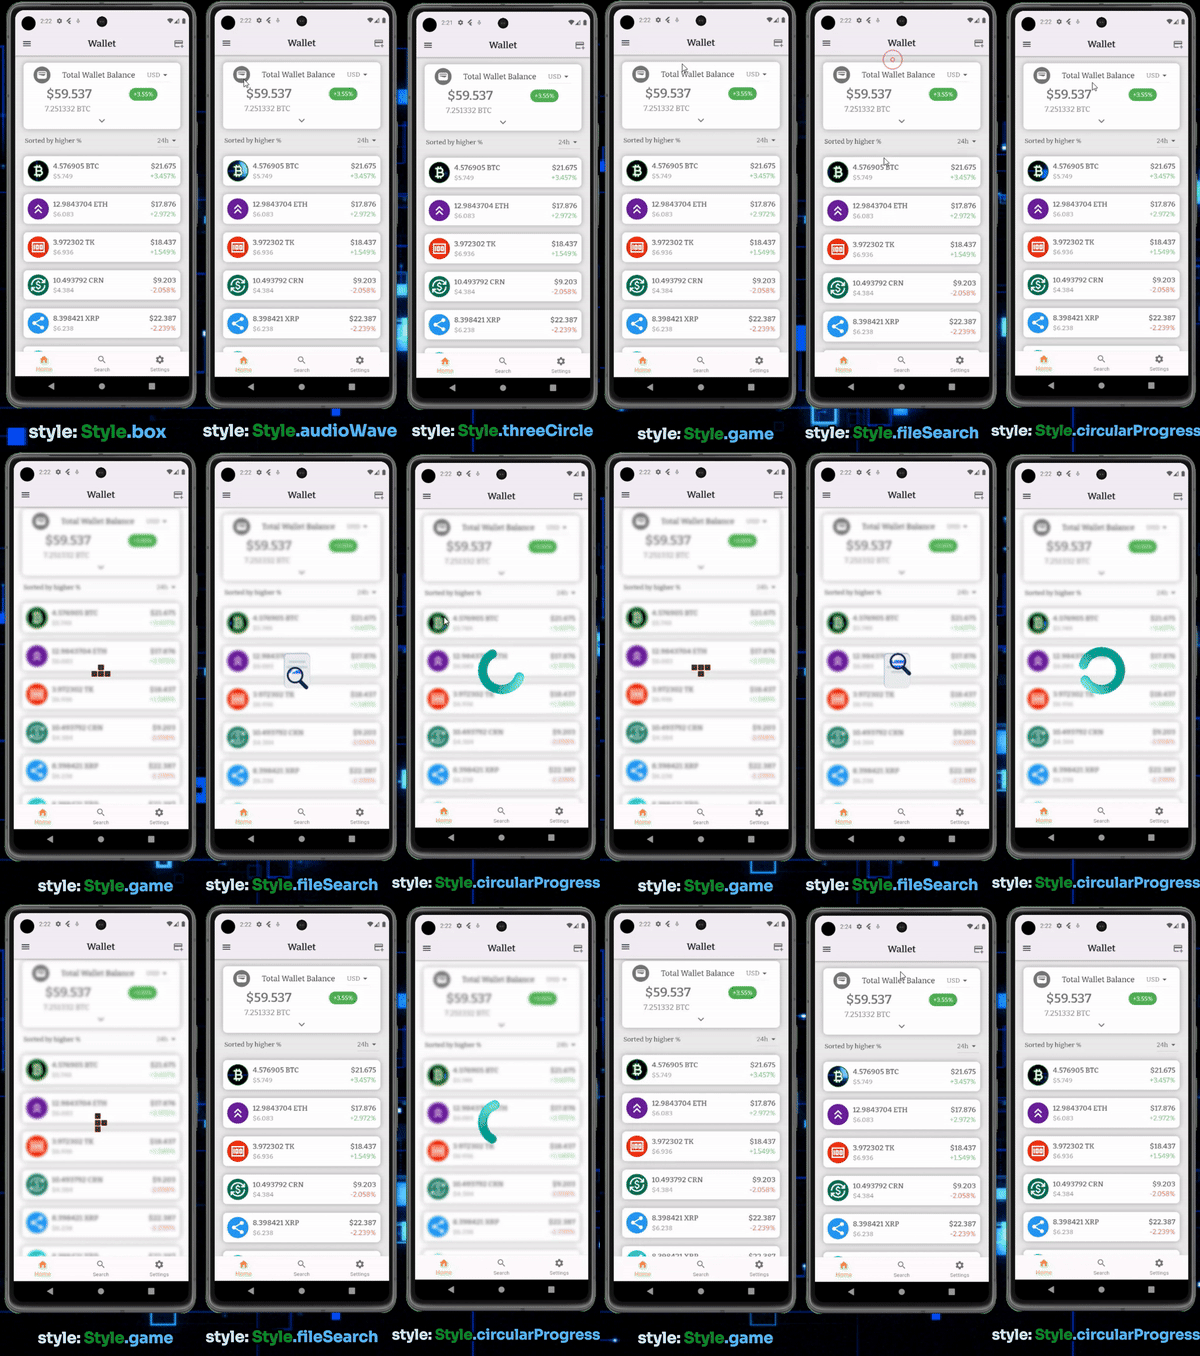
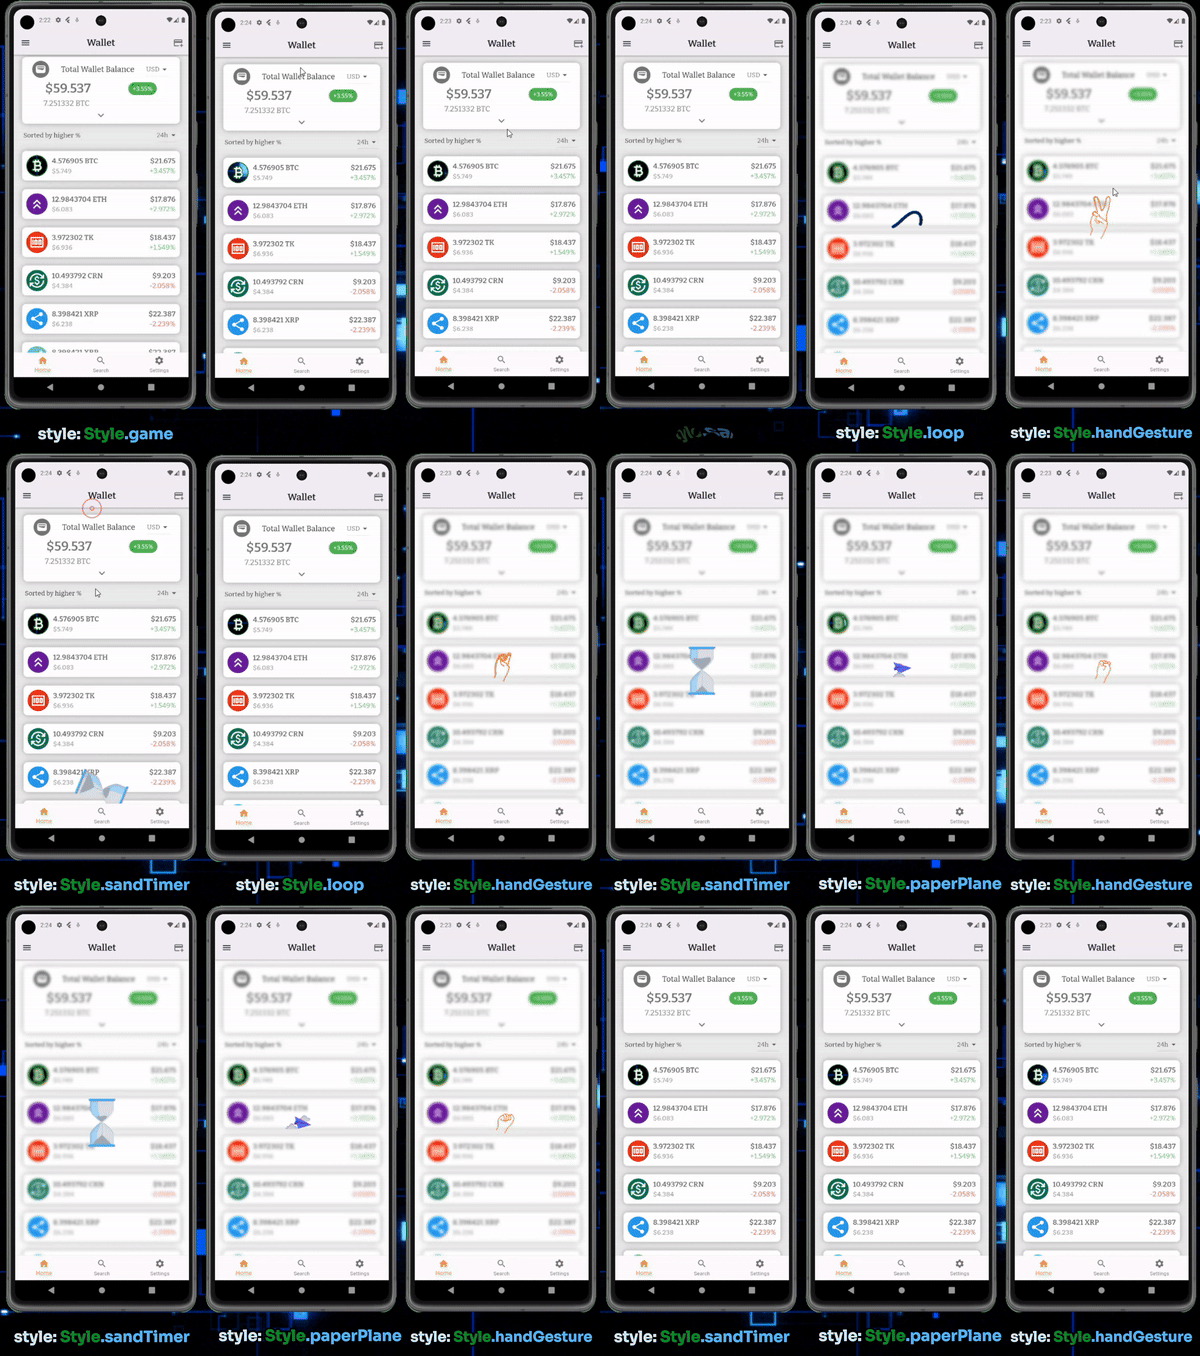
以下是该插件的一些演示效果:


可用样式
以下是你可以应用的所有样式列表:
Style.audioWaveStyle.boxStyle.circularProgressStyle.fileSearchStyle.gameStyle.handGestureStyle.loopStyle.paperPlaneStyle.sandTimerStyle.threeCircle
你可以根据自己的需求选择合适的样式,使你的应用界面更加独特和吸引人。
更多关于Flutter下拉刷新风格化插件stylish_pull_to_refresh的使用的实战系列教程也可以访问 https://www.itying.com/category-92-b0.html
更多关于Flutter下拉刷新风格化插件stylish_pull_to_refresh的使用的实战系列教程也可以访问 https://www.itying.com/category-92-b0.html
当然,下面是一个关于如何在Flutter中使用stylish_pull_to_refresh插件来实现下拉刷新功能的代码案例。这个插件允许你自定义下拉刷新的样式,使得你的应用界面更加美观和个性化。
首先,你需要在你的pubspec.yaml文件中添加stylish_pull_to_refresh依赖:
dependencies:
  flutter:
    sdk: flutter
  stylish_pull_to_refresh: ^x.y.z  # 请替换为最新版本号
然后,运行flutter pub get来安装依赖。
接下来,在你的Dart文件中使用StylishPullToRefresh组件。以下是一个完整的示例,展示如何在Scaffold中集成下拉刷新功能,并自定义刷新指示器的样式。
import 'package:flutter/material.dart';
import 'package:stylish_pull_to_refresh/stylish_header_builder.dart';
import 'package:stylish_pull_to_refresh/stylish_pull_to_refresh.dart';

void main() {
  runApp(MyApp());
}

class MyApp extends StatelessWidget {
  @override
  Widget build(BuildContext context) {
    return MaterialApp(
      title: 'Flutter Stylish Pull To Refresh Demo',
      theme: ThemeData(
        primarySwatch: Colors.blue,
      ),
      home: MyHomePage(),
    );
  }
}

class MyHomePage extends StatefulWidget {
  @override
  _MyHomePageState createState() => _MyHomePageState();
}

class _MyHomePageState extends State<MyHomePage> {
  bool _isRefreshing = false;

  @override
  Widget build(BuildContext context) {
    return Scaffold(
      appBar: AppBar(
        title: Text('Stylish Pull To Refresh Demo'),
      ),
      body: StylishPullToRefresh(
        onRefresh: () async {
          setState(() {
            _isRefreshing = true;
          });
          // 模拟网络请求
          await Future.delayed(Duration(seconds: 2));
          setState(() {
            _isRefreshing = false;
          });
        },
        isRefreshing: _isRefreshing,
        headerBuilder: (BuildContext context, RefreshStatus mode) {
          return WaterDropHeader(
            color: Theme.of(context).primaryColor,
            waterDropColor: Colors.white,
            showText: true,
            textStyle: TextStyle(color: Colors.white),
          );
        },
        child: ListView.builder(
          itemCount: 20,
          itemBuilder: (context, index) {
            return ListTile(
              title: Text('Item $index'),
            );
          },
        ),
      ),
    );
  }
}
在这个示例中:
- 我们首先定义了一个
MyApp应用,其中包含一个MyHomePage作为主页。 - 在
MyHomePage中,我们使用StylishPullToRefresh组件来包装一个ListView。 onRefresh回调用于处理下拉刷新逻辑,这里我们简单地使用Future.delayed来模拟网络请求的延迟。isRefreshing状态用于控制下拉刷新的动画是否正在进行。headerBuilder用于自定义下拉刷新指示器的样式。在这个例子中,我们使用了WaterDropHeader,你可以根据需要选择其他样式或自定义样式。
这样,你就可以在你的Flutter应用中集成并自定义下拉刷新功能了。希望这个示例对你有帮助!


