Flutter地图路线规划插件google_maps_routes的使用
Flutter地图路线规划插件google_maps_routes的使用
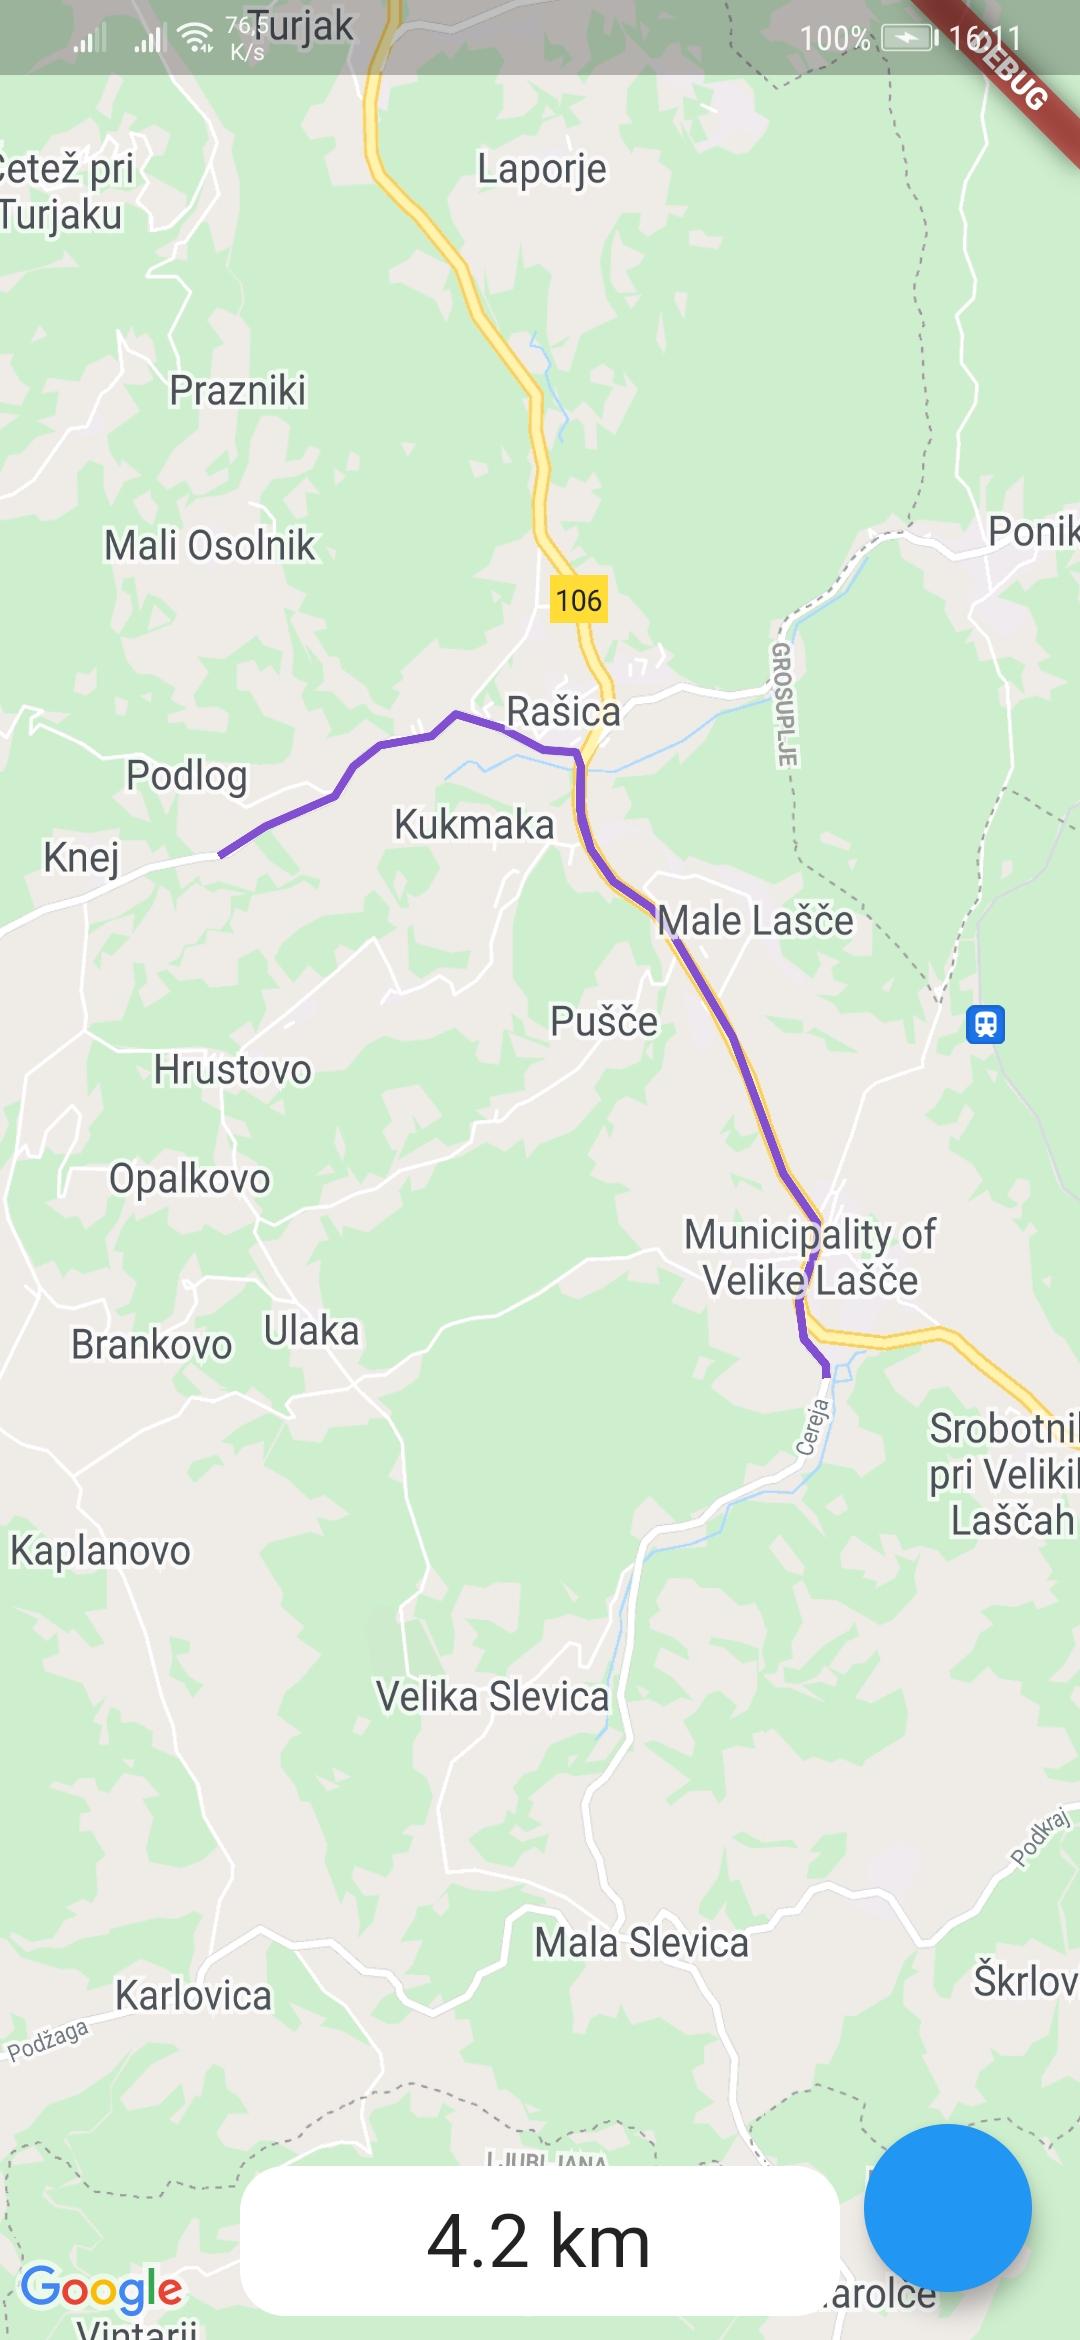
google_maps_routes 是一个用于在 Google 地图上创建路线的 Flutter 插件。它通过 Google Directions API 来绘制路线,并依赖 flutter_polyline_points 包来实现。
截图

使用方法
1. 添加依赖
首先,确保在 pubspec.yaml 文件中添加对 google_maps_routes 的依赖:
dependencies:
  flutter:
    sdk: flutter
  google_maps_routes: ^latest_version
然后运行 flutter pub get 命令来安装依赖。
2. 导入包
在需要使用的地方导入包:
import 'package:google_maps_routes/google_maps_routes.dart';
3. 创建点列表
你需要一个包含多个 LatLng 点的列表,这些点将用于定义路线:
/// LatLng 是 google_maps_flutter 包中的类
List<LatLng> points = [
    LatLng(45.82917150748776, 14.63705454546316),
    LatLng(45.833828635680355, 14.636544256202207),
    LatLng(45.851254420031296, 14.624331708344428),
    LatLng(45.84794984187217, 14.605434384742317)
];
4. 初始化插件
实例化 MapsRoutes 对象:
MapsRoutes route = MapsRoutes();
5. 绘制路线
调用 drawRoute 方法来绘制路线:
await route.drawRoute(
    points,
    'Test routes',
    Color.fromRGBO(130, 78, 210, 1.0),
    'YOUR_GOOGLE_API_KEY',
    travelMode: TravelModes.walking
);
routeName: 路线名称。color: 路线的颜色。googleApiKey: Google Directions API 的密钥。travelMode: 可选参数,指定出行方式(如:driving、bicycling、transit、walking)。
6. 显示路线
在 GoogleMap 小部件中添加 polylines 参数以显示路线:
GoogleMap(
    polylines: route.routes,
    initialCameraPosition: CameraPosition(
        target: LatLng(45.82917150748776, 14.63705454546316),
        zoom: 15.0,
    ),
    onMapCreated: (GoogleMapController controller) {
        _controller.complete(controller);
    },
)
7. 清除路线
如果你想清除路线,可以调用以下方法:
route.routes.clear();
8. 计算距离
你可以使用 DistanceCalculator 类来计算路线的距离:
DistanceCalculator distanceCalculator = DistanceCalculator();
String totalDistance = distanceCalculator.calculateRouteDistance(points, decimals: 1);
示例代码
下面是一个完整的示例应用,演示如何使用 google_maps_routes 包:
import 'dart:async';
import 'package:flutter/material.dart';
import 'package:google_maps_flutter/google_maps_flutter.dart';
import 'package:google_maps_routes/google_maps_routes.dart';

void main() {
  runApp(MyApp());
}

class MyApp extends StatelessWidget {
  @override
  Widget build(BuildContext context) {
    return MaterialApp(
      title: 'Google Maps Routes Demo',
      theme: ThemeData(
        primarySwatch: Colors.blue,
      ),
      home: MapsRoutesExample(title: 'GMR Demo Home'),
    );
  }
}

class MapsRoutesExample extends StatefulWidget {
  MapsRoutesExample({Key? key, required this.title}) : super(key: key);
  final String title;

  @override
  _MapsRoutesExampleState createState() => _MapsRoutesExampleState();
}

class _MapsRoutesExampleState extends State<MapsRoutesExample> {
  Completer<GoogleMapController> _controller = Completer();

  List<LatLng> points = [
    LatLng(45.82917150748776, 14.63705454546316),
    LatLng(45.833828635680355, 14.636544256202207),
    LatLng(45.851254420031296, 14.624331708344428),
    LatLng(45.84794984187217, 14.605434384742317)
  ];

  MapsRoutes route = MapsRoutes();
  DistanceCalculator distanceCalculator = DistanceCalculator();
  String googleApiKey = 'YOUR_GOOGLE_API_KEY';
  String totalDistance = 'No route';

  @override
  Widget build(BuildContext context) {
    return Scaffold(
      body: Stack(
        children: [
          Align(
            alignment: Alignment.center,
            child: GoogleMap(
              zoomControlsEnabled: false,
              polylines: route.routes,
              initialCameraPosition: const CameraPosition(
                zoom: 15.0,
                target: LatLng(45.82917150748776, 14.63705454546316),
              ),
              onMapCreated: (GoogleMapController controller) {
                _controller.complete(controller);
              },
            ),
          ),
          Padding(
            padding: const EdgeInsets.all(8.0),
            child: Align(
              alignment: Alignment.bottomCenter,
              child: Container(
                  width: 200,
                  height: 50,
                  decoration: BoxDecoration(
                      color: Colors.white,
                      borderRadius: BorderRadius.circular(15.0)),
                  child: Align(
                    alignment: Alignment.center,
                    child: Text(totalDistance, style: TextStyle(fontSize: 25.0)),
                  )),
            ),
          )
        ],
      ),
      floatingActionButton: FloatingActionButton(
        onPressed: () async {
          await route.drawRoute(points, 'Test routes',
              Color.fromRGBO(130, 78, 210, 1.0), googleApiKey,
              travelMode: TravelModes.walking);
          setState(() {
            totalDistance =
                distanceCalculator.calculateRouteDistance(points, decimals: 1);
          });
        },
      ),
    );
  }
}
以上是关于 google_maps_routes 插件的基本使用方法和一个简单的示例应用。请根据自己的需求进行调整和扩展。
更多关于Flutter地图路线规划插件google_maps_routes的使用的实战系列教程也可以访问 https://www.itying.com/category-92-b0.html
更多关于Flutter地图路线规划插件google_maps_routes的使用的实战系列教程也可以访问 https://www.itying.com/category-92-b0.html
当然,下面是一个关于如何使用 google_maps_routes 插件在 Flutter 中实现地图路线规划的示例代码。这个插件结合了 Google Maps 和 Directions API 来显示从一个点到另一个点的路线。
首先,确保你的 pubspec.yaml 文件中包含了必要的依赖项:
dependencies:
  flutter:
    sdk: flutter
  google_maps_flutter: ^2.1.1  # 确保使用最新版本
  google_maps_routes: ^2.4.0  # 确保使用最新版本
然后,运行 flutter pub get 来获取这些依赖项。
接下来,创建一个 Flutter 应用,并在其中使用 google_maps_flutter 和 google_maps_routes。以下是一个完整的示例:
import 'package:flutter/material.dart';
import 'package:google_maps_flutter/google_maps_flutter.dart';
import 'package:google_maps_routes/google_maps_routes.dart';

void main() {
  runApp(MyApp());
}

class MyApp extends StatelessWidget {
  @override
  Widget build(BuildContext context) {
    return MaterialApp(
      title: 'Flutter Google Maps Routes Demo',
      theme: ThemeData(
        primarySwatch: Colors.blue,
      ),
      home: MapScreen(),
    );
  }
}

class MapScreen extends StatefulWidget {
  @override
  _MapScreenState createState() => _MapScreenState();
}

class _MapScreenState extends State<MapScreen> {
  final LatLng _initialPosition = LatLng(40.7128, -74.0060); // 纽约市
  final LatLng _destinationPosition = LatLng(34.0522, -118.2437); // 洛杉矶市
  GoogleMapController? _controller;
  Set<Marker> _markers = {};
  Polyline? _polyline;

  @override
  Widget build(BuildContext context) {
    return Scaffold(
      appBar: AppBar(
        title: Text('Flutter Google Maps Routes Demo'),
      ),
      body: Stack(
        children: <Widget>[
          GoogleMap(
            mapType: MapType.normal,
            initialCameraPosition: CameraPosition(
              target: _initialPosition,
              zoom: 10.0,
            ),
            markers: _markers,
            polylines: _polyline != null ? [_polyline!] : [],
            onMapCreated: (GoogleMapController controller) {
              _controller = controller;
              _getRoute();
            },
          ),
        ],
      ),
      floatingActionButton: FloatingActionButton(
        onPressed: () async {
          final GoogleMapController? controller = _controller;
          if (controller != null) {
            final CameraPosition position = await controller.getCameraPosition();
            setState(() {
              _initialPosition = position.target;
              _getRoute();
            });
          }
        },
        tooltip: 'Get Route',
        child: Icon(Icons.directions),
      ),
    );
  }

  Future<void> _getRoute() async {
    final GoogleMapsRoutes _googleMapsRoutes = GoogleMapsRoutes();

    var polylinePoints = await _googleMapsRoutes.getPolylinePoints(
      apiKey: 'YOUR_GOOGLE_MAPS_API_KEY', // 请替换为你的API密钥
      origin: Coordinates(
        _initialPosition.latitude,
        _initialPosition.longitude,
      ),
      destination: Coordinates(
        _destinationPosition.latitude,
        _destinationPosition.longitude,
      ),
      mode: TravelMode.driving,
    );

    if (polylinePoints.isNotEmpty) {
      final Polyline polyline = Polyline.fromPoints(polylinePoints.map((point) => LatLng(point.latitude, point.longitude)),
          color: Colors.blue.withOpacity(0.8),
          width: 4);

      setState(() {
        _polyline = polyline;
        _markers = {
          Marker(
            markerId: MarkerId('origin'),
            position: _initialPosition,
            infoWindow: InfoWindow(title: 'Origin', snippet: _initialPosition.toString()),
            icon: BitmapDescriptor.defaultMarker,
          ),
          Marker(
            markerId: MarkerId('destination'),
            position: _destinationPosition,
            infoWindow: InfoWindow(title: 'Destination', snippet: _destinationPosition.toString()),
            icon: BitmapDescriptor.defaultMarkerWithHue(BitmapDescriptor.hueAzure),
          ),
        };
      });
    }
  }
}
说明:
- 依赖项:确保
google_maps_flutter和google_maps_routes已经添加到pubspec.yaml中。 - API Key:在
_getRoute方法中,替换'YOUR_GOOGLE_MAPS_API_KEY'为你的实际 Google Maps API 密钥。 - 初始位置:我们设置了纽约市作为初始位置,洛杉矶市作为目的地。
- 获取路线:点击浮动操作按钮(FAB)时,会调用
_getRoute方法来获取从初始位置到目的地的路线,并在地图上显示。
确保你已经启用了 Directions API 和 Maps JavaScript API 在你的 Google Cloud 项目中,并且你的 API 密钥具有访问这些服务的权限。


