Flutter对话框插件butterfly_dialog的使用
Flutter对话框插件 butterfly_dialog 的使用
butterfly_dialog 是一个用于快速显示各种类型对话框(如成功、错误、警告和删除)的Flutter插件。本文将介绍如何在你的Flutter项目中使用这个插件。
功能展示
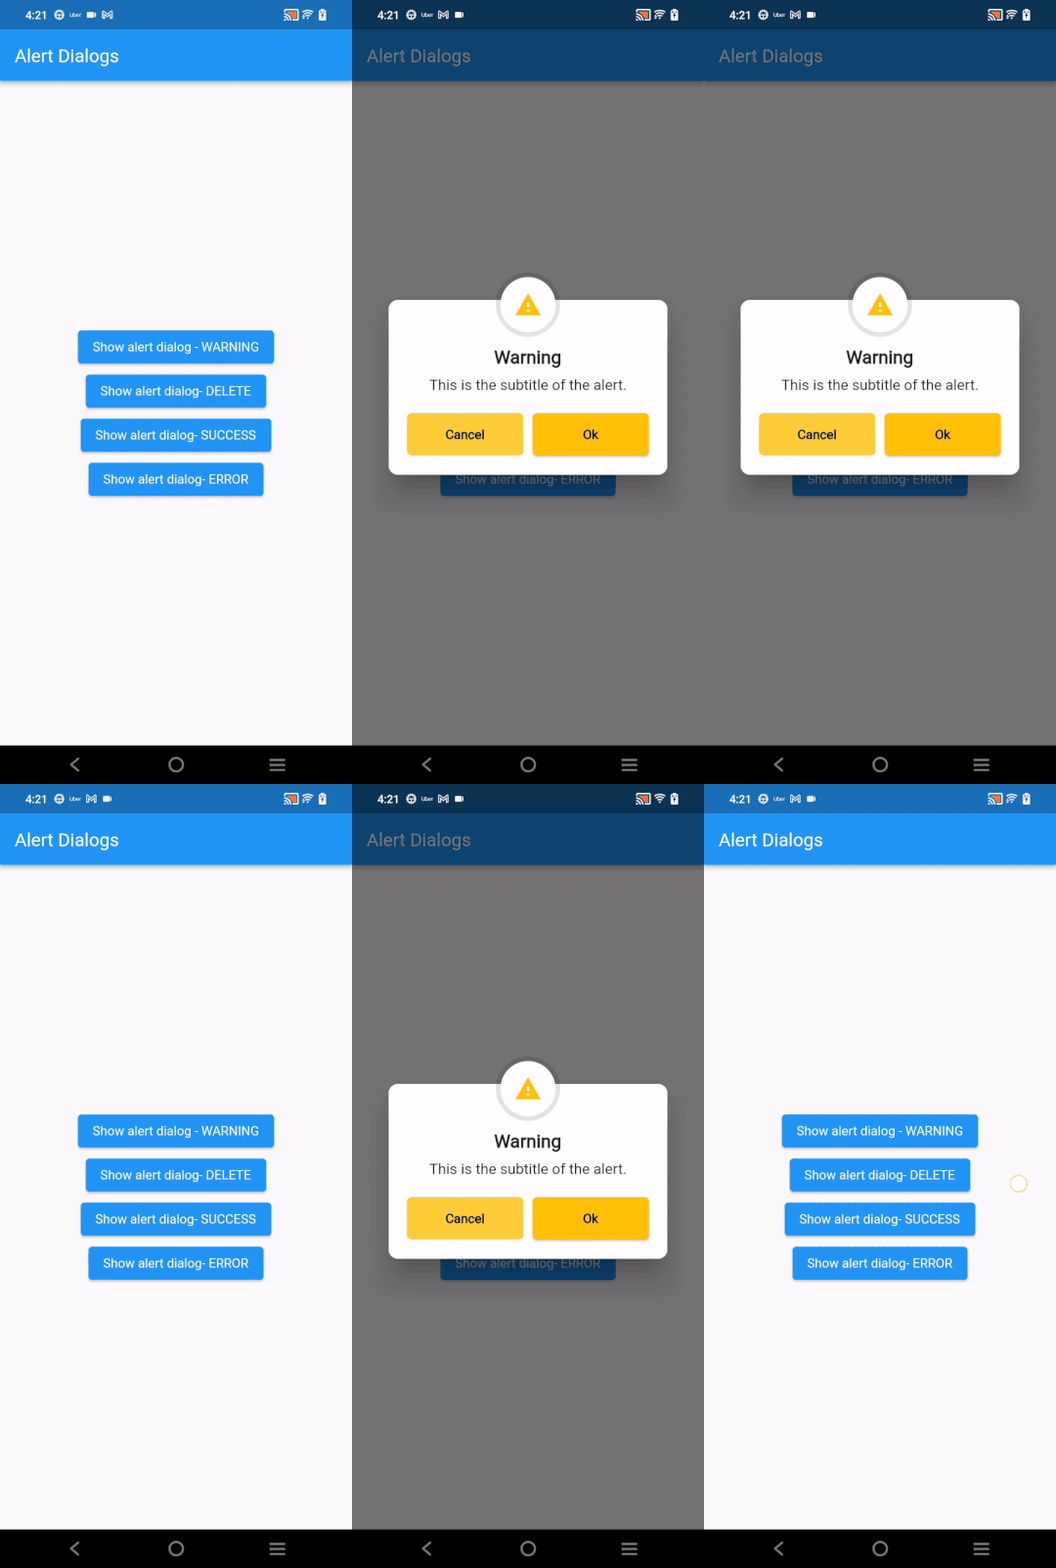
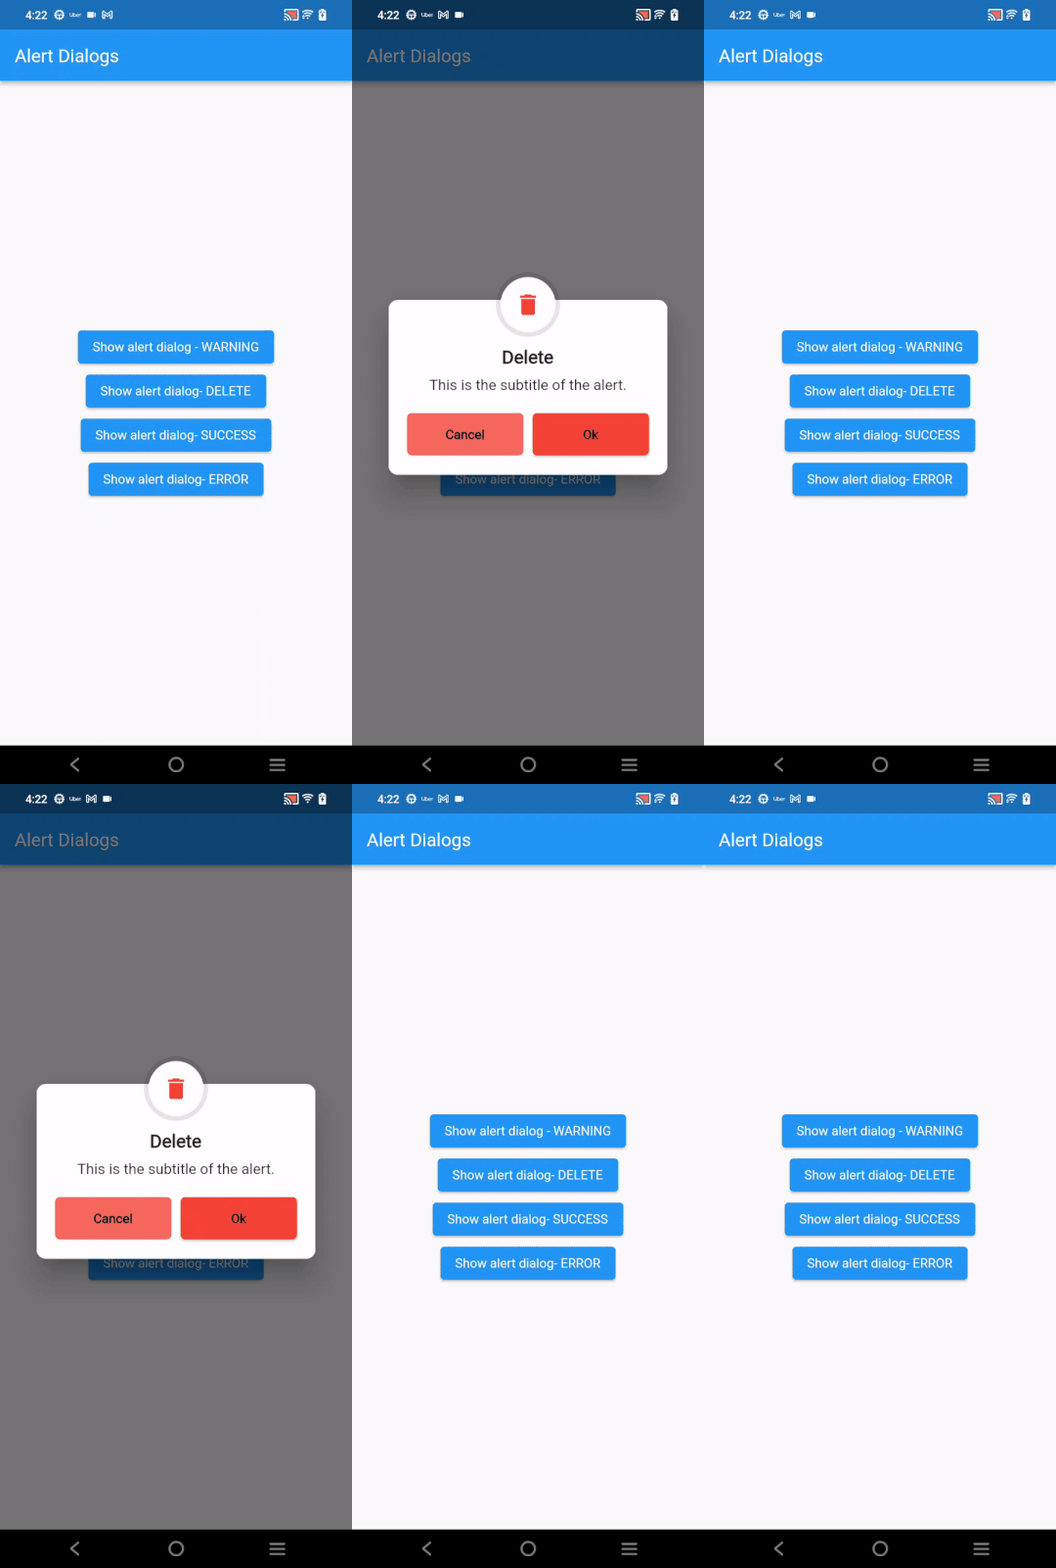
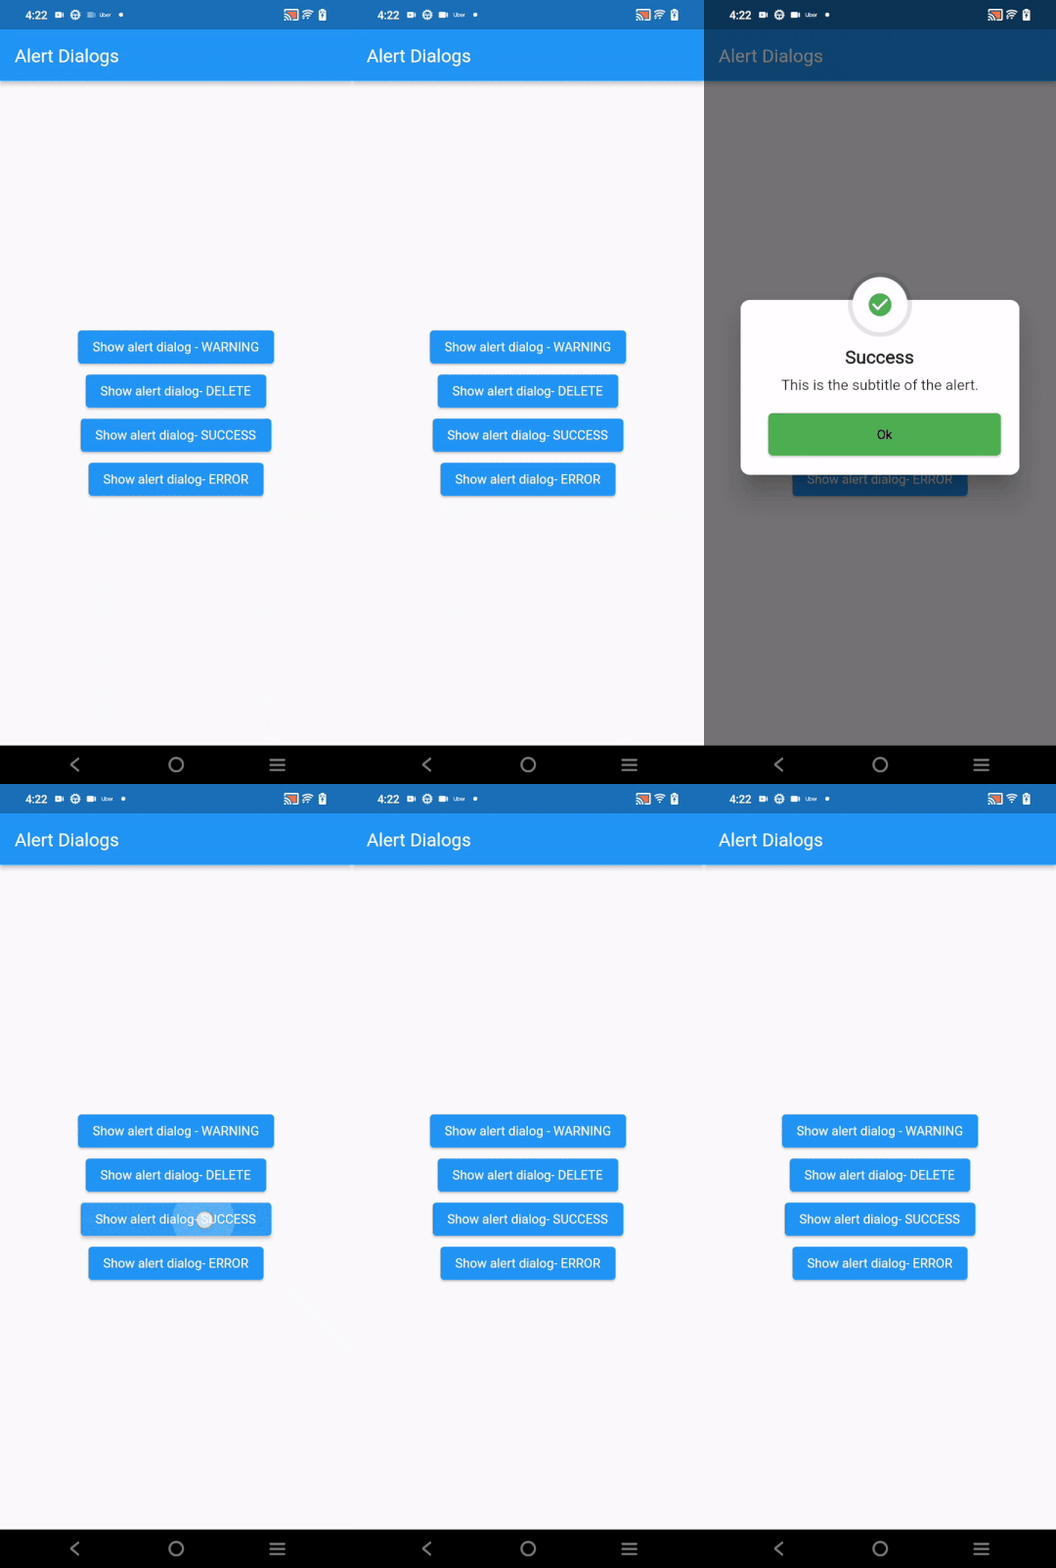
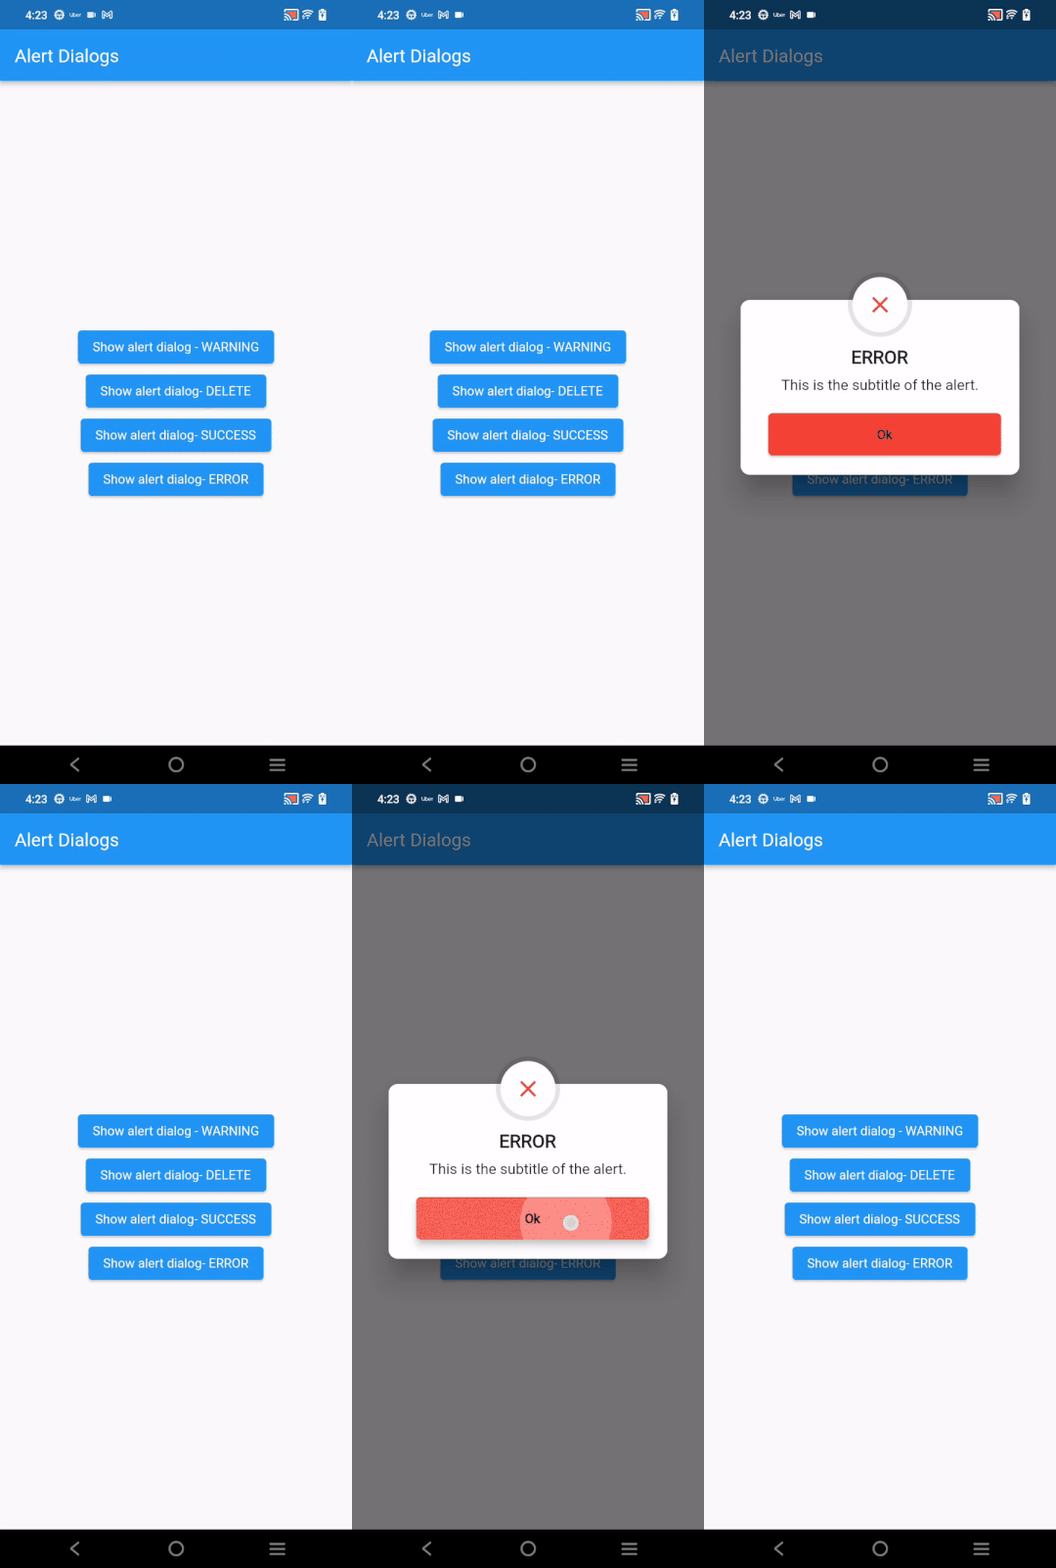
以下是不同类型的对话框示例:
| Warning Alert | Delete Alert |
|---|---|
 |
 |
| Success Alert | Error Alert |
|---|---|
 |
 |
开始使用
首先,在你的 pubspec.yaml 文件中添加 butterfly_dialog 作为依赖项,然后运行 flutter pub get:
dependencies:
  butterfly_dialog: ^0.0.3
使用方法
要使用 ButterflyAlertDialog,你需要调用 show 方法,并提供以下必需参数:
contexttitlesubtitlealertTypeonConfirm
示例代码
以下是一个完整的示例,展示了如何在Flutter应用中使用 ButterflyAlertDialog 显示不同类型的消息对话框。
import 'package:butterfly_dialog/butterfly_dialog.dart';
import 'package:flutter/material.dart';

void main() {
  runApp(const MyApp());
}

class MyApp extends StatelessWidget {
  const MyApp({super.key});

  [@override](/user/override)
  Widget build(BuildContext context) {
    return MaterialApp(
      debugShowCheckedModeBanner: false,
      title: 'Butterfly Alert Dialog',
      theme: ThemeData(
        primarySwatch: Colors.blue,
      ),
      home: const HomePage(),
    );
  }
}

class HomePage extends StatefulWidget {
  const HomePage({super.key});

  [@override](/user/override)
  State<HomePage> createState() => _HomePageState();
}

class _HomePageState extends State<HomePage> {
  [@override](/user/override)
  Widget build(BuildContext context) {
    return Scaffold(
      appBar: AppBar(
        title: const Text('Alert Dialogs'),
      ),
      body: Center(
        child: Column(
          mainAxisAlignment: MainAxisAlignment.center,
          children: [
            ElevatedButton(
              onPressed: () {
                ButterflyAlertDialog.show(
                  context: context,
                  title: 'Warning',
                  subtitle: 'This is the subtitle of the alert.',
                  alertType: AlertType.warning,
                  onConfirm: () {
                    // Your confirm action here
                  },
                );
              },
              child: const Text('Show alert dialog - WARNING'),
            ),
            ElevatedButton(
              onPressed: () {
                ButterflyAlertDialog.show(
                  context: context,
                  title: 'Delete',
                  subtitle: 'This is the subtitle of the alert.',
                  alertType: AlertType.delete,
                  onConfirm: () {
                    // Your confirm action here
                  },
                );
              },
              child: const Text('Show alert dialog - DELETE'),
            ),
            ElevatedButton(
              onPressed: () {
                ButterflyAlertDialog.show(
                  context: context,
                  title: 'Success',
                  subtitle: 'This is the subtitle of the alert.',
                  alertType: AlertType.success,
                  onConfirm: () {
                    // Your confirm action here
                  },
                );
              },
              child: const Text('Show alert dialog - SUCCESS'),
            ),
            ElevatedButton(
              onPressed: () {
                ButterflyAlertDialog.show(
                  context: context,
                  title: 'ERROR',
                  subtitle: 'This is the subtitle of the alert.',
                  alertType: AlertType.error,
                  onConfirm: () {
                    // Your confirm action here
                  },
                );
              },
              child: const Text('Show alert dialog - ERROR'),
            ),
          ],
        ),
      ),
    );
  }
}
更多关于Flutter对话框插件butterfly_dialog的使用的实战系列教程也可以访问 https://www.itying.com/category-92-b0.html
更多关于Flutter对话框插件butterfly_dialog的使用的实战系列教程也可以访问 https://www.itying.com/category-92-b0.html
当然,下面是一个关于如何在Flutter项目中使用butterfly_dialog插件的示例代码。butterfly_dialog是一个功能强大的对话框插件,它提供了多种样式的对话框,适用于不同的使用场景。
首先,你需要在你的pubspec.yaml文件中添加butterfly_dialog依赖:
dependencies:
  flutter:
    sdk: flutter
  butterfly_dialog: ^最新版本号  # 请替换为实际的最新版本号
然后,运行flutter pub get来安装依赖。
接下来,你可以在你的Flutter项目中导入butterfly_dialog并使用它。以下是一个简单的示例,展示了如何使用ButterflyDialog来显示一个加载对话框和一个警告对话框:
import 'package:flutter/material.dart';
import 'package:butterfly_dialog/butterfly_dialog.dart';

void main() {
  runApp(MyApp());
}

class MyApp extends StatelessWidget {
  @override
  Widget build(BuildContext context) {
    return MaterialApp(
      title: 'Butterfly Dialog Example',
      theme: ThemeData(
        primarySwatch: Colors.blue,
      ),
      home: MyHomePage(),
    );
  }
}

class MyHomePage extends StatefulWidget {
  @override
  _MyHomePageState createState() => _MyHomePageState();
}

class _MyHomePageState extends State<MyHomePage> {
  @override
  Widget build(BuildContext context) {
    return Scaffold(
      appBar: AppBar(
        title: Text('Butterfly Dialog Example'),
      ),
      body: Center(
        child: Column(
          mainAxisAlignment: MainAxisAlignment.center,
          children: <Widget>[
            ElevatedButton(
              onPressed: () => showLoadingDialog(context),
              child: Text('Show Loading Dialog'),
            ),
            SizedBox(height: 20),
            ElevatedButton(
              onPressed: () => showAlertDialog(context),
              child: Text('Show Alert Dialog'),
            ),
          ],
        ),
      ),
    );
  }

  void showLoadingDialog(BuildContext context) {
    showDialog(
      context: context,
      builder: (context) => BFLoadingDialog(
        message: 'Loading...',
        // 可选参数,设置加载对话框的样式
        // loadingType: BFLoadingType.cupertino, // 或者 BFLoadingType.ios, BFLoadingType.android
        // cancelable: false, // 是否可以取消加载对话框
        // backgroundColor: Colors.white,
        // loadingColor: Colors.blue,
      ),
    );

    // 模拟异步操作,例如网络请求
    Future.delayed(Duration(seconds: 3), () {
      Navigator.of(context).pop(); // 3秒后关闭加载对话框
    });
  }

  void showAlertDialog(BuildContext context) {
    showDialog(
      context: context,
      builder: (context) => BFAlertDialog(
        title: 'Alert',
        content: 'This is an alert dialog.',
        confirmText: 'OK',
        onConfirm: () {
          Navigator.of(context).pop(); // 点击确认按钮后关闭对话框
        },
        // 可选参数,设置警告对话框的样式
        // titleStyle: TextStyle(color: Colors.red),
        // contentStyle: TextStyle(fontSize: 18),
        // dialogBackgroundColor: Colors.grey[200],
        // confirmTextStyle: TextStyle(color: Colors.green),
      ),
    );
  }
}
在这个示例中,我们创建了一个简单的Flutter应用,它包含两个按钮,一个用于显示加载对话框,另一个用于显示警告对话框。showLoadingDialog函数显示一个加载对话框,并在3秒后自动关闭。showAlertDialog函数显示一个警告对话框,当用户点击“OK”按钮时关闭对话框。
你可以根据需要调整对话框的样式和参数,butterfly_dialog插件提供了丰富的配置选项来满足不同的需求。


