Flutter GitHub反馈集成插件feedback_github的使用
Flutter GitHub反馈集成插件 feedback_github 的使用
feedback_github 是一个Flutter插件,允许用户在应用中直接提交反馈并将其作为GitHub问题存储在Firebase Storage中。以下是详细的使用指南和示例代码。
功能
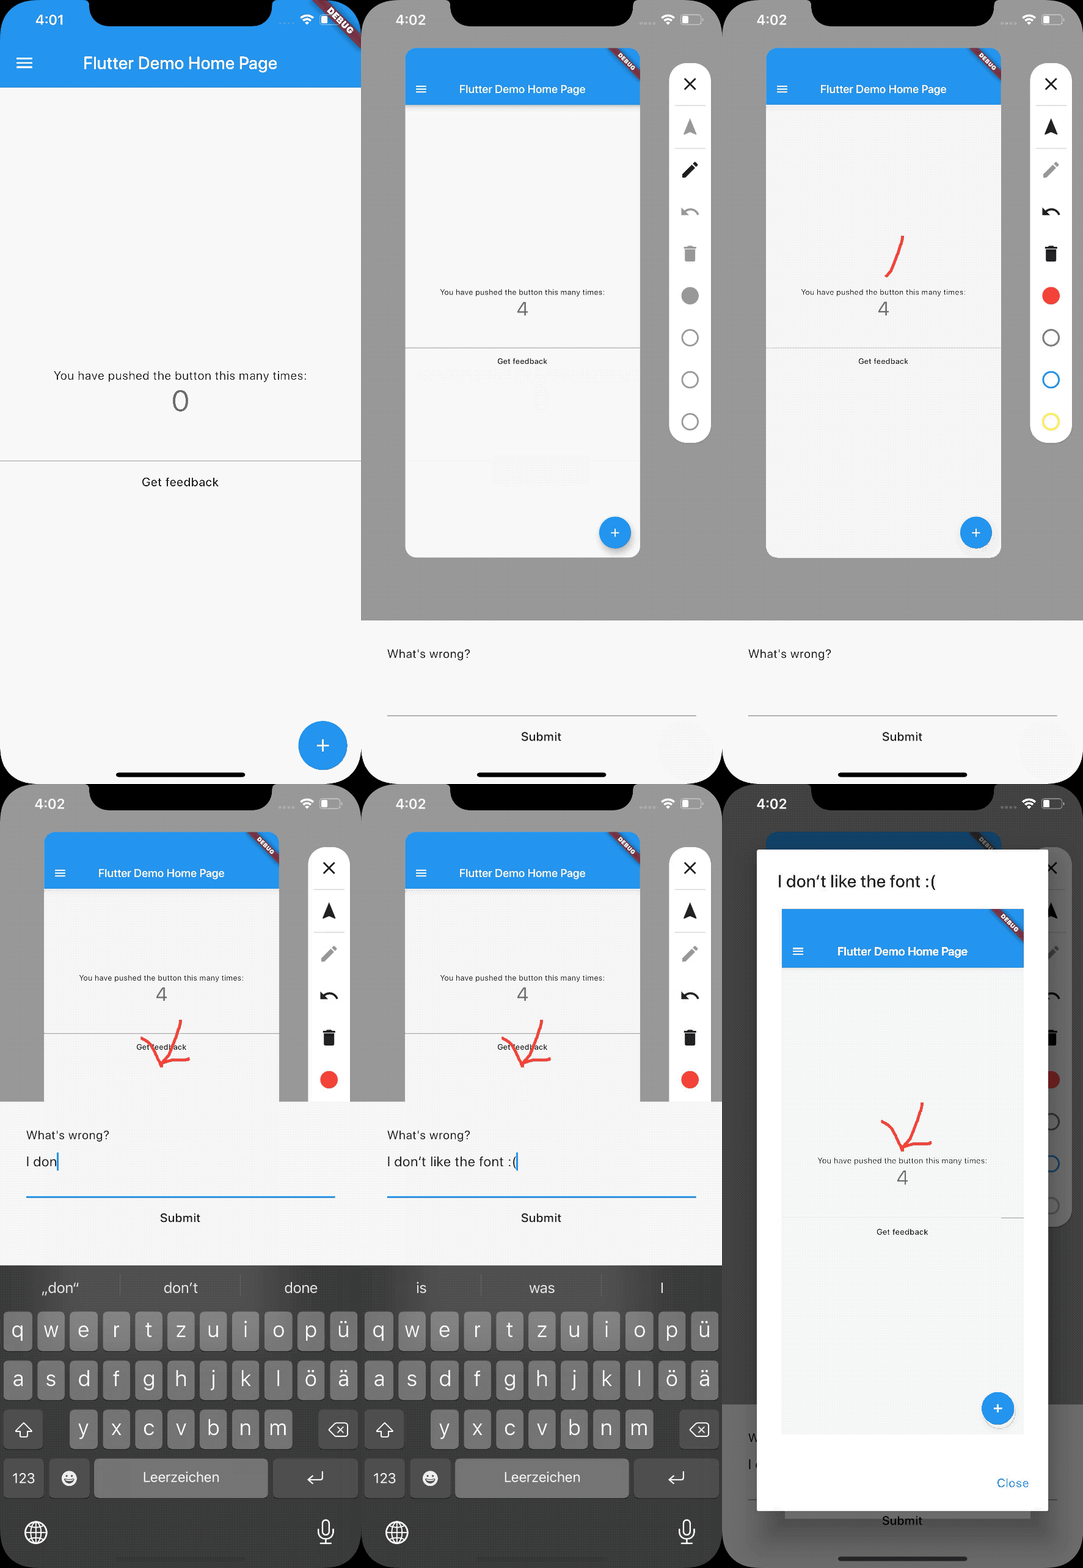
- 允许用户通过注释当前页面的截图以及添加文本的方式提供交互式反馈。
- 将反馈发送为GitHub问题,并将图像存储在Firebase Storage中。
- 可选地添加调试信息(包括包信息和设备信息)。
示例动画

开始使用
步骤 1: 设置 Firebase 和 Firebase Storage
首先,按照官方文档设置 Firebase 和 Firebase Storage: https://firebase.google.com/docs/storage/flutter/start
步骤 2: 创建 GitHub Token
- 登录到 GitHub。
- 点击右上角的头像。
- 进入“Settings”(齿轮图标)。
- 在列表底部选择“Developer settings”。
- 选择“Personal access tokens” -> “Fine-grained tokens”。
- 生成新令牌:
- 命名令牌并可选设置过期时间(最大日期是从今天起一年)。
- 选择仅对特定仓库有访问权限,并选择你的仓库。
- 授予仓库读写Issue的权限。
- 生成令牌并安全保存(不要将其提交到代码库中)。
步骤 3: 包装应用
void main() {
  runApp(
    BetterFeedback(
      child: const App(),
    ),
  );
}
步骤 4: 提供反馈显示方式
BetterFeedback.of(context).showAndUploadToGitHub(
    repoUrl: "https://github.com/tempo-riz/dummy-repo",
    gitHubToken: dotenv.get("GITHUB_ISSUE_TOKEN"),
    labels: ['feedback'],
    packageInfo: true,
    deviceInfo: true,
    extraData: "Some extra data you want to add in the issue",
    onSucces: (issue) => print("success !"),
    onError: (error) => print("failed :/ $error"),
);
你也可以直接调用 uploadToGitHub() 方法,如果你不想使用面板的话(图片是可选的)。
你可以调用 BetterFeedback.of(context).hide() 来手动关闭面板。
完整示例 Demo
完整的Flutter示例可以在这里找到:完整示例
示例代码
import 'package:feedback_github/feedback_github.dart';
import 'package:flutter/material.dart';
import 'package:flutter_dotenv/flutter_dotenv.dart';

import 'package:example/firebase_options.dart';
import 'package:firebase_core/firebase_core.dart';

void main() async {
  await dotenv.load();
  await Firebase.initializeApp(
    options: DefaultFirebaseOptions.currentPlatform,
  );
  // 不要忘记将MaterialApp包装在BetterFeedback小部件中:
  runApp(BetterFeedback(
    child: App(),
  ));
}

class App extends StatelessWidget {
  @override
  Widget build(BuildContext context) {
    return MaterialApp(
        title: 'Demo',
        home: Scaffold(
          appBar: AppBar(title: Text("Demo")),
          body: Center(
              child: ElevatedButton.icon(
            icon: Icon(Icons.feedback),
            label: Text("Send feedback"),
            onPressed: () {
              BetterFeedback.of(context).showAndUploadToGitHub(
                  repoUrl: "https://github.com/tempo-riz/dummy-repo",
                  gitHubToken: dotenv.get("GITHUB_ISSUE_TOKEN"),
                  labels: ['feedback'],
                  packageInfo: true,
                  deviceInfo: true,
                  extraData: "Some extra data you want to add in the issue",
                  onSucces: (issue) => print("success !"),
                  onError: (error) => print("failed :/ $error"));
            },
          )),
        ));
  }
}
配置与自定义
你可以根据需要自定义主题和本地化文本:
自定义主题
import 'package:feedback/feedback.dart';
import 'package:flutter/material.dart';
import 'package:flutter_localizations/flutter_localizations.dart';

void main() {
  runApp(
    BetterFeedback(
      child: const MyApp(),
      theme: FeedbackThemeData(
        background: Colors.grey,
        feedbackSheetColor: Colors.grey[50]!,
        drawColors: [
          Colors.red,
          Colors.green,
          Colors.blue,
          Colors.yellow,
        ],
      ),
      localizationsDelegates: [
        GlobalMaterialLocalizations.delegate,
        GlobalCupertinoLocalizations.delegate,
        GlobalWidgetsLocalizations.delegate,
        GlobalFeedbackLocalizationsDelegate(),
      ],
      localeOverride: const Locale('en'),
    ),
  );
}
更改本地化文本
class CustomFeedbackLocalizations implements FeedbackLocalizations {
  // ...
}

class CustomFeedbackLocalizationsDelegate
    extends GlobalFeedbackLocalizationsDelegate {
  static final supportedLocales = <Locale, FeedbackLocalizations>{
    const Locale('en'): const CustomFeedbackLocalizations(),
  };
}

void main() {
  runApp(
    BetterFeedback(
      child: const MyApp(),
      localizationsDelegates: [
        GlobalMaterialLocalizations.delegate,
        GlobalCupertinoLocalizations.delegate,
        GlobalWidgetsLocalizations.delegate,
        CustomFeedbackLocalizationsDelegate(),
      ],
    ),
  );
}
更多关于Flutter GitHub反馈集成插件feedback_github的使用的实战系列教程也可以访问 https://www.itying.com/category-92-b0.html
1 回复


