Flutter 3D动画卡片插件animated_3d_card的使用
Flutter 3D动画卡片插件 animated_3d_card 的使用
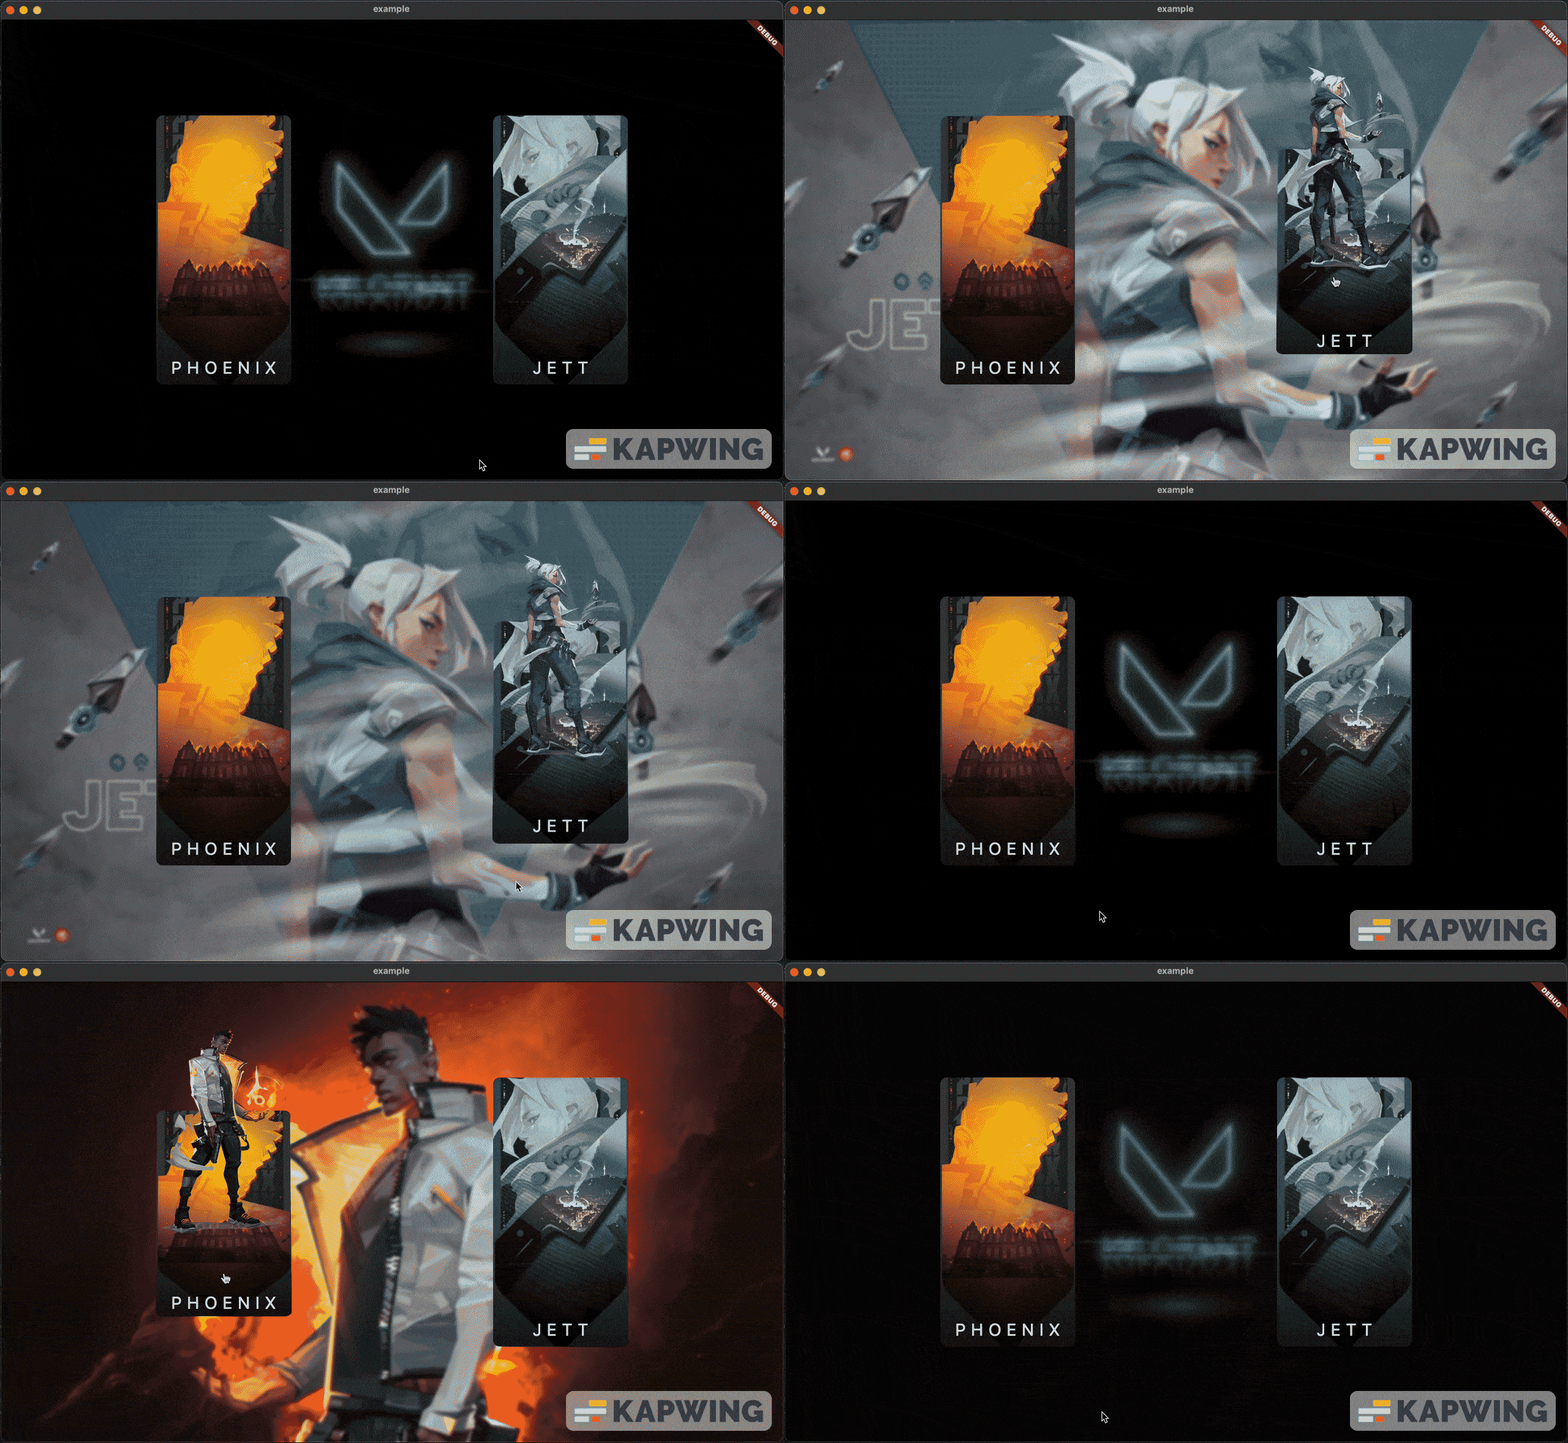
在Flutter中,如果你想为你的应用程序添加一些酷炫的3D动画效果,那么animated_3d_card插件是一个不错的选择。这个插件可以帮助你轻松地创建具有3D翻转效果的卡片。
插件预览
你可以通过下面的链接查看插件的实际效果:
示例1

示例2

如何使用
首先,在你的pubspec.yaml文件中添加animated_3d_card依赖:
dependencies:
  flutter:
    sdk: flutter
  animated_3d_card: ^latest_version # 替换为最新版本号
然后运行flutter pub get来安装这个包。
完整示例代码
以下是一个完整的示例demo,展示了如何使用animated_3d_card插件来创建一个简单的3D卡片应用:
import 'package:flutter/material.dart';
// 假设你已经从pub.dev导入了animated_3d_card包
// import 'package:animated_3d_card/your_import_here.dart';

void main() => runApp(MyApp());

class MyApp extends StatelessWidget {
  [@override](/user/override)
  Widget build(BuildContext context) {
    return MaterialApp(
      title: 'Flutter Demo',
      theme: ThemeData(
        primarySwatch: Colors.blue,
      ),
      home: MyHomePage(),
    );
  }
}

class MyHomePage extends StatefulWidget {
  [@override](/user/override)
  _MyHomePageState createState() => _MyHomePageState();
}

class _MyHomePageState extends State<MyHomePage> {
  bool _isFront = true;

  void _toggleCard() {
    setState(() {
      _isFront = !_isFront;
    });
  }

  [@override](/user/override)
  Widget build(BuildContext context) {
    return Scaffold(
      appBar: AppBar(
        title: Text('3D Card Animation Demo'),
      ),
      body: Center(
        child: GestureDetector(
          onTap: _toggleCard,
          child: AnimatedContainer(
            duration: Duration(seconds: 1),
            transform: Matrix4.identity()
              ..rotateY(_isFront ? 0 : 1.57), // 90度=π/2≈1.57
            child: Container(
              width: 200,
              height: 300,
              decoration: BoxDecoration(
                color: _isFront ? Colors.red : Colors.blue,
                borderRadius: BorderRadius.circular(16.0),
              ),
              child: Center(
                child: Text(
                  _isFront ? 'Front Side' : 'Back Side',
                  style: TextStyle(color: Colors.white, fontSize: 24),
                ),
              ),
            ),
          ),
        ),
      ),
    );
  }
}
更多关于Flutter 3D动画卡片插件animated_3d_card的使用的实战系列教程也可以访问 https://www.itying.com/category-92-b0.html
更多关于Flutter 3D动画卡片插件animated_3d_card的使用的实战系列教程也可以访问 https://www.itying.com/category-92-b0.html
当然,以下是一个关于如何在Flutter应用中使用animated_3d_card插件来实现3D动画卡片的示例代码。
首先,你需要在你的pubspec.yaml文件中添加animated_3d_card依赖:
dependencies:
  flutter:
    sdk: flutter
  animated_3d_card: ^最新版本号  # 请替换为当前最新版本号
然后运行flutter pub get来安装依赖。
接下来是一个完整的示例代码,展示如何使用animated_3d_card插件:
import 'package:flutter/material.dart';
import 'package:animated_3d_card/animated_3d_card.dart';

void main() {
  runApp(MyApp());
}

class MyApp extends StatelessWidget {
  @override
  Widget build(BuildContext context) {
    return MaterialApp(
      title: '3D Card Animation Demo',
      theme: ThemeData(
        primarySwatch: Colors.blue,
      ),
      home: Scaffold(
        appBar: AppBar(
          title: Text('3D Card Animation Demo'),
        ),
        body: Center(
          child: Animated3DCardDemo(),
        ),
      ),
    );
  }
}

class Animated3DCardDemo extends StatefulWidget {
  @override
  _Animated3DCardDemoState createState() => _Animated3DCardDemoState();
}

class _Animated3DCardDemoState extends State<Animated3DCardDemo> with SingleTickerProviderStateMixin {
  late AnimationController _controller;
  late Animation<double> _animation;

  @override
  void initState() {
    super.initState();
    _controller = AnimationController(
      duration: const Duration(seconds: 2),
      vsync: this,
    )..repeat(reverse: true);

    _animation = Tween<double>(begin: 0, end: 1).animate(_controller);
  }

  @override
  void dispose() {
    _controller.dispose();
    super.dispose();
  }

  @override
  Widget build(BuildContext context) {
    return Stack(
      alignment: Alignment.center,
      children: <Widget>[
        Animated3DCard(
          animation: _animation,
          card: Card(
            shape: RoundedRectangleBorder(
              borderRadius: BorderRadius.circular(16),
            ),
            elevation: 8,
            child: Container(
              width: 200,
              height: 300,
              color: Colors.blue,
              child: Center(
                child: Text(
                  '3D Card',
                  style: TextStyle(color: Colors.white, fontSize: 24),
                ),
              ),
            ),
          ),
          frontFace: FrontFace(
            color: Colors.transparent,
            elevation: 4,
            shape: RoundedRectangleBorder(
              borderRadius: BorderRadius.circular(16),
            ),
            child: Container(
              decoration: BoxDecoration(
                shape: BoxShape.rectangle,
                borderRadius: BorderRadius.circular(16),
                boxShadow: [
                  BoxShadow(
                    color: Colors.grey.withOpacity(0.5),
                    spreadRadius: 5,
                    blurRadius: 7,
                    offset: Offset(0, 3), // changes position of shadow
                  ),
                ],
              ),
              child: Center(
                child: Icon(
                  Icons.flip_to_front,
                  color: Colors.white,
                  size: 50,
                ),
              ),
            ),
          ),
          backFace: BackFace(
            color: Colors.red,
            elevation: 8,
            shape: RoundedRectangleBorder(
              borderRadius: BorderRadius.circular(16),
            ),
            child: Container(
              child: Center(
                child: Text(
                  'Flip me!',
                  style: TextStyle(color: Colors.white, fontSize: 24),
                ),
              ),
            ),
          ),
        ),
      ],
    );
  }
}
在这个示例中,我们创建了一个Animated3DCard,它包含一个普通的Card组件作为卡片主体,并定义了frontFace和backFace两个面。frontFace和backFace分别定义了卡片翻转前后的显示内容。
AnimationController和Tween动画用于控制卡片的翻转动画。在initState方法中,我们初始化了AnimationController并设置了一个重复的动画,这样卡片会不断翻转。
这个示例展示了如何使用animated_3d_card插件来实现一个简单的3D卡片翻转动画。你可以根据需要进一步自定义和扩展这个示例。


