Flutter自适应返回栈插件adaptive_pop_scope的使用
Flutter自适应返回栈插件adaptive_pop_scope的使用
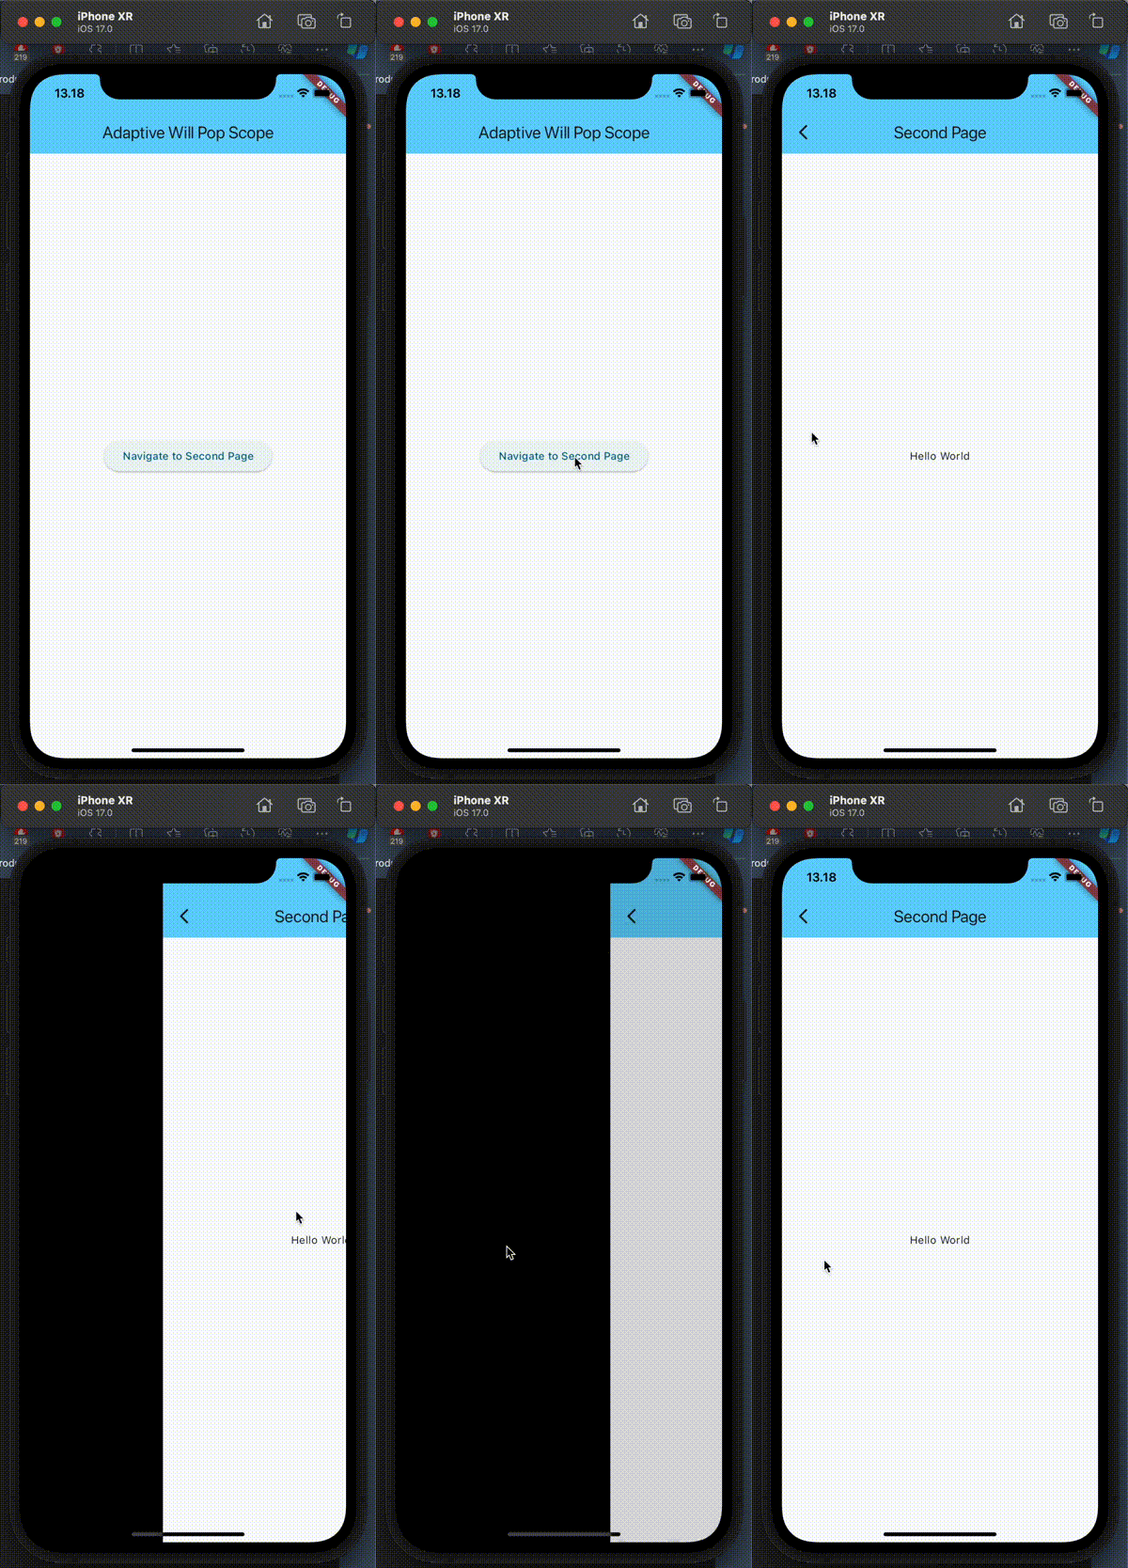
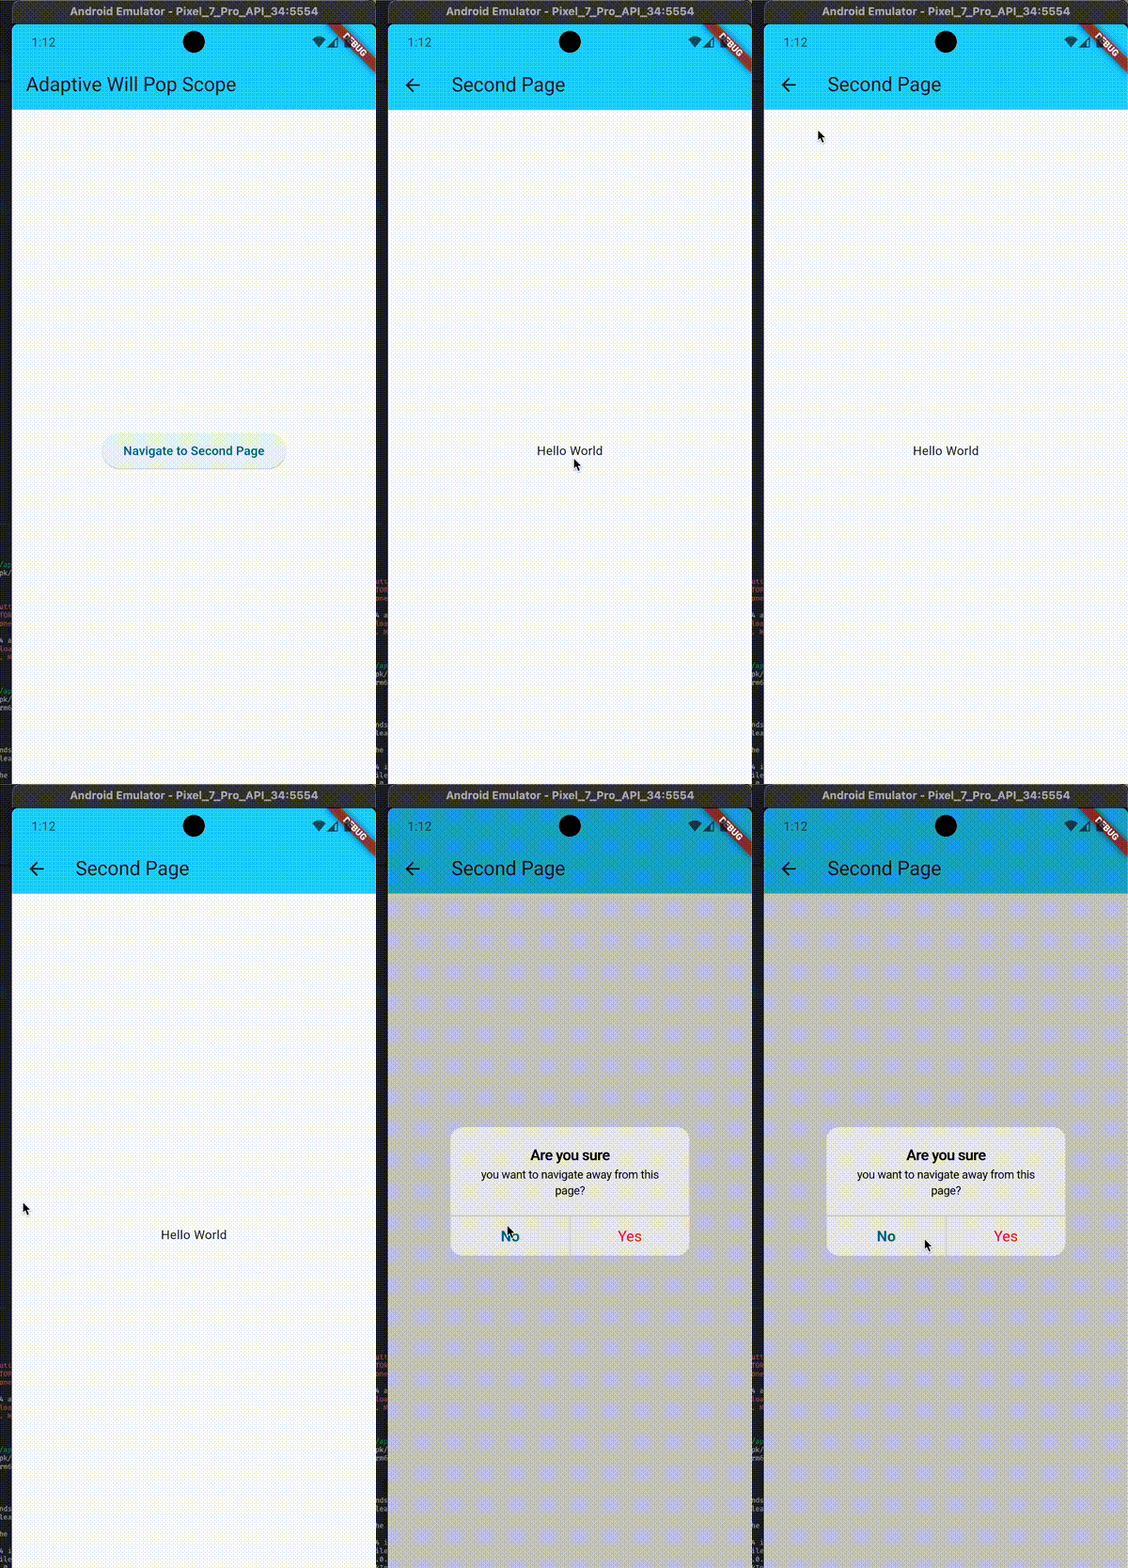
adaptive_pop_scope是一个自定义的小部件,允许用户在iOS设备上通过手势返回,并且可以在Android和iOS平台上提供一致的返回体验。以下是关于如何使用该插件的详细指南。
预览
| iOS | Android |
|---|---|
 |
 |
开始使用
添加依赖
首先,在你的pubspec.yaml文件中添加adaptive_will_pop_scope库,然后运行flutter pub get命令。
dependencies:
  adaptive_will_pop_scope: ^1.0.1
导入库
接下来,在需要使用的文件中导入这个库:
import 'package:adaptive_will_pop_scope/adaptive_will_pop_scope.dart';
使用方法
AdaptivePopScope提供了两个可选参数:swipeWidth用于确定用户可以滑动的最大宽度(默认值为屏幕宽度),swipeThreshold用于指示当用户滑动超过此值时将调用onWillPop回调(默认值为swipeWidth的一半)。
以下是一个完整的示例,展示了如何在页面中使用AdaptivePopScope:
import 'package:flutter/material.dart';
import 'package:adaptive_will_pop_scope/adaptive_will_pop_scope.dart';

class SecondPage extends StatefulWidget {
  const SecondPage({super.key});

  static MaterialPageRoute get route => MaterialPageRoute(builder: (_) => const SecondPage());

  [@override](/user/override)
  State<SecondPage> createState() => _SecondPageState();
}

class _SecondPageState extends State<SecondPage> {
  [@override](/user/override)
  Widget build(BuildContext context) {
    final screenWidth = MediaQuery.of(context).size.width;
    return AdaptivePopScope(
      onWillPop: () async => await _showAlertDialog(context) ?? false,
      swipeWidth: screenWidth,
      swipeThreshold: screenWidth / 2,
      child: Scaffold(
        appBar: AppBar(
          title: const Text('Second Page'),
          backgroundColor: Theme.of(context).colorScheme.inversePrimary,
        ),
        body: const Center(child: Text('Hello World')),
      ),
    );
  }

  Future<bool?> _showAlertDialog(BuildContext context) =>
      showCupertinoModalPopup<bool>(
        context: context,
        builder: (_) => CupertinoAlertDialog(
          title: const Text('Are you sure'),
          content: const Text('you want to navigate away from this page?'),
          actions: <CupertinoDialogAction>[
            CupertinoDialogAction(
              isDefaultAction: true,
              onPressed: () => Navigator.pop(context),
              child: const Text('No'),
            ),
            CupertinoDialogAction(
              isDestructiveAction: true,
              onPressed: () => Navigator.pop(context, true),
              child: const Text('Yes'),
            ),
          ],
        ),
      );
}
示例应用入口
这里还有一个简单的示例应用入口代码,展示如何启动应用并导航到包含AdaptivePopScope的小部件页面:
import 'package:example/main_page.dart';
import 'package:flutter/material.dart';

void main() {
  runApp(const MyApp());
}

class MyApp extends StatelessWidget {
  const MyApp({super.key});

  [@override](/user/override)
  Widget build(BuildContext context) => MaterialApp(
        title: 'Adaptive Will Pop Scope',
        theme: ThemeData(
          colorScheme: ColorScheme.fromSeed(seedColor: Colors.blueGrey),
          useMaterial3: true,
        ),
        home: const MainPage(),
      );
}
更多关于Flutter自适应返回栈插件adaptive_pop_scope的使用的实战系列教程也可以访问 https://www.itying.com/category-92-b0.html
更多关于Flutter自适应返回栈插件adaptive_pop_scope的使用的实战系列教程也可以访问 https://www.itying.com/category-92-b0.html
当然,下面是一个关于如何在Flutter中使用adaptive_pop_scope插件的示例代码。这个插件可以帮助你实现更灵活的返回栈管理,特别是在复杂的导航结构中。
首先,你需要在你的pubspec.yaml文件中添加依赖:
dependencies:
  flutter:
    sdk: flutter
  adaptive_pop_scope: ^x.y.z  # 请替换为最新版本号
然后运行flutter pub get来安装依赖。
接下来,我们来看一个使用AdaptivePopScope的示例。假设我们有一个包含多个页面的应用,并且希望在某些情况下自定义返回行为。
示例代码
main.dart
import 'package:flutter/material.dart';
import 'package:adaptive_pop_scope/adaptive_pop_scope.dart';
import 'package:flutter/services.dart';

void main() {
  runApp(MyApp());
}

class MyApp extends StatelessWidget {
  @override
  Widget build(BuildContext context) {
    return MaterialApp(
      title: 'AdaptivePopScope Demo',
      theme: ThemeData(
        primarySwatch: Colors.blue,
      ),
      home: AdaptivePopScope(
        builder: (context, router) {
          return Navigator(
            key: router.navigatorKey,
            initialRoute: '/',
            onGenerateRoute: (settings) {
              switch (settings.name) {
                case '/':
                  return MaterialPageRoute(builder: (context) => HomePage(router: router));
                case '/page1':
                  return MaterialPageRoute(builder: (context) => Page1(router: router));
                case '/page2':
                  return MaterialPageRoute(builder: (context) => Page2(router: router));
                default:
                  return null;
              }
            },
          );
        },
      ),
    );
  }
}

class HomePage extends StatelessWidget {
  final AdaptivePopRouter router;

  HomePage({required this.router});

  @override
  Widget build(BuildContext context) {
    return Scaffold(
      appBar: AppBar(
        title: Text('Home Page'),
      ),
      body: Center(
        child: Column(
          mainAxisAlignment: MainAxisAlignment.center,
          children: <Widget>[
            Text('You are on Home Page'),
            ElevatedButton(
              onPressed: () {
                Navigator.of(context).pushNamed('/page1');
              },
              child: Text('Go to Page 1'),
            ),
          ],
        ),
      ),
    );
  }
}

class Page1 extends StatelessWidget {
  final AdaptivePopRouter router;

  Page1({required this.router});

  @override
  Widget build(BuildContext context) {
    return Scaffold(
      appBar: AppBar(
        title: Text('Page 1'),
      ),
      body: Center(
        child: Column(
          mainAxisAlignment: MainAxisAlignment.center,
          children: <Widget>[
            Text('You are on Page 1'),
            ElevatedButton(
              onPressed: () {
                // Use router.popUntil to pop until a specific route
                router.popUntil((route) => route.settings?.name == '/');
              },
              child: Text('Pop to Home'),
            ),
            ElevatedButton(
              onPressed: () {
                Navigator.of(context).pushNamed('/page2');
              },
              child: Text('Go to Page 2'),
            ),
          ],
        ),
      ),
    );
  }
}

class Page2 extends StatelessWidget {
  final AdaptivePopRouter router;

  Page2({required this.router});

  @override
  Widget build(BuildContext context) {
    return Scaffold(
      appBar: AppBar(
        title: Text('Page 2'),
      ),
      body: Center(
        child: Text('You are on Page 2'),
      ),
    );
  }
}
解释
- 安装依赖:在
pubspec.yaml文件中添加adaptive_pop_scope依赖。 - 创建应用:在
MyApp中使用AdaptivePopScope包裹Navigator。 - 定义路由:在
AdaptivePopScope的builder方法中定义路由,每个路由页面都接收一个AdaptivePopRouter实例。 - 使用
router.popUntil:在Page1中,使用router.popUntil方法来实现自定义的返回行为,比如返回到首页。
这个示例展示了如何使用adaptive_pop_scope插件来实现更灵活的返回栈管理。你可以根据实际需求进一步自定义和扩展这个示例。


