HarmonyOS 鸿蒙Next 自定义弹窗 customdialog 高度
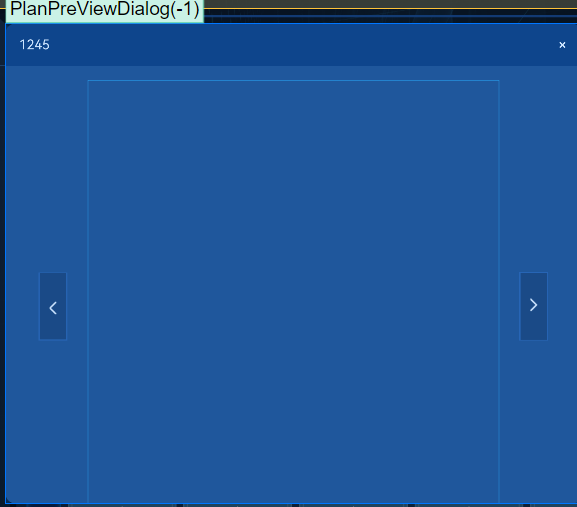
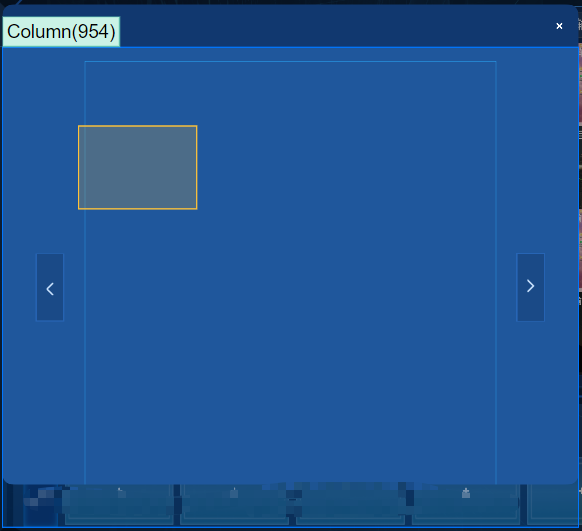
HarmonyOS 鸿蒙Next 自定义弹窗 customdialog 高度 我的弹窗的内容高度为什么不能自适应, column超过的dialog的高度,两个button无法显示
useDialogController: CustomDialogController | null = new CustomDialogController({
    builder: PlanPreViewDialog({
      cancel: () => {
      },
      confirm: () => {
      },
    }),
    alignment: DialogAlignment.Center,
    autoCancel: false,
    customStyle: false,
    width: '60%',
    height: '80%',
    keyboardAvoidMode: KeyboardAvoidMode.NONE,
    cornerRadius: 12,
    maskColor: 0x66000000,
    backgroundBlurStyle: BlurStyle.NONE,
})

export default struct PlanPreViewDialog {
  @State isPressed: boolean = false
  controller?: CustomDialogController
  cancel: () => void = () => {
  }
  confirm: () => void = () => {
  }

  build() {
    Column() {
      Row() {
        Text('1245')
          .fontColor(Color.White)
          .fontSize(16)
        Blank()
        this.closeButton()
      }
      .width('100%')
      .borderRadius({
        topLeft: 8,
        topRight: 8
      })
      .backgroundColor('#11386F')
      .padding(16)

      Column() {
        Row() {
          Stack() {
            Image($r('app.media.icon_btn_down_enabled_false'))
              .objectFit(ImageFit.Contain)
              .rotate({ angle: 90 })
          }
          .layoutWeight(1)

          Stack() {
          }
          .border({
            width: 1,
            color: '#34b9ff'
          })
          .layoutWeight(6)
          .height('100%')

          Stack() {
            Image($r('app.media.icon_btn_up_enabled_false'))
              .objectFit(ImageFit.Contain)
              .rotate({ angle: 90 })
          }
          .layoutWeight(1)
        }

        Row() {
          Button('预编辑', { type: ButtonType.Normal })
            .normalButton()
          Button('立即应用', { type: ButtonType.Normal })
            .normalButton()
        }
        .width('100%')
        .justifyContent(FlexAlign.SpaceAround)
        .margin({ top: 16 })
      }
      .width('100%')
      .borderRadius({
        bottomLeft: 8,
        bottomRight: 8
      })
      .backgroundColor('#274F83')
      .padding(16)
    }
    .width('100%')
    .height('100%')
  }

  @Builder
  closeButton() {
    Image(this.isPressed ? $r('app.media.ic_close_pressed') : $r('app.media.ic_close'))
      .width(px2vp(29))
      .height(px2vp(29))
      .onTouch((event: TouchEvent) => {
        if (event) {
          if (event.type == TouchType.Down) {
            this.isPressed = true
          }
          if (event.type == TouchType.Up) {
            this.isPressed = false
          }
        }
      })
      .onClick(() => {
        this.controller?.close()
      })
  }
}

@Extend(Button)
function normalButton() {
  .height(32)
  .backgroundColor('#34b9ff')
  .borderRadius(2)
  .fontColor(Color.Black)
  .fontSize(12)
}

更多关于HarmonyOS 鸿蒙Next 自定义弹窗 customdialog 高度的实战系列教程也可以访问 https://www.itying.com/category-93-b0.html
3 回复
给第一个Row加了个高度,能显示下面的按钮了,更好的解决办法可以再研究研究
Row() {
  Stack() {
    Image($r('app.media.background'))
      .objectFit(ImageFit.Contain)
      .rotate({ angle: 90 })
  }
  .layoutWeight(1)

  Stack() {
  }
  .border({
    width: 1,
    color: '#34b9ff'
  })
  .layoutWeight(6)
  .height('100%')

  Stack() {
    Image($r('app.media.background'))
      .objectFit(ImageFit.Contain)
      .rotate({ angle: 90 })
  }
  .layoutWeight(1)
}
.height('80%')
更多关于HarmonyOS 鸿蒙Next 自定义弹窗 customdialog 高度的实战系列教程也可以访问 https://www.itying.com/category-93-b0.html
但这是为什么呢?

在HarmonyOS鸿蒙Next系统中,自定义弹窗(customDialog)的高度调整通常涉及对弹窗布局文件的直接操作。以下是调整customDialog高度的基本方法:
-
布局文件调整:
- 打开你的customDialog的布局XML文件。
- 找到代表弹窗高度的属性,可能是
android:layout_height(尽管在鸿蒙中更常用的是ohos:height)。 - 根据需要设置具体的高度值,如
wrap_content、match_parent或具体的dp/px值。
-
代码动态调整:
- 如果需要在运行时动态调整高度,可以通过弹窗的根视图(通常是
Component或ComponentContainer的实例)来获取并修改其高度。 - 使用
setLayoutParams方法,并传入新的高度参数。
- 如果需要在运行时动态调整高度,可以通过弹窗的根视图(通常是
-
注意事项:
- 确保调整高度时不会破坏弹窗的其他布局属性。
- 弹窗的高度调整可能受到父容器或系统默认设置的影响,需综合考虑。
如果通过上述方法仍无法正确调整customDialog的高度,可能是由于其他布局或代码逻辑导致的。此时,建议仔细检查弹窗的布局文件及其相关代码,确保没有其他因素干扰高度设置。
如果问题依旧没法解决请联系官网客服, 官网地址是 https://www.itying.com/category-93-b0.html


