Flutter UI组件插件elevarm_ui的功能使用
以下是关于Flutter UI组件插件elevarm_ui的功能使用示例,包括完整的demo代码。内容中所有的图片会显示出来,并且英文介绍已经转换成简体中文。
Flutter UI组件插件elevarm_ui的功能使用
1. 初始化和设置主题
首先,在主函数中初始化字体配置并设置应用的主题:
import 'package:elevarm_ui/elevarm_ui.dart';

void main() {
    ElevarmFontFamilies.init(
         allowRuntimeFetching: true,
    );

    runApp(const MyApp());
}

class MyApp extends StatelessWidget {
    const MyApp({Key? key}) : super(key: key);

    @override
    Widget build(BuildContext context) {
        return MaterialApp(
            theme: ElevarmThemeData.light(),
            home: const MyHomePage(),
        );
    }
}
2. 使用ElevarmUI类的完整示例
以下是一个完整的示例,展示如何使用elevarm_ui中的各种组件:
import 'package:flutter/material.dart';
import 'package:elevarm_ui/elevarm_ui.dart';

class MyHomePage extends StatefulWidget {
    const MyHomePage({Key? key}) : super(key: key);

    @override
    _MyHomePageState createState() => _MyHomePageState();
}

class _MyHomePageState extends State<MyHomePage> {
    int _currentTabIndex = 0;
    bool checkboxChecked = false;

    void _handlePressedNext() {
        setState(() {
            _currentTabIndex++;
        });
    }

    void _handlePressedPrevious() {
        setState(() {
            _currentTabIndex--;
        });
    }

    @override
    Widget build(BuildContext context) {
        Widget body = Container();
        if (_currentTabIndex == 0) {
            body = _buildHomeScreen(context);
        }

        return Scaffold(
            appBar: AppBar(
                title: const Text('Elevarm UI Demo'),
            ),
            body: body,
            bottomNavigationBar: ElevarmBottomNavigationBar(
                currentIndex: _currentTabIndex,
                onTap: (index) {
                    setState(() {
                        _currentTabIndex = index;
                    });
                },
                items: [
                    ElevarmBottomNavigationBarItem(
                        labelText: 'Beranda',
                        iconAssetName: ElevarmIconsOutline.home02,
                        iconColor: ElevarmColors.primary500,
                    ),
                    ElevarmBottomNavigationBarItem(
                        labelText: 'Pembelanjaan',
                        iconAssetName: ElevarmIconsOutline.shoppingCart01,
                        badge: Container(
                            height: 16,
                            width: 16,
                            decoration: const BoxDecoration(
                                shape: BoxShape.circle,
                                color: ElevarmColors.danger,
                            ),
                            child: Center(
                                child: Text(
                                    '5',
                                    style: ElevarmFontFamilies.inter(
                                        fontSize: 10,
                                        color: ElevarmColors.white,
                                        fontWeight: ElevarmFontWeights.semibold,
                                    ),
                                ),
                            ),
                        ),
                        iconColor: ElevarmColors.primary500,
                    ),
                    ElevarmBottomNavigationBarItem(
                        labelText: 'Penjualan',
                        iconAssetName: ElevarmIconsOutline.coinsSwap01,
                        iconColor: ElevarmColors.primary500,
                    ),
                    ElevarmBottomNavigationBarItem(
                        labelText: 'Akun',
                        iconAssetName: ElevarmIconsOutline.user01,
                        iconColor: ElevarmColors.primary500,
                    ),
                ],
            ),
        );
    }

    Widget _buildHomeScreen(BuildContext context) {
        return Column(
            children: [
                // ElevarmAppBarSearchAndAction 示例
                AppBar(
                    title: const Text('搜索与操作'),
                    bottom: PreferredSize(
                        preferredSize: const Size.fromHeight(56.0),
                        child: ElevarmAppBarSearchAndAction(
                            context: context,
                            searchHintText: 'Cari kebutuhan harian di sini ...',
                            actionWidgets: const [],
                            callbackSubmittingSearch: (keyword) {},
                        ),
                    ),
                ),

                // ElevarmAlert 示例
                ElevarmAlert(
                    text: 'There was a problem with that action',
                    subtitle: 'Lorem ipsum...',
                    variant: ElevarmAlertVariant.info,
                    onClose: () {},
                    secondaryActionText: 'Dismiss',
                    onPressedSecondaryAction: () {},
                    primaryActionText: 'View changes',
                    onPressedPrimaryAction: () {},
                ),

                // ElevarmAvatar 示例
                const ElevarmAvatar(
                    initial: 'OR',
                ),

                // ElevarmDivider 示例
                ElevarmDivider(),

                // ElevarmDonutChartCard 示例
                ElevarmDonutChartCard(
                    title: 'Kepemilikan Lahan',
                    subtitle: 'Terakhir diperbarui 30/11/2021 - 09.30 WIB',
                    dataSource: [
                        ElevarmDonutChartData(
                            label: 'Sewa',
                            value: 2000,
                            color: ElevarmColors.success,
                        ),
                        ElevarmDonutChartData(
                            label: 'Milik Sendiri',
                            value: 1000,
                            color: ElevarmColors.primary600,
                        ),
                    ],
                ),

                // ElevarmCheckbox 示例
                ElevarmCheckbox(
                    checked: checkboxChecked,
                    onPressed: () {
                        setState(() {
                            checkboxChecked = !checkboxChecked;
                        });
                    },
                    title: '记住我',
                    subtitle: '保存我的登录详细信息以便下次使用。',
                ),

                // ElevarmButton 示例
                ElevarmPrimaryButton.text(
                    text: '按钮 CTA',
                    onPressed: () {
                        showElevarmSnackBar(
                            context: context,
                            iconAssetName: ElevarmIconsOutline.plus,
                            alignment: Alignment.topRight,
                            iconColor: ElevarmColors.success,
                            title: 'Perubahan Berhasil Dilakukan',
                            subtitle: 'Setoran potongan kotor diubah dengan nilai potongan sebesar 5%',
                            positiveText: 'Lihat Detail',
                            onPositiveButton: (animationController) {
                                animationController?.reverse();
                            },
                            negativeText: 'Tutup',
                            onNegativeButton: (animationController) {
                                animationController?.reverse();
                            },
                            onCloseButton: (animationController) {
                                animationController?.reverse();
                            },
                            onAnimationControllerInit: (animationController) {
                                /// Save AnimationController in a state.
                                _snackBarAnimationController = animationController;
                            },
                        );
                    },
                ),
            ],
        );
    }
}
3. 组件截图展示
以下是部分组件的截图展示:
-
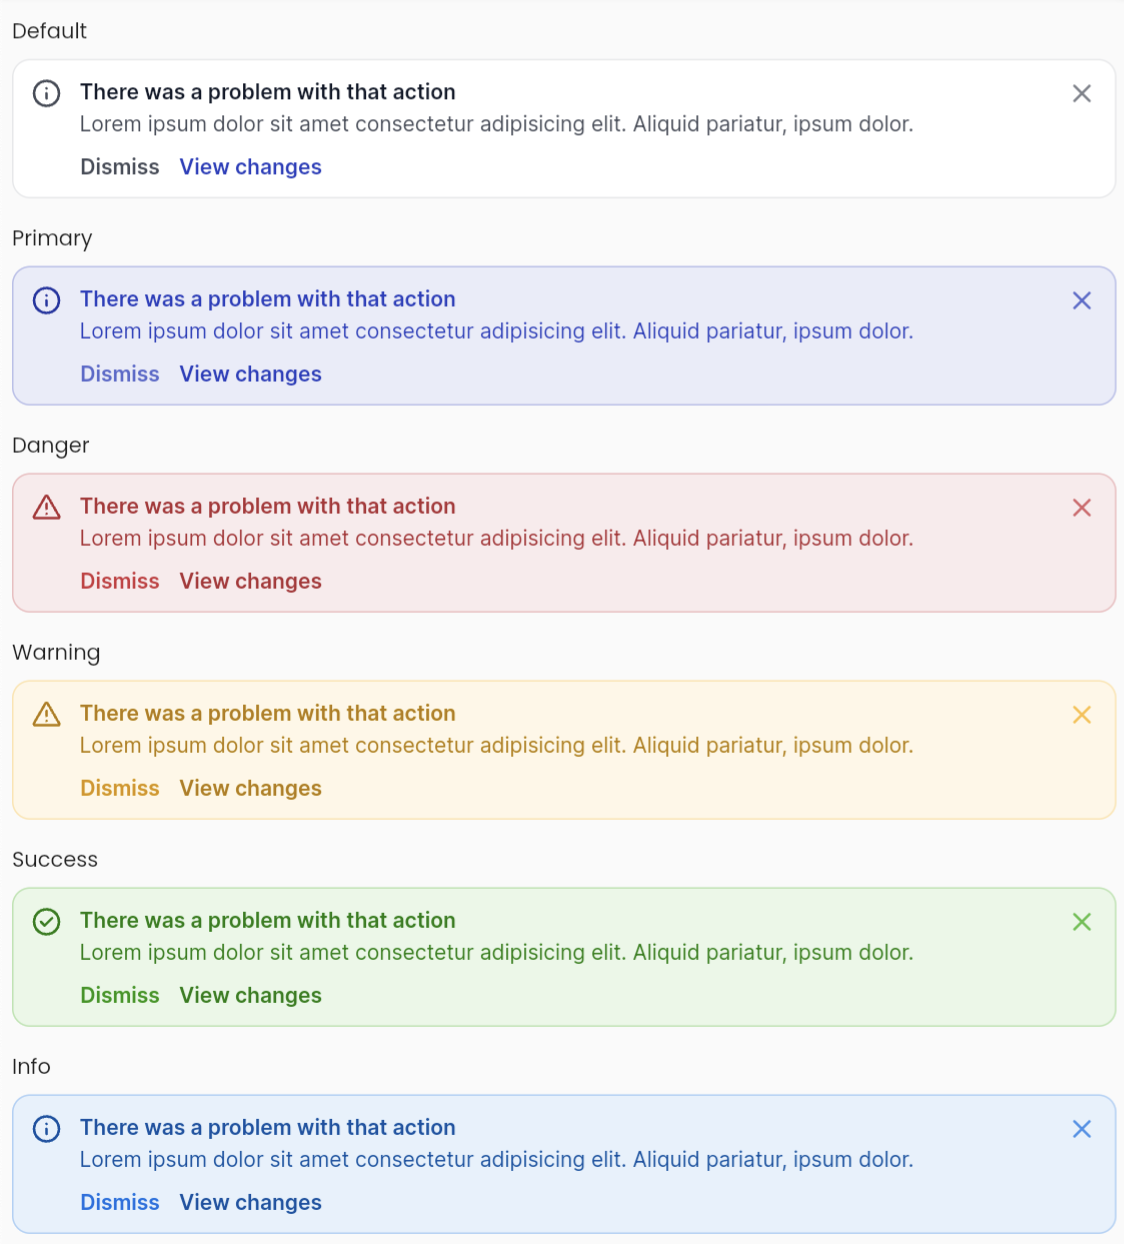
ElevarmAlert:

-
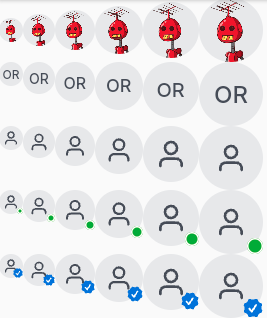
ElevarmAvatar:

-
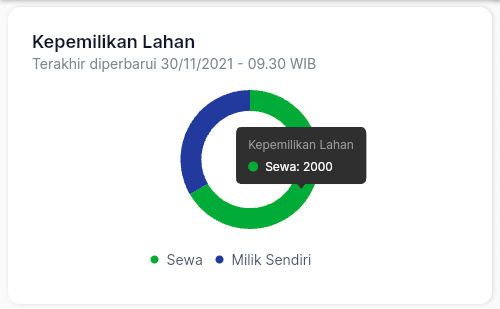
ElevarmDonutChartCard:

-
ElevarmDivider:

-
ElevarmPrimaryButton:

4. 高级组件
除了基本组件外,elevarm_ui还提供了一些高级组件,例如ElevarmMobilePaginationFooter和ElevarmOtpField:
// ElevarmMobilePaginationFooter 示例
ElevarmMobilePaginationFooter(
    currentPage: _currentPage,
    numPages: 10,
    onPressedNext: _currentPage < 10 ? _handlePressedNext : null,
    onPressedPrevious: _currentPage > 1 ? _handlePressedPrevious : null,
),

// ElevarmOtpField 示例
OtpFormField(
    length: 4, // 字段长度
    onChanged: (String otp) {}, // 字段更改时的回调
    onResendOtpCode: () {}, // 点击重新发送验证码文本时的回调
    duration: 60, // 重新发送计时器的持续时间,默认为30秒
),
5. 主题数据
你可以通过传递ElevarmThemeData.light()来设置应用的主题:
MaterialApp(
    theme: ElevarmThemeData.light(),
)
6. 屏幕组件
elevarm_ui还提供了用于处理错误、404页面等的屏幕组件:
// Elevarm404DesktopScreen 示例
Elevarm404DesktopScreen(
    prevNavButtonAction: () {} ,
    mainNavButtonAction: () {} ,
    prevNavButtonLabel: '返回上一页',
    mainNavButtonLabel: '去仪表盘',
    highlight: "哎呀!",
    title: "404 页面未找到",
    description: "抱歉,您查找的页面不存在或已被移动。",
    image: "packages/elevarm_ui/assets/images/not_found_illustration.png",
),
更多关于Flutter UI组件插件elevarm_ui的功能使用的实战系列教程也可以访问 https://www.itying.com/category-92-b0.html
更多关于Flutter UI组件插件elevarm_ui的功能使用的实战系列教程也可以访问 https://www.itying.com/category-92-b0.html
当然,Elevarm UI 是一个用于 Flutter 的 UI 组件库,它提供了一系列预构建的 UI 组件,可以帮助开发者快速构建美观且一致的用户界面。以下是如何在 Flutter 项目中使用 Elevarm UI 的一些基本示例代码。
首先,你需要在你的 Flutter 项目的 pubspec.yaml 文件中添加 Elevarm UI 的依赖:
dependencies:
  flutter:
    sdk: flutter
  elevarm_ui: ^最新版本号  # 请替换为实际发布的最新版本号
然后,运行 flutter pub get 来获取依赖。
使用 Elevarm UI 组件的示例
1. 使用 Button 组件
import 'package:flutter/material.dart';
import 'package:elevarm_ui/elevarm_ui.dart';

void main() {
  runApp(MyApp());
}

class MyApp extends StatelessWidget {
  @override
  Widget build(BuildContext context) {
    return MaterialApp(
      home: Scaffold(
        appBar: AppBar(
          title: Text('Elevarm UI Example'),
        ),
        body: Center(
          child: ElevarmButton(
            text: 'Click Me',
            onPressed: () {
              print('Button Clicked!');
            },
          ),
        ),
      ),
    );
  }
}
2. 使用 Card 组件
import 'package:flutter/material.dart';
import 'package:elevarm_ui/elevarm_ui.dart';

void main() {
  runApp(MyApp());
}

class MyApp extends StatelessWidget {
  @override
  Widget build(BuildContext context) {
    return MaterialApp(
      home: Scaffold(
        appBar: AppBar(
          title: Text('Elevarm UI Card Example'),
        ),
        body: Padding(
          padding: const EdgeInsets.all(16.0),
          child: ElevarmCard(
            child: Column(
              mainAxisAlignment: MainAxisAlignment.center,
              children: <Widget>[
                Text('Card Title'),
                SizedBox(height: 16.0),
                Text('Card Description'),
              ],
            ),
          ),
        ),
      ),
    );
  }
}
3. 使用 TextField 组件
import 'package:flutter/material.dart';
import 'package:elevarm_ui/elevarm_ui.dart';

void main() {
  runApp(MyApp());
}

class MyApp extends StatelessWidget {
  @override
  Widget build(BuildContext context) {
    return MaterialApp(
      home: Scaffold(
        appBar: AppBar(
          title: Text('Elevarm UI TextField Example'),
        ),
        body: Padding(
          padding: const EdgeInsets.all(16.0),
          child: Column(
            mainAxisAlignment: MainAxisAlignment.center,
            children: <Widget>[
              ElevarmTextField(
                labelText: 'Enter your name',
                onChanged: (value) {
                  print('Text field value: $value');
                },
              ),
            ],
          ),
        ),
      ),
    );
  }
}
注意事项
- 在实际使用中,你可能需要根据 Elevarm UI 提供的文档来配置更多的属性和方法。
- 确保你使用的是最新版本的 Elevarm UI,因为库可能会进行更新和变化。
- 如果 Elevarm UI 的组件不满足你的需求,你可以查看它的源码学习如何自定义和扩展这些组件。
这些示例展示了如何在 Flutter 项目中集成和使用 Elevarm UI 的一些基本组件。根据你的具体需求,你可以进一步自定义和扩展这些组件。


