


Flutter自定义工具功能插件flutter_custom_utility的使用
Flutter自定义工具功能插件flutter_custom_utility的使用
标题
Flutter Custom Utility
内容
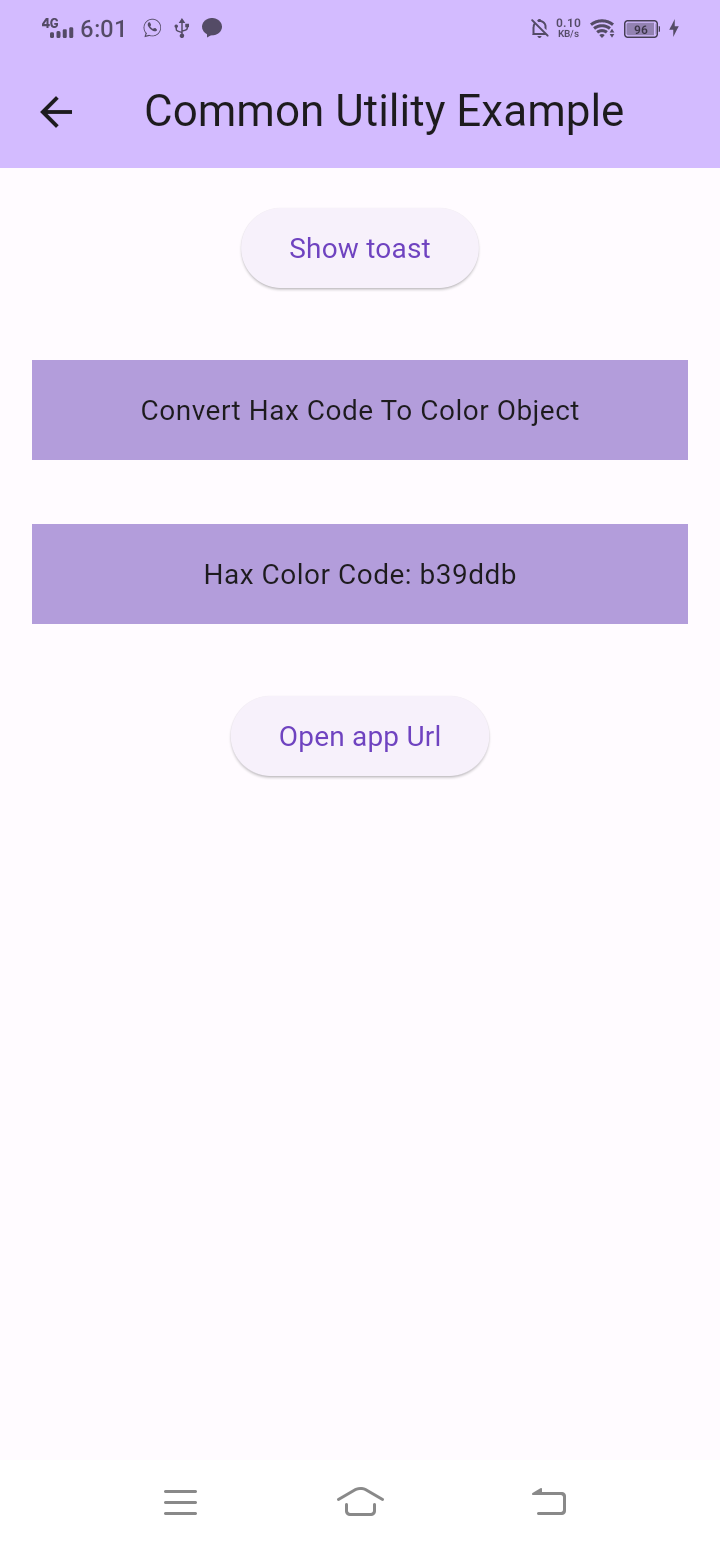
这个包包括通用实用函数(如启动URL、应用URL启动、十六进制到颜色转换、带缓存功能的文件下载、显示toast和打开文件),以及验证、正则表达式和日期时间实用程序模块。
特性
一个多功能的Flutter包,提供常用任务所需的实用函数。简化您的开发过程,包含以下特性:
- 通用实用函数:通过一组通用实用函数简化代码。
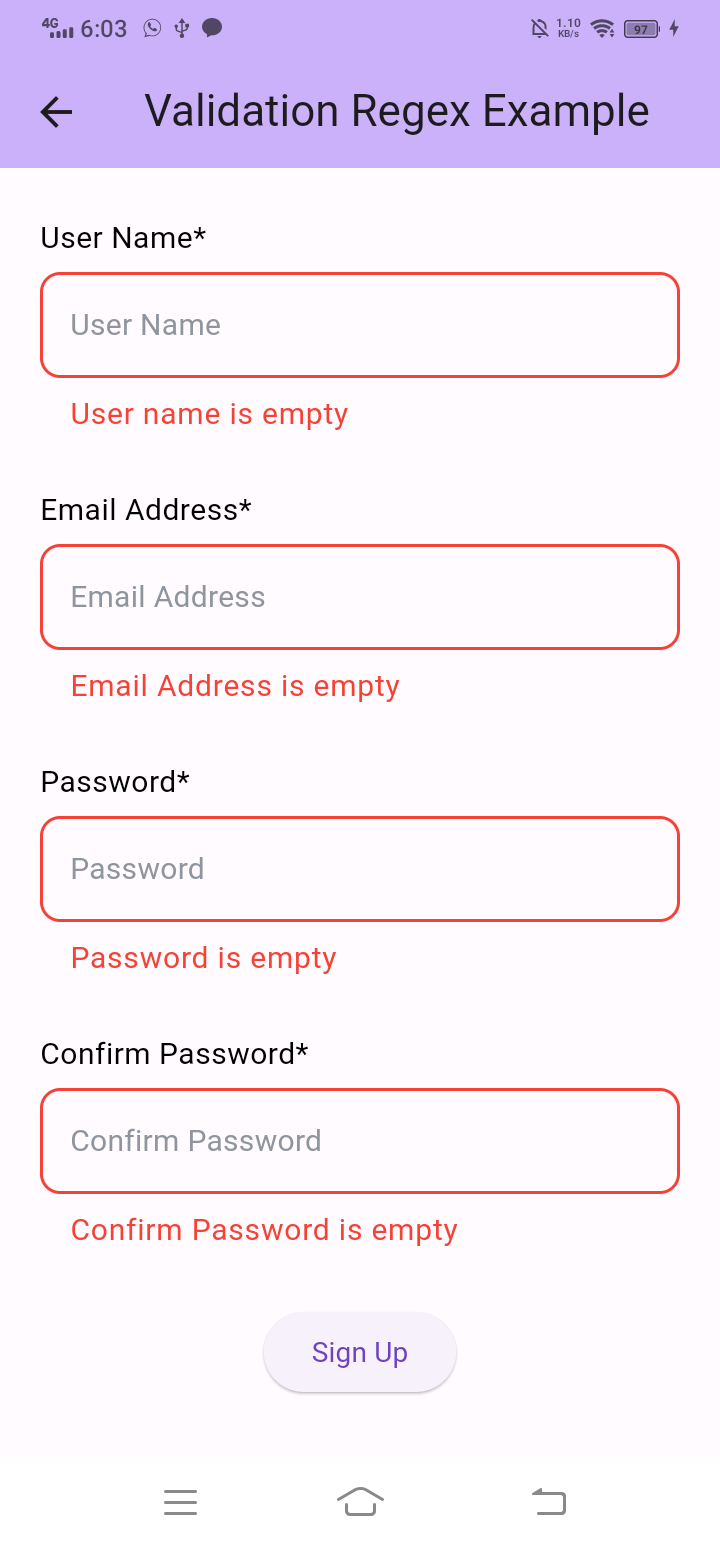
- 验证:轻松验证用户输入,使用预建的验证方法。
- 正则表达式:利用正则表达式的强大功能进行模式匹配和数据提取。
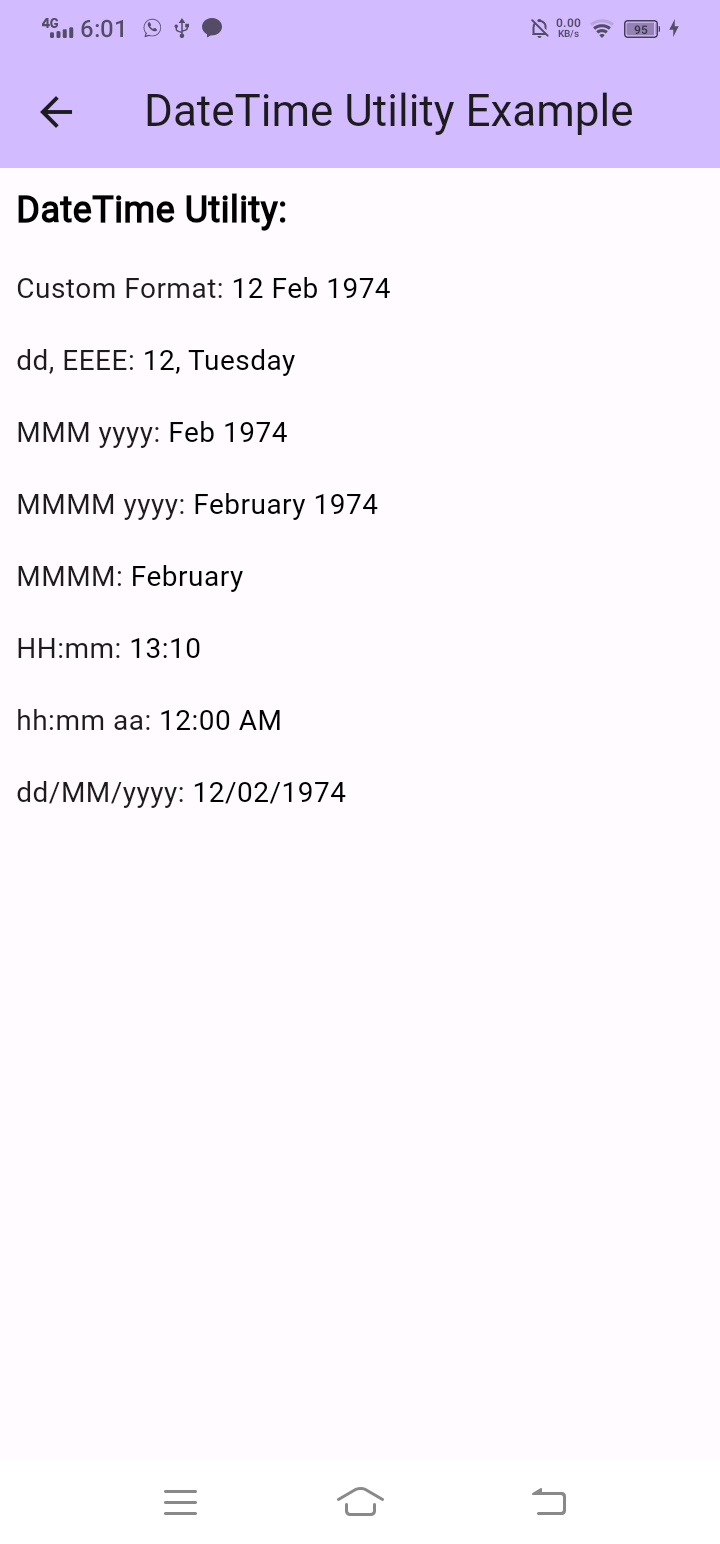
- 日期和时间实用程序:轻松处理日期和时间操作以实现无缝用户体验。
Flutter兼容性
| 包版本 | Flutter版本 |
|---|---|
| 0.0.1 - 1.0.1 | 3.16.0 - 3.22.3 |
屏幕截图
示例
日期和时间实用程序
DateUtil.getCustomDateFormat(
  getCustomFormat: "dd MMM yyyy",
  apiDateFormat: "yyyy-MM-dd'T'hh:mm:ssZ",
  localLang: "en",
  parseDateFormat: "1974-02-12T00:00:00.00+4"
)
验证
ValidationUtils.validateName(
  name: value!,
  emptyErrorMsg: "User name is empty",
  textLengthErrorMsg:
      "User should be More than 3 word",
  textLength: 3
)
正则表达式
bool isCustomRegexFormat(String value, String regexString) {
  RegExp(regexString).hasMatch(value);
}
通用实用函数
const nativeUrl =
    "instagram:instagram://user?username=severinas_app";
const webUrl = "https://www.instagram.com/car/";
await Utilities.launchAppOrWeb(
  androidUrl: nativeUrl,
  androidWebUrl: webUrl,
  iOSUrl: nativeUrl,
  iOSWebUrl: webUrl,
  useExternalApplication: true
);
安装
要在项目中使用flutter_custom_utility组件,请按照以下步骤操作:
- 添加以下行到项目的pubspec.yaml文件(并运行隐式dart pub get):
dependencies:
flutter_custom_utility: ^0.0.10- 导入它:
import 'package:flutter_custom_utility/flutter_custom_utility.dart';示例代码
import 'package:example/src/pages/common_utility_example_page.dart';
import 'package:example/src/pages/date_time_utility_example.dart';
import 'package:example/src/pages/validation_regex_example_page.dart';
import 'package:flutter/material.dart';
import 'package:intl/date_symbol_data_local.dart';

void main() => runApp(const MyApp());

class MyApp extends StatelessWidget {
  const MyApp({super.key});

  [@override](/user/override)
  Widget build(BuildContext context) => MaterialApp(
        title: 'Flutter Demo',
        debugShowCheckedModeBanner: false,
        theme: ThemeData(
          colorScheme: ColorScheme.fromSeed(
            seedColor: Colors.deepPurple,
          ),
          useMaterial3: true,
        ),
        home: const MyHomePage(
          title: 'Flutter Custom Utility',
        ),
      );
}

class MyHomePage extends StatefulWidget {
  const MyHomePage({
    super.key,
    required this.title,
  });
  final String title;

  [@override](/user/override)
  State<MyHomePage> createState() => _MyHomePageState();
}

class _MyHomePageState extends State<MyHomePage> {
  [@override](/user/override)
  Widget build(BuildContext context) {
    initializeDateFormatting();
    return Scaffold(
      appBar: AppBar(
        backgroundColor: Theme.of(context).colorScheme.inversePrimary,
        title: Text(widget.title),
      ),
      body: SingleChildScrollView(
        child: Column(
          children: [
            exampleList(
              "DateTime Utility Example",
              () {
                Navigator.push(
                  context,
                  MaterialPageRoute(
                    builder: (BuildContext context) =>
                        const DateTimeUtilityExamplePage(),
                  ),
                );
              },
            ),
            exampleList(
              "Common Utility Example",
              () {
                Navigator.push(
                  context,
                  MaterialPageRoute(
                    builder: (BuildContext context) =>
                        const CommonUtilityExamplePage(),
                  ),
                );
              },
            ),
            exampleList(
              "Regex Validation Example",
              () {
                Navigator.push(
                  context,
                  MaterialPageRoute(
                    builder: (BuildContext context) =>
                        const ValidationRegexExamplePage(),
                  ),
                );
              },
            ),
          ],
        ),
      ),
    );
  }

  Widget exampleList(String title, Function onTap) => Column(
        children: [
          GestureDetector(
            onTap: () {
              onTap();
            },
            child: Padding(
              padding: const EdgeInsets.all(16.0),
              child: Row(
                mainAxisAlignment: MainAxisAlignment.start,
                crossAxisAlignment: CrossAxisAlignment.center,
                children: [
                  Expanded(
                    child: Text(
                      title,
                      style: const TextStyle(
                        color: Colors.black,
                        fontSize: 18,
                        fontWeight: FontWeight.bold,
                      ),
                    ),
                  ),
                  const Icon(
                    Icons.arrow_forward_ios_sharp,
                    color: Colors.black,
                    size: 18,
                  )
                ],
              ),
            ),
          ),
          const Divider(
            color: Colors.black,
            thickness: 1,
            height: 1,
更多关于Flutter自定义工具功能插件flutter_custom_utility的使用的实战系列教程也可以访问 https://www.itying.com/category-92-b0.html


更多关于Flutter自定义工具功能插件flutter_custom_utility的使用的实战系列教程也可以访问 https://www.itying.com/category-92-b0.html
当然,下面是一个关于如何使用Flutter自定义工具功能插件flutter_custom_utility的示例代码。请注意,flutter_custom_utility是一个假设的插件名称,因为在实际Flutter生态系统中并不存在一个广泛认可的同名插件。因此,以下代码将展示如何假设性地创建和使用一个自定义插件。
1. 创建插件项目
首先,我们需要在Flutter环境中创建一个插件项目。你可以使用以下命令来创建:
flutter create --org com.example --template=plugin flutter_custom_utility2. 实现插件功能
进入插件项目目录,并编辑lib/flutter_custom_utility.dart文件,添加你的自定义功能。例如,我们可以添加一个用于字符串处理的简单工具类:
// lib/flutter_custom_utility.dart
import 'dart:convert';

class FlutterCustomUtility {
  static String reverseString(String input) {
    return input.split('').reversed.join();
  }

  static Map<String, dynamic> jsonToMap(String jsonString) {
    return jsonDecode(jsonString) as Map<String, dynamic>;
  }
}
3. 编辑插件的pubspec.yaml
确保在pubspec.yaml中正确声明了插件:
name: flutter_custom_utility
description: A Flutter plugin for custom utilities.
version: 0.0.1
homepage: https://github.com/yourusername/flutter_custom_utility

flutter:
  plugin:
    platforms:
      android:
        package: com.example.flutter_custom_utility
        pluginClass: FlutterCustomUtilityPlugin
      ios:
        pluginClass: FlutterCustomUtilityPlugin

dependencies:
  flutter:
    sdk: flutter

dev_dependencies:
  flutter_test:
    sdk: flutter

# The following section is specific to Flutter.
flutter_plugins:
  - flutter_custom_utility
4. 在Flutter应用中使用插件
现在,我们可以在一个Flutter应用中使用这个插件。首先,将插件添加到你的Flutter应用的pubspec.yaml文件中:
dependencies:
  flutter:
    sdk: flutter
  flutter_custom_utility:
    path: ../path_to_your_plugin  # 使用本地路径进行开发
然后,在你的Flutter应用中导入并使用这个插件:
// lib/main.dart
import 'package:flutter/material.dart';
import 'package:flutter_custom_utility/flutter_custom_utility.dart';

void main() {
  runApp(MyApp());
}

class MyApp extends StatelessWidget {
  @override
  Widget build(BuildContext context) {
    return MaterialApp(
      home: Scaffold(
        appBar: AppBar(
          title: Text('Flutter Custom Utility Demo'),
        ),
        body: Center(
          child: Column(
            mainAxisAlignment: MainAxisAlignment.center,
            children: <Widget>[
              Text(
                'Reversed String:',
                style: TextStyle(fontSize: 20),
              ),
              Text(
                FlutterCustomUtility.reverseString('Hello, Flutter!'),
                style: TextStyle(fontSize: 18),
              ),
              SizedBox(height: 20),
              Text(
                'JSON to Map:',
                style: TextStyle(fontSize: 20),
              ),
              Text(
                FlutterCustomUtility.jsonToMap('{"key": "value"}').toString(),
                style: TextStyle(fontSize: 18),
              ),
            ],
          ),
        ),
      ),
    );
  }
}
5. 运行应用
最后,运行你的Flutter应用:
flutter run你应该能够在你的应用中看到字符串反转和JSON解析的结果。
请注意,这只是一个简单的示例,用于展示如何创建和使用一个自定义的Flutter插件。在实际项目中,你可能需要处理更多的平台特定代码(如Android和iOS的实现),并添加更多的功能和错误处理。