


Flutter可重排序标签栏插件reorderable_tabbar的使用
Flutter可重排序标签栏插件reorderable_tabbar的使用
reorderable_tabbar 是一个用于 Flutter 的可重排序标签栏插件。通过该插件,用户可以轻松地在标签栏中拖动并重新排列标签。
示例视频
示例代码
以下是一个完整的示例代码,展示了如何在 Flutter 应用程序中使用 reorderable_tabbar 插件:
import 'package:flutter/material.dart';
import 'package:reorderable_tabbar/reorderable_tabbar.dart';
void main() {
runApp(const MyApp());
}
class MyApp extends StatelessWidget {
const MyApp({Key? key}) : super(key: key);
[@override](/user/override)
Widget build(BuildContext context) {
return MaterialApp(
title: 'Reorderable TabBar',
theme: ThemeData(
useMaterial3: true,
),
home: const ReorderableTabBarPage(),
);
}
}
class ReorderableTabBarPage extends StatefulWidget {
const ReorderableTabBarPage({Key? key}) : super(key: key);
[@override](/user/override)
State<ReorderableTabBarPage> createState() => _ReorderableTabBarPageState();
}
extension StringExt on String {
Text get text => Text(this);
Widget tab(int index) {
return Tab(
text: "Tab $this",
);
}
}
class _ReorderableTabBarPageState extends State<ReorderableTabBarPage> {
PageController pageController = PageController();
List<String> tabs = [
"1",
"2",
"3",
"4",
];
bool isScrollable = false;
bool tabSizeIsLabel = false;
[@override](/user/override)
Widget build(BuildContext context) {
return DefaultTabController(
length: tabs.length,
child: Scaffold(
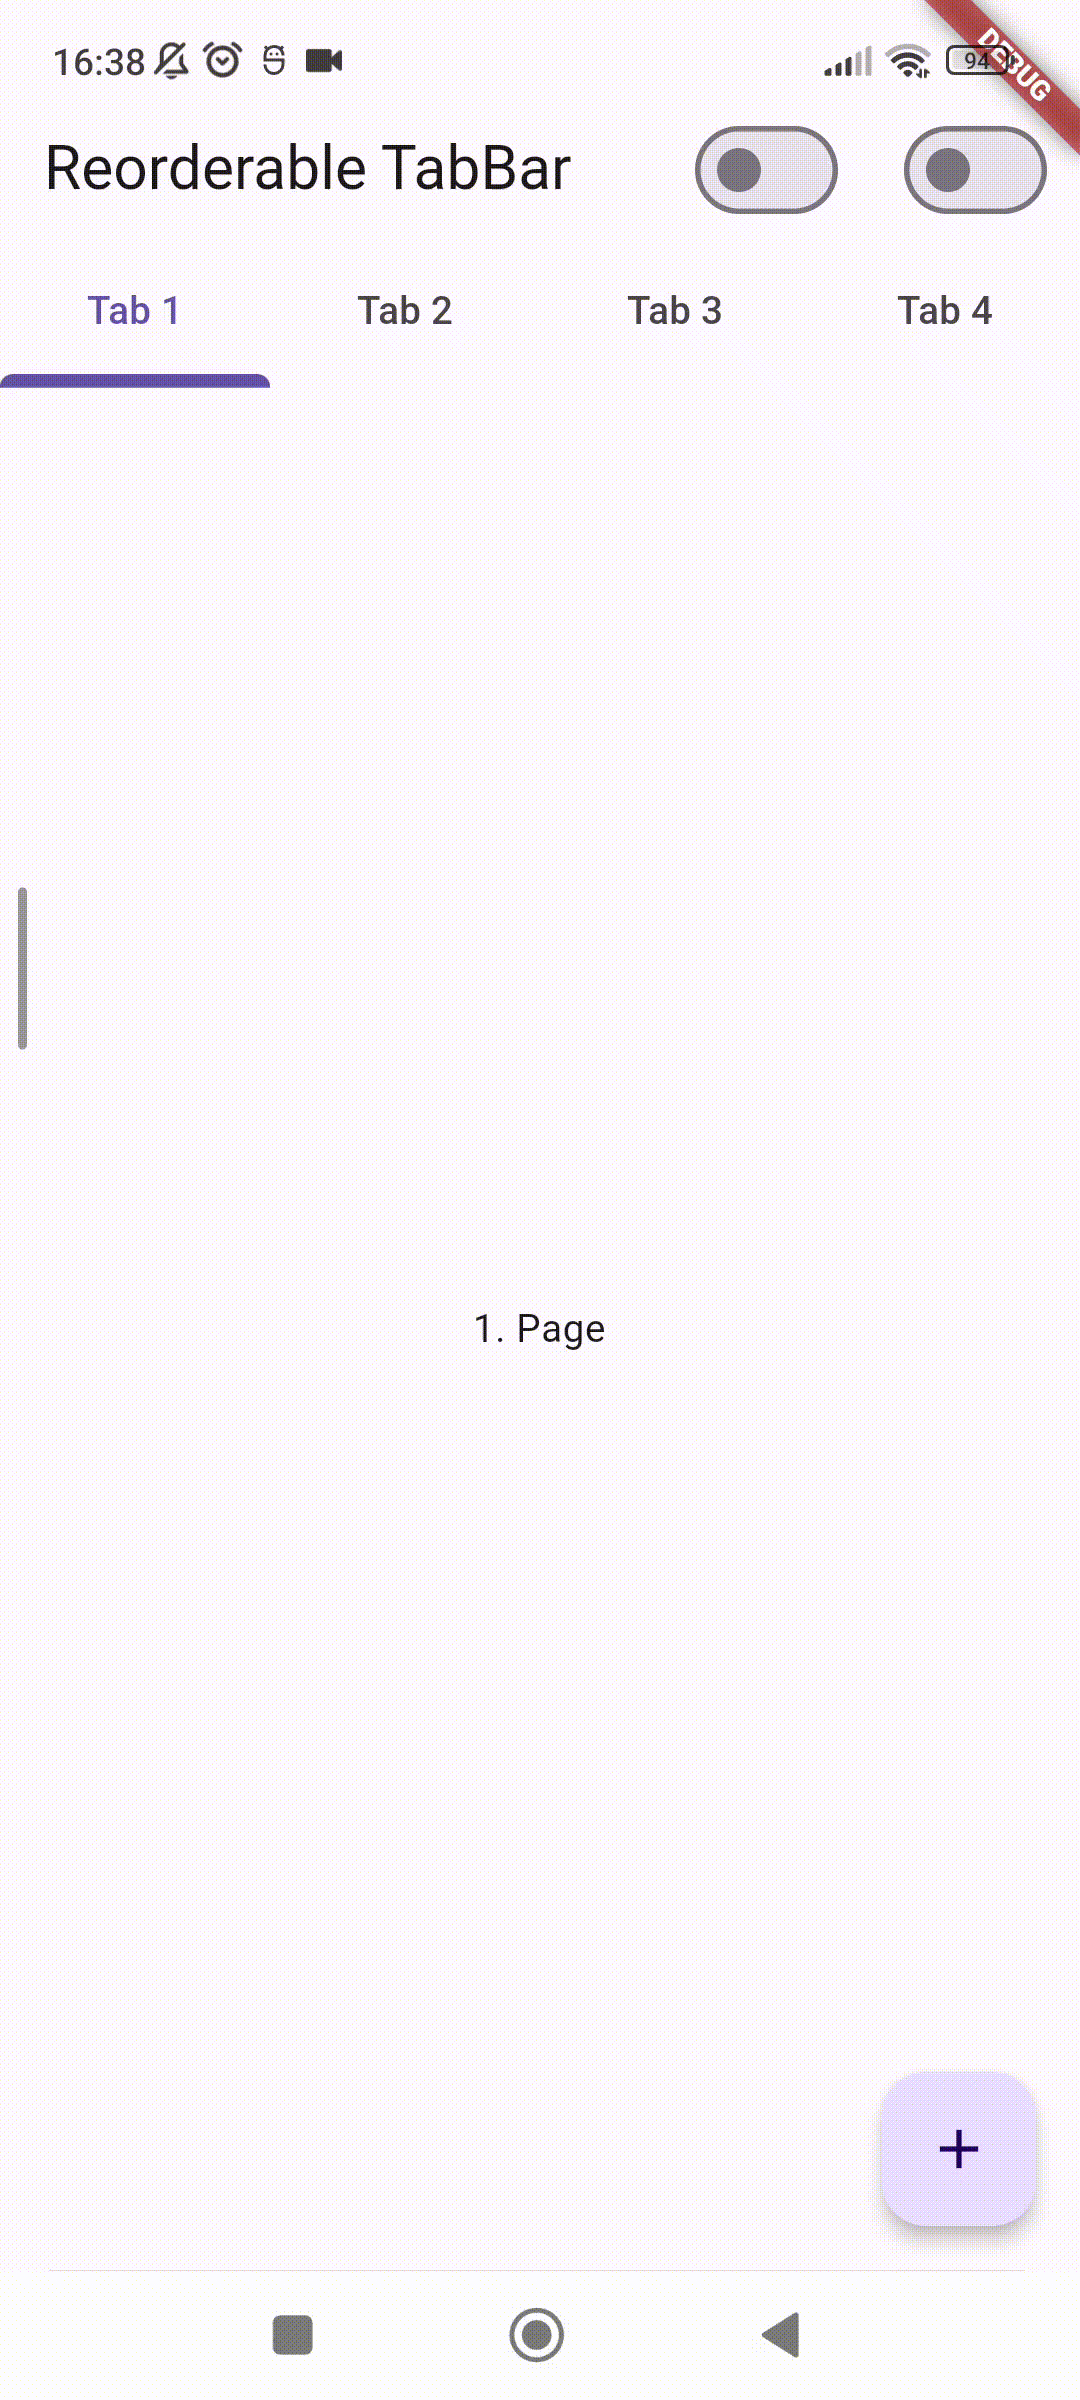
appBar: AppBar(
elevation: 0,
title: const Text("Reorderable TabBar"),
actions: [
Padding(
padding: const EdgeInsets.all(8.0),
child: Center(
child: Switch(
value: tabSizeIsLabel,
onChanged: (s) {
setState(() {
tabSizeIsLabel = s;
});
},
),
),
),
Padding(
padding: const EdgeInsets.all(8.0),
child: Center(
child: Switch(
value: isScrollable,
onChanged: (s) {
setState(() {
isScrollable = s;
});
},
),
),
),
],
bottom: ReorderableTabBar(
buildDefaultDragHandles: false,
tabs: tabs.map((e) => e.tab(tabs.indexOf(e))).toList(),
indicatorSize: tabSizeIsLabel ? TabBarIndicatorSize.label : null,
isScrollable: isScrollable,
reorderingTabBackgroundColor: Colors.black45,
indicatorWeight: 5,
tabBorderRadius: const BorderRadius.vertical(
top: Radius.circular(8),
),
onReorder: (oldIndex, newIndex) async {
String temp = tabs.removeAt(oldIndex);
tabs.insert(newIndex, temp);
setState(() {});
},
),
),
floatingActionButton: FloatingActionButton(
child: const Icon(Icons.add),
onPressed: () {
tabs.add((tabs.length + 1).toString());
setState(() {});
},
),
body: TabBarView(
children: tabs.map((e) {
return Center(
child: ("$e. Page").text,
);
}).toList(),
),
),
);
}
}
使用说明
-
安装插件: 在
pubspec.yaml文件中添加依赖项:dependencies: reorderable_tabbar: ^x.x.x其中
x.x.x是具体的版本号。 -
初始化应用: 在
main.dart中初始化应用,并设置初始页面。void main() { runApp(const MyApp()); } -
创建标签栏页: 创建一个状态管理类
_ReorderableTabBarPageState,并在其中定义标签列表tabs和一些布尔变量来控制滚动和标签大小。class _ReorderableTabBarPageState extends State<ReorderableTabBarPage> { PageController pageController = PageController(); List<String> tabs = [ "1", "2", "3", "4", ]; bool isScrollable = false; bool tabSizeIsLabel = false; -
构建UI: 使用
DefaultTabController包裹整个标签栏,并在AppBar中设置标签栏。[@override](/user/override) Widget build(BuildContext context) { return DefaultTabController( length: tabs.length, child: Scaffold( appBar: AppBar( elevation: 0, title: const Text("Reorderable TabBar"), actions: [ Padding( padding: const EdgeInsets.all(8.0), child: Center( child: Switch( value: tabSizeIsLabel, onChanged: (s) { setState(() { tabSizeIsLabel = s; }); }, ), ), ), Padding( padding: const EdgeInsets.all(8.0), child: Center( child: Switch( value: isScrollable, onChanged: (s) { setState(() { isScrollable = s; }); }, ), ), ), ], bottom: ReorderableTabBar( buildDefaultDragHandles: false, tabs: tabs.map((e) => e.tab(tabs.indexOf(e))).toList(), indicatorSize: tabSizeIsLabel ? TabBarIndicatorSize.label : null, isScrollable: isScrollable, reorderingTabBackgroundColor: Colors.black45, indicatorWeight: 5, tabBorderRadius: const BorderRadius.vertical( top: Radius.circular(8), ), onReorder: (oldIndex, newIndex) async { String temp = tabs.removeAt(oldIndex); tabs.insert(newIndex, temp); setState(() {}); }, ), ), -
添加浮动按钮: 添加一个浮动按钮,用于动态添加新的标签。
floatingActionButton: FloatingActionButton( child: const Icon(Icons.add), onPressed: () { tabs.add((tabs.length + 1).toString()); setState(() {}); }, ), -
构建标签视图: 使用
TabBarView来显示每个标签对应的页面内容。body: TabBarView( children: tabs.map((e) { return Center( child: ("$e. Page").text, ); }).toList(), ), ), ); }
更多关于Flutter可重排序标签栏插件reorderable_tabbar的使用的实战系列教程也可以访问 https://www.itying.com/category-92-b0.html


更多关于Flutter可重排序标签栏插件reorderable_tabbar的使用的实战系列教程也可以访问 https://www.itying.com/category-92-b0.html
当然,以下是如何在Flutter中使用reorderable_tabbar插件来实现可重排序标签栏的一个简单示例。这个插件允许你创建一个标签栏,用户可以长按并拖动标签来重新排序它们。
首先,你需要在你的pubspec.yaml文件中添加reorderable_tabbar依赖:
dependencies:
  flutter:
    sdk: flutter
  reorderable_tabbar: ^x.y.z  # 请替换为最新版本号
然后运行flutter pub get来获取依赖。
接下来是一个完整的示例代码,展示如何使用reorderable_tabbar:
import 'package:flutter/material.dart';
import 'package:reorderable_tabbar/reorderable_tabbar.dart';

void main() {
  runApp(MyApp());
}

class MyApp extends StatelessWidget {
  @override
  Widget build(BuildContext context) {
    return MaterialApp(
      home: MyHomePage(),
    );
  }
}

class MyHomePage extends StatefulWidget {
  @override
  _MyHomePageState createState() => _MyHomePageState();
}

class _MyHomePageState extends State<MyHomePage> with SingleTickerProviderStateMixin {
  late TabController _tabController;
  late List<String> _tabs;

  @override
  void initState() {
    super.initState();
    _tabs = ['Tab 1', 'Tab 2', 'Tab 3'];
    _tabController = TabController(length: _tabs.length, vsync: this);
  }

  @override
  void dispose() {
    _tabController.dispose();
    super.dispose();
  }

  void _onTabsReordered(int oldIndex, int newIndex) {
    setState(() {
      final String tab = _tabs.removeAt(oldIndex);
      _tabs.insert(newIndex, tab);
      _tabController.index = newIndex < _tabController.index ? _tabController.index - 1 : _tabController.index;
      if (_tabController.index >= _tabs.length) {
        _tabController.index = _tabs.length - 1;
      } else if (_tabController.index < 0) {
        _tabController.index = 0;
      }
      _tabController.animateTo(_tabController.index);
    });
  }

  @override
  Widget build(BuildContext context) {
    return Scaffold(
      appBar: AppBar(
        title: Text('Reorderable TabBar Example'),
      ),
      body: Column(
        children: <Widget>[
          ReorderableTabBar(
            controller: _tabController,
            tabs: List.generate(
              _tabs.length,
              (index) => Tab(text: _tabs[index]),
            ),
            onReorder: _onTabsReordered,
            dragStartBehavior: DragStartBehavior.down,
          ),
          Expanded(
            child: TabBarView(
              controller: _tabController,
              children: List.generate(
                _tabs.length,
                (index) => Center(child: Text('Content of $_{index + 1}')),
              ),
            ),
          ),
        ],
      ),
    );
  }
}
在这个示例中,我们做了以下几件事:
-
定义标签和控制器:在
_MyHomePageState中,我们初始化了一个TabController和一个包含标签名称的列表_tabs。 -
处理标签重排序:我们定义了一个
_onTabsReordered方法,当用户拖动标签改变顺序时,这个方法会被调用。这个方法更新_tabs列表的顺序,并相应地调整_tabController的索引。 -
构建UI:在
build方法中,我们使用ReorderableTabBar来创建可重排序的标签栏,并传入_tabController和标签列表。同时,我们使用TabBarView来显示与标签对应的视图内容。
这个示例展示了如何使用reorderable_tabbar插件来创建一个可重排序的标签栏,并相应地更新视图内容。你可以根据需要进一步自定义和扩展这个示例。