


Flutter聊天界面插件chatview3的使用
Flutter聊天界面插件ChatView3的使用
ChatView3

通过ChatView3增强您的聊天体验。此版本的ChatView现在支持多语言(阿拉伯语、法语和英语)并包含各种改进。通过增强的语言选项和优化的功能实现无缝通信。
对于Web演示,请访问Chat View Example。
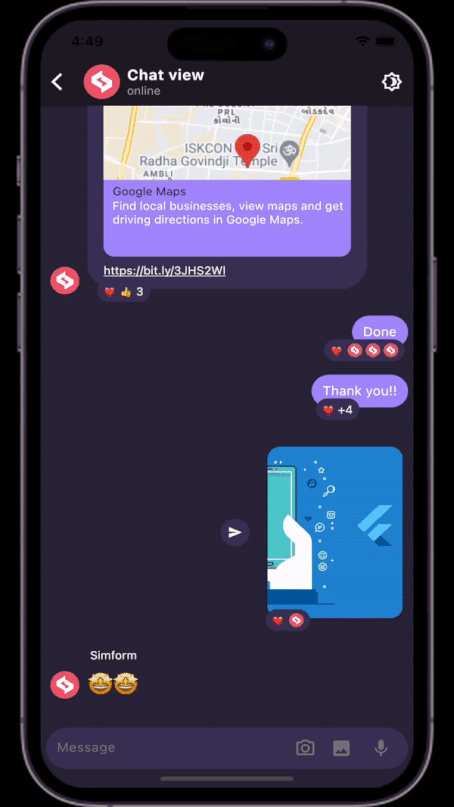
预览
安装
步骤1:添加依赖到pubspec.yaml
dependencies:
  chatview3: <最新版本>
获取最新版本,请参阅安装标签下的pub.dev页面。
步骤2:导入包
import 'package:chatview3/chatview3.dart';
步骤3:添加一个聊天控制器
final chatController = ChatController(
  initialMessageList: messageList,
  scrollController: ScrollController(),
  chatUsers: [ChatUser(id: '2', name: 'Simform')],
);
步骤4:添加一个ChatView2小部件
ChatView2(
  currentUser: ChatUser(id: '1', name: 'Flutter'),
  chatController: chatController,
  onSendTap: onSendTap,
  chatview2State: ChatView2State.hasMessages, // 在数据可用时添加此状态。
)
步骤5:添加一个带有Message类的消息列表
List<Message> messageList = [
  Message(
    id: '1',
    message: "Hi",
    createdAt: createdAt,
    sendBy: userId,
  ),
  Message(
    id: '2',
    message: "Hello",
    createdAt: createdAt,
    sendBy: userId,
  ),
];
步骤6:添加onSendTap
void onSendTap(String message, ReplyMessage replyMessage, MessageType messageType) {
  final message = Message(
    id: '3',
    message: "How are you",
    createdAt: DateTime.now(),
    sendBy: currentUser.id,
    replyMessage: replyMessage,
    messageType: messageType,
  );
  chatController.addMessage(message);
}
注意:您可以从messageType参数评估消息类型,并根据该类型执行操作。
消息类型兼容性
| 消息类型 | Android | iOS |
|---|---|---|
| 文本消息 | ✔️ | ✔️ |
| 图片消息 | ✔️ | ✔️ |
| 语音消息 | ✔️ | ✔️ |
| 自定义消息 | ✔️ | ✔️ |
平台特定配置
对于图像选择器
iOS
- 将以下键添加到您的
Info.plist文件中,位于<项目根目录>/ios/Runner/Info.plist:
<key>NSCameraUsageDescription</key>
<string>用于演示图像选择器插件</string>
<key>NSMicrophoneUsageDescription</key>
<string>用于捕获音频以进行图像选择器插件</string>
<key>NSPhotoLibraryUsageDescription</key>
<string>用于演示图像选择器插件</string>
对于语音消息
iOS
- 在
ios/Runner/Info.plist中添加这两行:
<key>NSMicrophoneUsageDescription</key>
<string>此应用程序需要麦克风权限。</string>
- 该插件需要iOS 10.0或更高版本。因此,在
Podfile中添加此行:
platform :ios, '10.0'
Android
- 在您的
android/app/build.gradle文件中将最低Android SDK版本更改为21(或更高):
minSdkVersion 21
- 在
AndroidManifest.xml中添加录音权限:
<uses-permission android:name="android.permission.RECORD_AUDIO"/>
其他可选参数
步骤0:传递自定义本地(语言)阿拉伯语、英语或法语
ChatView2(
  ...
  local: 'ar' // 如果是英语 'en' 如果是法语 'fr'

  ...

)
但是,您必须修改主文件并添加intl包,例如(对于阿拉伯语):
import 'package:intl/date_symbol_data_local.dart';
void main() {
  initializeDateFormatting("ar", null).then((_) {
    runApp(const YourApp());
  });
}
对于英语语言:
import 'package:intl/date_symbol_data_local.dart';
void main() {
  initializeDateFormatting("en", null).then((_) {
    runApp(const YourApp());
  });
}
对于法语语言:
import 'package:intl/date_symbol_data_local.dart';
void main() {
  initializeDateFormatting("fr", null).then((_) {
    runApp(const YourApp());
  });
}
注意:此包仅支持阿拉伯语、英语和法语。
步骤1:启用和禁用特定功能与FeatureActiveConfig
ChatView2(
  ...
  featureActiveConfig: FeatureActiveConfig(
    enableSwipeToReply: true,
    enableSwipeToSeeTime: false,
  ),
  ...
)
步骤2:添加一个带有ChatView2AppBar的小部件
ChatView2(
  ...
  appBar: ChatView2AppBar(
    profilePicture: profileImage,
    chatTitle: "Simform",
    userStatus: "online",
    actions: [
      Icon(Icons.more_vert),
    ],
  ),
  ...
)
步骤3:添加一个带有ChatBackgroundConfiguration类的消息列表配置
ChatView2(
  ...
  chatBackgroundConfig: ChatBackgroundConfiguration(
    backgroundColor: Colors.white,
    backgroundImage: backgroundImage,
  ),
  ...
)
步骤4:添加一个带有SendMessageConfiguration类的发送消息配置
ChatView2(
  ...
  sendMessageConfig: SendMessageConfiguration(
    replyMessageColor: Colors.grey,
    replyDialogColor:Colors.blue,
    replyTitleColor: Colors.black,
    closeIconColor: Colors.black,
  ),
  ...
)
步骤5:添加一个带有ChatBubbleConfiguration类的聊天气泡配置
ChatView2(
  ...
  chatBubbleConfig: ChatBubbleConfiguration(
    onDoubleTap: (){
       // 您的代码在这里
    },
    outgoingChatBubbleConfig: ChatBubble(      // 发送者的消息聊天气泡
      color: Colors.blue,
      borderRadius: const BorderRadius.only(
        topRight: Radius.circular(12),
        topLeft: Radius.circular(12),
        bottomLeft: Radius.circular(12),
      ),
    ),
    inComingChatBubbleConfig: ChatBubble(      // 接收者的消息聊天气泡
      color: Colors.grey.shade200,
      borderRadius: const BorderRadius.only(
        topLeft: Radius.circular(12),
        topRight: Radius.circular(12),
        bottomRight: Radius.circular(12),
      ),
    ),
  )
  ...
)
步骤6:添加带有SwipeToReplyConfiguration类的滑动回复配置
ChatView2(
  ...
  swipeToReplyConfig: SwipeToReplyConfiguration(
    onLeftSwipe: (message, sendBy){
        // 您的代码在这里
    },
    onRightSwipe: (message, sendBy){
        // 您的代码在这里
    },
  ),
  ...
)
步骤7:添加带有MessageConfiguration类的消息配置
ChatView2(
  ...
  messageConfig: MessageConfiguration(
    messageReactionConfig: MessageReactionConfiguration(),      // 单个消息的Emoji反应配置
    imageMessageConfig: ImageMessageConfiguration(
      onTap: (){
          // 您的代码在这里
      },
      shareIconConfig: ShareIconConfiguration(
        onPressed: (){
           // 您的代码在这里
        },
      ),
    ),
  ),
  ...
)
步骤8:添加带有ReactionPopupConfiguration类的反应弹出配置
ChatView2(
  ...
  reactionPopupConfig: ReactionPopupConfiguration(
    backgroundColor: Colors.white,
    userReactionCallback: (message, emoji){
      // 您的代码在这里
    }
    padding: EdgeInsets.all(12),
    shadow: BoxShadow(
      color: Colors.black54,
      blurRadius: 20,
    ),
  ),
  ...
)
步骤9:添加带有ReplyPopupConfiguration类的回复弹出配置
ChatView2(
  ...
  replyPopupConfig: ReplyPopupConfiguration(
    backgroundColor: Colors.white,
    onUnsendTap:(message){                   // message 是 'Message' 类实例
       // 您的代码在这里
    },
    onReplyTap:(message){                    // message 是 'Message' 类实例
       // 您的代码在这里
    },
    onReportTap:(){
       // 您的代码在这里
    },
    onMoreTap:(){
       // 您的代码在这里
    },
  ),
  ...
)
步骤10:添加带有RepliedMessageConfiguration类的回复消息配置
ChatView2(
   ...
   repliedMessageConfig: RepliedMessageConfiguration(
     backgroundColor: Colors.blue,
     verticalBarColor: Colors.black,
     repliedMsgAutoScrollConfig: RepliedMsgAutoScrollConfig(),
   ),
   ...
)
步骤11:使用typeIndicatorConfig与TypeIndicatorConfig自定义打字指示器
ChatView2(
  ...

  typeIndicatorConfig: TypeIndicatorConfiguration(
    flashingCircleBrightColor: Colors.grey,
    flashingCircleDarkColor: Colors.black,
  ),
  ...
)
步骤12:使用ChatController.setTypingIndicator显示/隐藏打字指示器,更多详情见ChatController。
/// 使用您的 [ChatController] 实例。
_chatContoller.setTypingIndicator = true; // 显示指示器
_chatContoller.setTypingIndicator = false; // 隐藏指示器
步骤13:添加带有LinkPreviewConfiguration类的链接预览配置
ChatView2(
  ...
  chatBubbleConfig: ChatBubbleConfiguration(
    linkPreviewConfig: LinkPreviewConfiguration(
      linkStyle: const TextStyle(
        color: Colors.white,
        decoration: TextDecoration.underline,
      ),
      backgroundColor: Colors.grey,
      bodyStyle: const TextStyle(
        color: Colors.grey.shade200,
        fontSize:16,
      ),
      titleStyle: const TextStyle(
        color: Colors.black,
        fontSize:20,
      ),
    ),
  )
  ...
)
步骤13:添加分页
ChatView2(
  ...
  isLastPage: false,
  featureActiveConfig: FeatureActiveConfig(
    enablePagination: true,
  ),
  loadMoreData: chatController.loadMoreData,
  ...
)
步骤14:添加图像选择器配置
ChatView2(
  ...
  sendMessageConfig: SendMessageConfiguration(
    enableCameraImagePicker: false,
    enableGalleryImagePicker: true,
    imagePickerIconsConfig: ImagePickerIconsConfiguration(
      cameraIconColor: Colors.black,
      galleryIconColor: Colors.black,
    )
  )
  ...
)
步骤15:添加ChatView2State定制
ChatView2(
  ...
  chatview2StateConfig: Chatview2StateConfiguration(
    loadingWidgetConfig: ChatView2StateWidgetConfiguration(
      loadingIndicatorColor: Colors.pink,
    ),
    onReloadButtonTap: () {},
  ),
  ...
)
步骤16:使用RepliedMsgAutoScrollConfig类设置自动滚动和高亮配置
ChatView2(
    ...
    repliedMsgAutoScrollConfig: RepliedMsgAutoScrollConfig(
      enableHighlightRepliedMsg: true,
      highlightColor: Colors.grey,
      highlightScale: 1.1,
    )
    ...
)
步骤17:当用户开始/停止在TextFieldConfiguration中输入时的回调
ChatView2(
    ...
      sendMessageConfig: SendMessageConfiguration(
          textFieldConfig: TextFieldConfiguration(
            onMessageTyping: (status) {
                // 发送正在输入/已输入状态给其他客户端
                // 您的代码在这里
            },
            compositionThresholdTime: const Duration(seconds: 1),
          ),
    ...
  )
)
步骤19:传递自定义Receipts构建器或处理与收据相关的事务,查看ReceiptsWidgetConfig中的outgoingChatBubbleConfig。
ChatView2(
   ...
      featureActiveConfig: const FeatureActiveConfig(
            /// 控制消息已读时间戳的可见性,默认为true
            lastSeenAgoBuilderVisibility: false,
            /// 控制消息[receiptsBuilder]的可见性
            receiptsBuilderVisibility: false),
       ChatBubbleConfiguration(
          inComingChatBubbleConfig: ChatBubble(
            onMessageRead: (message) {
              /// 发送您的消息收据给其他客户端
              debugPrint('Message Read');
            },

          ),
          outgoingChatBubbleConfig: ChatBubble(
              receiptsWidgetConfig: ReceiptsWidgetConfig(
                      /// 自定义收据构建器
                      receiptsBuilder: _customReceiptsBuilder,
                      /// 是否在所有消息中显示收据,还是只在最后一条消息上显示,类似于Instagram
                      showReceiptsIn: ShowReceiptsIn.lastMessage
              ),
            ),
        ),
  ...
)
如何使用
请参阅博客以更好地理解并进行基本实现。
此外,要查看完整的示例,请参阅example目录中的示例应用,或者在pub.dartlang.org的“Example”标签中查看。
主要贡献者
| 姓名 | 贡献者链接 |
|---|---|
| Mohamed Salem | GitHub |
| Vatsal Tanna | GitHub |
| Dhvanit Vaghani | GitHub |
| Ujas Majithiya | GitHub |
许可证
MIT License
Copyright (c) 2022 Simform Solutions
Permission is hereby granted, free of charge, to any person obtaining a copy
of this software and associated documentation files (the "Software"), to deal
in the Software without restriction, including without limitation the rights
to use, copy, modify, merge, publish, distribute, sublicense, and/or sell
copies of the Software, and to permit persons to whom the Software is
furnished to do so, subject to the following conditions:
The above copyright notice and this permission notice shall be included in all
copies or substantial portions of the Software.
THE SOFTWARE IS PROVIDED "AS IS", WITHOUT WARRANTY OF ANY KIND, EXPRESS OR
IMPLIED, INCLUDING BUT NOT LIMITED TO THE WARRANTIES OF MERCHANTABILITY,
FITNESS FOR A PARTICULAR PURPOSE AND NONINFRINGEMENT. IN NO EVENT SHALL THE
AUTHORS OR COPYRIGHT HOLDERS BE LIABLE FOR ANY CLAIM, DAMAGES OR OTHER
LIABILITY, WHETHER IN AN ACTION OF CONTRACT, TORT OR OTHERWISE, ARISING FROM,
OUT OF OR IN CONNECTION WITH THE SOFTWARE OR THE USE OR OTHER DEALINGS IN THE
SOFTWARE.
完整示例代码
import 'package:chatview3/chatview3.dart';
import 'package:example/data.dart';
import 'package:example/models/theme.dart';
import 'package:flutter/material.dart';
import 'package:intl/date_symbol_data_local.dart';

void main() {
  initializeDateFormatting("ar", null).then((_) {
    runApp(const Example());
  });
}

class Example extends StatelessWidget {
  const Example({Key? key}) : super(key: key);

  [@override](/user/override)
  Widget build(BuildContext context) {
    return MaterialApp(
      title: 'Flutter Chat UI Demo',
      debugShowCheckedModeBanner: false,
      theme: ThemeData(
        primaryColor: const Color(0xffEE5366),
        colorScheme: ColorScheme.fromSwatch(accentColor: const Color(0xffEE5366)),
      ),
      home: const ChatScreen(),
    );
  }
}

class ChatScreen extends StatefulWidget {
  const ChatScreen({Key? key}) : super(key: key);

  [@override](/user/override)
  State<ChatScreen> createState() => _ChatScreenState();
}

class _ChatScreenState extends State<ChatScreen> {
  AppTheme theme = LightTheme();
  bool isDarkTheme = false;
  final currentUser = ChatUser(
    id: '1',
    name: 'Flutter',
    profilePhoto: Data.profileImage,
  );
  final _chatController = ChatController(
    initialMessageList: Data.messageList,
    scrollController: ScrollController(),
    chatUsers: [
      ChatUser(
        id: '2',
        name: 'Simform',
        profilePhoto: Data.profileImage,
      ),
      ChatUser(
        id: '3',
        name: 'Jhon',
        profilePhoto: Data.profileImage,
      ),
      ChatUser(
        id: '4',
        name: 'Mike',
        profilePhoto: Data.profileImage,
      ),
      ChatUser(
        id: '5',
        name: 'Rich',
        profilePhoto: Data.profileImage,
      ),
    ],
  );

  void _showHideTypingIndicator() {
    _chatController.setTypingIndicator = !_chatController.showTypingIndicator;
  }

  [@override](/user/override)
  Widget build(BuildContext context) {
    return Scaffold(
      body: ChatView2(
        currentUser: currentUser,
        chatController: _chatController,
        onSendTap: _onSendTap,
        local: "ar",
        featureActiveConfig: const FeatureActiveConfig(
          lastSeenAgoBuilderVisibility: true,
          receiptsBuilderVisibility: true,
        ),
        chatview2State: ChatView2State.hasMessages,
        chatview2StateConfig: Chatview2StateConfiguration(
          loadingWidgetConfig: ChatView2StateWidgetConfiguration(
            loadingIndicatorColor: theme.outgoingChatBubbleColor,
          ),
          onReloadButtonTap: () {},
        ),
        typeIndicatorConfig: TypeIndicatorConfiguration(
          flashingCircleBrightColor: theme.flashingCircleBrightColor,
          flashingCircleDarkColor: theme.flashingCircleDarkColor,
        ),
        appBar: ChatView2AppBar(
          elevation: theme.elevation,
          backGroundColor: theme.appBarColor,
          profilePicture: Data.profileImage,
          backArrowColor: theme.backArrowColor,
          chatTitle: "Chat view",
          chatTitleTextStyle: TextStyle(
            color: theme.appBarTitleTextStyle,
            fontWeight: FontWeight.bold,
            fontSize: 18,
            letterSpacing: 0.25,
          ),
          userStatus: "online",
          userStatusTextStyle: const TextStyle(color: Colors.grey),
          actions: [
            IconButton(
              onPressed: _onThemeIconTap,
              icon: Icon(
                isDarkTheme
                    ? Icons.brightness_4_outlined
                    : Icons.dark_mode_outlined,
                color: theme.themeIconColor,
              ),
            ),
            IconButton(
              tooltip: 'Toggle TypingIndicator',
              onPressed: _showHideTypingIndicator,
              icon: Icon(
                Icons.keyboard,
                color: theme.themeIconColor,
              ),
            ),
          ],
        ),
        chatBackgroundConfig: ChatBackgroundConfiguration(
          messageTimeIconColor: theme.messageTimeIconColor,
          messageTimeTextStyle: TextStyle(color: theme.messageTimeTextColor),
          defaultGroupSeparatorConfig: DefaultGroupSeparatorConfiguration(
            textStyle: TextStyle(
              color: theme.chatHeaderColor,
              fontSize: 17,
            ),
          ),
          backgroundColor: theme.backgroundColor,
        ),
        sendMessageConfig: SendMessageConfiguration(
          imagePickerIconsConfig: ImagePickerIconsConfiguration(
            cameraIconColor: theme.cameraIconColor,
            galleryIconColor: theme.galleryIconColor,
          ),
          replyMessageColor: theme.replyMessageColor,
          defaultSendButtonColor: theme.sendButtonColor,
          replyDialogColor: theme.replyDialogColor,
          replyTitleColor: theme.replyTitleColor,
          textFieldBackgroundColor: theme.textFieldBackgroundColor,
          closeIconColor: theme.closeIconColor,
          textFieldConfig: TextFieldConfiguration(
            onMessageTyping: (status) {
              /// Do with status
              debugPrint(status.toString());
            },
            compositionThresholdTime: const Duration(seconds: 1),
            textStyle: TextStyle(color: theme.textFieldTextColor),
          ),
          micIconColor: theme.replyMicIconColor,
          voiceRecordingConfiguration: VoiceRecordingConfiguration(
            backgroundColor: theme.waveformBackgroundColor,
            recorderIconColor: theme.recordIconColor,
            waveStyle: WaveStyle(
              showMiddleLine: false,
              waveColor: theme.waveColor ?? Colors.white,
              extendWaveform: true,
            ),
          ),
        ),
        chatBubbleConfig: ChatBubbleConfiguration(
          outgoingChatBubbleConfig: ChatBubble(
            linkPreviewConfig: LinkPreviewConfiguration(
              backgroundColor: theme.linkPreviewOutgoingChatColor,
              bodyStyle: theme.outgoingChatLinkBodyStyle,
              titleStyle: theme.outgoingChatLinkTitleStyle,
            ),
            receiptsWidgetConfig:
                const ReceiptsWidgetConfig(showReceiptsIn: ShowReceiptsIn.all),
            color: theme.outgoingChatBubbleColor,
          ),
          inComingChatBubbleConfig: ChatBubble(
            linkPreviewConfig: LinkPreviewConfiguration(
              linkStyle: TextStyle(
                color: theme.inComingChatBubbleTextColor,
                decoration: TextDecoration.underline,
              ),
              backgroundColor: theme.linkPreviewIncomingChatColor,
              bodyStyle: theme.incomingChatLinkBodyStyle,
              titleStyle: theme.incomingChatLinkTitleStyle,
            ),
            textStyle: TextStyle(color: theme.inComingChatBubbleTextColor),
            onMessageRead: (message) {
              /// 发送您的消息收据给其他客户端
              debugPrint('Message Read');
            },
            senderNameTextStyle:
                TextStyle(color: theme.inComingChatBubbleTextColor),
            color: theme.inComingChatBubbleColor,
          ),
        ),
        replyPopupConfig: ReplyPopupConfiguration(
          backgroundColor: theme.replyPopupColor,
          buttonTextStyle: TextStyle(color: theme.replyPopupButtonColor),
          topBorderColor: theme.replyPopupTopBorderColor,
        ),
        reactionPopupConfig: ReactionPopupConfiguration(
          shadow: BoxShadow(
            color: isDarkTheme ? Colors.black54 : Colors.grey.shade400,
            blurRadius: 20,
          ),
          backgroundColor: theme.reactionPopupColor,
        ),
        messageConfig: MessageConfiguration(
          messageReactionConfig: MessageReactionConfiguration(
            backgroundColor: theme.messageReactionBackGroundColor,
            borderColor: theme.messageReactionBackGroundColor,
            reactedUserCountTextStyle:
                TextStyle(color: theme.inComingChatBubbleTextColor),
            reactionCountTextStyle:
                TextStyle(color: theme.inComingChatBubbleTextColor),
            reactionsBottomSheetConfig: ReactionsBottomSheetConfiguration(
              backgroundColor: theme.backgroundColor,
              reactedUserTextStyle: TextStyle(
                color: theme.inComingChatBubbleTextColor,
              ),
              reactionWidgetDecoration: BoxDecoration(
                color: theme.inComingChatBubbleColor,
                boxShadow: [
                  BoxShadow(
                    color: isDarkTheme ? Colors.black12 : Colors.grey.shade200,
                    offset: const Offset(0, 20),
                    blurRadius: 40,
                  )
                ],
                borderRadius: BorderRadius.circular(10),
              ),
            ),
          ),
          imageMessageConfig: ImageMessageConfiguration(
            margin: const EdgeInsets.symmetric(horizontal: 12, vertical: 15),
            shareIconConfig: ShareIconConfiguration(
              defaultIconBackgroundColor: theme.shareIconBackgroundColor,
              defaultIconColor: theme.shareIconColor,
            ),
          ),
        ),
        profileCircleConfig: const ProfileCircleConfiguration(
          profileImageUrl: Data.profileImage,
        ),
        repliedMessageConfig: RepliedMessageConfiguration(
          backgroundColor: theme.repliedMessageColor,
          verticalBarColor: theme.verticalBarColor,
          repliedMsgAutoScrollConfig: RepliedMsgAutoScrollConfig(
            enableHighlightRepliedMsg: true,
            highlightColor: Colors.pinkAccent.shade100,
            highlightScale: 1.1,
          ),
          textStyle: const TextStyle(
            color: Colors.white,
            fontWeight: FontWeight.bold,
            letterSpacing: 0.25,
          ),
          replyTitleTextStyle: TextStyle(color: theme.repliedTitleTextColor),
        ),
        swipeToReplyConfig: SwipeToReplyConfiguration(
          replyIconColor: theme.swipeToReplyIconColor,
        ),
      ),
    );
  }

  void _onSendTap(
    String message,
    ReplyMessage replyMessage,
    MessageType messageType,
  ) {
    final id = int.parse(Data.messageList.last.id) + 1;
    _chatController.addMessage(
      Message(
        id: id.toString(),
        createdAt: DateTime.now(),
        message: message,
        sendBy: currentUser.id,
        replyMessage: replyMessage,
        messageType: messageType,
      ),
    );
    Future.delayed(const Duration(milliseconds: 300), () {
      _chatController.initialMessageList.last.setStatus =
          MessageStatus.undelivered;
    });
    Future.delayed(const Duration(seconds: 1), () {
      _chatController.initialMessageList.last.setStatus = MessageStatus.read;
    });
  }

  void _onThemeIconTap() {
    setState(() {
      if (isDarkTheme) {
        theme = LightTheme();
        isDarkTheme = false;
      } else {
        theme = DarkTheme();
        isDarkTheme = true;
      }
    });
  }
}
更多关于Flutter聊天界面插件chatview3的使用的实战系列教程也可以访问 https://www.itying.com/category-92-b0.html


更多关于Flutter聊天界面插件chatview3的使用的实战系列教程也可以访问 https://www.itying.com/category-92-b0.html
当然,下面是一个关于如何在Flutter项目中使用chat_view_3插件来创建一个聊天界面的代码示例。请注意,实际使用时,你需要确保已经在pubspec.yaml文件中添加了chat_view_3的依赖,并运行flutter pub get来安装它。
首先,确保你的pubspec.yaml文件包含以下依赖:
dependencies:
  flutter:
    sdk: flutter
  chat_view_3: ^x.y.z  # 替换为实际的版本号
然后,你可以按照以下步骤来创建一个简单的聊天界面:
- 导入必要的包:
import 'package:flutter/material.dart';
import 'package:chat_view_3/chat_view.dart';
- 定义聊天数据模型:
class ChatMessage {
  String sender;
  String message;
  bool isMe;
  DateTime timestamp;

  ChatMessage({
    required this.sender,
    required this.message,
    required this.isMe,
    required this.timestamp,
  });
}
- 创建聊天消息列表:
List<ChatMessage> chatMessages = [
  ChatMessage(
    sender: "User1",
    message: "Hello!",
    isMe: false,
    timestamp: DateTime.now().subtract(Duration(minutes: 1)),
  ),
  ChatMessage(
    sender: "You",
    message: "Hi there!",
    isMe: true,
    timestamp: DateTime.now(),
  ),
  // 可以添加更多消息
];
- 构建聊天界面:
void main() {
  runApp(MyApp());
}

class MyApp extends StatelessWidget {
  @override
  Widget build(BuildContext context) {
    return MaterialApp(
      home: ChatScreen(chatMessages: chatMessages),
    );
  }
}

class ChatScreen extends StatelessWidget {
  final List<ChatMessage> chatMessages;

  ChatScreen({required this.chatMessages});

  @override
  Widget build(BuildContext context) {
    return Scaffold(
      appBar: AppBar(
        title: Text("Chat"),
      ),
      body: ChatView(
        messages: chatMessages.map((message) => ChatMessageModel(
          id: message.hashCode.toString(),
          sender: message.sender,
          text: message.message,
          time: message.timestamp.toLocal().toString(),
          isMe: message.isMe,
          avatar: message.isMe ? 'assets/your_avatar.png' : 'assets/other_avatar.png', // 替换为你的头像路径
        )).toList(),
        onMessageSent: (message) {
          // 当发送消息时触发的回调
          print("Message sent: $message");
        },
        onMessageLongPressed: (message) {
          // 当长按消息时触发的回调
          print("Message long pressed: $message");
        },
        onMessageTap: (message) {
          // 当点击消息时触发的回调
          print("Message tapped: $message");
        },
        inputFieldPlaceholder: "Type a message...",
        onSendPressed: (text) {
          // 当点击发送按钮时触发的回调
          if (text.isNotEmpty) {
            setState(() {
              chatMessages.add(ChatMessage(
                sender: "You",
                message: text,
                isMe: true,
                timestamp: DateTime.now(),
              ));
              // 清除输入框
              // 注意:这里不能直接使用setState来更新UI,因为ChatScreen是无状态的。
              // 你需要在父组件中管理这个状态,或者将ChatScreen改为StatefulWidget。
            });
          }
        },
      ),
    );
  }
}
在这个例子中,ChatMessageModel是chat_view_3插件提供的数据模型,用于传递给ChatView。你需要根据你的实际数据格式来映射到ChatMessageModel。
请注意,为了简化示例,这里直接将ChatScreen定义为StatelessWidget,但在实际应用中,你可能需要将其改为StatefulWidget以正确管理聊天消息的状态。
此外,确保你已经准备好头像图片,并将路径替换为实际的图片路径。
这个示例应该能帮助你快速上手chat_view_3插件,并创建一个基本的聊天界面。如果你有更复杂的需求,可以查阅chat_view_3的官方文档以获取更多高级用法。