


Flutter综合下拉选择插件comprehensive_dropdown的使用
Flutter综合下拉选择插件comprehensive_dropdown的使用
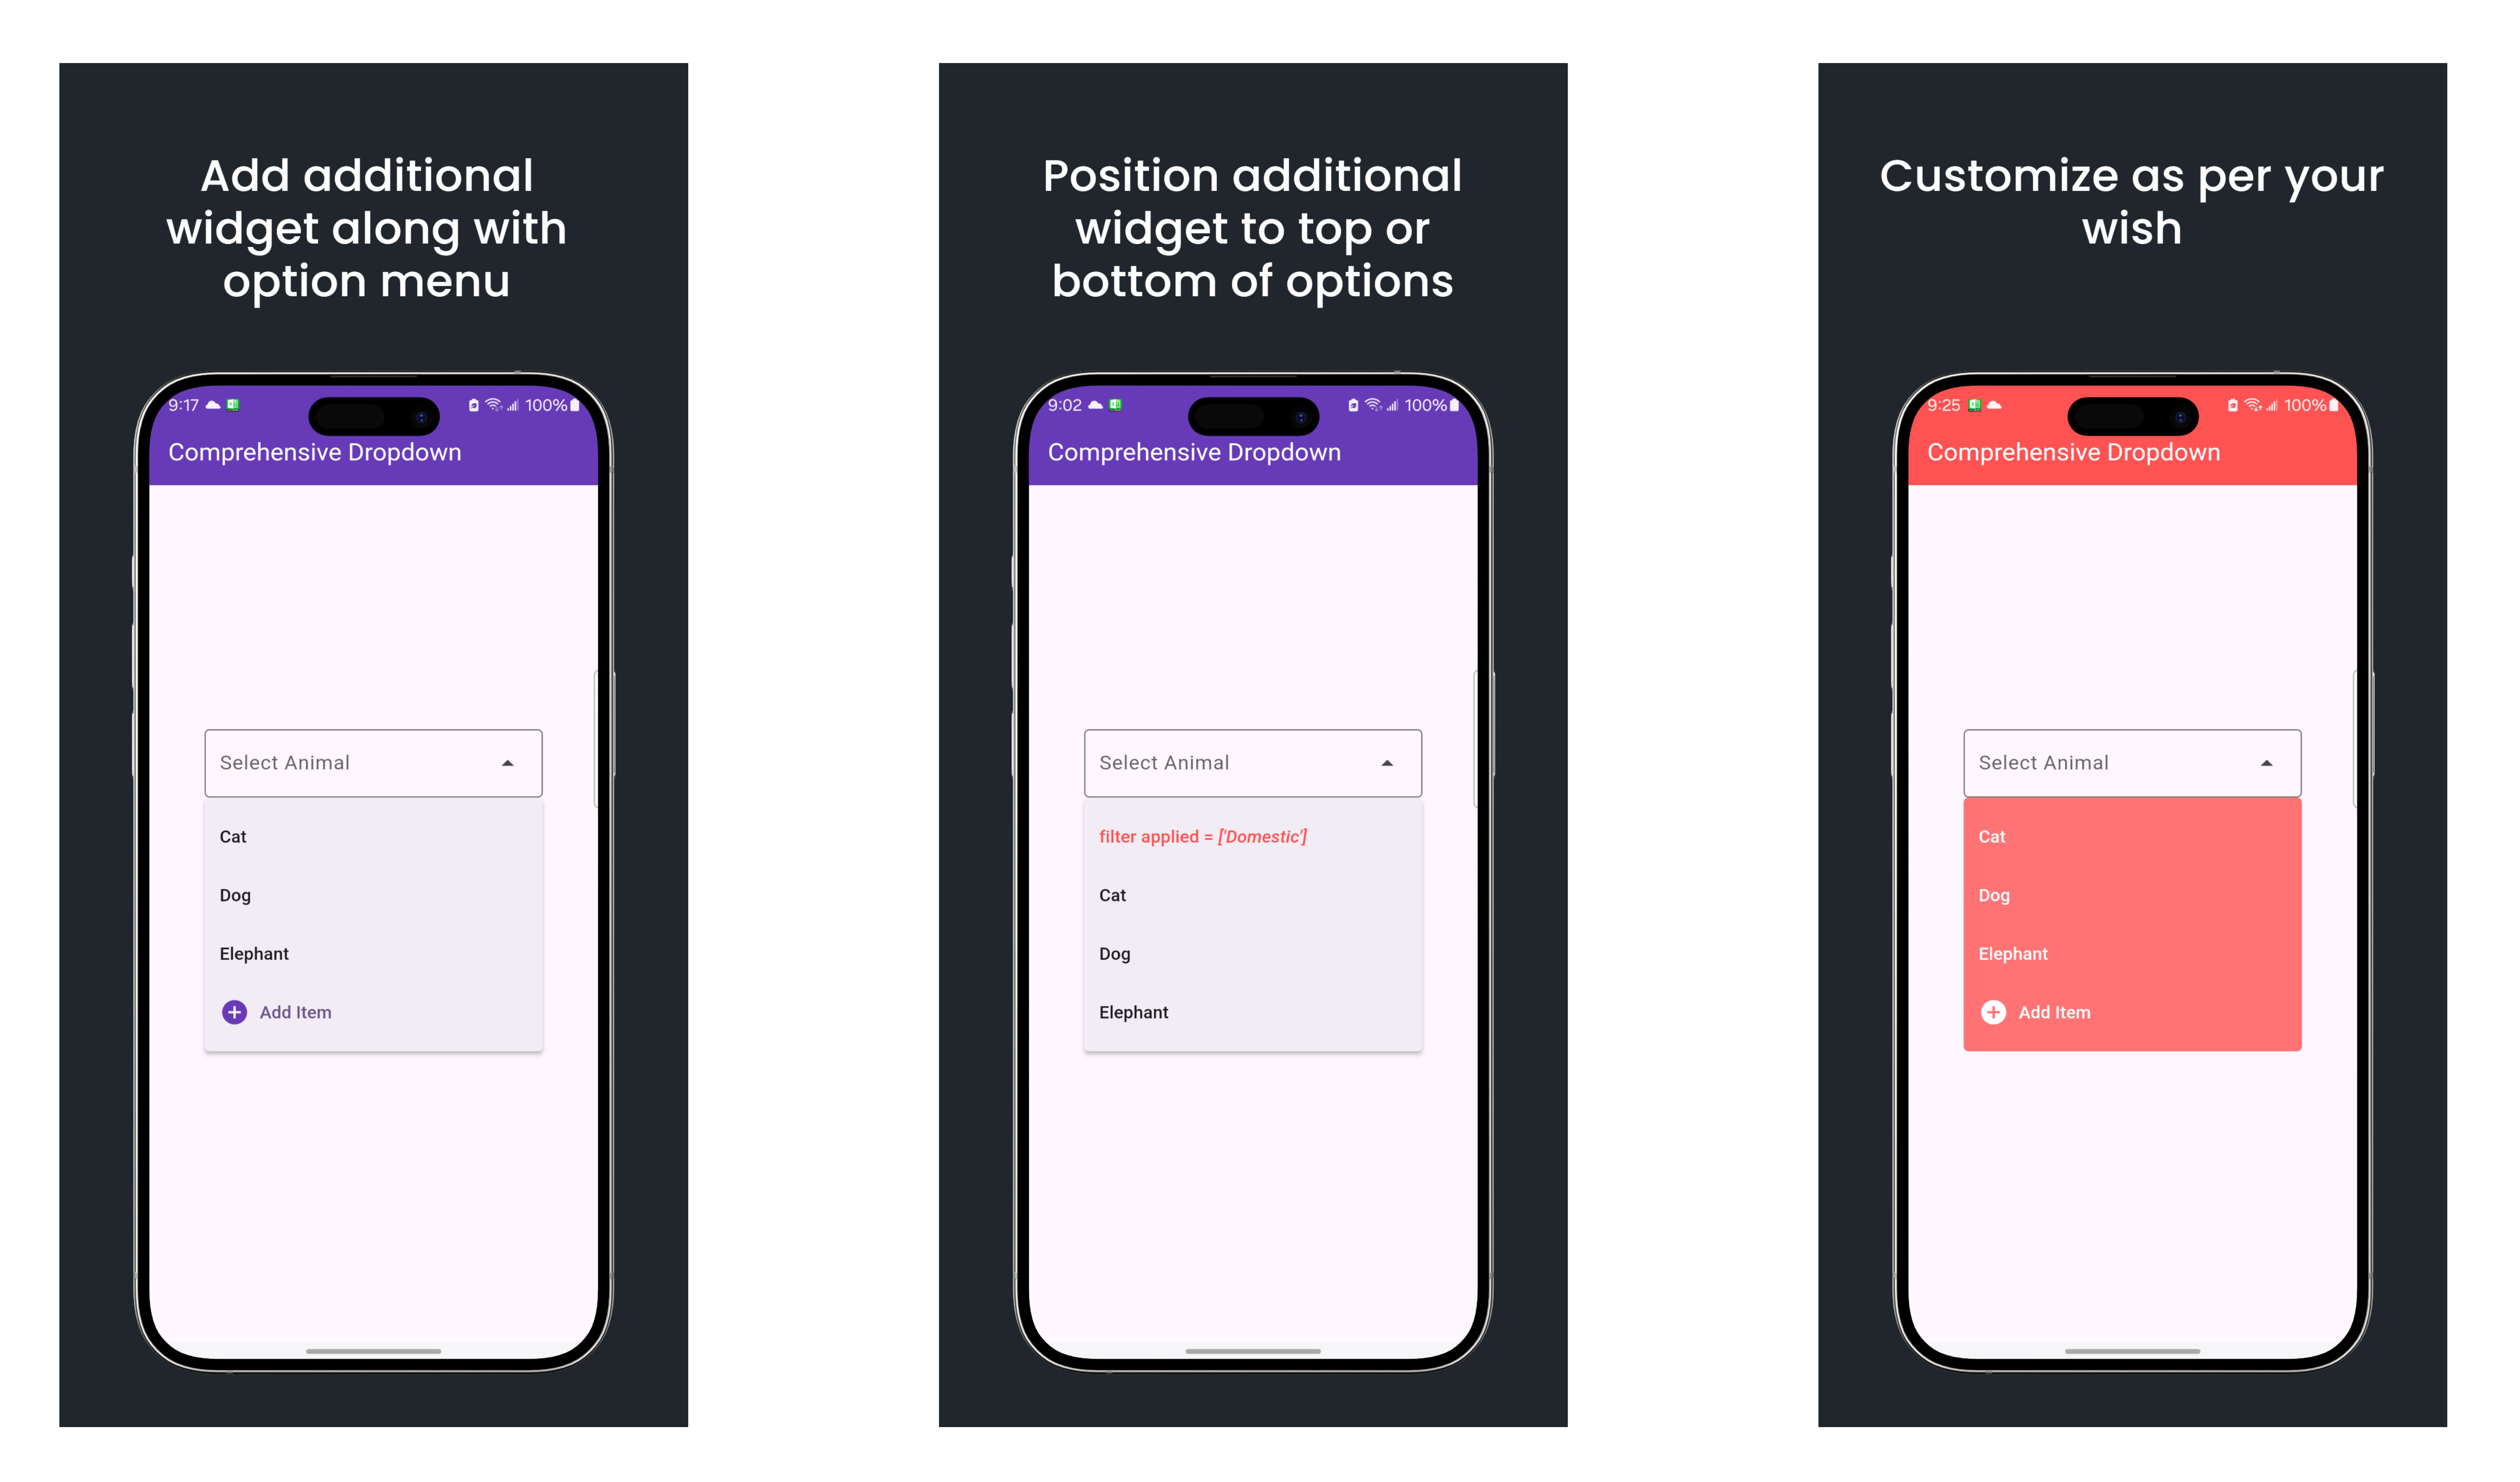
comprehensive_dropdown 是一个具有额外功能的下拉菜单小部件。🚀
开始使用
要使用此插件,在 pubspec.yaml 文件中添加 comprehensive_dropdown 作为依赖项。
import 'package:comprehensive_dropdown/comprehensive_dropdown.dart';
使用说明
添加额外的小部件到下拉菜单
你可以使用它来添加一个按钮以添加或创建项目。
CDropdownMenu(
    margin: EdgeInsets.symmetric(horizontal: 45),
    enableFilter: true,
    focusNode: FocusNode(),
    actionWidgetPosition: ActionWidgetPosition.bottom,
    actionWidget: TextButton.icon(
    onPressed: () {
        log('action worked');
    },
    label: const Text('Add Item'),
    icon: Icon(Icons.add),
    ),
    menuEntries: const [
        CMenuEntry(value: "Cat", label: 'Cat'),
        CMenuEntry(value: "Dog", label: 'Dog'),
        CMenuEntry(value: "Elephant", label: 'Elephant'),
    ],
)
或者为选项添加描述:
CDropdownMenu(
    margin: EdgeInsets.symmetric(horizontal: 45),
    enableFilter: true,
    focusNode: FocusNode(),
    actionWidgetPosition: ActionWidgetPosition.top,
    actionWidget: Text("filter applied = [[category='Animals']]"),
    menuEntries: const [
        CMenuEntry(value: "Cat", label: 'Cat'),
        CMenuEntry(value: "Dog", label: 'Dog'),
        CMenuEntry(value: "Elephant", label: 'Elephant'),
    ],
)
完整示例代码
以下是一个完整的示例代码,展示了如何在应用中使用 comprehensive_dropdown 插件。
import 'dart:developer';

import 'package:comprehensive_dropdown/comprehensive_dropdown.dart';
import 'package:flutter/cupertino.dart';
import 'package:flutter/material.dart';

void main() {
  runApp(const MyApp());
}

class MyApp extends StatelessWidget {
  const MyApp({super.key});

  [@override](/user/override)
  Widget build(BuildContext context) {
    return MaterialApp(
      debugShowCheckedModeBanner: false,
      title: 'Comprehensive Dropdown',
      theme: ThemeData(
        colorScheme: ColorScheme.fromSeed(seedColor: Colors.deepPurple),
        useMaterial3: true,
      ),
      home: const ExampleWidget(),
    );
  }
}

class ExampleWidget extends StatefulWidget {
  const ExampleWidget({super.key});

  [@override](/user/override)
  State<ExampleWidget> createState() => _ExampleWidgetState();
}

class _ExampleWidgetState extends State<ExampleWidget> {
  [@override](/user/override)
  Widget build(BuildContext context) {
    return Scaffold(
      appBar: AppBar(
        backgroundColor: Colors.redAccent,
        title: const Text(
          "Comprehensive Dropdown",
          style: TextStyle(fontSize: 20, color: Colors.white),
        ),
      ),
      body: Padding(
        padding: const EdgeInsets.only(top: 200.0),
        child: CDropdownMenu(
          margin: const EdgeInsets.symmetric(horizontal: 45),
          enableFilter: false,
          actionWidgetPosition: ActionWidgetPosition.bottom,
          hintText: "Select Animal",
          actionWidget: TextButton.icon(
            style: TextButton.styleFrom(padding: EdgeInsetsDirectional.zero),
              icon: const Icon(
                Icons.add_circle,
                color: Colors.white,
              ),
              onPressed: () {},
              label: const Text("Add Item", style: TextStyle(color: Colors.white),)),
          trailingIcon: const Icon(
            CupertinoIcons.chevron_down,
            size: 18,
          ),
          menuStyle: MenuStyle(
              shadowColor: const WidgetStatePropertyAll<Color>(Colors.transparent),
              backgroundColor: WidgetStatePropertyAll<Color>(Colors.redAccent.withOpacity(0.8))),
          menuEntries: const [
            CMenuEntry(value: "Cat", label: 'Cat', labelWidget: Text("Cat", style: TextStyle(color: Colors.white),)),
            CMenuEntry(value: "Dog", label: 'Dog', labelWidget: Text("Dog", style: TextStyle(color: Colors.white),)),
            CMenuEntry(value: "Elephant", label: 'Elephant', labelWidget: Text("Elephant", style: TextStyle(color: Colors.white),)),
          ],
        ),
      ),
    );
  }
}
更多关于Flutter综合下拉选择插件comprehensive_dropdown的使用的实战系列教程也可以访问 https://www.itying.com/category-92-b0.html


更多关于Flutter综合下拉选择插件comprehensive_dropdown的使用的实战系列教程也可以访问 https://www.itying.com/category-92-b0.html
当然,以下是如何在Flutter项目中使用comprehensive_dropdown插件的一个示例代码案例。comprehensive_dropdown是一个功能强大的下拉选择插件,它提供了多种样式和配置选项,以满足不同的需求。
首先,确保你的pubspec.yaml文件中已经添加了comprehensive_dropdown依赖:
dependencies:
  flutter:
    sdk: flutter
  comprehensive_dropdown: ^x.y.z  # 请替换为最新版本号
然后,运行flutter pub get来安装依赖。
接下来,你可以在你的Dart文件中使用ComprehensiveDropdown组件。以下是一个完整的示例,展示了如何配置和使用comprehensive_dropdown:
import 'package:flutter/material.dart';
import 'package:comprehensive_dropdown/comprehensive_dropdown.dart';

void main() {
  runApp(MyApp());
}

class MyApp extends StatelessWidget {
  @override
  Widget build(BuildContext context) {
    return MaterialApp(
      title: 'Flutter Comprehensive Dropdown Demo',
      theme: ThemeData(
        primarySwatch: Colors.blue,
      ),
      home: MyHomePage(),
    );
  }
}

class MyHomePage extends StatefulWidget {
  @override
  _MyHomePageState createState() => _MyHomePageState();
}

class _MyHomePageState extends State<MyHomePage> {
  String? selectedValue;

  @override
  Widget build(BuildContext context) {
    List<CDDropdownMenuItem> dropdownMenuItems = [
      CDDropdownMenuItem(value: 'Option 1', displayValue: 'Option 1'),
      CDDropdownMenuItem(value: 'Option 2', displayValue: 'Option 2'),
      CDDropdownMenuItem(value: 'Option 3', displayValue: 'Option 3'),
    ];

    return Scaffold(
      appBar: AppBar(
        title: Text('Comprehensive Dropdown Demo'),
      ),
      body: Padding(
        padding: const EdgeInsets.all(16.0),
        child: ComprehensiveDropdown<String>(
          dropdownMenuItems: dropdownMenuItems,
          hint: Text('Select an option'),
          value: selectedValue,
          onChanged: (newValue) {
            setState(() {
              selectedValue = newValue;
            });
          },
          dropdownDecoration: BoxDecoration(
            borderRadius: BorderRadius.circular(8),
            color: Colors.white,
            boxShadow: [
              BoxShadow(
                color: Colors.grey.withOpacity(0.5),
                spreadRadius: 5,
                blurRadius: 7,
                offset: Offset(0, 3), // changes position of shadow
              ),
            ],
          ),
          dropdownButtonDecoration: BoxDecoration(
            borderRadius: BorderRadius.circular(8),
            color: Colors.blue,
          ),
          dropdownButtonIconData: Icons.arrow_drop_down,
          dropdownButtonTextStyle: TextStyle(color: Colors.white),
          dropdownMenuItemTextStyle: TextStyle(color: Colors.black),
        ),
      ),
    );
  }
}
在这个示例中,我们做了以下几件事情:
-
定义下拉选项:
dropdownMenuItems列表包含了CDDropdownMenuItem对象,每个对象都有value和displayValue属性。 -
构建
ComprehensiveDropdown组件:dropdownMenuItems:传递下拉选项列表。hint:当下拉菜单未选中时显示的提示文本。value:当前选中的值。onChanged:当选项改变时的回调函数。dropdownDecoration:定义下拉菜单的装饰,比如边框、颜色和阴影。dropdownButtonDecoration:定义下拉按钮的装饰,比如边框和颜色。dropdownButtonIconData:下拉按钮的图标。dropdownButtonTextStyle和dropdownMenuItemTextStyle:分别定义下拉按钮和菜单项的文本样式。
你可以根据需要调整这些属性来满足你的具体需求。希望这个示例对你有所帮助!