


Flutter路径动画插件flutter_path_morph的使用
Flutter路径动画插件flutter_path_morph的使用

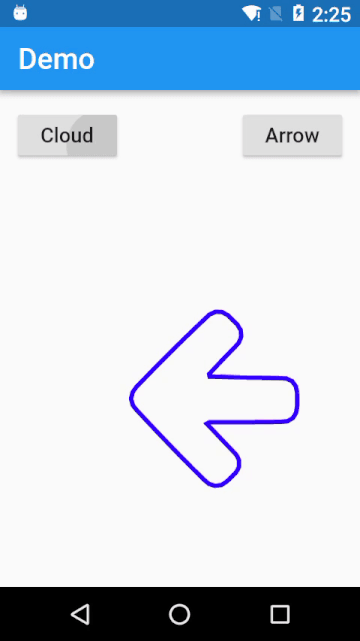
这是一个允许你在Flutter中平滑地将一个Path对象变形为另一个的包。你可以将其视为路径的补间动画。基本思想是取两个路径,源路径和目标路径,并逐渐移动源路径的点,直到它看起来完全像目标路径。
该包基于路径变形。
提示
使用path_drawing来处理SVG路径!
(请查看示例底部)
重要信息
此包目前仅允许你变形两个具有相同轮廓数的路径。你可以将轮廓视为不提起笔就能画出的一条线。例如,绘制三角形、圆形或正方形的路径只有一个轮廓。但绘制两个同心圆的路径将有两个轮廓。
使用方法
只需提供一个AnimationController和你想要变形的路径。
向前移动控制器以从路径1变形到路径2 <code>_controller.forward();</code>
向后移动控制器以从路径2变形到路径1 <code>_controller.reverse();</code>
MorphWidget(
  controller: _controller,
  path1: _path1,
  path2: _path2,
)
自定义组件
你可以使用PathMorphUtils来自定义你的组件。
首先,你需要使用PathMorphUtils.samplePaths()方法对两个路径进行采样,这将返回一个SampledPathData对象。
SampledPathData data = PathMorphUtils.samplePaths(path1, path2);
然后,调用PathMorphUtils.generateAnimations()方法为路径中的每个点创建动画。此方法需要一个AnimationController对象和一个SampledPathData对象作为参数。此外,它还期望你传递一个函数,该函数本身接受两个参数。在函数体内,你必须调用setState()并更新shiftedPoints列表的值,该列表存在于SampledPathData对象中。
AnimationController controller = AnimationController(vsync: this,
                                    duration: Duration(seconds: 1));

PathMorphUtils.generateAnimations(controller, data, (i,z) {
    setState((){
      data.shiftedPoints[i] = z;
    });
});
最后,在渲染变形动画时,你可以调用PathMorphUtils.generatePath()方法并将shiftedPoints列表传递给它。这将返回一个你可以绘制在画布上的Path对象。如果你使用的是CustomPainter对象,你将希望将其作为参数传递给它。
[@override](/user/override)
Widget build(BuildContext context) {
    return CustomPaint(painter: MyPainter(PathMorphUtils.generatePath(data)));
}
请务必查看示例项目以获得更好的理解。
示例代码
import 'package:flutter/material.dart';
import 'package:path_drawing/path_drawing.dart';
import 'package:flutter_path_morph/flutter_path_morph.dart';

void main() => runApp(const MyApp());

class MyApp extends StatefulWidget {
  const MyApp({super.key});

  [@override](/user/override)
  State<StatefulWidget> createState() => _MyApp();
}

class _MyApp extends State<MyApp> with SingleTickerProviderStateMixin {
  final _path1 = Path()
    ..moveTo(60, 200)
    ..lineTo(60, 150)
    ..lineTo(200, 150)
    ..lineTo(200, 200);
  final _path2 = Path()
    ..moveTo(60, 200)
    ..lineTo(90, 150)
    ..lineTo(150, 100)
    ..lineTo(180, 150)
    ..lineTo(250, 190)
    ..lineTo(250, 250);

  late final _controller =
      AnimationController(vsync: this, duration: const Duration(seconds: 1));

  [@override](/user/override)
  void initState() {
    super.initState();
    _controller.addStatusListener((status) {
      if (status == AnimationStatus.completed) {
        _controller.reverse();
      } else if (status == AnimationStatus.dismissed) {
        _controller.forward();
      }
    });
    _controller.forward();
  }

  [@override](/user/override)
  Widget build(BuildContext context) {
    return MaterialApp(
      home: Scaffold(
        body: Column(
          children: [
            Expanded(
              child: MorphWidget(
                controller: _controller,
                path1: _path1,
                path2: _path2,
              ),
            ),
            const Expanded(child: SvgMorphExample()),
          ],
        ),
      ),
    );
  }
}

class SvgMorphExample extends StatefulWidget {
  const SvgMorphExample({super.key});

  [@override](/user/override)
  State<SvgMorphExample> createState() => _SvgMorphExampleState();
}

class _SvgMorphExampleState extends State<SvgMorphExample> with TickerProviderStateMixin {
  final _homePath = parseSvgPathData(
      r'M61.44,0L0,60.18l14.99,7.87L61.04,19.7l46.85,48.36l14.99-7.87L61.44,0L61.44,0z M18.26,69.63L18.26,69.63 L61.5,26.38l43.11,43.25h0v0v42.43H73.12V82.09H49.49v29.97H18.26V69.63L18.26,69.63L18.26,69.63z');

  final _appleScaleMatrix4 = Matrix4.identity()..scale(0.2, 0.2);
  late final _applePath = parseSvgPathData(
          r'M380.844,297.529c0.787,84.751,74.349,112.954,75.164,113.314c-0.622,1.989-11.754,40.192-38.756,79.653 c-23.342,34.116-47.568,68.107-85.731,68.811c-37.499,0.691-49.557-22.237-92.429-22.237c-42.859,0-56.256,21.533-91.753,22.928 c-36.837,1.394-64.888-36.892-88.424-70.883C10.822,419.585-25.931,292.64,23.419,206.95 c24.516-42.554,68.328-69.501,115.882-70.192c36.173-0.69,70.316,24.336,92.429,24.336c22.099,0,63.59-30.096,107.208-25.676 c18.26,0.76,69.516,7.376,102.429,55.552C438.715,192.614,380.208,226.674,380.844,297.529 M310.369,89.418 C329.926,65.745,343.089,32.79,339.498,0c-28.19,1.133-62.278,18.785-82.498,42.445c-18.121,20.952-33.991,54.487-29.709,86.628 C258.712,131.504,290.811,113.106,310.369,89.418')
      .transform(_appleScaleMatrix4.storage);
  late final _controller =
      AnimationController(vsync: this, duration: const Duration(seconds: 1));

  [@override](/user/override)
  void initState() {
    super.initState();
    _controller.addStatusListener((status) {
      if (status == AnimationStatus.completed) {
        _controller.reverse();
      } else if (status == AnimationStatus.dismissed) {
        _controller.forward();
      }
    });
    _controller.forward();
  }

  [@override](/user/override)
  Widget build(BuildContext context) {
    return MorphWidget(
      controller: _controller,
      path1: _homePath,
      path2: _applePath,
    );
  }
}
更多关于Flutter路径动画插件flutter_path_morph的使用的实战系列教程也可以访问 https://www.itying.com/category-92-b0.html


更多关于Flutter路径动画插件flutter_path_morph的使用的实战系列教程也可以访问 https://www.itying.com/category-92-b0.html
当然,下面是一个关于如何在Flutter中使用flutter_path_morph插件来实现路径动画的示例代码。flutter_path_morph插件允许你在Flutter应用中创建复杂的路径动画,通过从一个路径平滑过渡到另一个路径。
首先,确保你的pubspec.yaml文件中已经添加了flutter_path_morph依赖:
dependencies:
  flutter:
    sdk: flutter
  flutter_path_morph: ^x.y.z  # 请替换为最新版本号
然后,运行flutter pub get来安装依赖。
接下来是一个完整的示例代码,展示了如何使用flutter_path_morph来创建一个简单的路径动画:
import 'package:flutter/material.dart';
import 'package:flutter_path_morph/flutter_path_morph.dart';

void main() {
  runApp(MyApp());
}

class MyApp extends StatelessWidget {
  @override
  Widget build(BuildContext context) {
    return MaterialApp(
      home: Scaffold(
        appBar: AppBar(
          title: Text('Flutter Path Morph Example'),
        ),
        body: Center(
          child: PathMorphExample(),
        ),
      ),
    );
  }
}

class PathMorphExample extends StatefulWidget {
  @override
  _PathMorphExampleState createState() => _PathMorphExampleState();
}

class _PathMorphExampleState extends State<PathMorphExample> with SingleTickerProviderStateMixin {
  late AnimationController _controller;
  late Animation<double> _animation;

  @override
  void initState() {
    super.initState();
    _controller = AnimationController(
      duration: const Duration(seconds: 2),
      vsync: this,
    )..repeat(reverse: true);

    _animation = Tween<double>(begin: 0, end: 1).animate(_controller);
  }

  @override
  void dispose() {
    _controller.dispose();
    super.dispose();
  }

  @override
  Widget build(BuildContext context) {
    return PathMorph(
      pathBuilder: (animationValue) {
        // 初始路径(动画开始时)
        final startPath = Path()
          ..moveTo(50, 50)
          ..lineTo(200, 50);

        // 结束路径(动画结束时)
        final endPath = Path()
          ..moveTo(50, 50)
          ..lineTo(100, 200)
          ..lineTo(200, 50)
          ..close();

        // 使用`lerpDouble`来在路径之间插值
        if (animationValue == 0.0) {
          return startPath;
        } else if (animationValue == 1.0) {
          return endPath;
        } else {
          // 在这里你可以使用更复杂的插值逻辑,但为了简单起见,我们仅展示基本用法
          // 注意:实际应用中,你可能需要自定义插值逻辑来生成中间路径
          return Path()
            ..moveTo(lerpDouble(50, 100, animationValue), lerpDouble(50, 50, animationValue))
            ..lineTo(lerpDouble(200, 100, animationValue), lerpDouble(50, 200, animationValue))
            ..lineTo(lerpDouble(200, 200, animationValue), lerpDouble(50, 50, animationValue))
            ..close();
        }
      },
      animation: _animation,
      child: CustomPaint(
        size: Size(300, 300),
        painter: PathPainter(
          color: Colors.blue,
          strokeWidth: 4.0,
        ),
      ),
    );
  }
}

class PathPainter extends CustomPainter {
  final Color color;
  final double strokeWidth;

  PathPainter({required this.color, required this.strokeWidth});

  @override
  void paint(Canvas canvas, Size size) {
    final paint = Paint()
      ..color = color
      ..strokeWidth = strokeWidth
      ..style = PaintingStyle.stroke;

    canvas.drawPath(path, paint);
  }

  @override
  bool shouldRepaint(covariant CustomPainter oldDelegate) {
    return false;
  }

  late Path path;

  @override
  void didChangeDependencies() {
    super.didChangeDependencies();
    // 在这里你可以根据依赖项更新路径,但在这个例子中,路径是通过`PathMorph`的`pathBuilder`动态生成的
  }
}
注意:
- 在上面的代码中,
lerpDouble函数用于在两个值之间线性插值,但直接用于路径插值可能不够精确。实际应用中,你可能需要更复杂的逻辑来生成中间路径。 PathPainter是一个简单的自定义绘制类,用于绘制路径。在这个例子中,它主要用于展示如何结合PathMorph使用。- 路径动画是通过
AnimationController和Tween控制的,PathMorph会根据动画值调用pathBuilder来生成当前路径。
这个示例展示了基本的用法,你可以根据需求进一步自定义和扩展。