Flutter忙碌状态指示插件busy的使用
Flutter忙碌状态指示插件busy的使用
介绍
busy 是一个专注于处理忙碌状态的 Flutter 包。
开始使用

功能
- 在
State对象中添加了一个isBusy属性。 - 添加了
startBusyContext方法,该方法可以自动管理isBusy属性的状态。 BusyScaffold:带有自动管理忙碌状态的scaffold。BusyCupertinoScaffold:带有自动管理忙碌状态的cupertino scaffold。BusyWidget:带有自动管理忙碌状态的widget。- 不依赖任何外部包,放心使用。
使用
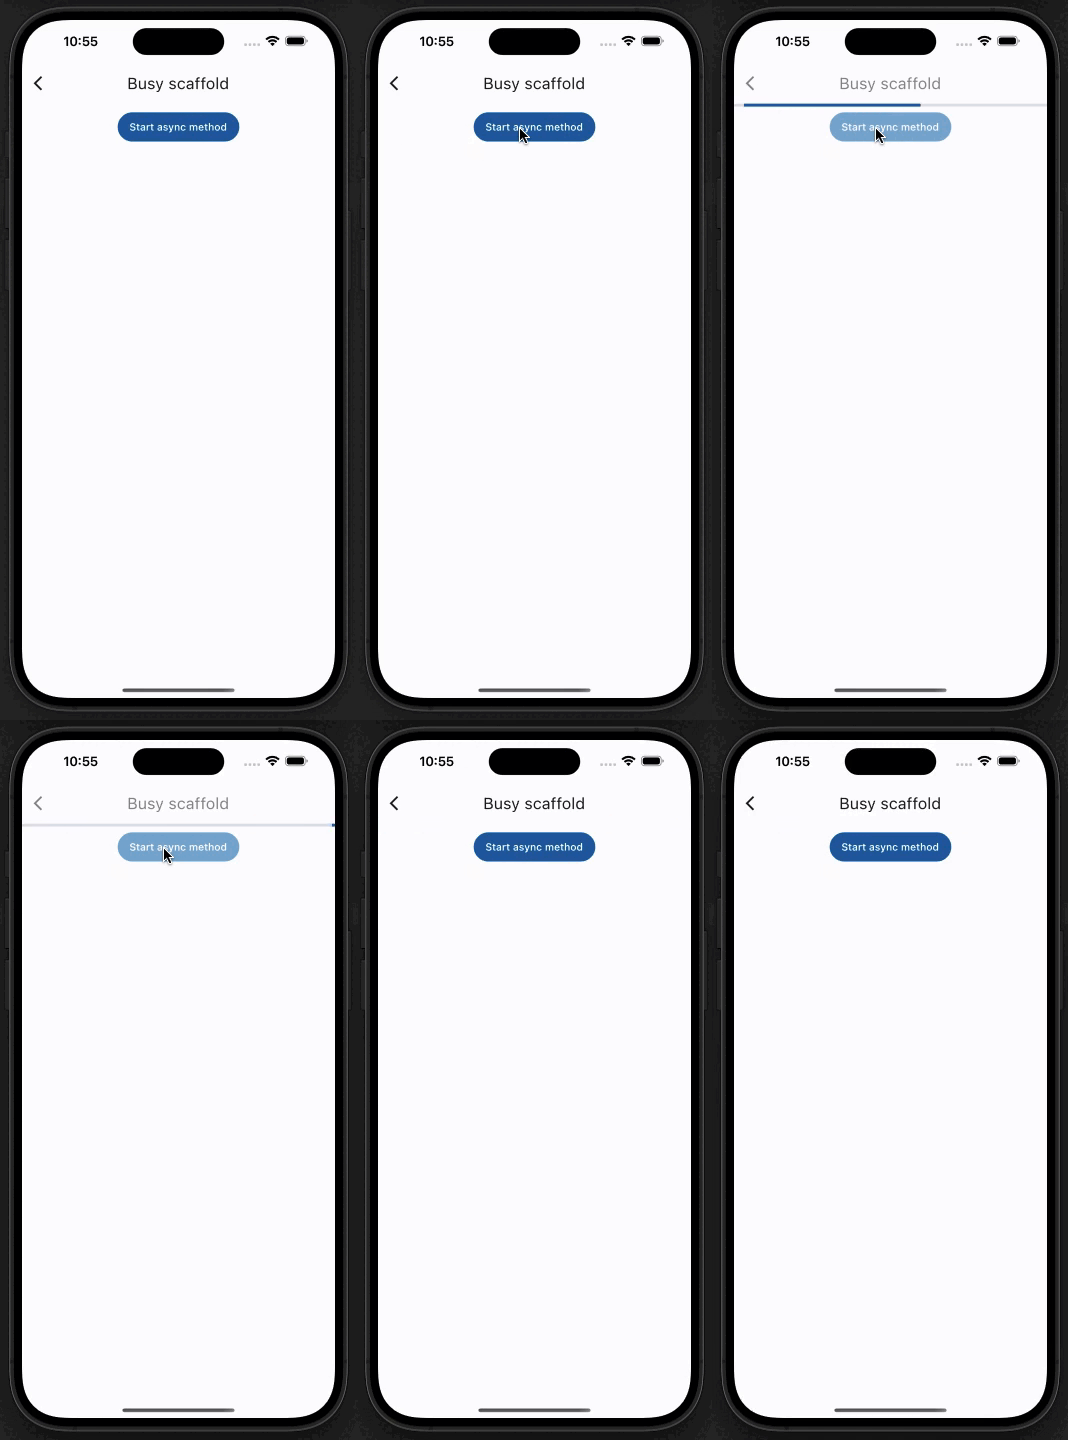
BusyScaffold
在你的 Material 应用程序中使用此小部件。

class _BusyScaffoldPageState extends State<BusyScaffoldPage> {
  [@override](/user/override)
  Widget build(BuildContext context) {
    return BusyScaffold(
      isBusy: isBusy,
      scaffold: Scaffold(
        appBar: AppBar(
          title: const Text("Busy scaffold"),
        ),
        body: SafeArea(
          child: Center(
            child: Column(
              mainAxisAlignment: MainAxisAlignment.start,
              children: [
                const SizedBox(height: 8),
                FilledButton(
                  onPressed: () {
                    startBusyContext(() async {
                      await Future.delayed(const Duration(seconds: 2));
                    });
                  },
                  child: Text("Start async method"),
                ),
              ],
            ),
          ),
        ),
      ),
    );
  }
}
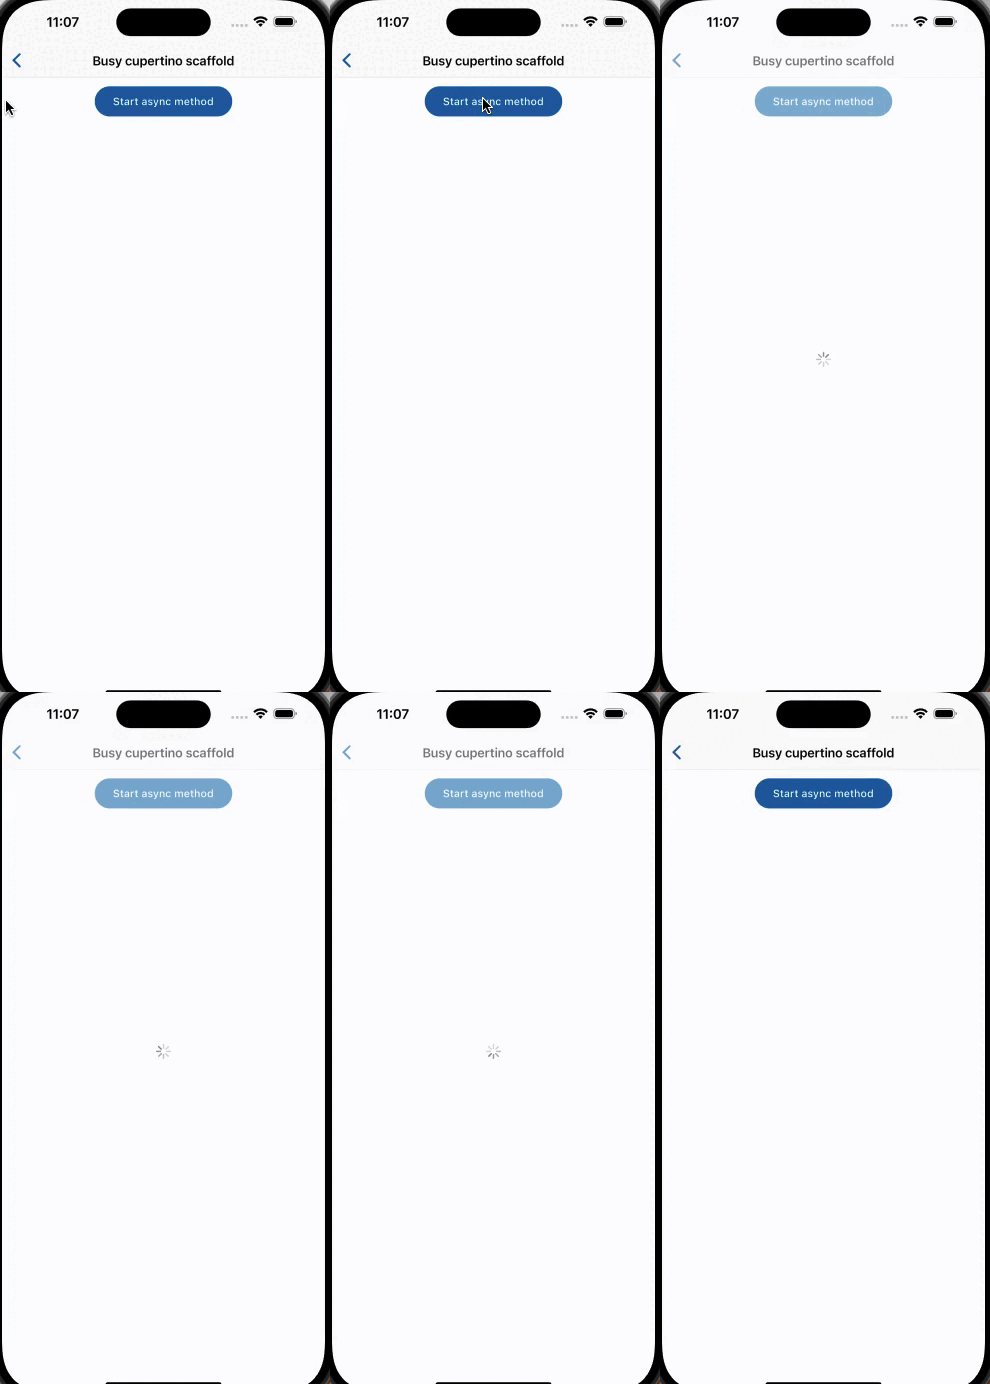
BusyCupertinoScaffold
在你的 iOS 应用程序中使用此小部件。

class _BusyCupertinoScaffoldPageState extends State<BusyCupertinoScaffoldPage> {
  [@override](/user/override)
  Widget build(BuildContext context) {
    return BusyCupertinoScaffold(
      isBusy: isBusy,
      scaffold: CupertinoPageScaffold(
        navigationBar: const CupertinoNavigationBar(
          middle: Text("Busy cupertino scaffold"),
        ),
        child: SafeArea(
          child: Center(
            child: Column(
              mainAxisAlignment: MainAxisAlignment.start,
              children: [
                const SizedBox(height: 8),
                FilledButton(
                  onPressed: () {
                    startBusyContext(() async {
                      await Future.delayed(const Duration(seconds: 2));
                    });
                  },
                  child: const Text("Start async method"),
                ),
              ],
            ),
          ),
        ),
      ),
    );
  }
}
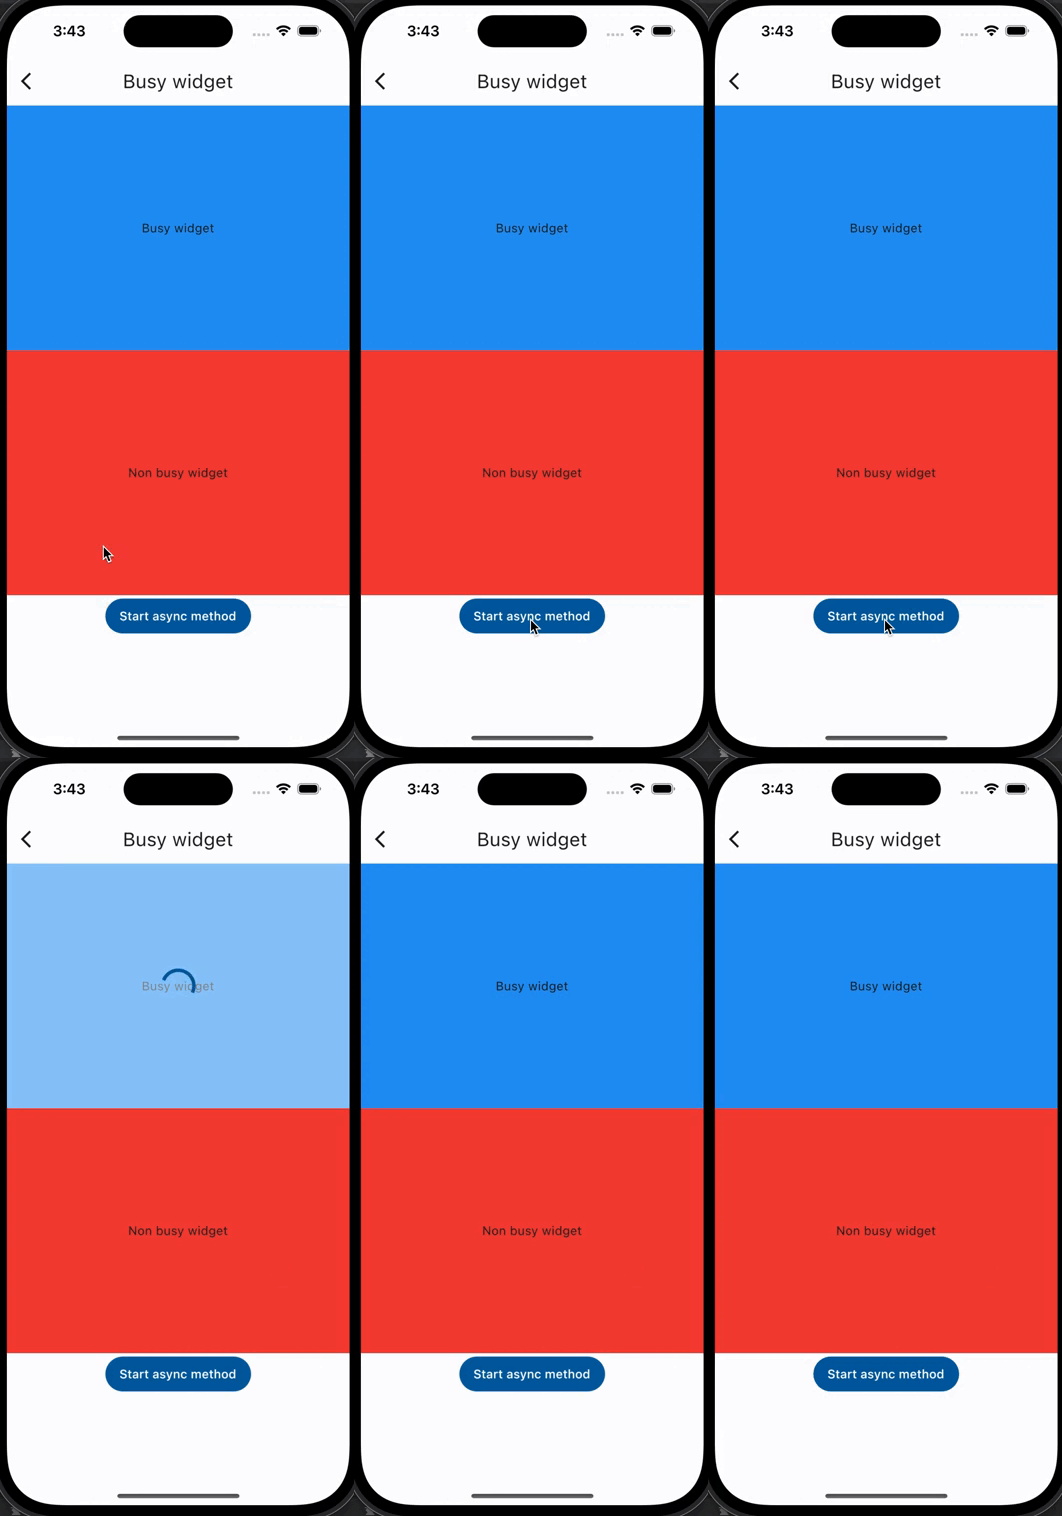
BusyWidget

class _BusyWidgetPageState extends State<BusyWidgetPage> {
  [@override](/user/override)
  Widget build(BuildContext context) {
    return Scaffold(
      appBar: AppBar(
        title: const Text("Busy widget"),
      ),
      body: Center(
        child: Column(
          mainAxisAlignment: MainAxisAlignment.start,
          children: [
            BusyWidget(
              isBusy: isBusy,
              child: SizedBox(
                height: MediaQuery.of(context).size.height * 0.33,
                child: Container(
                  color: Colors.blue,
                  child: const Center(child: Text("Busy widget")),
                ),
              ),
            ),
            SizedBox(
              height: MediaQuery.of(context).size.height * 0.33,
              child: Container(
                color: Colors.red,
                child: const Center(child: Text("Non busy widget")),
              ),
            ),
            FilledButton(
              onPressed: () {
                startBusyContext(() async {
                  await Future.delayed(const Duration(seconds: 2));
                });
              },
              child: const Text("Start async method"),
            ),
          ],
        ),
      ),
    );
  }
}
完整示例
以下是一个完整的示例代码:
import 'package:busy/busy.dart';
import 'package:example/busy_widget_page.dart';
import 'package:flutter/material.dart';

import 'busy_cupertino_scaffold_page.dart';
import 'busy_scaffold_page.dart';

void main() {
  runApp(const MyApp());
}

class MyApp extends StatelessWidget {
  const MyApp({super.key});

  [@override](/user/override)
  Widget build(BuildContext context) {
    return MaterialApp(
      debugShowCheckedModeBanner: false,
      title: 'Flutter Demo',
      theme: ThemeData(useMaterial3: true, colorSchemeSeed: Colors.blue),
      home: const MyHomePage(title: 'Flutter Demo Home Page'),
    );
  }
}

class MyHomePage extends StatefulWidget {
  const MyHomePage({super.key, required this.title});

  final String title;

  [@override](/user/override)
  State<MyHomePage> createState() => _MyHomePageState();
}

class _MyHomePageState extends State<MyHomePage> {
  bool isBusy = false;

  [@override](/user/override)
  Widget build(BuildContext context) {
    return BusyScaffold(
      isBusy: isBusy,
      scaffold: Scaffold(
        appBar: AppBar(
          title: Text(widget.title),
        ),
        body: SafeArea(
          child: Center(
            child: Column(
              mainAxisAlignment: MainAxisAlignment.start,
              children: [
                const SizedBox(height: 8),
                FilledButton(
                  onPressed: () {
                    Navigator.push(
                      context,
                      MaterialPageRoute(builder: (context) => const BusyScaffoldPage()),
                    );
                  },
                  child: const Text("Go to busy scaffold"),
                ),
                FilledButton(
                  onPressed: () {
                    Navigator.push(
                      context,
                      MaterialPageRoute(builder: (context) => const BusyCupertinoScaffoldPage()),
                    );
                  },
                  child: const Text("Go to busy cupertino scaffold"),
                ),
                FilledButton(
                  onPressed: () {
                    Navigator.push(
                      context,
                      MaterialPageRoute(builder: (context) => const BusyWidgetPage()),
                    );
                  },
                  child: const Text("Go to busy widget"),
                ),
                ExampleStatelessWidget(
                  functionToCall: () async {
                    await Future.delayed(const Duration(seconds: 1));
                  },
                  isBusyValueChanged: (isBusyNewValue) {
                    setState(() {
                      isBusy = isBusyNewValue;
                    });
                  },
                ),
              ],
            ),
          ),
        ),
      ),
    );
  }
}

class ExampleStatelessWidget extends StatelessWidget {
  const ExampleStatelessWidget(
      {super.key,
      required this.functionToCall,
      required this.isBusyValueChanged});

  final Function functionToCall;
  final Function(bool) isBusyValueChanged;

  [@override](/user/override)
  Widget build(BuildContext context) {
    return FilledButton(
      onPressed: () async {
        startBusyContext(
            functionToCall: functionToCall,
            isBusyValueChanged: isBusyValueChanged);
      },
      child: const Text("Load from stateless widget"),
    );
  }
}
更多关于Flutter忙碌状态指示插件busy的使用的实战系列教程也可以访问 https://www.itying.com/category-92-b0.html
1 回复
更多关于Flutter忙碌状态指示插件busy的使用的实战系列教程也可以访问 https://www.itying.com/category-92-b0.html
当然,以下是如何在Flutter项目中使用busy状态指示插件的一个示例。假设你使用的是flutter_busy_indicator这个流行的包来显示忙碌状态指示器。
首先,你需要在你的pubspec.yaml文件中添加这个依赖:
dependencies:
  flutter:
    sdk: flutter
  flutter_busy_indicator: ^5.0.0  # 请检查最新版本号
然后运行flutter pub get来安装依赖。
接下来,你可以在你的Flutter应用中使用BusyIndicator组件。下面是一个完整的示例,展示如何在按钮点击时显示一个忙碌状态指示器,并在模拟的异步操作完成后隐藏它。
import 'package:flutter/material.dart';
import 'package:flutter_busy_indicator/flutter_busy_indicator.dart';

void main() {
  runApp(MyApp());
}

class MyApp extends StatelessWidget {
  @override
  Widget build(BuildContext context) {
    return MaterialApp(
      title: 'Flutter Busy Indicator Example',
      theme: ThemeData(
        primarySwatch: Colors.blue,
      ),
      home: BusyIndicatorExample(),
    );
  }
}

class BusyIndicatorExample extends StatefulWidget {
  @override
  _BusyIndicatorExampleState createState() => _BusyIndicatorExampleState();
}

class _BusyIndicatorExampleState extends State<BusyIndicatorExample> {
  bool isBusy = false;

  void _simulateLongRunningTask() async {
    setState(() {
      isBusy = true;
    });

    // 模拟一个耗时操作,例如网络请求或计算
    await Future.delayed(Duration(seconds: 3));

    setState(() {
      isBusy = false;
    });
  }

  @override
  Widget build(BuildContext context) {
    return Scaffold(
      appBar: AppBar(
        title: Text('Flutter Busy Indicator Example'),
      ),
      body: Center(
        child: Column(
          mainAxisAlignment: MainAxisAlignment.center,
          children: <Widget>[
            ElevatedButton(
              onPressed: () {
                if (!isBusy) {
                  _simulateLongRunningTask();
                }
              },
              child: Text('Start Long Running Task'),
            ),
            SizedBox(height: 20),
            if (isBusy)
              BusyIndicator(
                alignment: Alignment.center,
                indicatorType: BusyIndicatorType.ballPulse,
                size: 50.0,
              ),
          ],
        ),
      ),
    );
  }
}
在这个示例中:
- 我们定义了一个
BusyIndicatorExample状态类,它包含一个isBusy布尔值来跟踪是否显示忙碌状态指示器。 _simulateLongRunningTask方法模拟一个耗时操作,它首先将isBusy设置为true,然后等待3秒钟,最后将isBusy设置回false。- 在
build方法中,我们根据isBusy的值来决定是否显示BusyIndicator。 BusyIndicator组件具有多个属性,如alignment、indicatorType和size,你可以根据需要调整这些属性。
运行这个应用,当你点击按钮时,会看到一个忙碌状态指示器显示3秒钟,然后消失。这个示例展示了如何在Flutter应用中使用flutter_busy_indicator包来显示和隐藏忙碌状态指示器。


