


Flutter弹簧动画效果插件spring_view的使用
Flutter弹簧动画效果插件spring_view的使用
spring_view: 一个为Flutter应用中的视图、按钮或小部件提供愉快弹跳效果的包。轻松将其集成到您的应用程序中,为您的应用添加一点趣味!
特性
弹跳效果: 轻松为Flutter应用中的任何视图、按钮或小部件添加愉快的弹跳动画。
安装
要使用此包,在您的 pubspec.yaml 文件中添加 spring_view 作为依赖项。
dependencies:
  spring_view: ^版本号
运行 flutter pub get 来获取该包。
使用
以下是一个简单的示例,展示如何在Flutter应用中使用 SpringView。
SpringView(
  child: Center(
    child: Container(
      padding: const EdgeInsets.all(8.0),
      decoration: BoxDecoration(
        color: Colors.cyan,
        borderRadius: BorderRadius.circular(8),
      ),
      child: const Text(
        "Spring view example"
      ),
    ),
  ),
  onPressed: (){} // 可以在这里添加点击事件
),
完整示例
以下是完整的示例代码,展示了如何在Flutter应用中使用 SpringView。
import 'package:flutter/material.dart';
import 'package:spring_view/spring_view.dart';
void main() {
runApp(const MyApp());
}
class MyApp extends StatelessWidget {
const MyApp({super.key});
[@override](/user/override)
Widget build(BuildContext context) {
return MaterialApp(
title: 'Flutter Demo',
theme: ThemeData(
colorScheme: ColorScheme.fromSeed(seedColor: Colors.deepPurple),
useMaterial3: true,
),
home: const MyHomePage(),
);
}
}
class MyHomePage extends StatefulWidget {
const MyHomePage({super.key});
[@override](/user/override)
State<MyHomePage> createState() => _MyHomePageState();
}
class _MyHomePageState extends State<MyHomePage> {
[@override](/user/override)
Widget build(BuildContext context) {
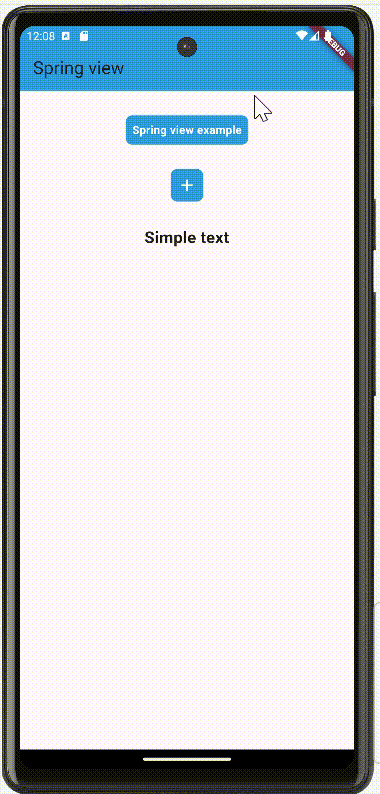
return Scaffold(
appBar: AppBar(
backgroundColor: Colors.blue,
title: const Text("Spring view"),
),
body: Column(
children: [
const SizedBox(
height: 30,
),
SpringView(
child: Center(
child: Container(
padding: const EdgeInsets.all(8.0),
decoration: BoxDecoration(
color: Colors.blue,
borderRadius: BorderRadius.circular(8),
),
child: const Text(
"Spring view example",
style: TextStyle(
color: Colors.white, fontWeight: FontWeight.bold),
),
),
),
onPressed: () {}), // 可以在这里添加点击事件
const SizedBox(
height: 30,
),
SpringView(
child: Center(
child: Container(
padding: const EdgeInsets.all(8.0),
decoration: BoxDecoration(
color: Colors.blue,
borderRadius: BorderRadius.circular(8),
),
child: const Icon(
Icons.add,
color: Colors.white,
),
),
),
onPressed: () {}), // 可以在这里添加点击事件
const SizedBox(
height: 30,
),
SpringView(
child: const Center(
child: Text(
"Simple text",
style: TextStyle(fontWeight: FontWeight.bold, fontSize: 20),
)),
onPressed: () {}), // 可以在这里添加点击事件
const SizedBox(
height: 30,
),
],
),
);
}
}
更多关于Flutter弹簧动画效果插件spring_view的使用的实战系列教程也可以访问 https://www.itying.com/category-92-b0.html

1 回复

更多关于Flutter弹簧动画效果插件spring_view的使用的实战系列教程也可以访问 https://www.itying.com/category-92-b0.html
当然,以下是如何在Flutter中使用spring_view插件来实现弹簧动画效果的代码示例。spring_view插件可以帮助你创建类似弹簧物理效果的动画,非常适合用于实现具有弹性的UI组件动画。
首先,确保你的pubspec.yaml文件中已经添加了spring_view依赖:
dependencies:
  flutter:
    sdk: flutter
  spring_view: ^1.0.0  # 请确保使用最新版本号
然后运行flutter pub get来安装依赖。
接下来是一个完整的示例代码,展示了如何使用SpringView来实现弹簧动画效果:
import 'package:flutter/material.dart';
import 'package:spring_view/spring_view.dart';

void main() {
  runApp(MyApp());
}

class MyApp extends StatelessWidget {
  @override
  Widget build(BuildContext context) {
    return MaterialApp(
      home: Scaffold(
        appBar: AppBar(
          title: Text('SpringView 动画示例'),
        ),
        body: Center(
          child: SpringViewExample(),
        ),
      ),
    );
  }
}

class SpringViewExample extends StatefulWidget {
  @override
  _SpringViewExampleState createState() => _SpringViewExampleState();
}

class _SpringViewExampleState extends State<SpringViewExample> with SingleTickerProviderStateMixin {
  late AnimationController _controller;
  late Animation<double> _animation;

  @override
  void initState() {
    super.initState();
    _controller = AnimationController(
      duration: const Duration(seconds: 1),
      vsync: this,
    )..repeat(reverse: true);

    _animation = Tween<double>(begin: 0, end: 1).animate(_controller);
  }

  @override
  void dispose() {
    _controller.dispose();
    super.dispose();
  }

  @override
  Widget build(BuildContext context) {
    return Stack(
      alignment: Alignment.center,
      children: <Widget>[
        // 静态背景
        Container(
          height: 200,
          width: 200,
          color: Colors.grey[200],
        ),
        // 使用 SpringView 实现弹簧动画效果
        SpringView(
          child: Container(
            width: 100,
            height: 100,
            color: Colors.blue,
          ),
          animation: _animation,
          springConfig: SpringConfig(
            mass: 1.0,
            stiffness: 0.3,
            damping: 0.25,
          ),
        ),
      ],
    );
  }
}
代码说明:
- 依赖导入:在
pubspec.yaml中添加spring_view依赖。 - 主应用:在
MyApp中创建一个基本的MaterialApp,并设置主页面为Scaffold。 - 示例组件:
SpringViewExample是一个有状态的组件,用于演示SpringView的使用。 - 动画控制:在
_SpringViewExampleState中,使用AnimationController和Tween来创建动画。这里设置了一个简单的动画,动画持续时间为1秒,并反复播放。 - SpringView:
SpringView组件接收一个子组件(这里是一个蓝色的容器)和动画值。springConfig属性用于配置弹簧动画的参数,包括质量(mass)、刚度(stiffness)和阻尼(damping)。
运行这个示例,你会看到一个蓝色的方块在灰色背景上按照弹簧物理效果进行动画。你可以根据需要调整SpringConfig的参数来改变动画效果。