在HarmonyOS鸿蒙Next智慧屏上抢红包的Demo和代码(基于鸿蒙模拟器)
在HarmonyOS鸿蒙Next智慧屏上抢红包的Demo和代码(基于鸿蒙模拟器)

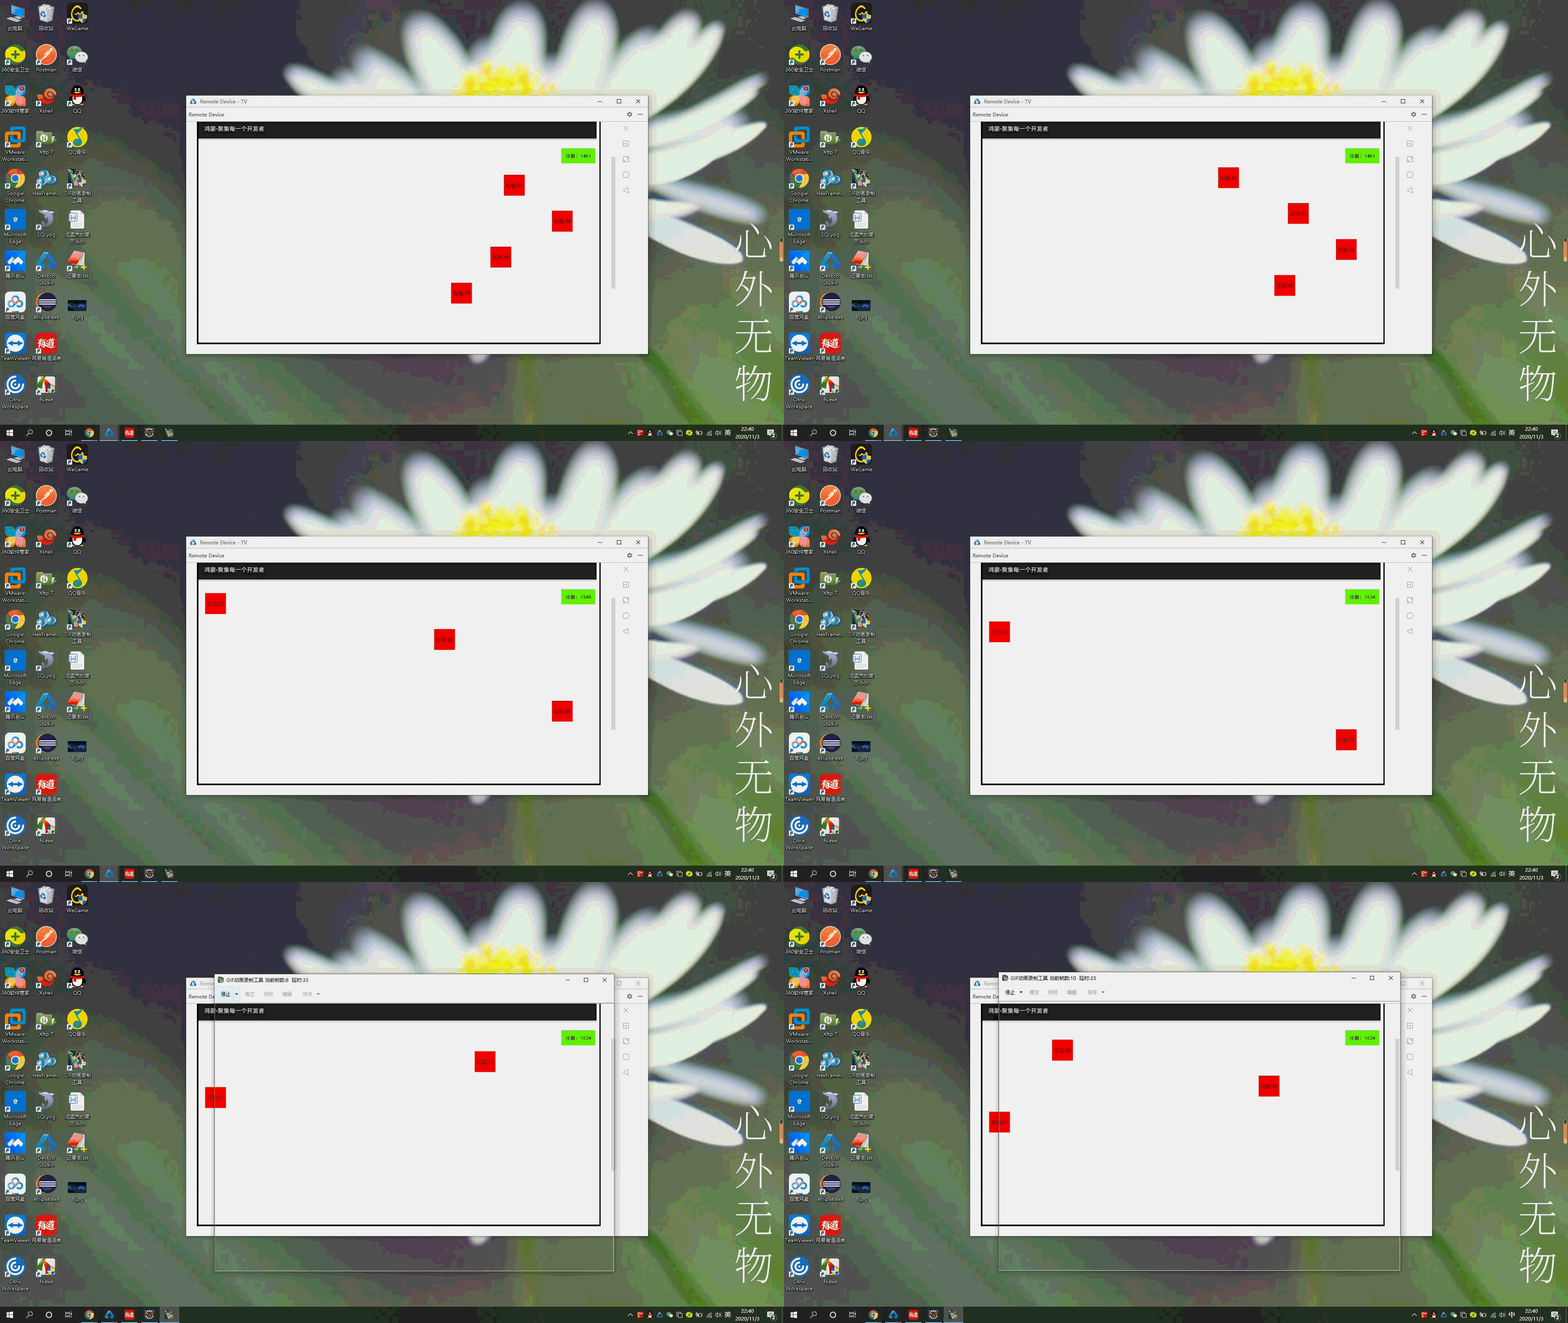
效果演示
说下遇到的问题
- 在XML中使用PositionLayout布局增加子组件后,子组件使用setContentPosition(x,y)造成定位失败。
- 无法父组件无法删除子组件,removeComponent()无效。
- 无法隐藏组件setVisibility();值是4或者8都无效。demo需要删除元素,无奈只能设置元素的width,height为0。
以下是代码片段
<?xml version="1.0" encoding="utf-8"?>
<PositionLayout xmlns:ohos="http://schemas.huawei.com/res/ohos"
    ohos:width="match_parent"
    ohos:height="match_parent"
    ohos:id="$+id:p">
    <Text
        ohos:id="$+id:fenshu"
        ohos:text="分数:0"
        ohos:background_element="#66FF00"
        ohos:padding="10vp"/>
</PositionLayout>
package com.example.tv.slice;
import com.example.tv.ResourceTable;
import ohos.aafwk.ability.AbilitySlice;
import ohos.aafwk.content.Intent;
import ohos.agp.animation.Animator;
import ohos.agp.animation.AnimatorProperty;
import ohos.agp.colors.RgbColor;
import ohos.agp.components.*;
import ohos.agp.components.element.ShapeElement;
import ohos.app.Context;
import java.util.Random;
import java.util.Timer;
import java.util.TimerTask;
//1920*1080
public class MainAbilitySlice extends AbilitySlice {
int count = 0;
@Override
public void onStart(Intent intent) {
super.onStart(intent);
super.setUIContent(ResourceTable.Layout_layout1);
System.out.println("MainAbilitySlice>>>>>>>>>>>>>>>>onStart");
Context context = this;
PositionLayout positionLayout = (PositionLayout) findComponentById(ResourceTable.Id_p);
Text text = (Text) findComponentById(ResourceTable.Id_fenshu);
text.setContentPosition(1750, 0);
text.setHeight(ComponentContainer.LayoutConfig.MATCH_CONTENT);
text.setWidth(ComponentContainer.LayoutConfig.MATCH_CONTENT);
Timer timer = new Timer();
timer.scheduleAtFixedRate(new TimerTask() {
public void run() {
Random random = new Random();
int rFenshu = random.nextInt(100);
Button button = new Button(context);
button.setWidth(100);
button.setHeight(100);
button.setText("红包:" + rFenshu);
button.setClickedListener((c) -> {
button.setWidth(0);
button.setHeight(0);
count += rFenshu;
text.setText("分数:" + count);
});
ShapeElement shapeElement = new ShapeElement();
shapeElement.setRgbColor(new RgbColor(255, 0, 0));
button.setBackground(shapeElement);
int i1 = random.nextInt(1720);
button.setContentPosition(i1, 0);
positionLayout.addComponent(button);
AnimatorProperty animatorProperty = button.createAnimatorProperty();
animatorProperty.moveToY(700).setDuration(4000);
animatorProperty.setStateChangedListener(new Animator.StateChangedListener() {
@Override
public void onStart(Animator animator) {}
@Override
public void onStop(Animator animator) {}
@Override
public void onCancel(Animator animator) {}
@Override
public void onEnd(Animator animator) {
button.setWidth(0);
button.setHeight(0);
}
@Override
public void onPause(Animator animator) {}
@Override
public void onResume(Animator animator) {}
});
animatorProperty.start();
}
}, 1000,1000);
}
@Override
protected void onActive() {
super.onActive();
System.out.println("MainAbilitySlice>>>>>>>>>>>>>>>>onActive");
}
@Override
protected void onInactive() {
super.onInactive();
System.out.println("MainAbilitySlice>>>>>>>>>>>>>>>>onInactive");
}
@Override
protected void onBackground() {
super.onBackground();
System.out.println("MainAbilitySlice>>>>>>>>>>>>>>>>onBackground");
}
@Override
protected void onForeground(Intent intent) {
super.onForeground(intent);
System.out.println("MainAbilitySlice>>>>>>>>>>>>>>>>onForeground");
}
@Override
protected void onStop() {
super.onStop();
System.out.println("MainAbilitySlice>>>>>>>>>>>>>>>>onStop");
}
}作者:顶风少年
12 回复
好专业呀,看不懂
更多关于在HarmonyOS鸿蒙Next智慧屏上抢红包的Demo和代码(基于鸿蒙模拟器)的实战系列教程也可以访问 https://www.itying.com/category-93-b0.html
试了一下 removeComponent() 有效果 visibility(2) 是消失
写的挺好呀
要的就是这个,很棒
好棒,学起来
一起顶,让更多的人看到
有你的日子更精彩
必须顶起来,好内容
今天晚上八点的直播课已经报名了,看看能不能跟着老师做出来一个小游戏
在HarmonyOS鸿蒙Next智慧屏上实现抢红包的Demo,可以通过鸿蒙模拟器进行开发和测试。以下是一个简单的实现思路和代码示例。
-
环境准备:
- 安装DevEco Studio,配置鸿蒙模拟器。
- 创建HarmonyOS项目,选择智慧屏设备模板。
-
UI设计:
- 使用XML布局文件设计红包界面,包含红包图片、倒计时、抢红包按钮等元素。
-
逻辑实现:
- 使用ArkTS编写抢红包逻辑,监听按钮点击事件,模拟抢红包过程。
-
代码示例:
import { Button, Text, Image, Column } from '@ohos.arkui';
import { Timer } from '@ohos.timer';

class RedPacketDemo extends Component {
  private countdown: number = 5;
  private timer: Timer | null = null;

  onInit() {
    this.startCountdown();
  }

  startCountdown() {
    this.timer = setInterval(() => {
      if (this.countdown > 0) {
        this.countdown--;
        this.updateCountdown();
      } else {
        this.stopCountdown();
        this.showRedPacket();
      }
    }, 1000);
  }

  stopCountdown() {
    if (this.timer) {
      clearInterval(this.timer);
      this.timer = null;
    }
  }

  updateCountdown() {
    // 更新倒计时显示
  }

  showRedPacket() {
    // 显示红包
  }

  grabRedPacket() {
    // 抢红包逻辑
  }

  build() {
    return (
      <Column>
        <Image src="red_packet.png" />
        <Text text={`倒计时: ${this.countdown}`} />
        <Button text="抢红包" onClick={this.grabRedPacket} />
      </Column>
    );
  }
}- 运行测试:
- 在鸿蒙模拟器上运行项目,测试抢红包功能。
通过以上步骤,可以在HarmonyOS鸿蒙Next智慧屏上实现一个简单的抢红包Demo。
在HarmonyOS鸿蒙Next智慧屏上实现抢红包功能,可以通过以下步骤进行开发:
- 环境准备:确保已安装DevEco Studio和鸿蒙模拟器。
- 创建项目:在DevEco Studio中创建一个新的鸿蒙应用项目。
- UI设计:使用XML布局文件设计红包界面,包括红包图片和点击按钮。
- 逻辑实现:在Java或JS中编写抢红包的逻辑,如点击按钮后触发红包打开动画和金额显示。
- 测试运行:在鸿蒙模拟器上运行项目,测试抢红包功能。
示例代码片段(Java):
public class RedPacketActivity extends AbilitySlice {
    @Override
    public void onStart(Intent intent) {
        super.onStart(intent);
        // 设置布局
        setUIContent(ResourceTable.Layout_red_packet_layout);
        // 绑定点击事件
        findComponentById(ResourceTable.Id_btn_open).setClickedListener(component -> openRedPacket());
    }

    private void openRedPacket() {
        // 实现打开红包的逻辑
        showAmount("88.88元");
    }

    private void showAmount(String amount) {
        // 显示红包金额
        Text text = (Text) findComponentById(ResourceTable.Id_tv_amount);
        text.setText(amount);
    }
}


