


Flutter苹果账号登录插件sign_in_with_apple的使用
Flutter苹果账号登录插件sign_in_with_apple的使用
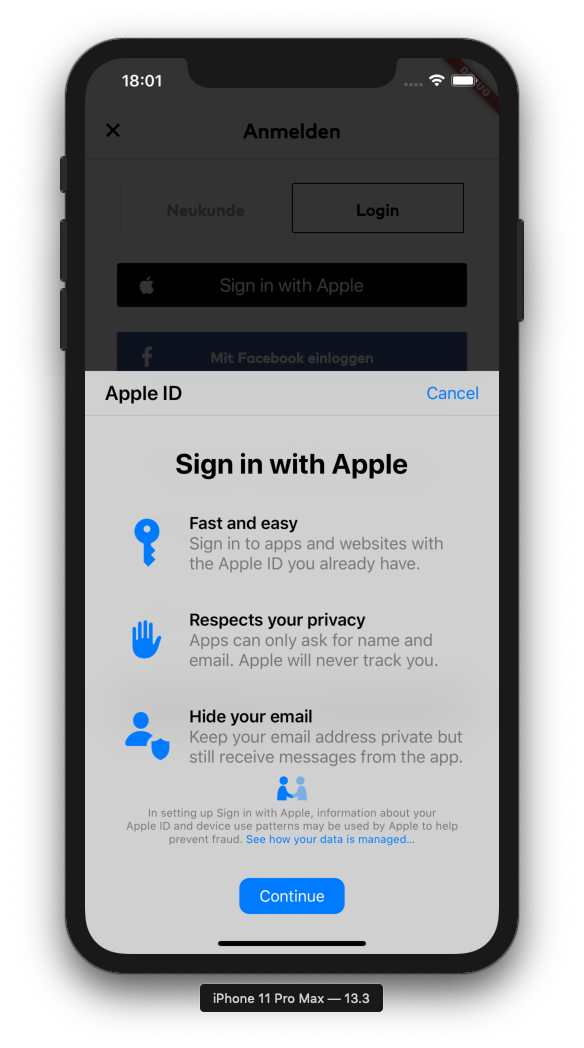
Sign in With Apple
Flutter桥接到Apple登录。它支持通过Apple ID登录,以及检索用户钥匙串中保存的凭证。

Supported platforms
- iOS
- macOS
- Android
- Web
Example Usage
SignInWithAppleButton(
  onPressed: () async {
    final credential = await SignInWithApple.getAppleIDCredential(
      scopes: [
        AppleIDAuthorizationScopes.email,
        AppleIDAuthorizationScopes.fullName,
      ],
    );

    print(credential);

    // Now send the credential (especially `credential.authorizationCode`) to your server to create a session
    // after they have been validated with Apple (see `Integration` section for more information on how to do this)
  },
);
Flow

Integration
集成Sign in with Apple不仅仅是在pubspec.yaml中添加这个插件并使用其暴露的接收凭证的功能。一旦你收到凭证,就需要与Apple的服务器验证(以确保它们有效且确实涉及提到的用户),然后在你的系统中创建一个新会话。
您的服务器应该每天通过刷新令牌(最初验证时获得)来验证Apple上的会话,并在Apple端撤销授权时,在您的系统中撤销会话。
Prerequisites
在开始集成(或测试)Sign in with Apple之前,你需要有Apple Developer Program的付费会员资格。Sign in with Apple是受限制的服务之一,仅凭Apple ID无法免费使用。
Apple Mail Relay
由于用户可以使用私有电子邮件中继,因此需要向用于发送电子邮件的域添加SPF记录,请阅读更多:配置私有电子邮件中继服务 没有它,您的服务将无法向选择使用Apple的私有中继的用户发送电子邮件,邮件将无法送达。
Setup
Register an App ID
如果你还没有,可以在这里创建一个新的App ID:
- 点击"Register an App ID"
- 在向导中选择"App IDs",点击"Continue"
- 设置
Description和Bundle ID,并选择Sign In with Apple功能 - 点击"Continue",然后点击"Register"完成App ID的创建
如果你已经有现有的App ID要与Sign in with Apple一起使用:
- 打开该App ID列表中的项目
- 勾选"Sign in with Apple"功能
- 点击"Save"
如果你更改了应用程序的功能,则需要获取更新的配置文件(例如通过Xcode)以使用新的功能。
Create a Service ID
Service ID仅在Web或Android集成时需要。如果只打算在iOS上集成,可以跳过此步骤。
前往Apple开发者页面,并按照以下步骤操作:
- 点击"Register an Services ID"
- 选择"Services IDs",点击"Continue"
- 设置"Description"和"Identifier"
- 点击"Continue"然后"Register"
现在我们需要启用它以用于Sign in with Apple:
- 从服务列表中选择服务
- 勾选"Sign in with Apple"框,然后点击"Configure"
- 在
Domains and Subdomains中添加网站域名,例如example.com - 在
Return URLs框中添加完整的返回URL,例如https://example.com/callbacks/sign_in_with_apple - 点击"Next"然后"Done"关闭设置对话框
- 点击"Continue"然后"Save"更新服务
为了与Apple的服务器通信以验证来自应用客户端的授权代码,你需要在这里创建一个密钥:
- 点击"Create a key"
- 设置"Key Name"(例如"Sign in with Apple key")
- 勾选"Sign in with Apple"框,然后在同一行点击"Configure"
- 在"Primary App ID"下选择你要使用的App ID
- 点击"Save"离开详细视图
- 点击"Continue"然后点击"Register"
- 现在你会看到一个一次性的屏幕,必须通过点击"Download"按钮下载密钥
- 注意"Key ID"稍后配置服务器时会用到
现在所有设置都已在Apple开发者门户完成,我们可以开始设置服务器。
Server
服务器部分通常集成到您现有的后端中,大多数现有编程语言和Web框架都有现成的包。
为了展示如何构建一个完整的示例,我们在Glitch上设置了一个示例项目,提供简单的HTTPS启用Web API,这正是这里所需要的。
要开始使用Glitch-based示例,请访问项目页面并点击"Remix this"。现在你有了自己的样本服务器副本!
首先选择左侧文件浏览器中的.env文件并输入您的凭据(这些不会公开,但只会与受邀合作者共享)。
然后单击左上角头像旁边的"Share"按钮,选择"Live App"并复制入口页面URL(例如https://some-random-identifier.glitch.me)。
现在更新您之前创建的服务,以包含以下URL作为Return URLs:https://[YOUR-PROJECT-NAME].glitch.me/callbacks/sign_in_with_apple(替换方括号内的名称)。
完成后,您可以继续将Sign in with Apple集成到Flutter应用的代码中。
Android
要在Flutter应用中添加Sign in with Apple,分为两方面:首先是使示例应用与服务器端设置一起工作,然后是为从头开始设置应用所需的其他步骤。
要在此插件上使用Android,您需要使用Android V2嵌入。
检查是否已经使用新的嵌入,可以通过查看AndroidManifest.xml中的以下元素:
<meta-data
  android:name="flutterEmbedding"
  android:value="2"
/>
如果没有使用Android V2嵌入,请先按照以下指南升级应用:升级指南
launchMode
为了确保从登录网页(显示在Chrome自定义标签页中)回到应用的深度链接仍然有效,您的应用必须使用launchMode singleTask或singleTop
- 使用
singleTask时,Chrome自定义标签页会在使用Android的应用切换器时持久存在,但从主屏幕图标或应用商店重新启动应用时将被取消。 - 使用
launchModesingleTop时,无论使用应用切换器还是通过图标重新启动应用,Chrome自定义标签页都会保持存在。 - 如果更改了应用的
launchMode,请务必测试可能受到影响的任何第三方集成(例如深度链接)
Web
对于Web支持,需要在index.html的<head>标签中添加以下脚本导入:
<script type="text/javascript" src="https://appleid.cdn-apple.com/appleauth/static/jsapi/appleid/1/en_US/appleid.auth.js"></script>
(我们尚未找到一种方法可以按需加载此脚本,因为该脚本似乎在页面加载时自动初始化。)
然后在Apple开发者门户中的服务配置中添加托管页面的域名,既包括Domains and Subdomains也包括Returns URLs。
前者是必需的,以便可以从网页打开流程,而后者用于将最终凭证从弹出窗口发布回打开页面。(如果省略此步骤,流程将在最后一步静默卡住。)
Example App
- 打开
example文件夹并在编辑器中运行flutter packages get - 打开
lib/main.dart并查看SignInWithAppleButton.onPressed回调- 设置
scopes参数以匹配所需范围,测试时可以保留请求姓名和电子邮件 - 更新传递给
WebAuthenticationOptions构造函数的值,以匹配Apple开发者门户中的值 - 同样更新
signInWithAppleEndpoint变量以指向您的服务器
- 设置
- 更新代码后,使用
flutter run在Android设备或模拟器上运行示例
Your App
在android/app/src/main/AndroidManifest.xml中的<application>内添加:
<!-- Set up the Sign in with Apple activity, such that it's callable from the browser-redirect -->
<activity
    android:name="com.aboutyou.dart_packages.sign_in_with_apple.SignInWithAppleCallback"
    android:exported="true"
>
    <intent-filter>
        <action android:name="android.intent.action.VIEW" />
        <category android:name="android.intent.category.DEFAULT" />
        <category android:name="android.intent.category.BROWSABLE" />

        <data android:scheme="signinwithapple" />
        <data android:path="callback" />
    </intent-filter>
</activity>
在Apple服务器上的Sign in with Apple回调(指定在WebAuthenticationOptions.redirectUri中),安全地重定向回您的Android应用,使用以下URL:
intent://callback?${PARAMETERS FROM CALLBACK BODY}#Intent;package=YOUR.PACKAGE.IDENTIFIER;scheme=signinwithapple;end
PARAMETERS FROM CALLBACK BODY应填充从Apple服务器接收到的编码后的body,package参数应更改为匹配您应用的包标识符(如Google Play商店中发布的)。保持callback路径和signinwithapple方案不变。
此外,在处理传入的凭证时,确保只有在您自己的服务器验证了传入的code参数之后才覆盖当前(访客)会话,以防止恶意传入链接(例如注销当前用户)。
iOS
此时你应该已经在Apple开发者门户中为自己的应用或创建的测试应用添加了Sign in with Apple功能。
如果你没有在Xcode中开启Automatically manage Signing,则需要重新创建并下载更新的配置文件,以便它们包含新的Sign in with Apple功能。然后你可以下载新的证书并选择它们。
如果XCode管理您的签名,这一步会自动为您完成。只需确保启用了Sign in with Apple功能,如下面的示例所示。
此外,这假设你在开发者账户中至少注册了一台iOS设备进行本地测试,以便可以在设备上运行示例。
Example
- 在终端中打开
example文件夹并运行flutter packages get - 在Xcode中打开
example/ios/Runner.xcworkspace - 在
Runner(文件浏览器侧栏)->Targets->Runner->Signing & Capabilities设置“Bundle Identifier”(“App ID”)为你在Apple开发者门户中创建的- 确保“Sign in with Apple”列在功能下(如果没有,通过
+添加)
- 确保“Sign in with Apple”列在功能下(如果没有,通过
- 现在在终端中进入
example文件夹并执行以下命令cd iosbundle install,以安装Cocoapods使用的Ruby依赖项bundle exec pod install,以安装iOS项目的Cocoapods
- 在终端中导航回
example文件夹的根目录并flutter run在测试设备上运行
Your App
- 首先确保您的应用具有“Sign in with Apple”功能(
Runner(文件浏览器侧栏)->Targets->Runner->Signing & Capabilities),否则Sign in with Apple将失败而没有任何视觉指示(代码仍会抛出异常) - 要么集成上面的示例服务器,要么构建自己的后端
- 确保用于验证接收到的
code参数的clientID取决于客户端:当使用Apple平台上的应用代码时使用App ID(也称为“Bundle ID”),当使用从Web身份验证流中检索到的代码时使用服务ID
- 确保用于验证接收到的
macOS
macOS的设置与iOS基本相同。对于Flutter开发macOS,您必须在dev或master通道上。
Example
- 在终端中打开
example文件夹并运行flutter packages get - 在Xcode中打开
example/macos/Runner.xcworkspace - 在
Runner(文件浏览器侧栏)->Targets->Runner->Signing & Capabilities设置“Bundle Identifier”(“App ID”)为你在Apple开发者门户中创建的- 确保“Sign in with Apple”列在功能下(如果没有,通过
+添加) - 另外,该屏幕上不应有警告。(例如,您的Mac必须注册用于本地开发。(如果没有,您会看到一个“一键修复”按钮来执行此操作。))
- 确保“Sign in with Apple”列在功能下(如果没有,通过
- 在终端中导航回
example文件夹的根目录并flutter run在测试设备上运行
示例代码
import 'dart:io';

import 'package:flutter/foundation.dart';
import 'package:flutter/material.dart';
import 'package:http/http.dart' as http;
import 'package:sign_in_with_apple/sign_in_with_apple.dart';

// Needed because we can't import `web` into a mobile app,
// while on the flip-side access to `dart:io` throws at runtime (hence the `kIsWeb` check below)
import 'html_shim.dart' if (dart.library.js_interop) 'package:web/web.dart'
    show window;

void main() {
  runApp(const MyApp());
}

class MyApp extends StatefulWidget {
  const MyApp({super.key});

  @override
  State<MyApp> createState() => _MyAppState();
}

class _MyAppState extends State<MyApp> {
  @override
  Widget build(BuildContext context) {
    return MaterialApp(
      onGenerateRoute: ((settings) {
        // This is also invoked for incoming deep links

        // ignore: avoid_print
        print('onGenerateRoute: $settings');

        return null;
      }),
      home: Scaffold(
        appBar: AppBar(
          title: const Text('Example app: Sign in with Apple'),
        ),
        body: Container(
          padding: const EdgeInsets.all(10),
          child: Center(
            child: SignInWithAppleButton(
              onPressed: () async {
                final credential = await SignInWithApple.getAppleIDCredential(
                  scopes: [
                    AppleIDAuthorizationScopes.email,
                    AppleIDAuthorizationScopes.fullName,
                  ],
                  webAuthenticationOptions: WebAuthenticationOptions(
                    clientId: 'de.lunaone.flutter.signinwithappleexample.service',
                    redirectUri: kIsWeb
                        ? Uri.parse('https://${window.location.host}/')
                        : Uri.parse(
                            'https://flutter-sign-in-with-apple-example.glitch.me/callbacks/sign_in_with_apple',
                          ),
                  ),
                  nonce: 'example-nonce',
                  state: 'example-state',
                );

                print(credential);

                final signInWithAppleEndpoint = Uri(
                  scheme: 'https',
                  host: 'flutter-sign-in-with-apple-example.glitch.me',
                  path: '/sign_in_with_apple',
                  queryParameters: <String, String>{
                    'code': credential.authorizationCode,
                    if (credential.givenName != null)
                      'firstName': credential.givenName!,
                    if (credential.familyName != null)
                      'lastName': credential.familyName!,
                    'useBundleId':
                        !kIsWeb && (Platform.isIOS || Platform.isMacOS)
                            ? 'true'
                            : 'false',
                    if (credential.state != null) 'state': credential.state!,
                  },
                );

                final session = await http.Client().post(
                  signInWithAppleEndpoint,
                );

                print(session);
              },
            ),
          ),
        ),
      ),
    );
  }
}
更多关于Flutter苹果账号登录插件sign_in_with_apple的使用的实战教程也可以访问 https://www.itying.com/category-92-b0.html

更多关于Flutter苹果账号登录插件sign_in_with_apple的使用的实战系列教程也可以访问 https://www.itying.com/category-92-b0.html
当然,下面是一个关于如何在Flutter项目中使用sign_in_with_apple插件来实现苹果账号登录的示例代码。这个示例假定你已经设置好了Flutter开发环境,并且已经在你的pubspec.yaml文件中添加了sign_in_with_apple依赖。
首先,确保你的pubspec.yaml文件中包含以下依赖:
dependencies:
  flutter:
    sdk: flutter
  sign_in_with_apple: ^3.0.0  # 请确保使用最新版本
然后,运行flutter pub get来安装依赖。
接下来,你可以按照以下步骤在你的Flutter应用中实现苹果账号登录功能:
- 导入必要的包:
import 'package:flutter/material.dart';
import 'package:sign_in_with_apple/sign_in_with_apple.dart';
- 创建一个AppleSignInButton小部件:
class AppleSignInButton extends StatefulWidget {
  @override
  _AppleSignInButtonState createState() => _AppleSignInButtonState();
}

class _AppleSignInButtonState extends State<AppleSignInButton> {
  final SignInWithApple _signInWithApple = SignInWithApple();

  @override
  Widget build(BuildContext context) {
    return ElevatedButton(
      onPressed: () async {
        try {
          final credential = await _signInWithApple.performRequests([
            AppleIDRequest(requestedScopes: [AppleIDAuthorizationScopes.fullName, AppleIDAuthorizationScopes.email])
          ]);

          // 在这里处理登录成功的逻辑
          // credential.user 是用户的唯一标识符
          // credential.fullName 是用户的全名
          // credential.email 是用户的电子邮件地址(如果请求了电子邮件权限)

          print('User ID: ${credential.user}');
          print('Full Name: ${credential.fullName?.givenName} ${credential.fullName?.familyName}');
          print('Email: ${credential.email}');

        } catch (e) {
          print('Error: $e');
        }
      },
      child: Text('Sign in with Apple'),
    );
  }
}
- 在你的应用中使用这个按钮:
void main() {
  runApp(MyApp());
}

class MyApp extends StatelessWidget {
  @override
  Widget build(BuildContext context) {
    return MaterialApp(
      title: 'Flutter Sign In with Apple Demo',
      theme: ThemeData(
        primarySwatch: Colors.blue,
      ),
      home: Scaffold(
        appBar: AppBar(
          title: Text('Sign In with Apple Demo'),
        ),
        body: Center(
          child: AppleSignInButton(),
        ),
      ),
    );
  }
}
- 处理iOS特定配置:
确保你的iOS项目(ios/Runner)已经正确配置了Sign in with Apple功能。你需要:
- 在Xcode中,打开你的项目设置。
- 转到
Signing & Capabilities标签。 - 添加
Sign in with Apple功能。
此外,你还需要在Info.plist文件中添加一些必要的键值对,例如:
<key>LSApplicationQueriesSchemes</key>
<array>
    <string>apple-id-auth</string>
</array>
<key>CFBundleURLTypes</key>
<array>
    <dict>
        <key>CFBundleTypeRole</key>
        <string>Editor</string>
        <key>CFBundleURLSchemes</key>
        <array>
            <string>YOUR_REVERSE_CLIENT_ID</string>
        </array>
    </dict>
</array>
YOUR_REVERSE_CLIENT_ID应该是一个唯一的标识符,通常是你应用的bundle ID的反向域名格式。
这个示例代码提供了一个基本的框架,展示了如何在Flutter应用中使用sign_in_with_apple插件来实现苹果账号登录。根据你的具体需求,你可能需要添加更多的错误处理、UI调整或与其他后端服务的集成。