


Flutter支付集成插件my_fatoorah的使用
Flutter支付集成插件my_fatoorah的使用
My Fatoorah Payment
My Fatoorah是Flutter的一个支付集成插件,它可以帮助开发者轻松地将支付功能集成到他们的应用程序中。下面我们将详细介绍如何安装、配置和使用这个插件。
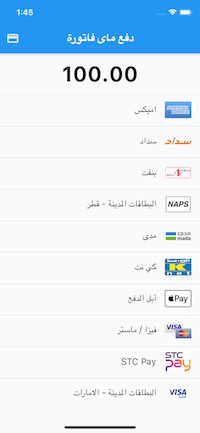
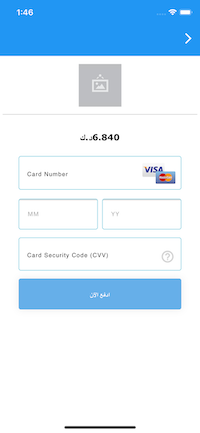
Screenshots in Test mode
| Payment methods | Card inputs | Acs Emulator | result |
|---|---|---|---|
 |
 |
 |
 |
Screenshots in Live(Release) mode
| Payment methods | Card inputs | result |
|---|---|---|
|
|
|
Getting Started
Installation
首先,在pubspec.yaml文件中添加以下依赖:
dependencies:
  my_fatoorah: any
然后运行flutter pub get以安装插件。
Config
iOS
对于iOS平台,需要在Info.plist文件中添加以下内容:
<key>io.flutter.embedded_views_preview</key>
<true/>
<key>NSAppTransportSecurity</key>
<dict>
    <key>NSAllowsArbitraryLoads</key>
    <true/>
</dict>
如果URL不是使用SSL,则还需要允许任意加载:
<key>NSAppTransportSecurity</key>
<dict>
    <key>NSAllowsArbitraryLoads</key>
    <true/>
</dict>
Android
对于Android平台,在AndroidManifest.xml文件中添加以下内容:
<application
  ...
  android:usesCleartextTraffic="true"
  ...>
  ...
</application>
Dialog Usage
以下是一个简单的示例代码,演示了如何使用startPayment方法启动支付流程:
import 'package:my_fatoorah/my_fatoorah.dart';
import 'dart:developer';

class Example extends StatelessWidget {
  const Example({Key? key}) : super(key: key);

  @override
  Widget build(BuildContext context) {
    return Scaffold(
      appBar: AppBar(
        title: const Text('my_fatoorah Demo'),
      ),
      body: Center(
        child: Container(
          padding: const EdgeInsets.all(8.0),
          child: MaterialButton(
            color: Colors.blue,
            onPressed: () async {
              var response = await MyFatoorah.startPayment(
                context: context,
                request: MyfatoorahRequest.test(
                  currencyIso: Country.SaudiArabia,
                  successUrl: "Your success call back",
                  errorUrl: "Your error call back",
                  invoiceAmount: 100,
                  language: ApiLanguage.Arabic,
                  token: "Your token here",
                ),
              );
              log(response.paymentId.toString());
            },
            splashColor: Colors.blueGrey,
            child: const Text(
              'Show Payment',
              style: TextStyle(
                color: Colors.white,
                fontSize: 16,
              ),
            ),
          ),
        ),
      ),
    );
  }
}
Another usage way => Listview Usage
除了对话框方式外,还可以通过ListView来使用:
MyFatoorah(
  onResult: (response) {
    print(response.status);
  },
  request: MyfatoorahRequest.test(
    currencyIso: Country.SaudiArabia,
    successUrl: 'https://www.facebook.com',
    errorUrl: 'https://www.google.com',
    invoiceAmount: widget.cartDetails.total,
    language: ApiLanguage.Arabic,
    token: "Your token here",
  ),
)
Tutorial
你可以参考Abdo tareq提供的视频教程:点击观看
Notes
- 在版本2.6.7之前,如果你传递null作为token,我们会处理测试版本。
- 自从我的fatoorah改变了他们的演示信息多次后,你需要在
MyfatoorahRequest中传递测试版本的URLhttps://apitest.myfatoorah.com和测试版本的token。 - 你可以在这里找到演示信息:My Fatoorah Demo Information
- 在版本3.0.2之后,你可以使用
MyfatoorahRequest.test或MyfatoorahRequest.live - 在重定向到成功URL后,你会得到一个paymentId,这将帮助你的后端跟踪与my fatoorah的支付状态
以上就是关于Flutter支付集成插件my_fatoorah的基本使用介绍,希望对您有所帮助!
更多关于Flutter支付集成插件my_fatoorah的使用的实战教程也可以访问 https://www.itying.com/category-92-b0.html

更多关于Flutter支付集成插件my_fatoorah的使用的实战系列教程也可以访问 https://www.itying.com/category-92-b0.html
当然,以下是一个关于如何在Flutter应用中集成并使用my_fatoorah支付插件的示例代码。假设你已经创建了一个Flutter项目,并且已经添加了my_fatoorah依赖到你的pubspec.yaml文件中。
首先,确保你的pubspec.yaml文件中包含以下依赖项:
dependencies:
  flutter:
    sdk: flutter
  my_fatoorah: ^latest_version  # 请替换为实际的最新版本号
然后,运行flutter pub get来安装依赖。
接下来,按照以下步骤配置和使用my_fatoorah插件:
- 初始化MyFatoorah服务:
在你的Flutter项目的入口文件(通常是main.dart)中,初始化MyFatoorah服务。你需要提供你的API密钥和其他必要的配置。
import 'package:flutter/material.dart';
import 'package:my_fatoorah/my_fatoorah.dart';

void main() {
  WidgetsFlutterBinding.ensureInitialized();

  // 初始化MyFatoorah服务
  MyFatoorah.initialize(
    apiKey: 'YOUR_API_KEY', // 替换为你的API密钥
    merchantId: 'YOUR_MERCHANT_ID', // 替换为你的商户ID
    sandboxMode: true, // 根据需要设置为true(沙箱模式)或false(生产环境)
  );

  runApp(MyApp());
}

class MyApp extends StatelessWidget {
  @override
  Widget build(BuildContext context) {
    return MaterialApp(
      title: 'Flutter MyFatoorah Demo',
      theme: ThemeData(
        primarySwatch: Colors.blue,
      ),
      home: MyHomePage(),
    );
  }
}
- 创建支付请求:
在你的主页面或其他页面中,创建一个按钮来触发支付请求。
import 'package:flutter/material.dart';
import 'package:my_fatoorah/my_fatoorah.dart';

class MyHomePage extends StatefulWidget {
  @override
  _MyHomePageState createState() => _MyHomePageState();
}

class _MyHomePageState extends State<MyHomePage> {
  @override
  Widget build(BuildContext context) {
    return Scaffold(
      appBar: AppBar(
        title: Text('Flutter MyFatoorah Demo'),
      ),
      body: Center(
        child: ElevatedButton(
          onPressed: () async {
            // 创建支付请求
            try {
              final paymentRequest = PaymentRequest(
                amount: 100.0, // 支付金额
                currency: 'SAR', // 货币代码
                description: 'Test Payment', // 支付描述
                returnUrl: 'https://yourwebsite.com/return', // 支付成功后的返回URL
                notifyUrl: 'https://yourwebsite.com/notify', // 支付通知URL
                customer: Customer(
                  email: 'customer@example.com', // 顾客邮箱
                  phone: '1234567890', // 顾客电话
                ),
              );

              final paymentResponse = await MyFatoorah.startPayment(paymentRequest);
              print('Payment Response: ${paymentResponse.toJson()}');
            } catch (e) {
              print('Error: $e');
            }
          },
          child: Text('Start Payment'),
        ),
      ),
    );
  }
}

class PaymentRequest {
  final double amount;
  final String currency;
  final String description;
  final String returnUrl;
  final String notifyUrl;
  final Customer customer;

  PaymentRequest({
    required this.amount,
    required this.currency,
    required this.description,
    required this.returnUrl,
    required this.notifyUrl,
    required this.customer,
  });
}

class Customer {
  final String email;
  final String phone;

  Customer({
    required this.email,
    required this.phone,
  });
}
注意:PaymentRequest和Customer类在这里只是为了演示目的而创建的简单数据模型。实际使用时,你应该根据my_fatoorah插件的文档使用正确的数据模型。
- 处理支付响应:
在上面的代码中,MyFatoorah.startPayment(paymentRequest)方法将启动支付流程,并返回一个paymentResponse对象。你可以根据这个响应对象来处理支付结果。
请注意,上述代码仅用于演示目的,并可能需要根据my_fatoorah插件的实际API进行调整。务必参考my_fatoorah插件的官方文档以获取最新的API信息和配置要求。