Flutter自定义底部导航栏插件fancy_bar的使用
Flutter自定义底部导航栏插件fancy_bar的使用
插件简介
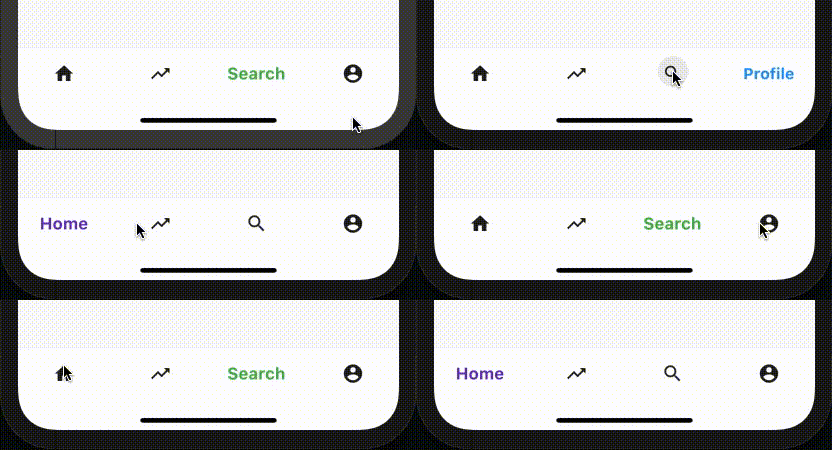
FancyBar 是一个用于Flutter应用的漂亮且动画丰富的底部导航栏插件。以下是该插件的一些功能预览图:
| 预览版本1 |
|---|
 |
| 预览版本2 |
|---|
 |
自定义选项(可选)
FancyBar
items- 导航项,必须多于一个且少于六个。selectedIndex- 当前选中的项索引,默认为0。onItemSelected- 必须监听项被点击时的事件,提供选中项的索引。type- 可以传递所需的Fancy Bar类型,可用的类型有 FancyV1, FancyV2。
FancyItem
icon- 该项的图标,可以传入任何小部件。title- 当该项被选中时出现在图标旁边的文本。textColor- 激活项的文本颜色。
开始使用
在 pubspec.yaml 文件中添加插件依赖:
dependencies:
  fancy_bar: ^1.2.0
基本用法
添加该组件到您的应用程序中:
bottomNavigationBar: FancyBottomBar(
        type: FancyType.FancyV2,   // Fancy Bar 类型
        items: [
          FancyItem(
            textColor: Colors.orange,
            title: 'Home',           // 标题
            icon: Icon(Icons.home),  // 图标
          ),
          FancyItem(
            textColor: Colors.red,
            title: 'Trending',
            icon: Icon(Icons.trending_up),
          ),
          FancyItem(
            textColor: Colors.green,
            title: 'Search',
            icon: Icon(Icons.search),
          ),
          FancyItem(
            textColor: Colors.brown,
            title: 'Settings',
            icon: Icon(Icons.settings),
          ),
        ],
        onItemSelected: (index) {
          print(index);             // 打印选中项的索引
        },
      ),
完整示例代码
以下是一个完整的示例代码,展示了如何在Flutter应用中使用 fancy_bar 插件创建自定义底部导航栏。
import 'package:fancy_bar/fancy_bar.dart';
import 'package:flutter/material.dart';

void main() => runApp(MyApp());

class MyApp extends StatelessWidget {
  [@override](/user/override)
  Widget build(BuildContext context) {
    return MaterialApp(
      title: 'Flutter Demo',
      theme: ThemeData(
        primarySwatch: Colors.blue,
      ),
      home: MyHomePage(title: 'Flutter Demo Home Page'),
    );
  }
}

class MyHomePage extends StatefulWidget {
  MyHomePage({Key? key, this.title}) : super(key: key);

  final String? title;

  [@override](/user/override)
  _MyHomePageState createState() => _MyHomePageState();
}

class _MyHomePageState extends State<MyHomePage> {
  int _counter = 0;

  void _incrementCounter() {
    setState(() {
      _counter++;
    });
  }

  [@override](/user/override)
  Widget build(BuildContext context) {
    return Scaffold(
      appBar: AppBar(
        title: Text(widget.title!),
      ),
      bottomNavigationBar: FancyBottomBar(
        type: FancyType.FancyV2,   // 设置Fancy Bar类型
        items: [
          FancyItem(
            textColor: Colors.orange,
            title: 'Home',
            icon: Icon(Icons.home),
          ),
          FancyItem(
            textColor: Colors.red,
            title: 'Trending',
            icon: Icon(Icons.trending_up),
          ),
          FancyItem(
            textColor: Colors.green,
            title: 'Search',
            icon: Icon(Icons.search),
          ),
          FancyItem(
            textColor: Colors.brown,
            title: 'Settings',
            icon: Icon(Icons.settings),
          ),
        ],
        onItemSelected: (index) {
          print('Selected index: $index');  // 打印选中项的索引
        },
      ),
      body: Center(
        child: Column(
          mainAxisAlignment: MainAxisAlignment.center,
          children: <Widget>[
            Text(
              'You have pushed the button this many times:',
            ),
            Text(
              '$_counter',
              style: Theme.of(context).textTheme.headline4,
            ),
          ],
        ),
      ),
      floatingActionButton: FloatingActionButton(
        onPressed: _incrementCounter,
        tooltip: 'Increment',
        child: Icon(Icons.add),
      ),
    );
  }
}
更多关于Flutter自定义底部导航栏插件fancy_bar的使用的实战教程也可以访问 https://www.itying.com/category-92-b0.html
1 回复
更多关于Flutter自定义底部导航栏插件fancy_bar的使用的实战系列教程也可以访问 https://www.itying.com/category-92-b0.html
当然,以下是如何在Flutter项目中使用fancy_bar插件来自定义底部导航栏的一个简单示例。fancy_bar是一个流行的Flutter包,用于创建高度可定制的底部导航栏。
首先,确保你已经在pubspec.yaml文件中添加了fancy_bar依赖:
dependencies:
  flutter:
    sdk: flutter
  fancy_bottom_navigation: ^x.x.x  # 请替换为最新版本号
然后运行flutter pub get来安装依赖。
接下来,在你的Flutter应用中实现FancyBar。以下是一个完整的示例代码:
import 'package:flutter/material.dart';
import 'package:fancy_bottom_navigation/fancy_bottom_navigation.dart';

void main() {
  runApp(MyApp());
}

class MyApp extends StatelessWidget {
  @override
  Widget build(BuildContext context) {
    return MaterialApp(
      title: 'FancyBar Example',
      theme: ThemeData(
        primarySwatch: Colors.blue,
      ),
      home: HomeScreen(),
    );
  }
}

class HomeScreen extends StatefulWidget {
  @override
  _HomeScreenState createState() => _HomeScreenState();
}

class _HomeScreenState extends State<HomeScreen> {
  int _selectedTab = 0;
  final List<TabData> _tabs = [
    TabData(iconData: Icons.home, title: 'Home'),
    TabData(iconData: Icons.search, title: 'Search'),
    TabData(iconData: Icons.add, title: 'Add'),
    TabData(iconData: Icons.account_circle, title: 'Profile'),
  ];

  void _onTabSelected(int index) {
    setState(() {
      _selectedTab = index;
    });
  }

  @override
  Widget build(BuildContext context) {
    return Scaffold(
      body: Center(
        child: Text('You have selected: ${_tabs[_selectedTab].title}'),
      ),
      bottomNavigationBar: FancyBottomNavigation(
        tabs: _tabs,
        onTabChangedListener: _onTabSelected,
        initialSelection: _selectedTab,
        backgroundColor: Colors.white,
        activeColor: Colors.blue,
        inactiveColor: Colors.grey,
        notchSmoothness: NotchSmoothness.softEdge, // or NotchSmoothness.sharpEdge
        splashColor: Colors.blueAccent,
        splashDuration: Duration(milliseconds: 300),
        dotSize: 6,
        hideAnimationDuration: Duration(milliseconds: 200),
        showAnimationDuration: Duration(milliseconds: 200),
      ),
    );
  }
}

class TabData {
  final IconData iconData;
  final String title;

  TabData({required this.iconData, required this.title});
}
代码解释:
-
依赖导入:
- 导入
flutter/material.dart用于基础UI组件。 - 导入
fancy_bottom_navigation/fancy_bottom_navigation.dart用于自定义底部导航栏。
- 导入
-
主应用:
MyApp是一个StatelessWidget,它定义了应用的主题和主页。
-
主页:
HomeScreen是一个StatefulWidget,它持有当前选中的标签索引状态。_tabs列表包含每个标签的数据,包括图标和标题。_onTabSelected方法用于更新当前选中的标签索引。
-
UI构建:
Scaffold组件包含应用的主体和底部导航栏。FancyBottomNavigation组件配置为显示标签、处理标签点击事件、设置颜色、动画等。
这个示例展示了如何使用fancy_bar(假设你指的是fancy_bottom_navigation,因为fancy_bar不是一个广泛认知的Flutter包名)来创建一个自定义的底部导航栏。你可以根据需要进一步自定义样式和行为。


