


Flutter无人机控制插件ryze_tello的使用
Flutter无人机控制插件ryze_tello的使用
关于
此包提供了一个用于控制Tello无人机的Dart接口。
入门指南
- 在pub.dev上安装此包。
- 编写一个Dart脚本来控制你的Tello无人机。
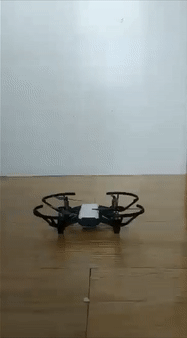
- 打开你的Tello无人机。
- 运行你的脚本,观看你的Tello在空中飞行!
使用方法
以下是一个示例代码,展示了如何让Tello起飞、在空中悬停5秒,然后降落。
import 'package:ryze_tello/ryze_tello.dart';

void main() async {
  late final Tello tello;

  try {
    // 初始化
    tello = await Tello.tello();

    // 飞行操作
    await tello.takeoff(); // 起飞

    await Future.delayed(const Duration(seconds: 5)); // 悬停5秒

    await tello.land(); // 降落
  } finally {
    // 清理和断开连接
    tello.disconnect(); // 重要:必须调用以正确释放连接到Tello的套接字。
  }
}
更多示例代码
以下是一个更全面的示例代码,展示了如何执行更多复杂的飞行操作,并监听无人机的状态数据。
import 'dart:async';
import 'package:ryze_tello/ryze_tello.dart';

void main() async {
  late final Tello tello;

  try {
    // 初始化
    tello = await Tello.tello();

    // 飞行操作
    await tello.takeoff(); // 起飞

    await tello.fly(FlyDirection.up, 90); // 向上飞行90厘米

    await tello.rotate(180); // 顺时针旋转180度
    await tello.rotate(-180); // 逆时针旋转180度
    await tello.rotate(180); // 顺时针旋转180度
    await tello.rotate(-180); // 逆时针旋转180度

    await Future.delayed(const Duration(seconds: 1)); // 暂停1秒

    await tello.flip(FlipDirection.front); // 前翻

    await tello.flyToPosition(x: -102, y: 0, z: 0, speed: 30); // 飞到指定位置
    await tello.curveToPosition(x1: 51, z1: 51, x2: 102); // 沿曲线飞行到指定位置
    await tello.setSpeed(10); // 设置飞行速度

    tello.remoteControl(pitch: 30); // 远程控制(俯仰角30度)
    await Future.delayed(const Duration(seconds: 1)); // 暂停1秒
    tello.remoteControl(); // 停止远程控制

    // 监听无人机状态数据
    StreamSubscription<TelloState> stateListener = tello.state.listen((TelloState state) {
      print(state); // 打印无人机状态
    });

    await Future.delayed(const Duration(seconds: 2)); // 暂停2秒
    stateListener.cancel(); // 取消状态监听

    // 获取无人机数据值
    List<dynamic> telloState = await Future.wait([
      tello.speed, // 速度
      tello.battery, // 电池电量
      tello.flightTime, // 飞行时间
      tello.height, // 高度
      tello.averageTemperature, // 平均温度
      tello.imuAttitude, // IMU姿态
      tello.barometerReading, // 气压计读数
      tello.distanceFromTakeoff, // 离起飞点的距离
      tello.wifiSnr, // WiFi信号强度
      tello.imuAcceleration // IMU加速度
    ]);

    const List<String> stateValueNames = [
      "speed", // 速度
      "battery", // 电池电量
      "flightTime", // 飞行时间
      "height", // 高度
      "averageTemperature", // 平均温度
      "imuAttitude", // IMU姿态
      "barometerReading", // 气压计读数
      "distanceFromTakeoff", // 离起飞点的距离
      "wifiSnr", // WiFi信号强度
      "imuAcceleration" // IMU加速度
    ];

    for (int i = 0; i < telloState.length; i++) {
      print("${stateValueNames[i]}: ${telloState[i]}"); // 打印每个数据值
    }

    // 降落
    await tello.land(); // 降落
    // tello.emergencyShutdown(); // 紧急关机(可选)
  } catch (error, stacktrace) {
    print("Error: $error"); // 打印错误信息
    print("Stack Trace: $stacktrace"); // 打印堆栈跟踪
  } finally {
    // 清理和断开连接
    tello.disconnect(); // 重要:必须调用以正确释放连接到Tello的套接字。
  }
}
更多关于Flutter无人机控制插件ryze_tello的使用的实战教程也可以访问 https://www.itying.com/category-92-b0.html
1 回复

更多关于Flutter无人机控制插件ryze_tello的使用的实战系列教程也可以访问 https://www.itying.com/category-92-b0.html
当然,下面是一个关于如何使用Flutter中的ryze_tello插件来控制Ryze Tello无人机的示例代码。这个插件允许你通过Flutter应用与Tello无人机进行通信,控制其飞行、拍摄视频等功能。
首先,确保你已经在你的pubspec.yaml文件中添加了ryze_tello依赖:
dependencies:
  flutter:
    sdk: flutter
  ryze_tello: ^最新版本号  # 请替换为实际的最新版本号
然后,运行flutter pub get来安装依赖。
接下来,是一个简单的Flutter应用示例,它展示了如何使用ryze_tello插件来控制Tello无人机:
import 'package:flutter/material.dart';
import 'package:ryze_tello/ryze_tello.dart';

void main() {
  runApp(MyApp());
}

class MyApp extends StatefulWidget {
  @override
  _MyAppState createState() => _MyAppState();
}

class _MyAppState extends State<MyApp> {
  late TelloController telloController;
  bool isConnected = false;

  @override
  void initState() {
    super.initState();
    telloController = TelloController();
    initTello();
  }

  Future<void> initTello() async {
    try {
      await telloController.connect('192.168.10.1');  // Tello无人机的IP地址
      isConnected = true;
      setState(() {});
      // 发送起飞命令
      await telloController.sendCommand('takeoff');
    } catch (e) {
      print('Failed to connect to Tello: $e');
    }
  }

  Future<void> sendCommand(String command) async {
    if (isConnected) {
      await telloController.sendCommand(command);
    } else {
      print('Not connected to Tello');
    }
  }

  @override
  Widget build(BuildContext context) {
    return MaterialApp(
      home: Scaffold(
        appBar: AppBar(
          title: Text('Tello Control'),
        ),
        body: Center(
          child: Column(
            mainAxisAlignment: MainAxisAlignment.center,
            children: <Widget>[
              Text(
                isConnected ? 'Connected to Tello' : 'Not connected to Tello',
                style: TextStyle(fontSize: 24),
              ),
              SizedBox(height: 20),
              ElevatedButton(
                onPressed: () => sendCommand('up 30'),
                child: Text('Up 30 cm'),
              ),
              SizedBox(height: 10),
              ElevatedButton(
                onPressed: () => sendCommand('down 30'),
                child: Text('Down 30 cm'),
              ),
              SizedBox(height: 10),
              ElevatedButton(
                onPressed: () => sendCommand('left 30'),
                child: Text('Left 30 cm'),
              ),
              SizedBox(height: 10),
              ElevatedButton(
                onPressed: () => sendCommand('right 30'),
                child: Text('Right 30 cm'),
              ),
              SizedBox(height: 10),
              ElevatedButton(
                onPressed: () => sendCommand('land'),
                child: Text('Land'),
              ),
            ],
          ),
        ),
      ),
    );
  }

  @override
  void dispose() {
    if (isConnected) {
      telloController.disconnect();
    }
    super.dispose();
  }
}
代码说明:
- 依赖管理:在
pubspec.yaml中添加ryze_tello依赖。 - 状态管理:使用
StatefulWidget和_MyAppState来管理连接状态和命令发送。 - 初始化连接:在
initState方法中尝试连接到Tello无人机,并发送起飞命令。 - 命令发送:定义一个
sendCommand方法来发送控制命令,如上升、下降、左转、右转和降落。 - UI布局:使用
MaterialApp和Scaffold构建一个简单的用户界面,包含连接状态和几个控制按钮。 - 资源释放:在
dispose方法中断开与Tello的连接,以避免资源泄漏。
请确保你的Tello无人机已经通过WiFi连接到你的开发设备,并且IP地址正确无误。这个示例代码仅展示了基本控制功能,你可以根据需要扩展更多功能,如视频流接收、姿态控制等。