


Flutter图片选择插件n_image_picker的使用
Flutter图片选择插件n_image_picker的使用
Neil’s Image Picker

新拖放区域,目前仅在版本3.0.0的Web上可用
使用此部件,您可以:
- 提供URL图像
- 提供资产图像
- 拖放(仅限Web)
- 启动时加载图像
- 命名图像的JSON键
- 获取多部分文件
- 在加载图像时进行错误控制
- 更改加载初始图像、选择图像、撤销选择图像以及发生错误时显示的部件
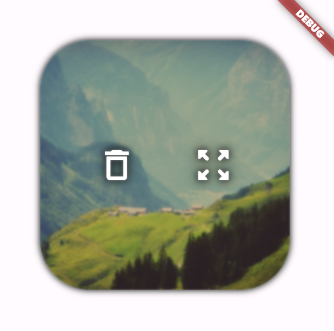
- 完整预览
- 调整图像大小
- 获取图像字节
控制器属性
/// 图像以字节数组形式存在
.bytes -> Uint8List

/// 当onLoadingImage有一个URL时
.error -> bool

/// 显示模糊背景或黑色透明度
.viewerBlur -> bool

/// 支持的格式列表
.fileTypes -> List<String>

.hasImage -> bool
.hasNoImage -> bool
.image -> Image
.file -> File
.path -> Path

/// 头部映射,这需要后端开放您的域端口
.headers -> Map<String, String>
控制器方法
/// 从HTTP响应和URL设置图像文件
.setFromResponse(response: Response, url: String)

/// 这在Web上不起作用!
.setFromPath(path: String)

/// 从URL获取图像,这在所有环境中都适用
.setFromURL(context, url: String, headers: Map<String, String>)

/// 打开图像对话框选择器
.pickImage(maxSize: int)

.removeImage(notify: bool)

/// 返回一个用于上传的异步[MultipartFile],示例:
/// - {"key" : "image_path.png"}
await imageController.image(key: "key").then((image) {}) -> Future<MultipartFile>
.showImageViewer(notify: bool)
小部件属性
ImagePicker(
    controller          : required ImageController,

    // 同步函数,当添加图像时触发
    onAdd               : null | Function () {},

    // 同步函数,当删除图像时触发
    onDelete            : null | Function () {},

    // 只能填写其中一个:urlImage 或 assetImage
    urlImage            : null | String,

    // 只能填写其中一个:urlImage 或 assetImage
    assetImage          : null | String,

    width               : null | double,
    height              : null | double,
    emptyWidget         : null | Widget,
    onErrorWidget       : null | Widget,
    onLoadingWidget     : null | Widget,
    margin              : null | EdgeInsetsGeometry,
    bankgroundColor     : null | Color,
    borderRadius        : null | BorderRadius,
    border              : null | Border,
    shadow              : null | BoxShadow,
    readOnly            : null | bool,
    fit                 : null | BoxFit,
    viewerBlur          : null | bool,
    viewerBlurSigma     : null | double,
    shape               : null | BoxShape,

    // 用于hero动画的关系字符串
    tag                 : null | Object,

    // 动画持续时间
    duration            : null | Duration,

    // 对于.circle或.square
    dimension           : null | Double,

    // 图标,如Icons.{name}
    deleteIcon          : null | IconData,

    // 图标,如Icons.{name}
    expandIcon          : null | IconData,

    // 图标,如Icons.{name}
    errorIcon           : null | IconData,

    // 图标,如Icons.{name}
    dragIcon            : null | IconData,

    // 仅适用于bmp、cur、jpg、png、pvr、tga、tiff格式
    maxSize             : null | int,

    /// 头部映射,这需要后端开放您的域端口
    headers             : null | Map<String, String>,
)
如何使用
1. 创建一个控制器并添加监听器
ImageController imageController = ImageController();

@override
void initState() {
    super.initState();
    imageController.addListener(() => setState(() {}));
}

@override
void dispose() {
    super.dispose();
    imageController.removeListener(() {});
    imageController.dispose();
}
2. 使用多种选项查看和选择图像
ImagePicker(
    controller  : imageController,
    width       : 250,
    height      : 250,
)

ImagePicker.circle(
    controller  : imageController,
    dimension   : 200
)

ImagePicker.square(
    controller  : imageController,
    dimension   : 200
)

ImagePicker.expand(
    controller  : imageController,
)

//! 如果Web上的图像服务器启用了CORS安全,并且您的代码不包含服务器接受的头信息,则会返回错误。需要注意的是,CORS安全包括后端注册的接受IP列表,如果您的项目不在列表中,即使有正确的头信息,图像也不会显示。

ImageViewer(
    urlImage : 'https://w.wallhaven.cc/full/49/wallhaven-49d5y8.jpg',
    width    : 250,
    height   : 250,
)

ImageViewer.square(
    urlImage  : 'https://w.wallhaven.cc/full/49/wallhaven-49d5y8.jpg',
    dimension : 200
)

ImageViewer.circle(
    urlImage  : 'https://w.wallhaven.cc/full/49/wallhaven-49d5y8.jpg',
    dimension : 200
)

ImageViewer.expand(
    urlImage  : 'https://w.wallhaven.cc/full/49/wallhaven-49d5y8.jpg',
)
更多关于Flutter图片选择插件n_image_picker的使用的实战教程也可以访问 https://www.itying.com/category-92-b0.html
1 回复

更多关于Flutter图片选择插件n_image_picker的使用的实战系列教程也可以访问 https://www.itying.com/category-92-b0.html
当然,以下是如何在Flutter项目中使用n_image_picker插件来选择图片的示例代码。n_image_picker是一个用于从设备图库或相机中选择图片的Flutter插件。请注意,在Flutter社区中,image_picker插件更为常见,但假设n_image_picker具有类似的功能,我们将按照该插件的假设使用方式编写代码。
首先,确保你的pubspec.yaml文件中包含了n_image_picker的依赖项(注意:如果n_image_picker不是一个实际存在的插件,你可能需要替换为image_picker或其他合适的插件):
dependencies:
  flutter:
    sdk: flutter
  n_image_picker: ^x.y.z  # 替换为实际的版本号
然后,运行flutter pub get来安装依赖项。
接下来,在你的Dart文件中,你可以按照以下方式使用n_image_picker来选择图片:
import 'package:flutter/material.dart';
import 'package:n_image_picker/n_image_picker.dart';  // 导入插件

void main() {
  runApp(MyApp());
}

class MyApp extends StatelessWidget {
  @override
  Widget build(BuildContext context) {
    return MaterialApp(
      home: ImagePickerScreen(),
    );
  }
}

class ImagePickerScreen extends StatefulWidget {
  @override
  _ImagePickerScreenState createState() => _ImagePickerScreenState();
}

class _ImagePickerScreenState extends State<ImagePickerScreen> {
  File? _imageFile;

  Future<void> _pickImage(ImageSource source) async {
    final ImagePicker _picker = ImagePicker();
    final PickedFile? pickedFile = await _picker.pickImage(source: source);

    if (pickedFile != null) {
      setState(() {
        _imageFile = File(pickedFile.path);
      });
    }
  }

  @override
  Widget build(BuildContext context) {
    return Scaffold(
      appBar: AppBar(
        title: Text('Image Picker Demo'),
      ),
      body: Center(
        child: Column(
          mainAxisAlignment: MainAxisAlignment.center,
          children: <Widget>[
            _imageFile == null
                ? Text('No image selected.')
                : Image.file(_imageFile!),
            SizedBox(height: 20),
            ElevatedButton(
              onPressed: () => _pickImage(ImageSource.gallery),
              child: Text('Pick Image from Gallery'),
            ),
            SizedBox(height: 10),
            ElevatedButton(
              onPressed: () => _pickImage(ImageSource.camera),
              child: Text('Pick Image from Camera'),
            ),
          ],
        ),
      ),
    );
  }
}
在这个示例中:
- 我们首先导入了
n_image_picker插件。 - 定义了
MyApp和ImagePickerScreen两个widget。 - 在
_ImagePickerScreenState中,我们定义了一个_imageFile变量来存储选中的图片文件。 _pickImage方法使用ImagePicker实例来选择图片,无论是从图库还是相机中选择。- 在UI部分,我们显示了一个按钮来触发图片选择操作,以及一个
Imagewidget来显示选中的图片。
请注意,由于n_image_picker可能不是一个实际存在的插件,上述代码是基于image_picker插件的假设编写的。如果n_image_picker确实存在且API有所不同,请查阅其官方文档并进行相应的调整。如果n_image_picker不存在,你可以考虑使用image_picker插件,其使用方式非常类似。