


Flutter智能验证码验证插件yandex_smart_captcha的使用
Flutter智能验证码验证插件yandex_smart_captcha的使用
本插件旨在简化在Flutter移动应用中集成Yandex智能验证码的过程。要了解更多关于Yandex智能验证码服务的信息,请访问其官方页面。
本插件受到了flutter_yandex_smartcaptcha的启发,但提供了几个改进,包括修复了严重的bug、性能有所提升、文档更加完善,并且API更简洁。
动机
有一天在工作中,我急需在移动应用中集成一个Yandex验证码,flutter_yandex_smartcaptcha包帮助了我。然而,我发现了一个严重的bug并报告给了作者。由于他们没有回应,我决定自己创建一个类似的包,并借此机会学习如何在pub.dev上发布包。这就是这个故事的结尾。
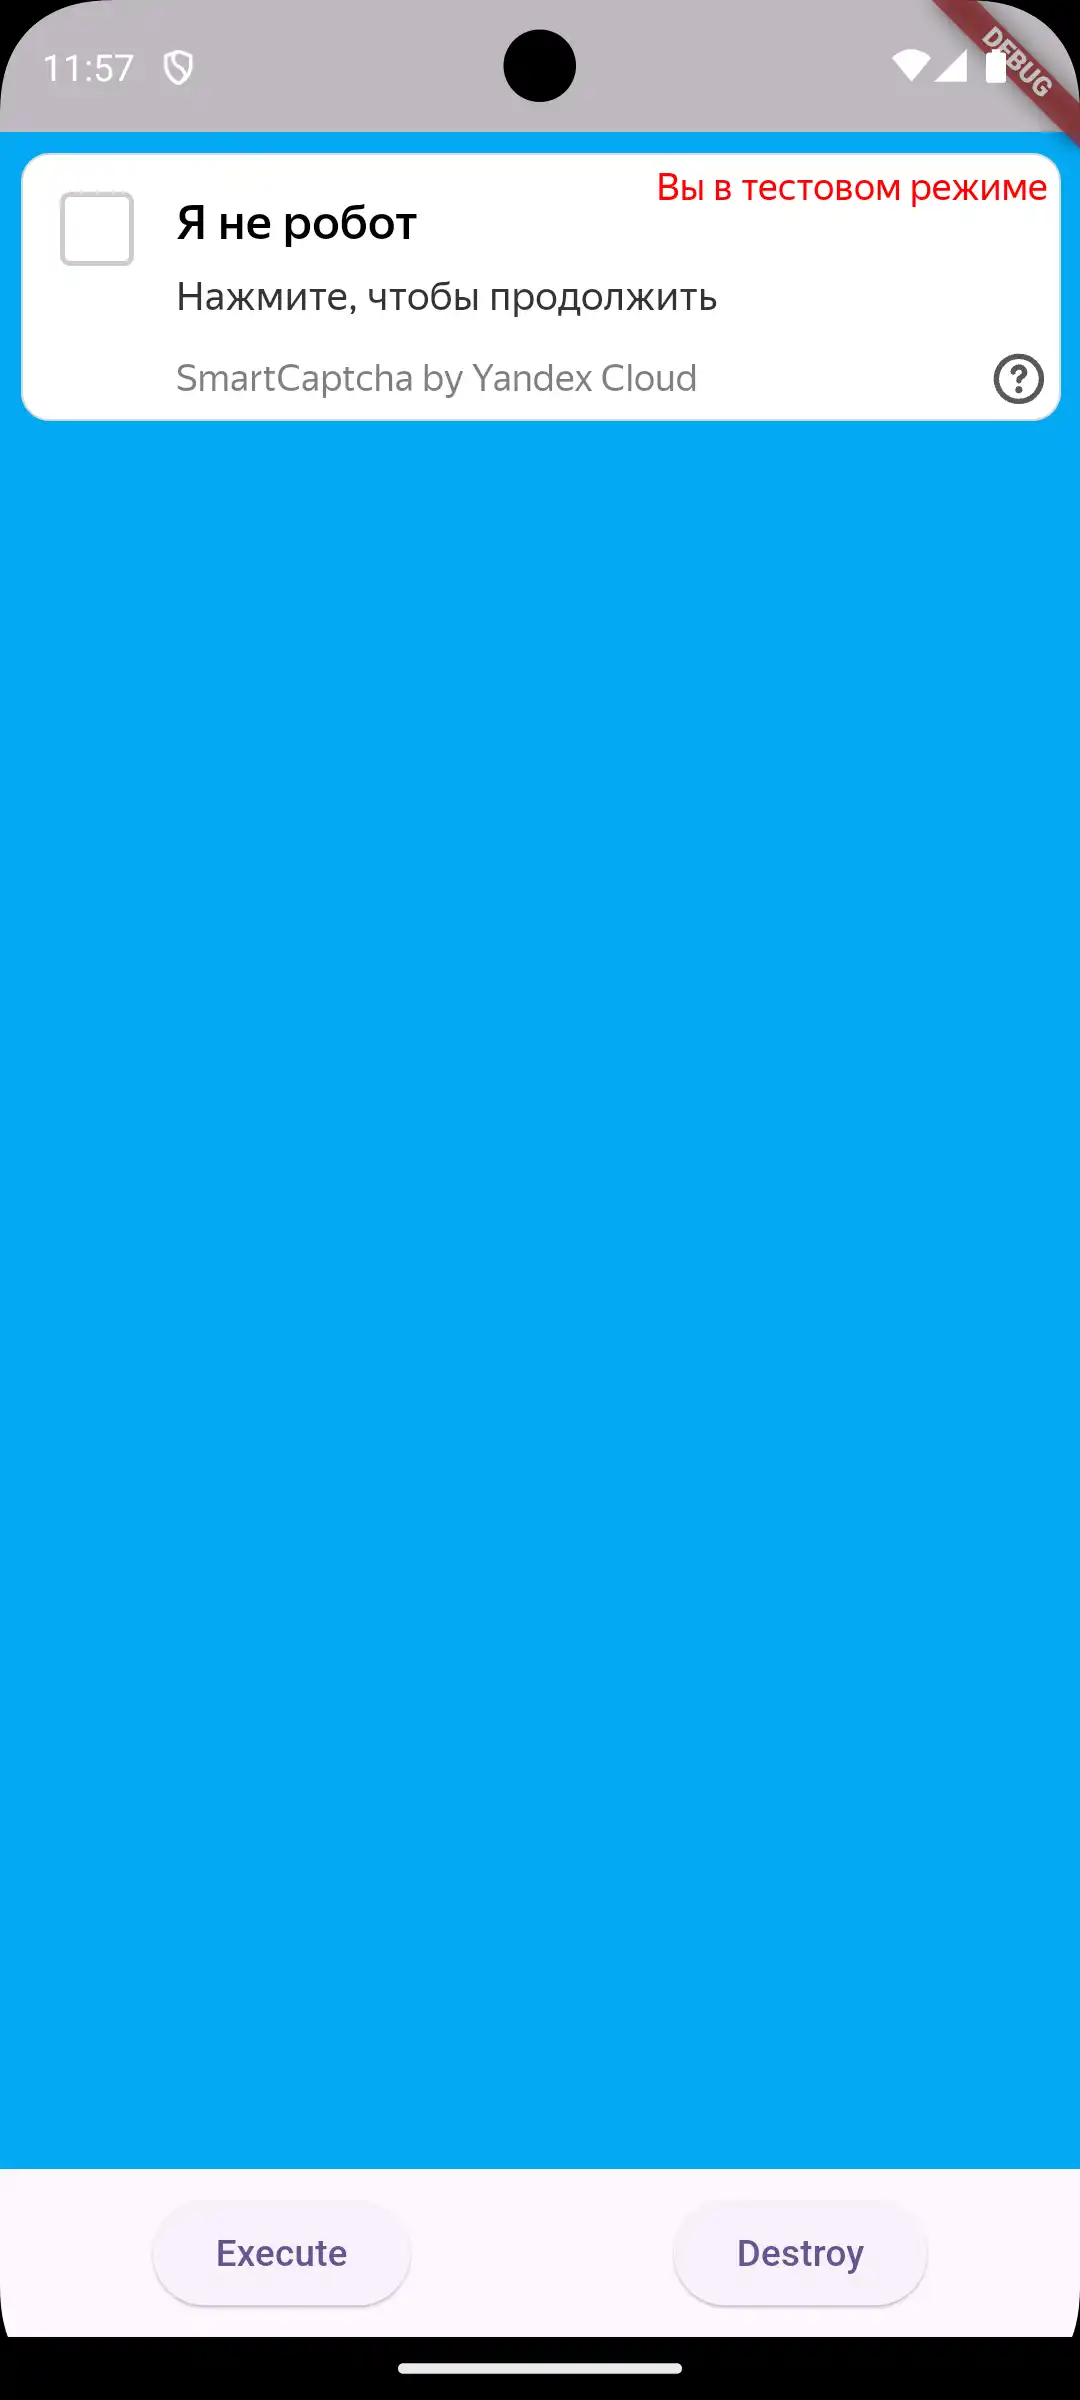
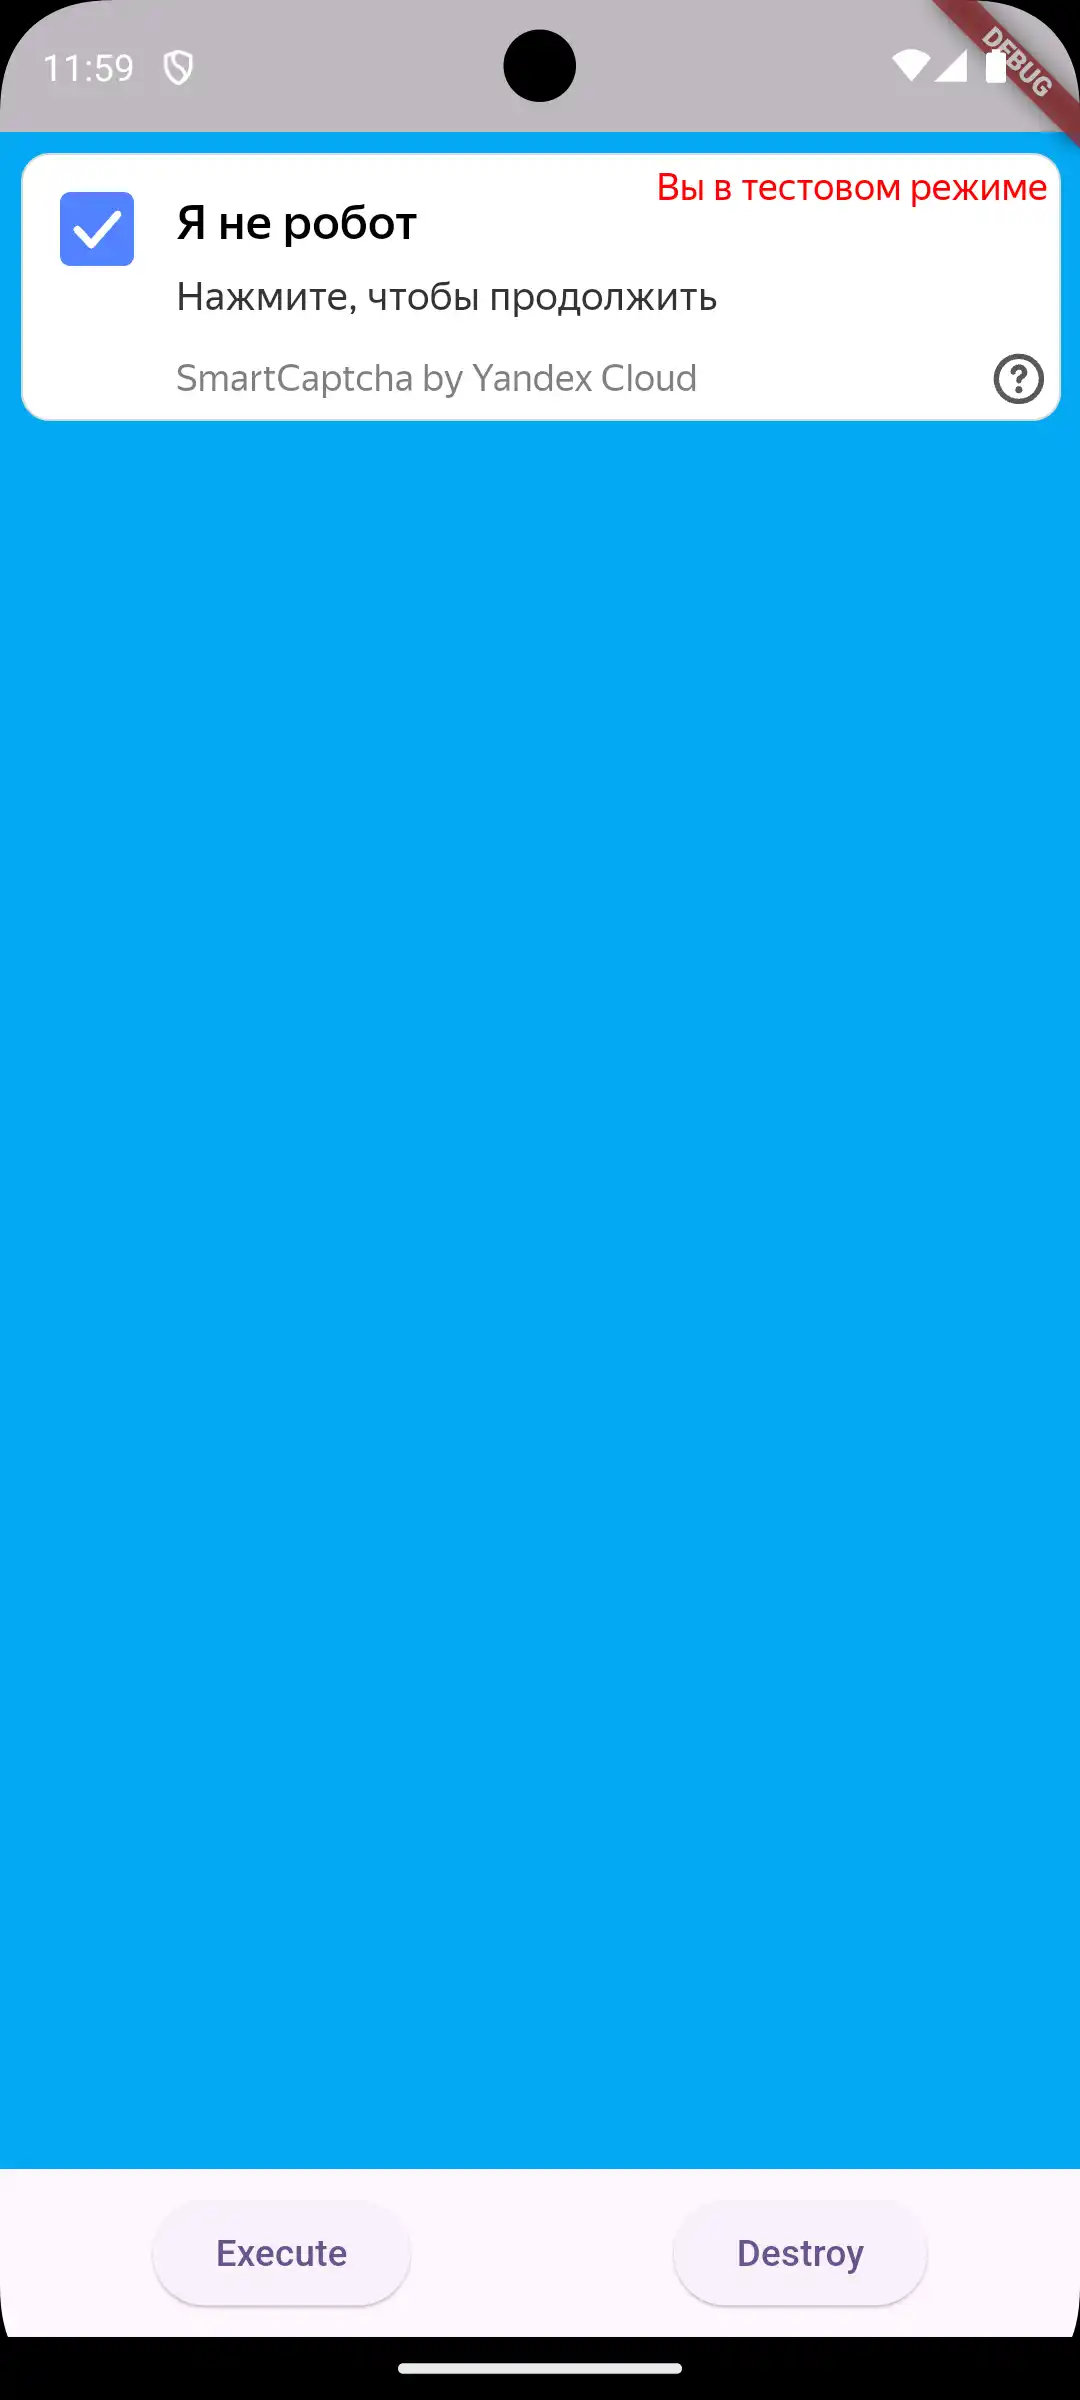
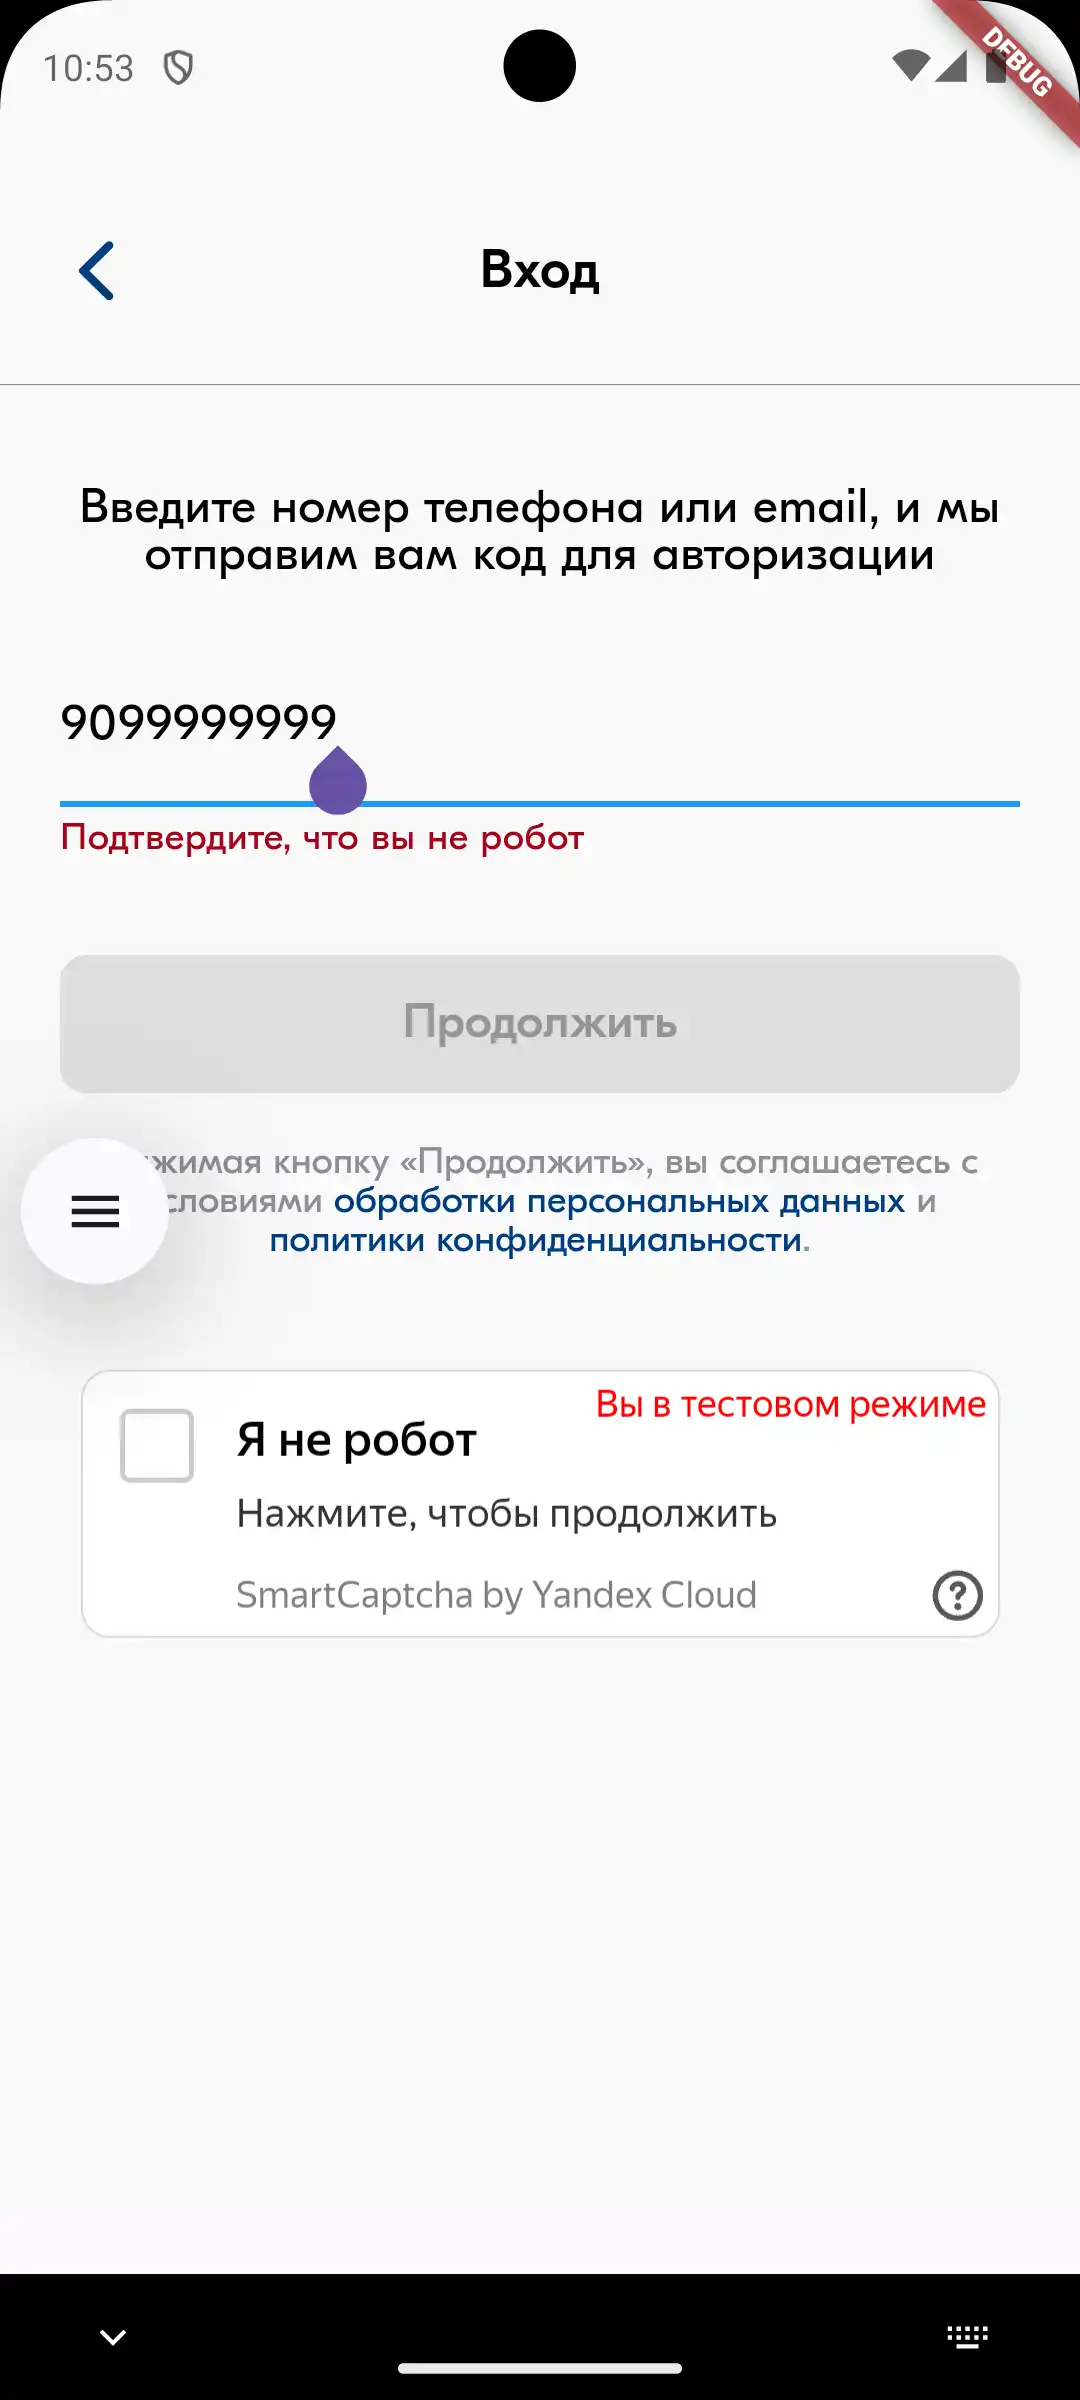
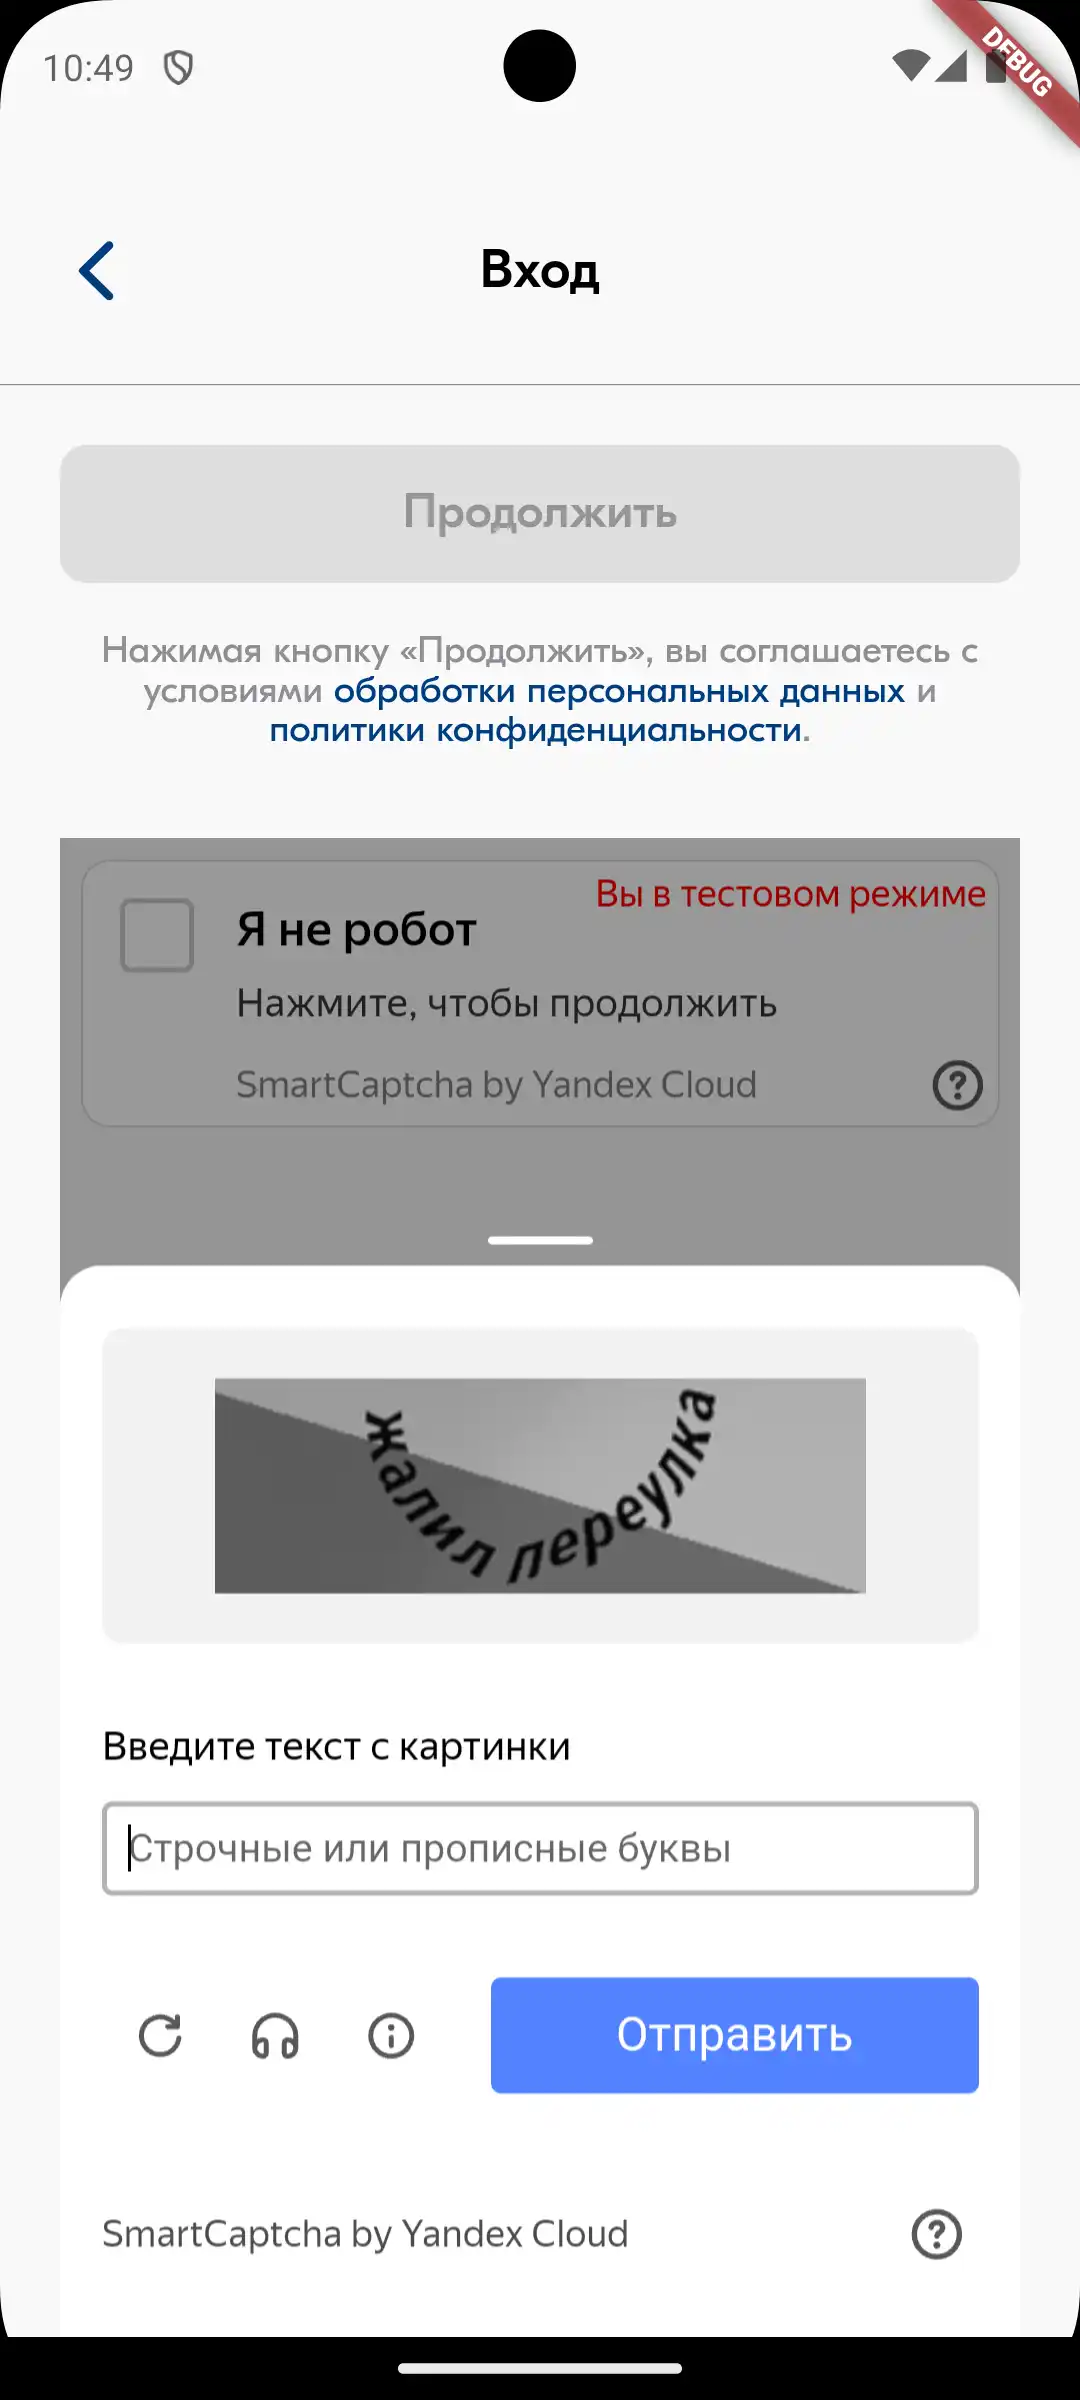
截图
智能验证码在简单的测试屏幕上的状态:

智能验证码在真实应用程序中的状态:
完整示例代码
以下是一个完整的示例代码,展示了如何在Flutter应用中使用yandex_smart_captcha插件。
import 'package:flutter/material.dart';
import 'package:yandex_smart_captcha/yandex_smart_captcha.dart';

// 从Yandex Cloud管理员面板获取您的密钥。
const clientKey = String.fromEnvironment('CLIENT_KEY');

void main() {
  runApp(const App());
}

class App extends StatelessWidget {
  const App({super.key});

  [@override](/user/override)
  Widget build(BuildContext context) {
    return MaterialApp(
      title: 'Yandex SmartCaptcha',
      theme: ThemeData(useMaterial3: true),
      home: const HomePage(title: 'Example'),
    );
  }
}

class HomePage extends StatefulWidget {
  final String title;

  const HomePage({required this.title, super.key});

  [@override](/user/override)
  State<HomePage> createState() => _HomePageState();
}

class _HomePageState extends State<HomePage> {
  late final CaptchaConfig _config;
  late final CaptchaController _controller;

  [@override](/user/override)
  void initState() {
    super.initState();
    _config = const CaptchaConfig(
      clientKey: clientKey,
      alwaysShowChallenge: true,
      language: CaptchaLanguage.en,
      // invisibleMode: false,
      // hideDPNBadge: false,
      // dpnBadgePosition: DPNBadgePosition.bottomRight,
      // webViewMode: true,
      backgroundColor: Colors.lightBlue,
    );
    _controller = CaptchaController()
      ..setReadyCallback(() {
        debugPrint('call: SmartCaptcha controller is ready');
      });
  }

  [@override](/user/override)
  Widget build(BuildContext context) {
    return Scaffold(
      body: SafeArea(
        child: Column(
          children: [
            Expanded(
              child: YandexSmartCaptcha(
                config: _config,
                controller: _controller,
                loadingIndicator: const Center(
                  child: SizedBox(
                    height: 50,
                    width: 50,
                    child: CircularProgressIndicator(),
                  ),
                ),
                onNavigationRequest: (url) {
                  debugPrint('call: onNavigationRequest $url');
                  if (url.contains('cloud.yandex')) {
                    // 当用户点击‘Yandex Cloud智能验证码’链接时,阻止导航请求。
                    return false;
                  }
                  return true;
                },
                onNetworkError: () {
                  debugPrint('call: onNetworkError');
                },
                onJavaScriptError: () {
                  debugPrint('call: onJavaScriptError');
                },
                onChallengeShown: () {
                  debugPrint('call: onChallengeShown');
                },
                onChallengeHidden: () {
                  debugPrint('call: onChallengeHidden');
                },
                onChallengeSolved: (token) {
                  debugPrint('call: onChallengeSolved $token');
                },
              ),
            ),
            Padding(
              padding: const EdgeInsets.all(8),
              child: Row(
                mainAxisAlignment: MainAxisAlignment.spaceAround,
                children: [
                  ElevatedButton(
                    onPressed: () {
                      if (_controller.isReady) {
                        _controller.execute();
                      }
                    },
                    child: const Text('Execute'),
                  ),
                  ElevatedButton(
                    onPressed: () {
                      if (_controller.isReady) {
                        _controller.destroy();
                      }
                    },
                    child: const Text('Destroy'),
                  ),
                ],
              ),
            ),
          ],
        ),
      ),
    );
  }
}
更多关于Flutter智能验证码验证插件yandex_smart_captcha的使用的实战教程也可以访问 https://www.itying.com/category-92-b0.html

更多关于Flutter智能验证码验证插件yandex_smart_captcha的使用的实战系列教程也可以访问 https://www.itying.com/category-92-b0.html
当然,以下是如何在Flutter项目中使用yandex_smart_captcha插件进行智能验证码验证的代码示例。这个插件允许你集成Yandex Smart Captcha到你的Flutter应用中,以增强用户验证的安全性。
步骤 1: 添加依赖
首先,在你的pubspec.yaml文件中添加yandex_smart_captcha依赖:
dependencies:
  flutter:
    sdk: flutter
  yandex_smart_captcha: ^最新版本号  # 请替换为实际的最新版本号
然后运行flutter pub get来安装依赖。
步骤 2: 配置Yandex Smart Captcha
在Yandex Smart Captcha的官方文档中注册你的应用并获取必要的API密钥。
步骤 3: 初始化插件并显示验证码
在你的Flutter应用中,初始化YandexSmartCaptcha插件并显示验证码。以下是一个基本的示例:
import 'package:flutter/material.dart';
import 'package:yandex_smart_captcha/yandex_smart_captcha.dart';

void main() {
  runApp(MyApp());
}

class MyApp extends StatefulWidget {
  @override
  _MyAppState createState() => _MyAppState();
}

class _MyAppState extends State<MyApp> {
  YandexSmartCaptcha? _captcha;
  bool _isCaptchaVisible = false;

  @override
  void initState() {
    super.initState();
    // 初始化YandexSmartCaptcha
    _captcha = YandexSmartCaptcha(
      apiKey: '你的API密钥',  // 替换为你的实际API密钥
      onCaptchaSolved: (result) {
        // 验证码验证成功后的回调
        print('Captcha solved: $result');
        setState(() {
          _isCaptchaVisible = false;
        });
      },
      onError: (error) {
        // 错误处理回调
        print('Captcha error: $error');
      },
    );
  }

  @override
  Widget build(BuildContext context) {
    return MaterialApp(
      home: Scaffold(
        appBar: AppBar(
          title: Text('Yandex Smart Captcha Example'),
        ),
        body: Center(
          child: ElevatedButton(
            onPressed: () {
              setState(() {
                _isCaptchaVisible = true;
              });
              _captcha?.showCaptcha();
            },
            child: Text(_isCaptchaVisible ? 'Hide Captcha' : 'Show Captcha'),
          ),
        ),
      ),
    );
  }

  @override
  void dispose() {
    _captcha?.dispose();
    super.dispose();
  }
}
说明
-
初始化YandexSmartCaptcha: 在
initState方法中初始化YandexSmartCaptcha实例,并传入你的API密钥。同时,设置验证码解决和错误处理的回调。 -
显示验证码: 使用
_captcha?.showCaptcha()方法来显示验证码。在这个例子中,当用户点击按钮时,验证码将被显示。如果验证码已经显示,按钮文本将变为"Hide Captcha"(尽管这个示例中并没有实现隐藏验证码的逻辑,你可以根据需要添加)。 -
处理验证码结果: 当用户成功解决验证码时,
onCaptchaSolved回调将被触发,你可以在这里处理验证成功后的逻辑。 -
资源释放: 在
dispose方法中释放YandexSmartCaptcha实例以避免内存泄漏。
请确保你已经正确配置了Yandex Smart Captcha的API密钥,并且你的应用满足Yandex Smart Captcha的使用要求。这个插件提供了与Yandex Smart Captcha服务交互的基本功能,你可以根据需求进一步自定义和扩展。