


Flutter代码质量评估插件girix_code_gauge的使用
Flutter代码质量评估插件girix_code_gauge的使用
Girix Code Gauge
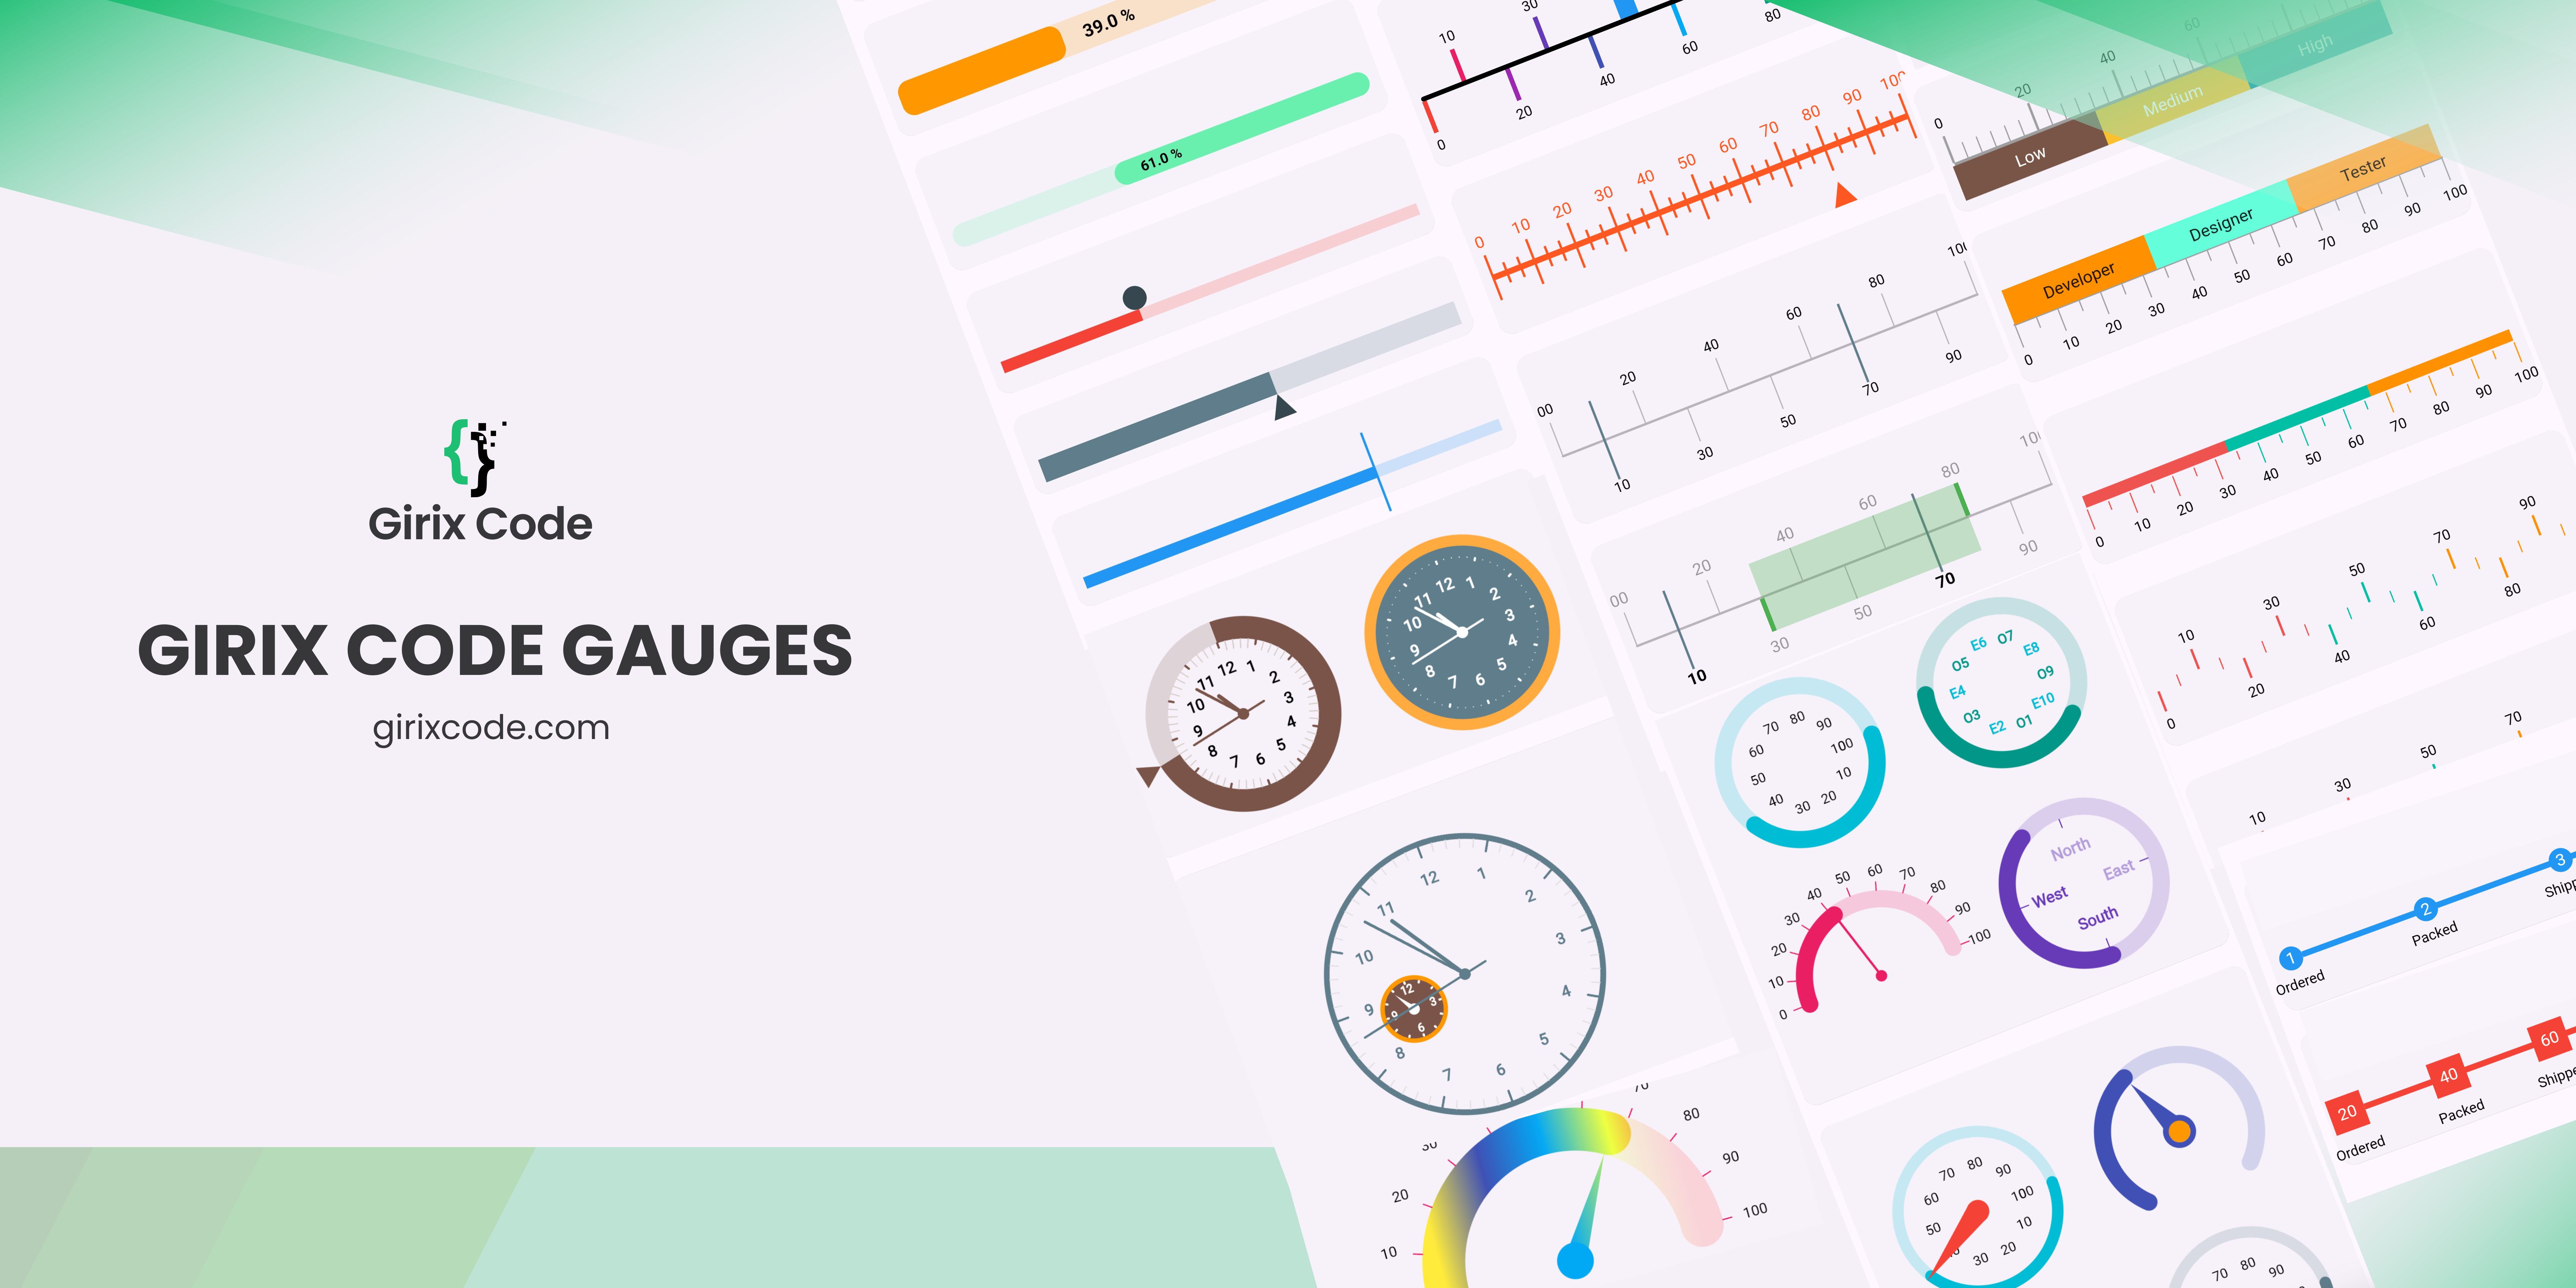
girix_code_gauge 是一个用于创建可自定义的线性进度条、线性仪表盘、径向仪表盘等的Flutter包。girix_code_gauge 提供了一系列小部件,可以轻松地将动态且视觉效果出色的仪表盘和形状集成到应用程序中。
目录
功能
- 使用可自定义的小部件绘制基本仪表盘,如进度条、刻度线性仪表盘等。
- 创建具有多种样式和动画效果的线性仪表盘。
- 实现具有灵活定制选项的径向仪表盘。
- 支持不同类型的指针和位置。
- 可以自定义仪表盘的范围和刻度。
- 为仪表盘值提供动画过渡。
- 简单的API,易于集成和使用。
预览
安装
在你的 pubspec.yaml 文件中添加以下内容:
dependencies:
  girix_code_gauge: latest
然后运行:
flutter pub get
开始使用
导入包
在Dart代码中导入 girix_code_gauge:
import 'package:girix_code_gauge/girix_code_gauge.dart';
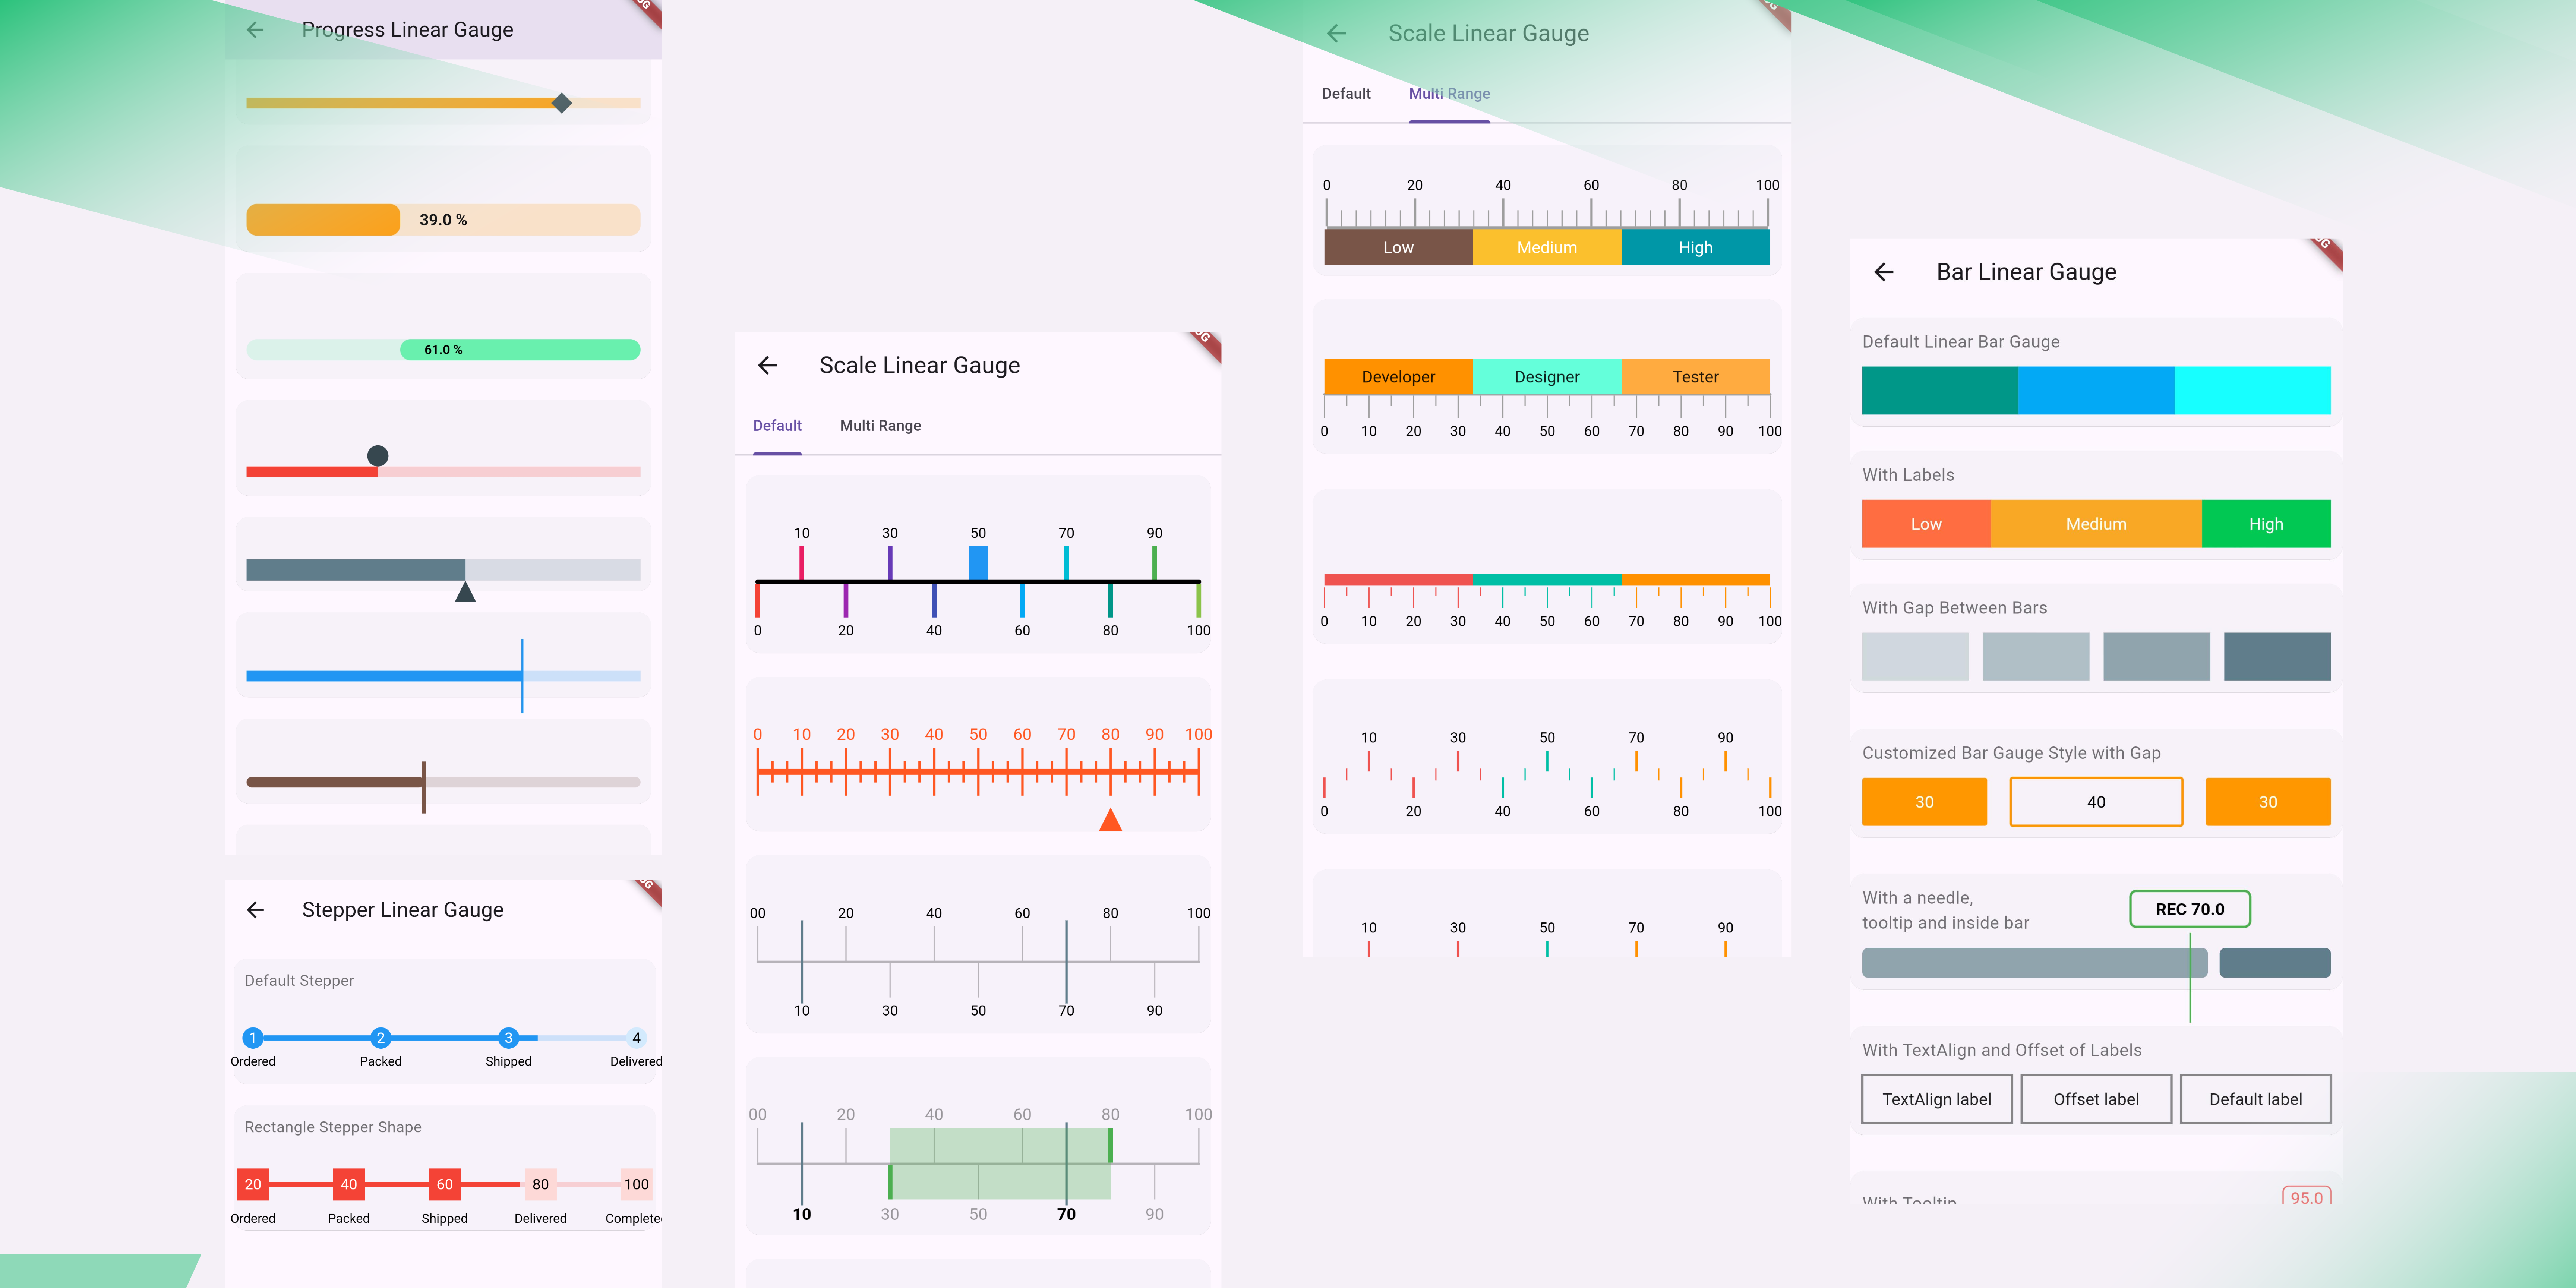
进度线性仪表盘
GxProgressLinearGauge 小部件用于显示进度线性仪表盘。
属性
value:GaugeValue类的一个实例,包含仪表盘的值。value: 进度线性仪表盘的值。min: 进度线性仪表盘的最小值。max: 进度线性仪表盘的最大值。
style:ProgressLinearStyle类的一个实例,包含进度线性仪表盘的样式属性。color: 活动部分的颜色。backgroundColor: 背景部分的颜色。dense: 是否为密集型仪表盘。thickness: 仪表盘的厚度。radius: 仪表盘的半径。strokeCap: 仪表盘的描边帽。paintingStyle: 仪表盘的绘画风格。
label:GaugeLabel类的一个实例,包含进度线性仪表盘的标签属性。label: 仪表盘的标签。style: 标签的样式。textAlign: 标签的对齐方式。spaceExtent: 标签的空间扩展。offset: 标签的偏移量。
needle:LinearNeedle类的一个实例,包含进度线性仪表盘的指针属性。enabled: 指针是否启用。position: 指针的位置。size: 指针的大小。color: 指针的颜色。needleType: 指针的类型。
customDrawNeedle: 一个允许你在进度线性仪表盘上绘制自定义指针的函数。reverse: 进度线性仪表盘是否反向。showLabel: 是否显示标签。height: 进度线性仪表盘的高度。
默认
添加一个简单的进度线性仪表盘小部件作为任何小部件的子级:
SizedBox(
    height: 80,
    child: GxProgressLinearGauge(
        value: GaugeValue(value: 50),
    )
)
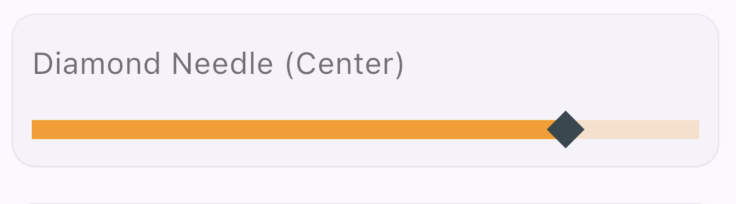
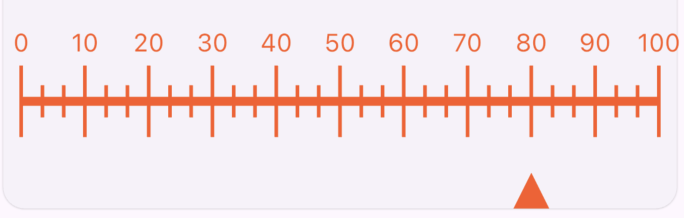
指针
通过传递 needle 属性来添加线性指针到进度线性仪表盘小部件。你可以通过改变 position, size, color, 和 needleType 来自定义指针。你也可以通过传递 style 属性来添加样式到仪表盘。
示例
SizedBox(
    height: 80,
    child: GxProgressLinearGauge(
        value: const GaugeValue(value: 80, min: 0, max: 100),
        style: const ProgressLinearStyle(
            color: Colors.orange,
        ),
        needle: LinearNeedle(
            position: LinearGaugeNeedlePosition.center,
            size: const Size(20, 20),
            color: Colors.blueGrey,
            needleType: LinearGaugeNeedleType.diamond
        )
    )
)
标签
通过传递 label 属性来添加标签到进度线性仪表盘小部件。你可以通过改变 label, style, textAlign, 和 spaceExtent 来自定义标签。你可以通过传递 showLabel 属性来显示标签。{value} 在标签中将被实际的仪表盘值替换。
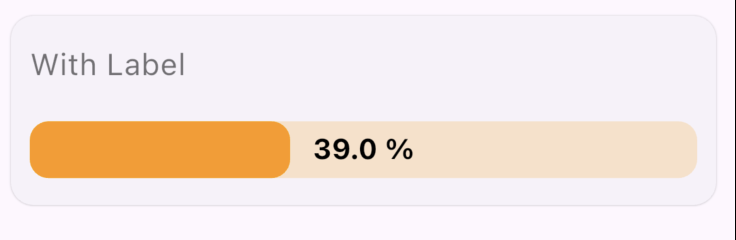
示例
SizedBox(
    height: 100,
    child: GxProgressLinearGauge(
        label: GaugeLabel(
            label: '{value} %',
            style: TextStyle(
                color: Colors.black,
                fontSize: 15,
                fontWeight: FontWeight.bold),
            textAlign: TextAlign.center,
            spaceExtent: 4),
        showLabel: true,
        height: 30,
        value: GaugeValue(value: 39, min: 00, max: 100),
        style: ProgressLinearStyle(
            color: Colors.orange, dense: false, thickness: 6),
    ),
)
动画进度线性仪表盘
通过传递 animationType 属性来添加动画进度线性仪表盘小部件。你可以通过改变 animationType 来自定义动画。
SizedBox(
    height: 80,
    child: GxAnimatedProgressLinearGauge(
        value: 60,
        style: ProgressLinearStyle(
            color: Colors.deepOrange.shade100, thickness: 10),
        animationType: GaugeAnimationType.linear,
        needle: const LinearNeedle(
            position: LinearGaugeNeedlePosition.bottom,
            size: Size(20, 20),
            color: Colors.deepOrange,
            needleType: LinearGaugeNeedleType.triangle),
    )
)
阶梯仪表盘
GxStepperLinearGauge 是一种线性仪表盘,用于以步骤形式显示过程的进度。
属性
value: 仪表盘的当前值。stepperPointers: 要在仪表盘中显示的指针列表。每个指针代表过程中的一步。
默认阶梯
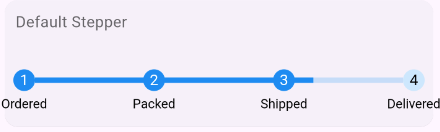
示例
const TextStyle textStyle = TextStyle(
      fontSize: 12,
      color: Colors.black,
    );

GxStepperLinearGauge(
    value: GaugeValue(
        value: 77,
        min: 0,     // 可选
        max: 100    // 可选
    ),
    stepperPointers: [
        StepperPointer(
            label: GaugeLabel(label: 'Ordered', style: textStyle)
        ),
        StepperPointer(
            label: GaugeLabel(label: 'Packed', style: textStyle)
        ),
        StepperPointer(
            label: GaugeLabel(label: 'Shipped', style: textStyle)
        ),
        StepperPointer(
            label: GaugeLabel(label: 'Delivered', style: textStyle)
        )
    ]
),
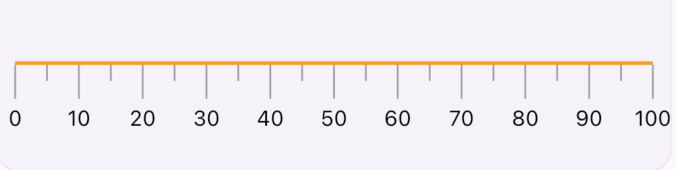
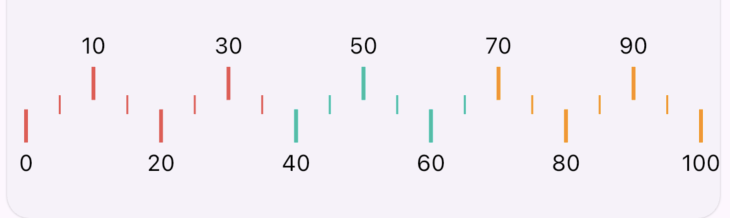
刻度线性仪表盘
GxScaleLinearGauge 用于显示带有刻度的不同自定义选项的线性仪表盘。
属性
minimum- 仪表盘的最小值。默认为0。maximum- 仪表盘的最大值。默认为100。interval- 仪表盘的间隔值。默认为10。minorTicksPerInterval- 每个间隔的次级刻度数。默认为1。axisSpaceExtent- 轴的空间扩展。默认为0。labelPosition- 标签的位置。默认为LinearGaugeLabelPosition.bottomCenter。tickPosition- 刻度的位置。默认为LinearElementPosition.inside。axisTrackStyle- 轴轨道的样式。默认为LinearAxisTrackStyle()。majorTickStyle- 主刻度的样式。默认为LinearTickStyle()。minorTickStyle- 次级刻度的样式。默认为LinearTickStyle()。markerPointers- 标记指针列表。默认为null。barPointers- 条形指针列表。默认为null。barHeight- 条形的高度。默认为10。barOffset- 条形的偏移量。默认为0。needle- 仪表盘的指针。默认为null。valueToLabelFormatCallback- 标签格式化的回调函数。默认为null。valueToMajorTickStyleCallback- 主刻度样式格式化的回调函数。默认为null。valueToLabelStyleCallback- 标签样式格式化的回调函数。默认为null。fillAreaPointers- 填充区域指针列表。默认为null。showAxisLabel- 是否显示轴标签。默认为true。showAxisTrack- 是否显示轴轨道。默认为true。showMinorTicks- 是否显示次级刻度。默认为true。
默认刻度
创建一个默认的刻度线性仪表盘小部件并将其添加到你的小部件中。
GxScaleLinearGauge()
基本样式
创建一个具有基本自定义样式的刻度线性仪表盘小部件,包括 minimum, maximum, interval, minorTicksPerInterval, axisSpaceExtent, majorTickStyle。
GxScaleLinearGauge(
  minimum: 0,
  maximum: 100,
  interval: 20,
  minorTicksPerInterval: 5,
  axisSpaceExtent: 2,
  majorTickStyle: LinearTickStyle(
    length: 20,
    thickness: 2,
    color: Colors.blue,
  )
)
刻度位置
创建一个刻度位置为 inside, outside, outAndIn, inAndOut 的刻度线性仪表盘小部件。
示例
GxScaleLinearGauge(
    tickPosition: LinearElementPosition.inside,
    minorTickStyle: LinearTickStyle(
        length: 20,
        thickness: 1,
    ),
    majorTickStyle: LinearTickStyle(
        length: 40,
        thickness: 1,
    ),
    axisTrackStyle: LinearAxisTrackStyle(
        thickness: 2, strokeCap: StrokeCap.butt, color: Colors.orange
    )
 )
轴和主刻度样式
创建一个具有自定义轴和主刻度样式的刻度线性仪表盘小部件,包括 axisLabelStyle, valueToLabelFormatCallback, labelPosition, majorTickStyle, axisTrackStyle, minorTickStyle 属性。
示例
GxScaleLinearGauge(
    tickPosition: LinearElementPosition.inAndOut,
    minorTickStyle: const LinearTickStyle(
        length: 10,
        thickness: 1,
    ),
    majorTickStyle: const LinearTickStyle(
        length: 60,
        thickness: 4,
    ),
    axisTrackStyle: const LinearAxisTrackStyle(
        thickness: 4, strokeCap: StrokeCap.round, color: Colors.black),
    showMinorTicks: false,
    valueToMajorTickStyleCallback: (value, index) {
        return LinearTickStyle(
        length: 60,
        thickness: value == 50 ? 16 : 4,
        color: Colors.primaries[index % Colors.primaries.length],
        );
    },
)
指针
创建一个具有自定义线性指针的刻度线性仪表盘小部件,包括 needle, offset, enabled, color, size, position, needleType 属性。
示例
GxScaleLinearGauge(
    minimum: 0,
    maximum: 100,
    interval: 10,
    minorTicksPerInterval: 2,
    axisLabelStyle: const TextStyle(
        color: Colors.deepOrange,
        fontSize: 14,
    ),
    valueToLabelFormatCallback: (value, index) => value,
    labelPosition: LinearGaugeLabelPosition.topCenter,
    majorTickStyle: const LinearTickStyle(
        length: 40,
        thickness: 2,
        color: Colors.deepOrange,
    ),
    axisTrackStyle: const LinearAxisTrackStyle(
        color: Colors.deepOrange,
    ),
    minorTickStyle: const LinearTickStyle(
        color: Colors.deepOrange, thickness: 2, length: 18),
    value: 80,
    needle: const LinearNeedle(
        offset: 20,
        enabled: true,
        color: Colors.deepOrange,
        size: Size(20, 20),
        position: LinearGaugeNeedlePosition.bottom,
        needleType: LinearGaugeNeedleType.triangle,
    )
)
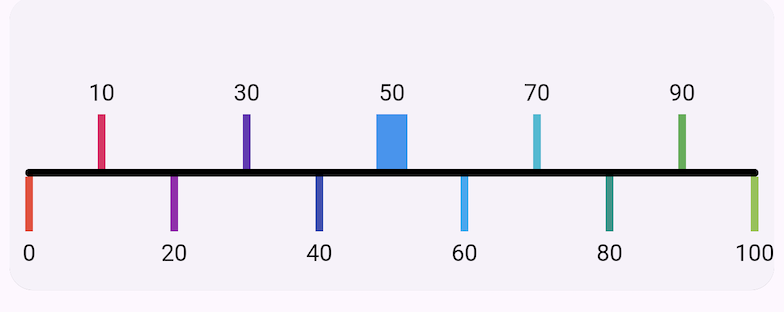
填充区域和标记指针
创建一个具有填充区域和标记指针的刻度线性仪表盘小部件,包括 fillAreaPointers, markerPointers 属性。
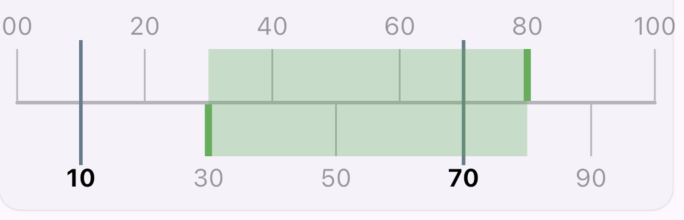
示例
GxScaleLinearGauge(
    tickPosition: LinearElementPosition.outAndIn,
    minorTickStyle: const LinearTickStyle(
        length: 10,
        thickness: 1,
    ),
    majorTickStyle: const LinearTickStyle(
        length: 60,
        thickness: 1,
    ),
    axisTrackStyle: const LinearAxisTrackStyle(
        thickness: 2,
        strokeCap: StrokeCap.round,
        color: Colors.black26),
    showMinorTicks: false,
    valueToMajorTickStyleCallback: (value, index) {
        return LinearTickStyle(
        length: 60,
        thickness: (value == 30 || value == 80) ? 4 : 1,
        color: (value == 30 || value == 80)
            ? Colors.green
            : Colors.black26,
        );
    },
    valueToLabelFormatCallback: (value, index) =>
        value.length == 1 ? '0$value' : value,
    markerPointers: [
        LinearMarkerPointer(
            value: 10,
            needle: const LinearNeedle(
                enabled: true,
                color: Colors.blueGrey,
                size: Size(2, 70),
                position: LinearGaugeNeedlePosition.center,
                needleType: LinearGaugeNeedleType.pipe,
                offset: 10,
            ),
        ),
        LinearMarkerPointer(
            value: 70,
            needle: const LinearNeedle(
                enabled: true,
                color: Colors.blueGrey,
                size: Size(2, 70),
                position: LinearGaugeNeedlePosition.center,
                needleType: LinearGaugeNeedleType.pipe,
                offset: 10,
            ),
        ),
    ],
    valueToLabelStyleCallback: (value, index) => TextStyle(
        color:
            (value == 10 || value == 70) ? Colors.black : Colors.black38,
        fontWeight: (value == 10 || value == 70)
            ? FontWeight.bold
            : FontWeight.normal,
    ),
    fillAreaPointers: [
        FillAreaPointer(
            thickness: 60,
            startValue: 30,
            endValue: 80,
            color: Colors.green.withOpacity(0.3))
        ],
    )
多范围
创建一个多范围刻度线性仪表盘。
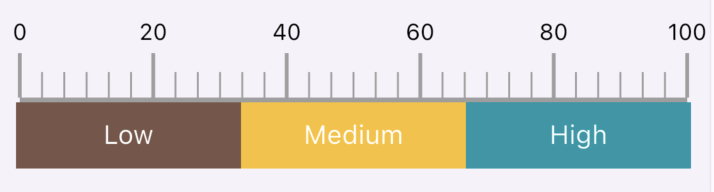
示例
GxScaleLinearGauge(
    minimum: 0,
    maximum: 100,
    interval: 20,
    minorTicksPerInterval: 5,
    axisSpaceExtent: 2,
    labelPosition: LinearGaugeLabelPosition.topCenter,
    tickPosition: LinearElementPosition.outside,
    axisTrackStyle: const LinearAxisTrackStyle(
        thickness: 3,
    ),
    majorTickStyle: const LinearTickStyle(
        length: 50,
        thickness: 2,
    ),
    minorTickStyle: const LinearTickStyle(
        length: 30,
        thickness: 1,
    ),
    barOffset: 1,
    barHeight: 35,
    barPointers: [
    LinearBarPointer(
        label: const GaugeLabel(label: 'Low'),
        value: barValue,
        thickness: 5,
        color: Colors.brown),
    LinearBarPointer(
        label: const GaugeLabel(label: 'Medium'),
        color: Colors.yellow.shade700,
        value: barValue,
        thickness: 5),
    LinearBarPointer(
        label: const GaugeLabel(label: 'High'),
        color: Colors.cyan.shade700,
        value: barValue,
        thickness: 5),
    ]
)
多范围:轴刻度上的颜色
创建一个具有多范围的刻度线性仪表盘,并使用 applyBarColorOnAxisTick 属性在轴刻度上应用条形颜色。
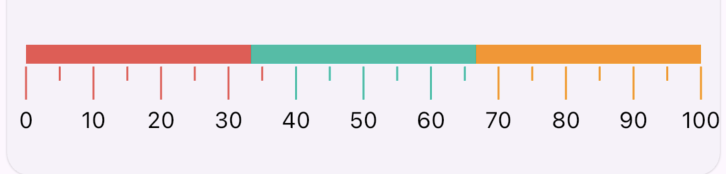
示例
GxScaleLinearGauge(
    tickPosition: LinearElementPosition.inside,
    labelPosition: LinearGaugeLabelPosition.bottomCenter,
    minorTickStyle: const LinearTickStyle(
        length: 20,
        thickness: 1,
    ),
    majorTickStyle: const LinearTickStyle(
        length: 40,
        thickness: 1,
    ),
    barHeight: 10,
    barOffset: 80,
    applyBarColorOnAxisTick: true,
    barPointers: [
    LinearBarPointer(
        value: barValue, thickness: 5, color: Colors.red.shade400),
    LinearBarPointer(
        color: Colors.tealAccent.shade700,
        value: barValue,
        thickness: 5),
    LinearBarPointer(
        color: Colors.orangeAccent.shade400,
        value: barValue,
        thickness: 5),
    ]
),
多范围:轴刻度上的颜色(内外)
创建一个具有多范围的刻度线性仪表盘,并在轴刻度上为内外应用条形颜色。
示例
GxScaleLinearGauge(
    tickPosition: LinearElementPosition.inAndOut,
    minorTickStyle: const LinearTickStyle(
        length: 10,
        thickness: 1,
    ),
    majorTickStyle: const LinearTickStyle(
        length: 40,
        thickness: 2,
    ),
    applyBarColorOnAxisTick: true,
    barPointers: [
        LinearBarPointer(
            value: barValue, thickness: 5, color: Colors.red.shade400),
        LinearBarPointer(
            color: Colors.tealAccent.shade700,
            value: barValue,
            thickness: 5),
        LinearBarPointer(
            color: Colors.orangeAccent.shade400,
            value: barValue,
            thickness: 5),
        ]
    )
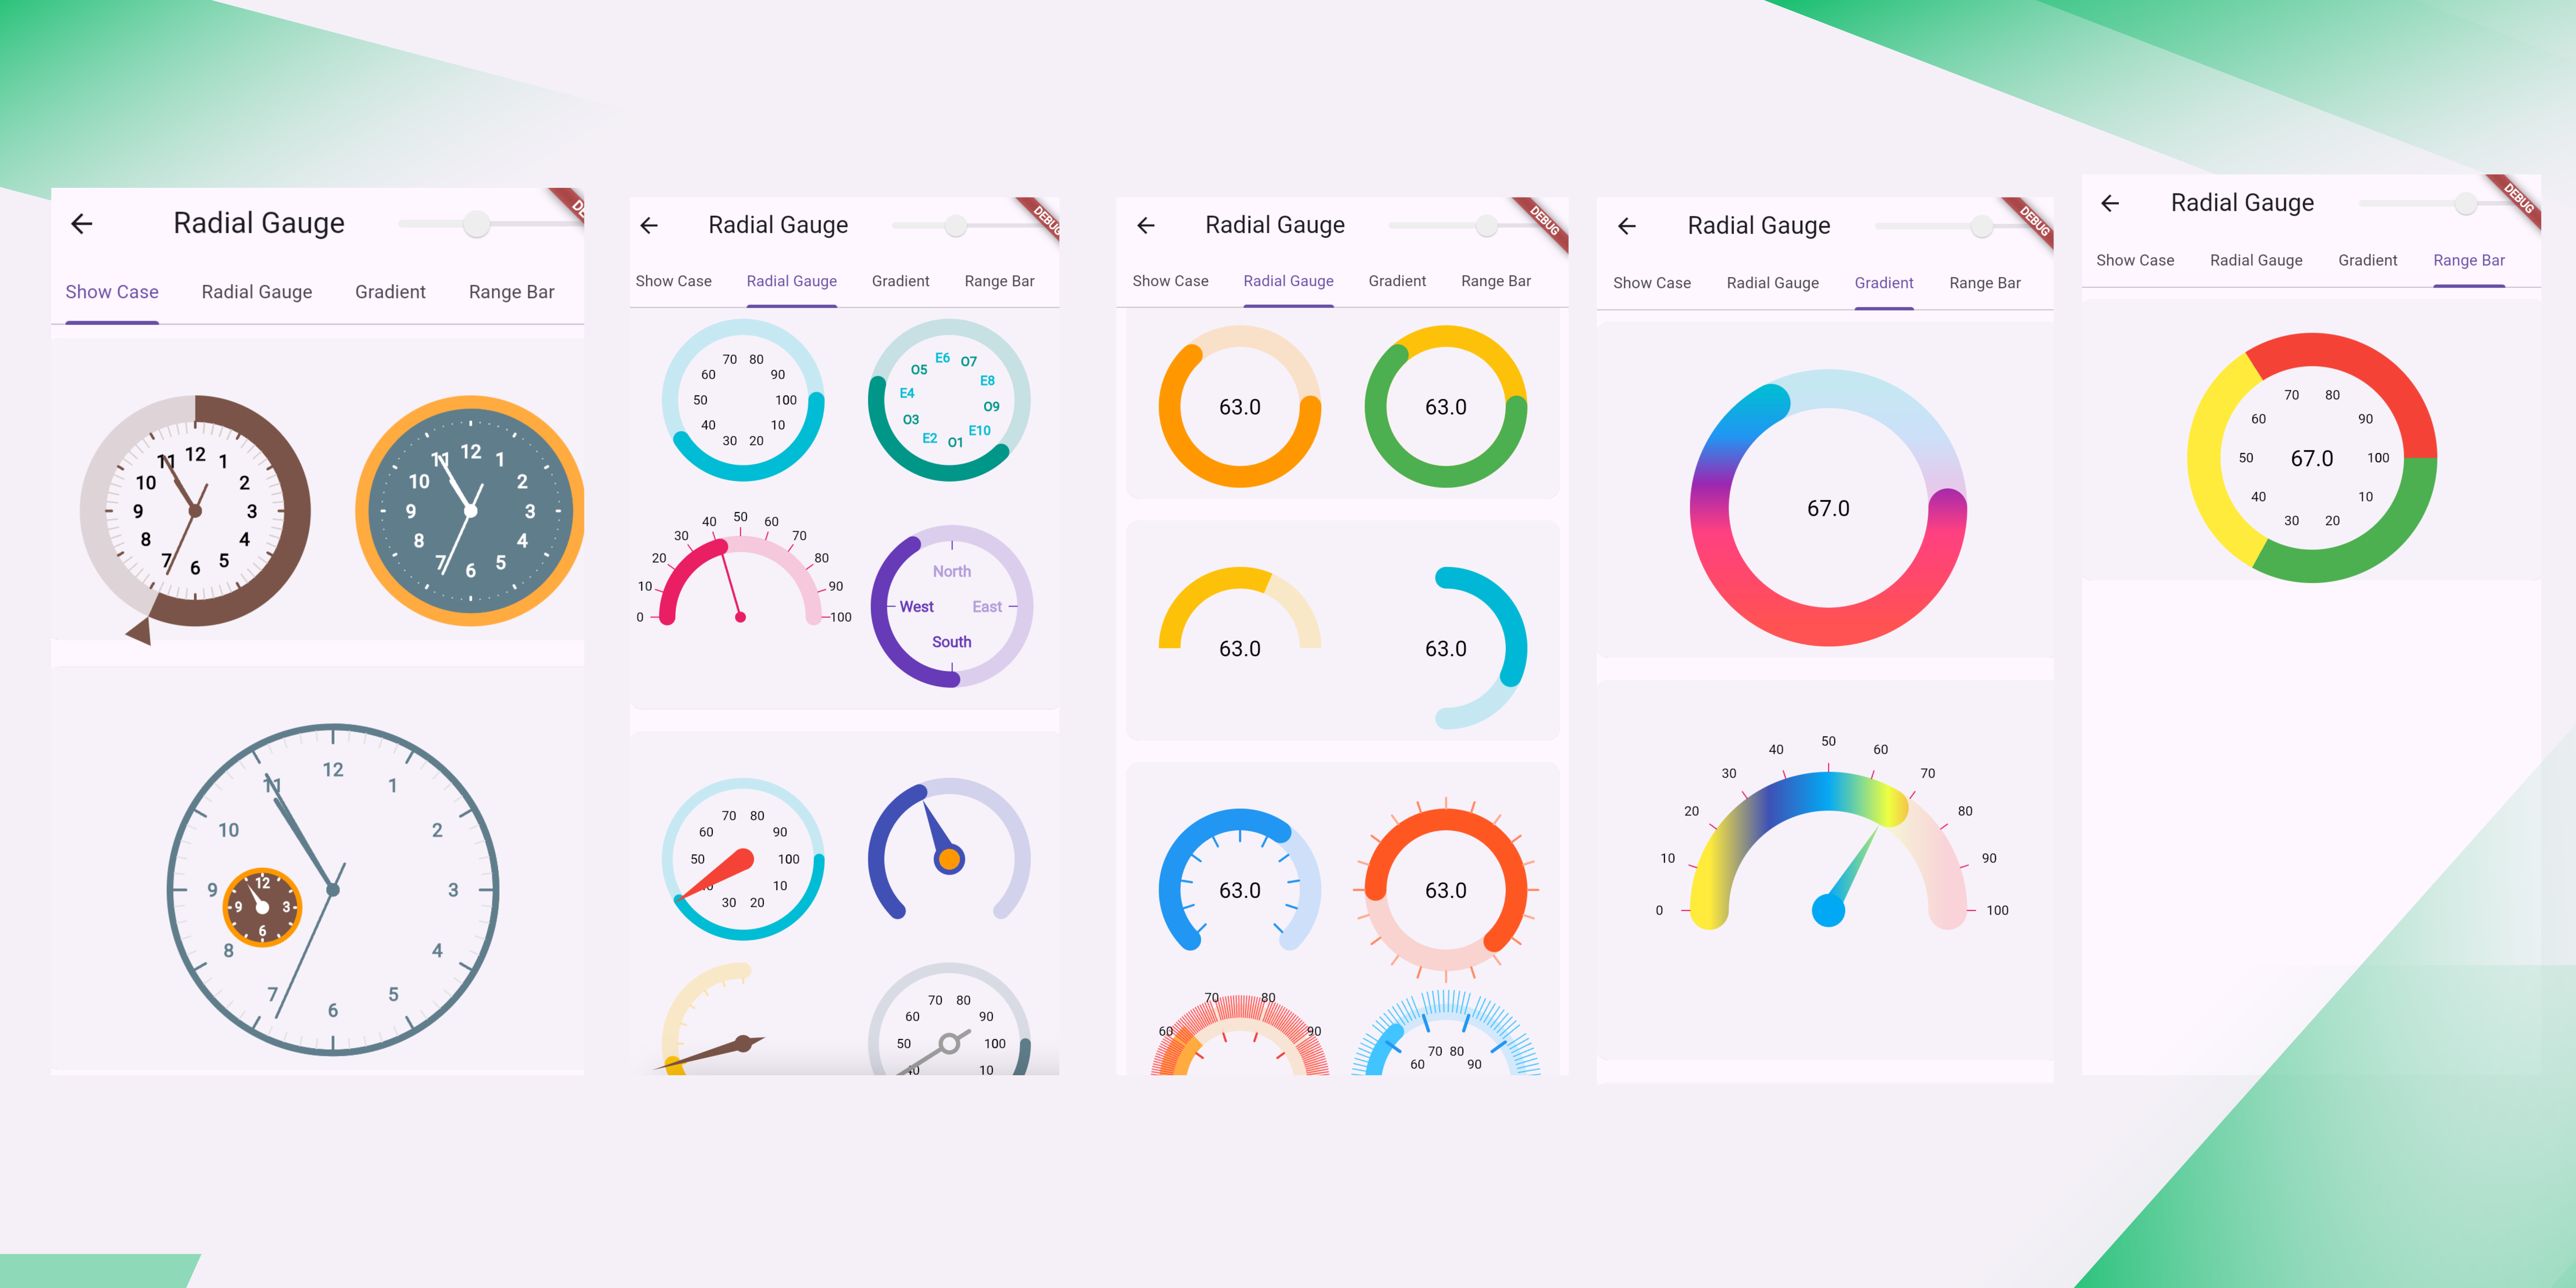
径向仪表盘
GxRadialGauge 小部件用于显示具有不同自定义样式的径向仪表盘。
属性
value: 仪表盘的值。该值是必需的。style: 仪表盘的样式。默认值为RadialGaugeStyle()。该样式是可选的。size: 仪表盘的大小。默认值为Size(200, 200)。该大小是可选的。labelTickStyle: 标签刻度的样式。默认值为RadialTickLabelStyle()。该标签刻度样式是可选的。showMajorTicks: 默认值为false。该显示主刻度选项是可选的。showMinorTicks: 默认值为false。该显示次级刻度选项是可选的。showLabels: 默认值为false。该显示标签选项是可选的。majorTickStyle: 默认值为RadialTickStyle()。该主刻度样式是可选的。minorTickStyle: 默认值为RadialTickStyle()。该次级刻度样式是可选的。interval: 默认值为10。该间隔选项是可选的。minorTicksPerInterval: 默认值为10。该每间隔次级刻度数选项是可选的。startAngleInDegree: 默认值为0。该起始角度选项是可选的。sweepAngleInDegree: 默认值为360。该扫过角度选项是可选的。showValueAtCenter: 默认值为true。该中心显示值选项是可选的。showNeedle: 默认值为false。该显示指针选项是可选的。needle: 仪表盘的指针。该指针是可选的。valueToLabelFormatCallback: 值到标签格式化回调函数。该值到标签格式化回调函数是可选的。valueToLabelStyleCallback: 值到标签样式回调函数。该值到标签样式回调函数是可选的。valueToMajorTickCallback: 值到主刻度样式回调函数。该值到主刻度样式回调函数是可选的。pointers: 径向指针。该指针是可选的。rangeBars: 范围条。该范围条是可选的。
默认

示例
GxRadialGauge(
    size: twinSize,
    value: GaugeValue(
        value: value,
    ),
    style: const RadialGaugeStyle(
        color: Colors.orange, thickness: 20
    )
),
GxRadialGauge(
    size: twinSize,
    value: GaugeValue(
        value: value,
    ),
    style: const RadialGaugeStyle(
        backgroundColor: Colors.amber,
        color: Colors.green,
        thickness: 20
    )
),
角度自定义
通过使用 startAngleInDegree 和 sweepAngleInDegree 属性,我们可以自定义仪表盘的起始和扫过角度。

示例
GxRadialGauge(
    showValueAtCenter: true,
    size: twinSize,
    startAngleInDegree: 180,
    sweepAngleInDegree: 180,
    value: GaugeValue(
        value: value,
    ),
    style: const RadialGaugeStyle(
        strokeCap: StrokeCap.butt,
        color: Colors.amber,
        thickness: 20
    )
),
GxRadialGauge(
    showValueAtCenter: true,
    size: twinSize,
    startAngleInDegree: 270,
    sweepAngleInDegree: 180,
    value: GaugeValue(
        value: value,
    ),
    style: RadialGaugeStyle(
        color: Colors.cyanAccent.shade700,
        thickness: 20
    )
),
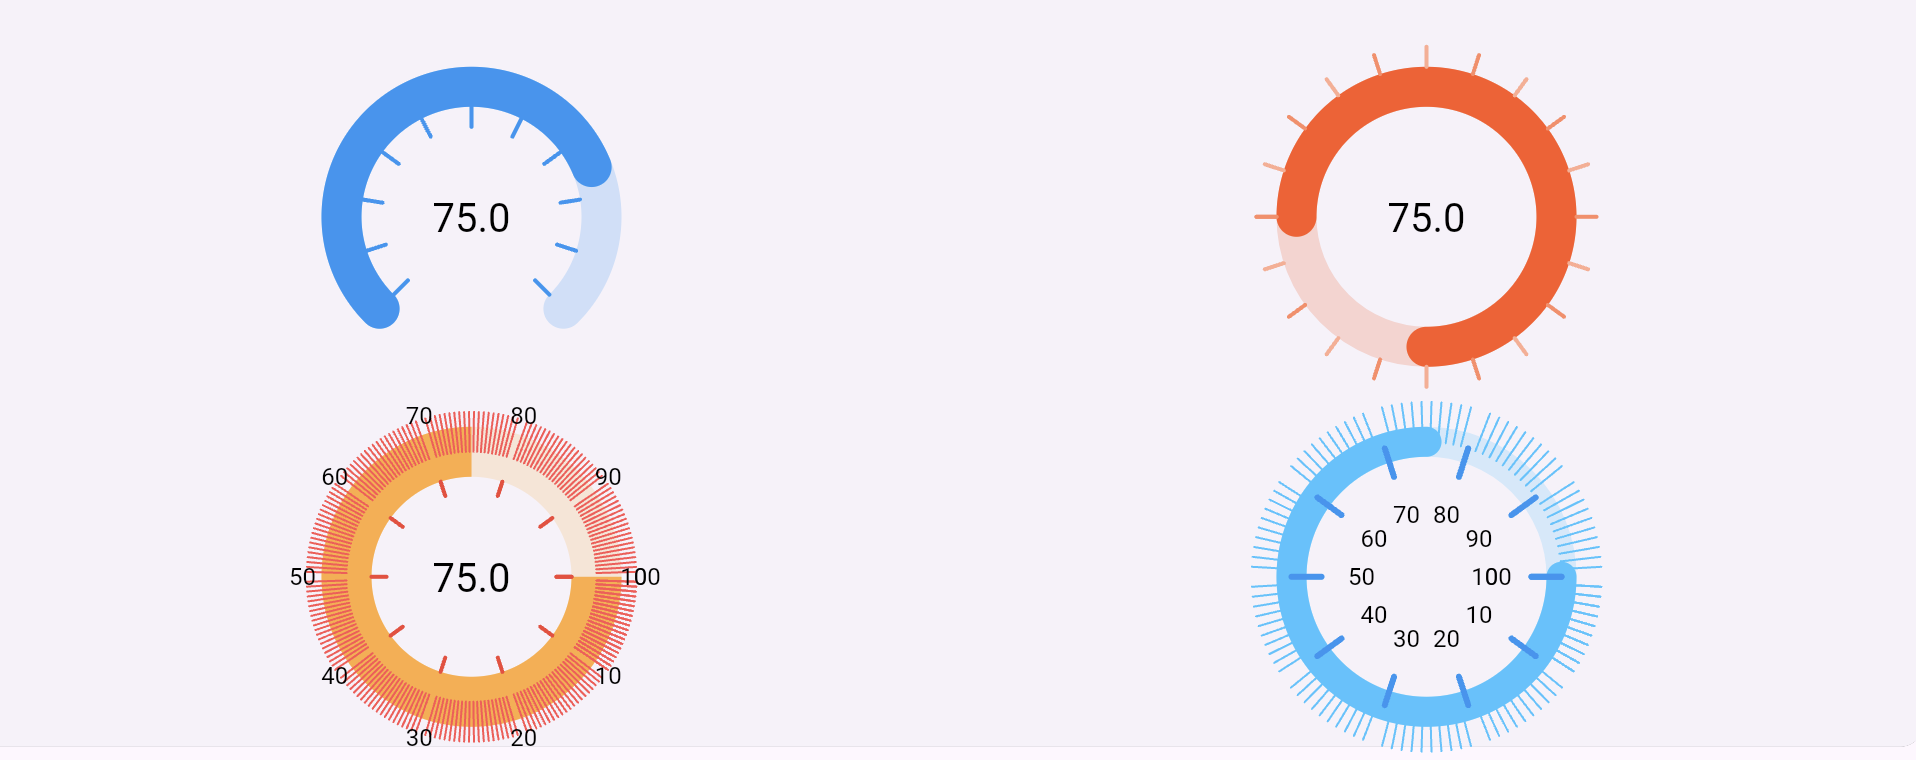
主刻度和次级刻度自定义
通过使用 majorTickStyle 和 minorTickStyle 属性,我们可以分别自定义仪表盘的主刻度和次级刻度。
示例
// 1st row
GxRadialGauge(
    size: twinSize,
    startAngleInDegree: 135,
    sweepAngleInDegree: 270,
    value: GaugeValue(
        value: 75,
    ),
    showMajorTicks: true,
    interval: 10,
    majorTickStyle: const RadialTickStyle(
        position: RadialElementPosition.inside,
        alignment: RadialElementAlignment.end,
        length: 20,
        thickness: 2,
        color: Colors.blue),
    style:
        const RadialGaugeStyle(color: Colors.blue, thickness: 20),
),
GxRadialGauge(
    size: twinSize,
    startAngleInDegree: 180,
    value: GaugeValue(
        value: 75,
    ),
    showMajorTicks: true,
    interval: 5,
    valueToMajorTickCallback: (value, index) {
    final bool isOdd = index.isOdd;
    return RadialTickStyle(
        position: RadialElementPosition.outside,
        alignment: RadialElementAlignment.start,
        length: 20,
        thickness: 2,
        color: isOdd
            ? Colors.deepOrange.shade200
            : Colors.deepOrange.shade300);
    },
    style: const RadialGaugeStyle(
        color: Colors.deepOrange, thickness: 20),
),

// 2nd row
 GxRadialGauge(
    value: GaugeValue(
        value: 75,
    ),
    showMajorTicks: true,
    showMinorTicks: true,
    minorTicksPerInterval: 20,
    showLabels: true,
    interval: 10,
    labelTickStyle: const RadialTickLabelStyle(
        padding: 2, position: RadialElementPosition.outside),
    majorTickStyle: const RadialTickStyle(
        position: RadialElementPosition.inside,
        alignment: RadialElementAlignment.end,
        length: 20,
        thickness: 2,
        color: Colors.red),
    minorTickStyle: const RadialTickStyle(
        position: RadialElementPosition.outside,
        alignment: RadialElementAlignment.center,
        length: 20,
        thickness: 1,
        color: Colors.redAccent),
    style: const RadialGaugeStyle(
        strokeCap: StrokeCap.butt,
        color: Colors.orangeAccent,
        thickness: 25),
),
GxRadialGauge(
    value: GaugeValue(
        value: 75,
    ),
    showMajorTicks: true,
    showMinorTicks: true,
    showLabels: true,
    interval: 10,
    majorTickStyle: const RadialTickStyle(
        position: RadialElementPosition.inside,
        alignment: RadialElementAlignment.center,
        length: 15,
        thickness: 3,
        color: Colors.blue),
    minorTickStyle: const RadialTickStyle(
        position: RadialElementPosition.outside,
        alignment: RadialElementAlignment.center,
        length: 20,
        thickness: 1,
        color: Colors.lightBlueAccent),
    style: const RadialGaugeStyle(
        color: Colors.lightBlueAccent, thickness: 15),
),
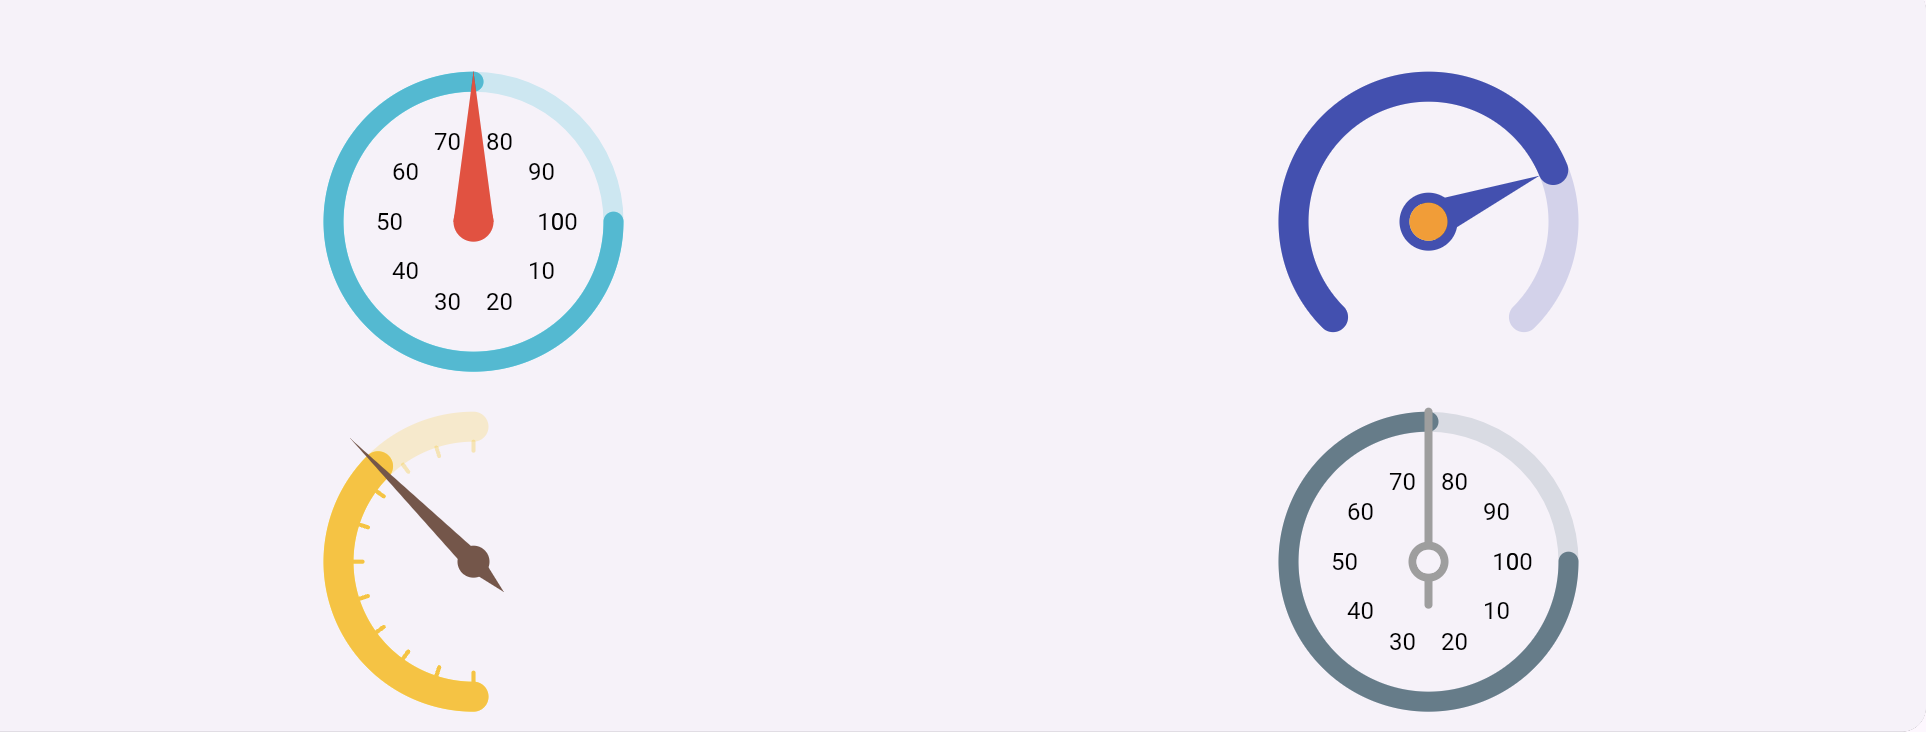
指针自定义
通过使用 needle 属性,我们可以自定义仪表盘的指针。showNeedle 属性用于显示和隐藏指针。
示例
// 1st row
GxRadialGauge(
    showValueAtCenter: false,
    value: GaugeValue(
        value: 75,
    ),
    showLabels: true,
    interval: 10,
    showNeedle: true,
    needle: const RadialNeedle(
        circle: NeedleCircle(
            radius: 10, paintingStyle: PaintingStyle.fill),
        color: Colors.red,
        bottomOffset: 1.0,
        thickness: 20,
        topOffest: 0,
        alignment: RadialElementAlignment.start),
    style:
        const RadialGaugeStyle(color: Colors.cyan, thickness: 10),
),
GxRadialGauge(
    showValueAtCenter: false,
    startAngleInDegree: 135,
    sweepAngleInDegree: 270,
    value: GaugeValue(
        value: 75,
    ),
    interval: 10,
    showNeedle: true,
    needle: const RadialNeedle(
        circle: NeedleCircle(
            radius: 12,
            strokeWidth: 5,
            innerColor: Colors.orange,
            paintingStyle: PaintingStyle.stroke),
        color: Colors.indigo,
        bottomOffset: 1.0,
        thickness: 20,
        topOffest: 0,
        alignment: RadialElementAlignment.end),
    style: const RadialGaugeStyle(
        color: Colors.indigo, thickness: 15),
),

// 2nd row
GxRadialGauge(
    showValueAtCenter: false,
    startAngleInDegree: 90,
    sweepAngleInDegree: 180,
    size: twinSize,
    value: GaugeValue(
        value: 75
    ),
    interval: 10,
    showNeedle: true,
    showMajorTicks: true,
    valueToMajorTickCallback: (tickValue, index) {
    return RadialTickStyle(
        position: RadialElementPosition.inside,
        alignment: RadialElementAlignment.end,
        length: 12,
        thickness: 2,
        color: tickValue < value
            ? Colors.amber
            : Colors.amber.withOpacity(0.3)
        );
    },
    needle: const RadialNeedle(
        circle: NeedleCircle(
            radius: 8,
            strokeWidth: 5,
            innerColor: Colors.orange,
            paintingStyle: PaintingStyle.fill
        ),
        color: Colors.brown,
        bottomOffset: 20.0,
        thickness: 10,
        topOffest: 12,
        alignment: RadialElementAlignment.start
    ),
    style: const RadialGaugeStyle(
        color: Colors.amber, thickness: 15
    )
),
GxRadialGauge(
    showValueAtCenter: false,
    size: twinSize,
    value: GaugeValue(
        value: 75
    ),
    showLabels: true,
    interval: 10,
    showNeedle: true,
    needle: const RadialNeedle(
        shape: RadialNeedleShape.line,
        circle: NeedleCircle(
            radius: 8,
            strokeWidth: 4,
            paintingStyle: PaintingStyle.stroke
        ),
        color: Colors.grey,
        bottomOffset: 20.0,
        thickness: 4,
        topOffest: 0,
        alignment: RadialElementAlignment.start
    ),
    style: const RadialGaugeStyle(
        color: Colors.blueGrey, thickness: 10
    )
),
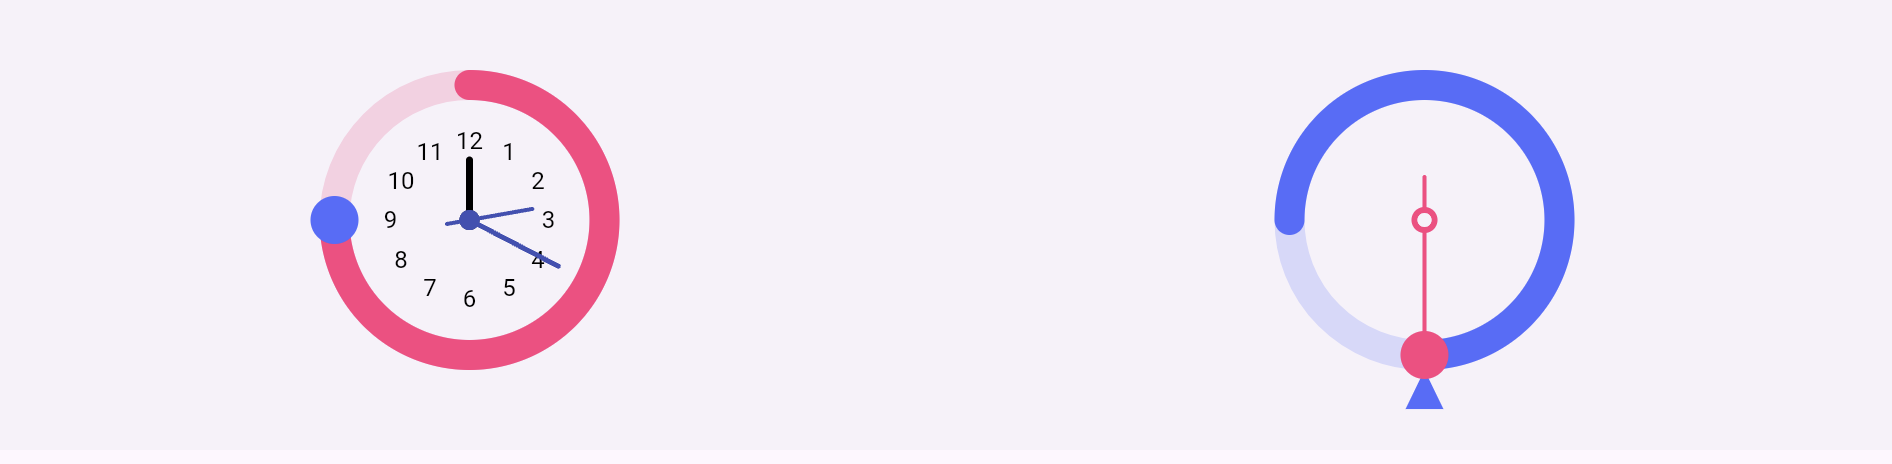
指针
通过使用 pointers 属性,我们可以为仪表盘添加指针。
示例
更多关于Flutter代码质量评估插件girix_code_gauge的使用的实战教程也可以访问 https://www.itying.com/category-92-b0.html

更多关于Flutter代码质量评估插件girix_code_gauge的使用的实战系列教程也可以访问 https://www.itying.com/category-92-b0.html
当然,下面是如何在Flutter项目中使用girix_code_gauge插件进行代码质量评估的示例说明。girix_code_gauge是一个用于Flutter项目的代码质量分析工具,可以帮助开发者识别代码中的潜在问题并提供改进建议。
1. 安装girix_code_gauge插件
首先,你需要在你的Flutter项目中添加girix_code_gauge插件。你可以通过修改pubspec.yaml文件来完成这一步:
dependencies:
  flutter:
    sdk: flutter
  girix_code_gauge: ^最新版本号  # 请替换为实际可用的最新版本号
然后运行以下命令来安装依赖:
flutter pub get
2. 配置girix_code_gauge
girix_code_gauge插件本身不需要特别的配置,但是你可能需要配置你的CI/CD管道来运行这个工具。以下是一个示例脚本,展示了如何在命令行中运行girix_code_gauge:
# 在你的项目根目录下运行
flutter pub run girix_code_gauge:analyze
这个命令会分析你的Flutter项目并输出代码质量报告。
3. 使用girix_code_gauge进行代码质量分析
一旦你安装了girix_code_gauge并配置好了你的项目,你可以通过运行以下命令来分析你的代码:
flutter pub run girix_code_gauge:analyze --output-format json > code_quality_report.json
这个命令会将分析结果以JSON格式输出到code_quality_report.json文件中。你可以根据这个报告来查看你的代码质量评分和潜在的问题。
4. 解读报告
girix_code_gauge生成的报告将包含多个方面的代码质量评估,如代码复杂度、代码重复性、命名规范等。以下是一个示例的JSON报告结构:
{
  "project": {
    "name": "your_project_name",
    "totalFiles": 100,
    "totalLinesOfCode": 5000,
    "averageComplexity": 3.5,
    "averageDuplication": 2.0,
    // 其他评估指标...
  },
  "files": [
    {
      "filePath": "lib/main.dart",
      "complexity": 4,
      "duplication": 1.5,
      "issues": [
        {
          "type": "naming_convention",
          "message": "Variable 'foo' should be named in lowerCamelCase.",
          "line": 10
        },
        // 其他问题...
      ]
    },
    // 其他文件...
  ]
}
你可以编写一个解析这个JSON报告的脚本,或者简单地打开它并查看各个文件和整个项目的代码质量评分。
5. 集成到CI/CD管道
为了持续监控你的代码质量,你可以将girix_code_gauge集成到你的CI/CD管道中。以下是一个简单的GitHub Actions示例,展示了如何在每次代码提交时运行girix_code_gauge:
name: Flutter Code Quality Check

on: [push, pull_request]

jobs:
  analyze:
    runs-on: ubuntu-latest

    steps:
      - name: Checkout code
        uses: actions/checkout@v2

      - name: Set up Flutter
        uses: subosito/flutter-action@v1
        with:
          channel: stable

      - name: Get Flutter dependencies
        run: flutter pub get

      - name: Run girix_code_gauge
        run: flutter pub run girix_code_gauge:analyze --output-format json > code_quality_report.json

      - name: Upload code quality report
        uses: actions/upload-artifact@v2
        with:
          name: code_quality_report
          path: code_quality_report.json
这个配置会在每次代码提交时运行girix_code_gauge并将生成的报告上传到GitHub Actions的Artifacts中,以便你可以轻松地查看和分析。
通过这些步骤,你就可以在你的Flutter项目中使用girix_code_gauge插件来进行代码质量评估了。