Flutter 3D翻转抽屉导航插件flip_drawer_3d的使用
Flutter 3D翻转抽屉导航插件flip_drawer_3d的使用
安装
- 在你的
pubspec.yaml文件中添加最新版本的插件:
dependencies:
  flip_drawer_3d: ^0.0.3
- 导入插件并在你的 Flutter 应用中使用它:
import 'package:flip_drawer_3d/flip_drawer_3d.dart';
使用
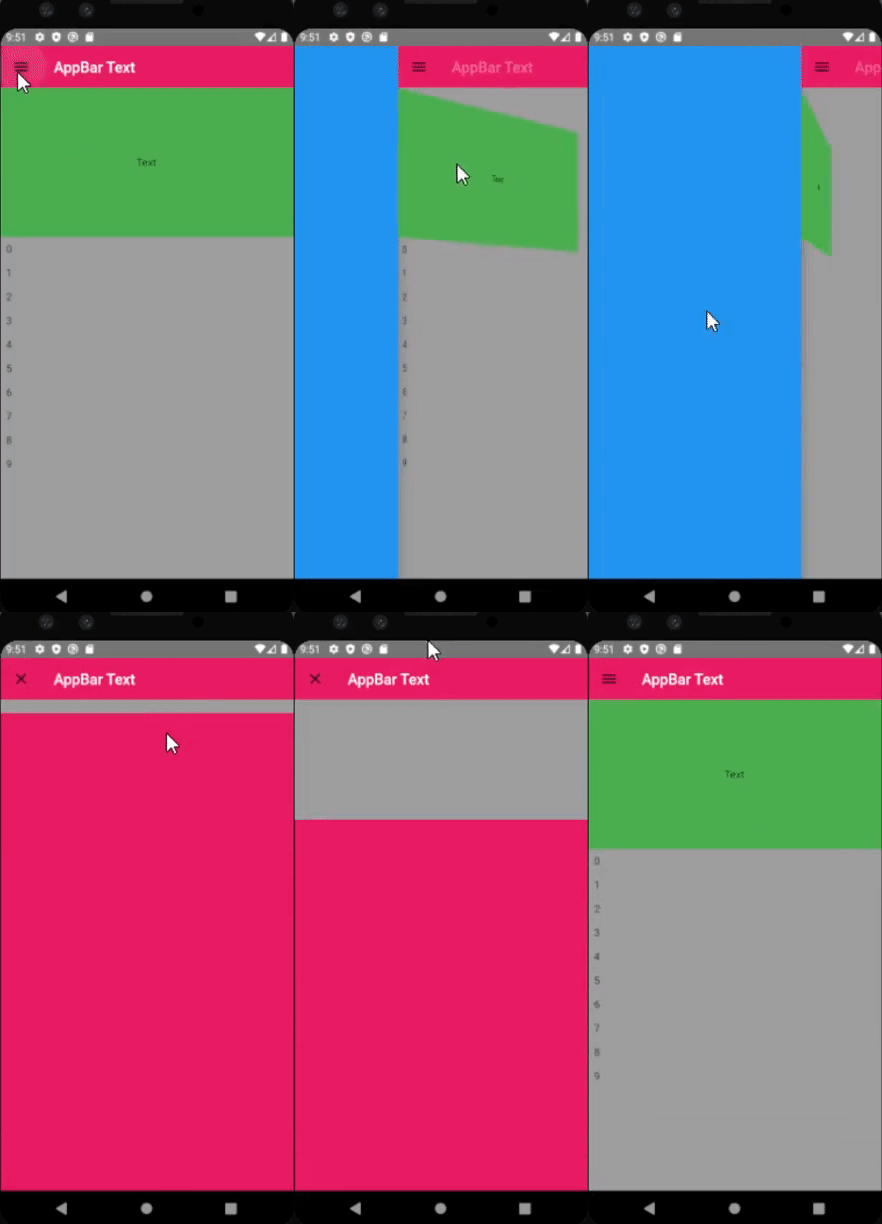
以下是一个基本的使用示例:
@override
Widget build(BuildContext context) {
  return MaterialApp(
    debugShowCheckedModeBanner: false,
    home: FlipDrawer3D(
        appBar: (context, controller, controller2) => CustomAppBar(
              color: Colors.pink,
              horizontalController: controller,
              verticalController: controller2,
              title: const Text('AppBar Text'),
            ),
        mainPage: (context, controller, controller2, controller3) => CustomNormalView(
              child: Column(
                children: [
                  Container(color: Colors.green, height: 200, child: const Center(child: Text('Text'))),
                  Expanded(
                      child: ListView.builder(
                    itemCount: 10,
                    itemBuilder: (context, index) => Padding(
                      padding: const EdgeInsets.all(8.0),
                      child: Text(index.toString()),
                    ),
                  ))
                ],
              ),
            ),
        contentPage: (context, controller) => Container(
              color: Colors.pink,
            ),
        drawer: CustomDrawer(
          backgroundColor: Colors.blue,
          child: Column(),
        )),
  );
}

示例
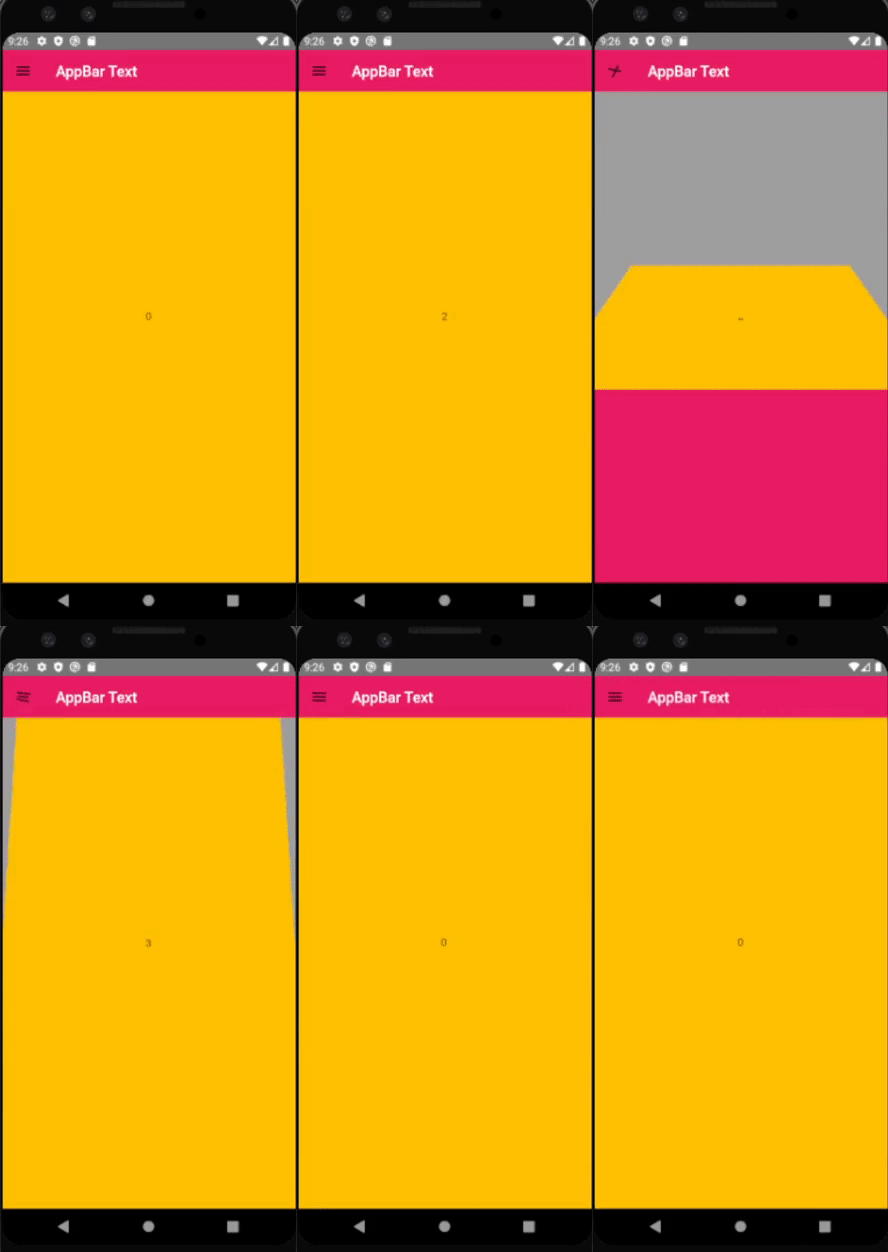
1. PageView.custom 示例
FlipDrawer3D(
  appBar: (context, controller, controller2) => CustomAppBar(
        color: Colors.pink,
        horizontalController: controller,
        verticalController: controller2,
        title: const Text('AppBar Text'),
      ),
  mainPage: (context, controller, controller2, controller3) => CustomPageView(
          pageViewOptions: PageViewOptions(
            childrenDelegate: SliverChildBuilderDelegate((context, index) => Container(
                width: 200,
                height: 200,
                color: Colors.amber,
                child: Center(child: Text(index.toString())),
              )),
          ),
        ),
  contentPage: (context, controller) => Container(
        color: Colors.pink,
      ),
  drawer: CustomDrawer(
    backgroundColor: Colors.blue,
    child: Column(),
  )),

2. ListView 示例
FlipDrawer3D(
  appBar: (context, controller, controller2) => CustomAppBar(
        color: Colors.pink,
        horizontalController: controller,
        verticalController: controller2,
        title: const Text('AppBar Text'),
      ),
  mainPage: (context, controller, controller2, controller3) => CustomListView(
        listViewOptions: ListViewOptions(children: [
                  Container(
            child: Center(
              child: Text('Item1'),
            ),
            color: Colors.amber,
            width: MediaQuery.of(context).size.width / 2,
            height: MediaQuery.of(context).size.height / 2,
          ),
          Container(
            child: Center(
              child: Text('Item2'),
            ),
            color: Colors.amber,
            width: MediaQuery.of(context).size.width / 2,
            height: MediaQuery.of(context).size.height / 2,
          ),
          Container(
            child: Center(
              child: Text('Item3'),
            ),
            color: Colors.amber,
            width: MediaQuery.of(context).size.width / 2,
            height: MediaQuery.of(context).size.height / 2,
          ),
        ]),
      ),
  contentPage: (context, controller) => Container(
        color: Colors.pink,
      ),
  drawer: CustomDrawer(
    backgroundColor: Colors.blue,
    child: Column(),
  )),

3. ListView.builder 示例
FlipDrawer3D(
  appBar: (context, controller, controller2) => CustomAppBar(
        color: Colors.pink,
        horizontalController: controller,
        verticalController: controller2,
        title: const Text('AppBar Text'),
      ),
  mainPage: (context, controller, controller2, controller3) => CustomListView(
        listViewOptions: ListViewOptions(
            itemCount: 5,
            itemBuilder: (p0, p1) => Container(
                  width: 200,
                  height: 200,
                  color: Colors.amber,
                  child: Center(child: Text('Item${p1 + 1}')),
                ),
            scrollDirection: Axis.horizontal),
      ),
  contentPage: (context, controller) => Container(
        color: Colors.pink,
      ),
  drawer: CustomDrawer(
    backgroundColor: Colors.blue,
    child: Column(),
  )),
更多关于Flutter 3D翻转抽屉导航插件flip_drawer_3d的使用的实战教程也可以访问 https://www.itying.com/category-92-b0.html
1 回复
更多关于Flutter 3D翻转抽屉导航插件flip_drawer_3d的使用的实战系列教程也可以访问 https://www.itying.com/category-92-b0.html
当然,下面是一个关于如何使用 flip_drawer_3d 插件在 Flutter 中实现 3D 翻转抽屉导航的示例代码。
首先,确保你已经在 pubspec.yaml 文件中添加了 flip_drawer_3d 依赖:
dependencies:
  flutter:
    sdk: flutter
  flip_drawer_3d: ^最新版本号  # 请替换为当前最新版本号
然后运行 flutter pub get 来获取依赖。
接下来是示例代码,展示如何使用 FlipDrawer3D 小部件来创建一个具有 3D 翻转效果的抽屉导航栏。
import 'package:flutter/material.dart';
import 'package:flip_drawer_3d/flip_drawer_3d.dart';

void main() {
  runApp(MyApp());
}

class MyApp extends StatelessWidget {
  @override
  Widget build(BuildContext context) {
    return MaterialApp(
      title: 'Flutter 3D Flip Drawer Demo',
      theme: ThemeData(
        primarySwatch: Colors.blue,
      ),
      home: MyHomePage(),
    );
  }
}

class MyHomePage extends StatefulWidget {
  @override
  _MyHomePageState createState() => _MyHomePageState();
}

class _MyHomePageState extends State<MyHomePage> with SingleTickerProviderStateMixin {
  late FlipController _controller;

  @override
  void initState() {
    super.initState();
    _controller = FlipController();
  }

  @override
  void dispose() {
    _controller.dispose();
    super.dispose();
  }

  @override
  Widget build(BuildContext context) {
    return Scaffold(
      appBar: AppBar(
        title: Text('3D Flip Drawer Navigation'),
      ),
      body: Center(
        child: ElevatedButton(
          onPressed: () {
            _controller.toggle();
          },
          child: Text('Open Drawer'),
        ),
      ),
      drawer: FlipDrawer3D(
        controller: _controller,
        frontWidget: FrontWidget(),
        backWidget: BackWidget(),
        frontViewTransform: FrontViewTransform.defaultTransform,
        backViewTransform: BackViewTransform.defaultTransform,
        angle: 90,
        borderRadius: 20,
        elevation: 16,
        shadowColor: Colors.black.withOpacity(0.5),
        frontBoxDecoration: BoxDecoration(
          color: Colors.white,
        ),
        backBoxDecoration: BoxDecoration(
          color: Colors.blue,
        ),
      ),
    );
  }
}

class FrontWidget extends StatelessWidget {
  @override
  Widget build(BuildContext context) {
    return Container(
      padding: EdgeInsets.all(16),
      child: Column(
        mainAxisAlignment: MainAxisAlignment.center,
        children: <Widget>[
          Text(
            'Front Side',
            style: TextStyle(fontSize: 24),
          ),
          SizedBox(height: 16),
          ElevatedButton(
            onPressed: () {},
            child: Text('Option 1'),
          ),
          SizedBox(height: 8),
          ElevatedButton(
            onPressed: () {},
            child: Text('Option 2'),
          ),
        ],
      ),
    );
  }
}

class BackWidget extends StatelessWidget {
  @override
  Widget build(BuildContext context) {
    return Container(
      padding: EdgeInsets.all(16),
      child: Column(
        mainAxisAlignment: MainAxisAlignment.center,
        children: <Widget>[
          Text(
            'Back Side',
            style: TextStyle(fontSize: 24, color: Colors.white),
          ),
          SizedBox(height: 16),
          ElevatedButton(
            onPressed: () {},
            style: ButtonStyle(
              backgroundColor: MaterialStateProperty.all(Colors.white),
            ),
            child: Text('Option 3', style: TextStyle(color: Colors.blue)),
          ),
          SizedBox(height: 8),
          ElevatedButton(
            onPressed: () {},
            style: ButtonStyle(
              backgroundColor: MaterialStateProperty.all(Colors.white),
            ),
            child: Text('Option 4', style: TextStyle(color: Colors.blue)),
          ),
        ],
      ),
    );
  }
}
在这个示例中,我们创建了一个基本的 Flutter 应用,其中包含一个 FlipDrawer3D 小部件。FlipDrawer3D 小部件有两个主要部分:frontWidget 和 backWidget,分别代表抽屉的前面和背面。我们还使用了一个 FlipController 来控制抽屉的打开和关闭。
FrontWidget和BackWidget是两个自定义的小部件,分别显示抽屉的前面和背面内容。ElevatedButton用于触发抽屉的打开动作。FlipDrawer3D的各种参数用于配置抽屉的视觉效果,如角度、边框半径、阴影颜色等。
希望这个示例代码能帮助你理解如何在 Flutter 中使用 flip_drawer_3d 插件实现 3D 翻转抽屉导航。


