


Flutter底部导航栏插件aqua_nav_bar的使用
Flutter底部导航栏插件aqua_nav_bar的使用
Aqua Nav Bar Flutter插件为您的Flutter应用程序提供了一个漂亮且可定制的导航栏。它具有流畅的动画效果,现代的设计风格,使其成为增强应用用户体验的理想选择。
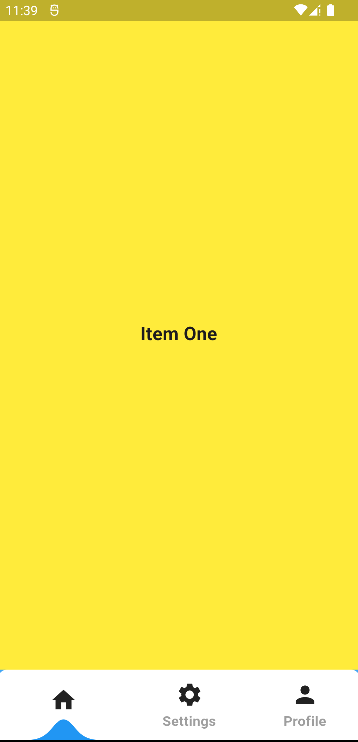
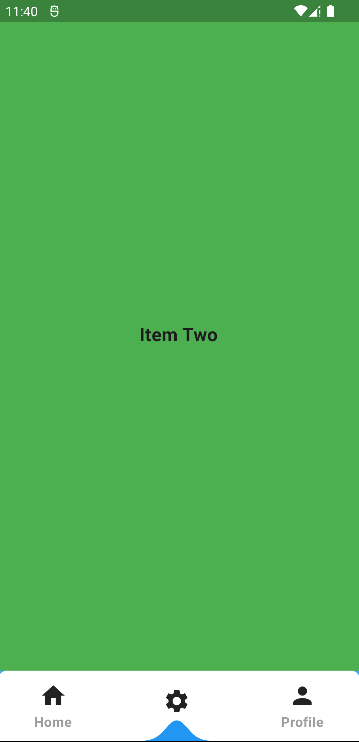
截图
特性
- 美丽且现代的设计。
- 平滑且流畅的动画效果。
- 可自定义的颜色、图标和标签。
- 支持iOS和Android平台。
- 轻松集成到现有的Flutter项目中。
安装
要使用Aqua_Nav_Bar插件,请按照以下步骤操作:
- 在
pubspec.yaml文件中添加插件依赖项:
dependencies:
  aqua_nav_bar: <最新版本>
- 运行以下命令以获取插件:
flutter pub get
- 在Dart代码中导入插件:
import 'package:aqua_nav_bar/aqua_nav_bar.dart';
使用
要在Flutter应用中使用Aqua_Nav_Bar,请参考以下示例代码:
class HomePage extends StatefulWidget {
  const HomePage({Key? key}) : super(key: key);

  [@override](/user/override)
  State<HomePage> createState() => _HomePageState();
}

class _HomePageState extends State<HomePage> {
  // 导航页列表
  final _navPages = [
    const ItemOne(),
    const ItemTwo(),
    const ItemThree()
  ];

  // 当前选中的索引
  int currentIndex = 0;

  [@override](/user/override)
  Widget build(BuildContext context) {
    return Scaffold(
      backgroundColor: Colors.white,
      // 底部导航栏
      bottomNavigationBar: AquaNavBar(
        currentIndex: currentIndex,
        textSize: 15.0,
        activeColor: Colors.blueAccent,
        onItemSelected: (index) {
          setState(() {
            currentIndex = index;
          });
        },
        barItems: [
          BarItem(
              title: "首页",
              icon: const Icon(
                Icons.home,
                size: 30.0,
              )),
          BarItem(
              title: "设置",
              icon: const Icon(
                Icons.settings,
                size: 30.0,
              )),
          BarItem(
              title: "个人资料",
              icon: const Icon(
                Icons.person,
                size: 30.0,
              ))
        ],
      ),
      body: SizedBox(
        height: MediaQuery.of(context).size.height,
        width: MediaQuery.of(context).size.width,
        child: _navPages[currentIndex],
      ),
    );
  }
}

// 第一个页面
class ItemOne extends StatelessWidget {
  const ItemOne({Key? key}) : super(key: key);

  [@override](/user/override)
  Widget build(BuildContext context) {
    return Container(
      color: Colors.pink,
      child: const Center(
        child: Text(
          "第一页",
          style: TextStyle(fontSize: 20.0, fontWeight: FontWeight.bold),
        ),
      ),
    );
  }
}

// 第二个页面
class ItemTwo extends StatelessWidget {
  const ItemTwo({Key? key}) : super(key: key);

  [@override](/user/override)
  Widget build(BuildContext context) {
    return Container(
      color: Colors.green,
      child: const Center(
        child: Text(
          "第二页",
          style: TextStyle(fontSize: 20.0, fontWeight: FontWeight.bold),
        ),
      ),
    );
  }
}

// 第三个页面
class ItemThree extends StatelessWidget {
  const ItemThree({Key? key}) : super(key: key);

  [@override](/user/override)
  Widget build(BuildContext context) {
    return Container(
      color: Colors.red,
      child: const Center(
        child: Text(
          "第三页",
          style: TextStyle(fontSize: 20.0, fontWeight: FontWeight.bold),
        ),
      ),
    );
  }
}
更多关于Flutter底部导航栏插件aqua_nav_bar的使用的实战教程也可以访问 https://www.itying.com/category-92-b0.html

更多关于Flutter底部导航栏插件aqua_nav_bar的使用的实战系列教程也可以访问 https://www.itying.com/category-92-b0.html
当然,以下是如何在Flutter应用中使用aqua_nav_bar插件来创建一个底部导航栏的示例代码。
首先,你需要在你的pubspec.yaml文件中添加aqua_nav_bar依赖:
dependencies:
  flutter:
    sdk: flutter
  aqua_nav_bar: ^0.4.0  # 请确保使用最新版本
然后运行flutter pub get来安装依赖。
接下来,你可以在你的主文件(通常是main.dart)中使用这个插件来创建一个底部导航栏。以下是一个完整的示例代码:
import 'package:flutter/material.dart';
import 'package:aqua_nav_bar/aqua_nav_bar.dart';

void main() {
  runApp(MyApp());
}

class MyApp extends StatelessWidget {
  @override
  Widget build(BuildContext context) {
    return MaterialApp(
      title: 'Flutter Demo',
      theme: ThemeData(
        primarySwatch: Colors.blue,
      ),
      home: MyHomePage(),
    );
  }
}

class MyHomePage extends StatefulWidget {
  @override
  _MyHomePageState createState() => _MyHomePageState();
}

class _MyHomePageState extends State<MyHomePage> {
  int _selectedIndex = 0;
  final List<Widget> _widgetOptions = [
    Text('Home'),
    Text('Search'),
    Text('Profile'),
    Text('Settings'),
  ];

  void _onItemTapped(int index) {
    setState(() {
      _selectedIndex = index;
    });
  }

  @override
  Widget build(BuildContext context) {
    return Scaffold(
      appBar: AppBar(
        title: Text('Aqua Nav Bar Demo'),
      ),
      body: Center(
        child: _widgetOptions.elementAt(_selectedIndex),
      ),
      bottomNavigationBar: AquaNavBar(
        selectedIndex: _selectedIndex,
        onItemTapped: _onItemTapped,
        items: [
          AquaNavBarItem(
            icon: Icons.home,
            title: 'Home',
          ),
          AquaNavBarItem(
            icon: Icons.search,
            title: 'Search',
          ),
          AquaNavBarItem(
            icon: Icons.person,
            title: 'Profile',
          ),
          AquaNavBarItem(
            icon: Icons.settings,
            title: 'Settings',
          ),
        ],
        activeColor: Colors.blue,
        inactiveColor: Colors.grey,
        borderRadius: BorderRadius.circular(20),
      ),
    );
  }
}
代码说明:
-
依赖导入:首先,我们导入了
flutter/material.dart和aqua_nav_bar/aqua_nav_bar.dart。 -
主应用:在
MyApp类中,我们创建了一个MaterialApp,并设置了home属性为MyHomePage。 -
状态管理:
MyHomePage是一个StatefulWidget,因为我们需要管理底部导航栏的选中状态。我们在_MyHomePageState类中定义了_selectedIndex来跟踪当前选中的索引,并定义了一个_widgetOptions列表来存储每个导航项的内容。 -
导航项点击事件:
_onItemTapped方法会在用户点击导航项时被调用,它更新_selectedIndex的值。 -
界面构建:在
build方法中,我们创建了一个Scaffold,其中包含一个AppBar、一个Center用于显示当前选中的页面内容,以及一个AquaNavBar作为底部导航栏。 -
AquaNavBar配置:我们配置了
AquaNavBar的selectedIndex、onItemTapped回调、items列表(包含图标和标题)、activeColor和inactiveColor用于设置选中和未选中时的颜色,以及borderRadius来设置圆角。
这个示例展示了如何使用aqua_nav_bar插件来创建一个具有四个导航项的底部导航栏,并在用户点击导航项时更新显示的内容。你可以根据自己的需求进一步自定义和扩展这个示例。