


Flutter下拉应用栏插件pull_appbar的使用
Flutter下拉应用栏插件pull_appbar的使用
概述
PullAppBar 是一个 Flutter 包,它通过允许用户通过拉动应用栏来动态更改页面内容,从而增强应用程序导航。它提供了平滑且交互式的用户体验,并支持自定义标题和页面。
实时演示
您可以在此处查看实时演示:实时演示
特性
- 通过拉动应用栏更改页面内容。
- 平滑过渡和动画效果。
安装
在您的 pubspec.yaml 文件中添加 pull_appbar 依赖项,并导入该包:
import 'package:pull_appbar/pull_appbar.dart';
使用
创建一个 PullAppBar 小部件,并传递所需的参数:
PullAppBar(
  titles: const [
    Text('Title1'),
    Text('Title2'),
    Text('Title3'),
    Text('Title4'),
  ],
  onPageChanged: (value) => print(value),
  children: const [
    Center(child: Text('Page1')),
    Center(child: Text('Page2')),
    Center(child: Text('Page3')),
    Center(child: Text('Page4')),
  ],
)
完整示例
以下是一个完整的示例代码,展示了如何使用 PullAppBar:
import 'package:flutter/material.dart';
import 'package:pull_appbar/pull_appbar.dart';
void main() {
runApp(const MyApp());
}
class MyApp extends StatelessWidget {
const MyApp({super.key});
[@override](/user/override)
Widget build(BuildContext context) {
return const MaterialApp(
debugShowCheckedModeBanner: false,
home: HomePage(),
);
}
}
class HomePage extends StatefulWidget {
const HomePage({super.key});
[@override](/user/override)
State<HomePage> createState() => _HomePageState();
}
class _HomePageState extends State<HomePage> {
final List gradients = [
const LinearGradient(
colors: [Color(0xffbde5d0), Color(0xff123c6c)],
begin: Alignment.topLeft,
end: Alignment.bottomRight,
),
const LinearGradient(
colors: [Color(0xff97c794), Color(0xff12656c)],
begin: Alignment.topLeft,
end: Alignment.bottomRight,
),
// 其他渐变颜色...
];
late final remainingSize = MediaQuery.of(context).size.height - 80;
final titleNames = [
'Latest Movies',
'Best Movies',
'Archive',
'About',
];
late final List<Widget> _titles = [
for (int i = 0; i < 4; i++)
Text(
titleNames[i],
style: const TextStyle(color: Colors.white),
),
];
[@override](/user/override)
Widget build(BuildContext context) {
return Scaffold(
body: PullAppBar(
titles: _titles,
children: [
ListView(
padding: EdgeInsets.zero,
children: [
SizedBox(
height: remainingSize,
child: Column(
children: [
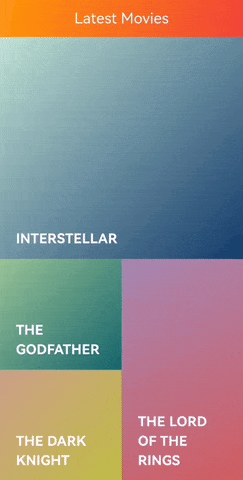
Expanded(child: ListItem(gradient: gradients[0], title: 'INTERSTELLAR')),
Expanded(
child: Row(
children: [
Expanded(
child: Column(
children: [
Expanded(child: ListItem(gradient: gradients[1], title: 'THE GODFATHER')),
Expanded(child: ListItem(gradient: gradients[2], title: 'THE DARK KNIGHT')),
],
),
),
Expanded(child: ListItem(gradient: gradients[3], title: 'THE LORD\nOF THE\nRINGS')),
],
)),
],
),
),
SizedBox(
height: remainingSize / 2,
child: Column(
children: [
Expanded(
child: Row(
children: [
Expanded(child: ListItem(gradient: gradients[4], title: 'INCEPTION')),
Expanded(child: ListItem(gradient: gradients[5], title: 'FIGHT CLUB')),
],
),
),
Expanded(child: ListItem(gradient: gradients[6], title: 'PULP FICTION')),
],
),
),
],
),
ListView(
padding: EdgeInsets.zero,
children: [
SizedBox(
height: remainingSize / 4,
child: ListItem(gradient: gradients[0], title: 'OPPENHEIMER'),
),
SizedBox(
height: remainingSize / 4,
child: ListItem(gradient: gradients[1], title: 'SPIDER-MAN: ACROSS THE SPIDER-VERSE'),
),
SizedBox(
height: remainingSize / 4,
child: ListItem(gradient: gradients[2], title: 'JOHN WICK: CHAPTER 4'),
),
SizedBox(
height: remainingSize / 4,
child: ListItem(gradient: gradients[3], title: 'DUNE: PART TWO'),
),
SizedBox(
height: remainingSize / 4,
child: ListItem(gradient: gradients[4], title: 'FURIOSA: A MAD MAX SAGA'),
),
SizedBox(
height: remainingSize / 4,
child: ListItem(gradient: gradients[5], title: 'WONKA'),
),
],
),
ListView(
padding: EdgeInsets.zero,
children: [
SizedBox(
height: remainingSize / 6,
child: ListItem(gradient: gradients[0], title: 'CASABLANCA'),
),
SizedBox(
height: remainingSize / 6,
child: ListItem(gradient: gradients[1], title: 'GONE WITH THE WIND'),
),
SizedBox(
height: remainingSize / 6,
child: ListItem(gradient: gradients[2], title: 'CITIZEN KANE'),
),
SizedBox(
height: remainingSize / 6,
child: ListItem(gradient: gradients[3], title: 'THE WIZARD OF OZ'),
),
SizedBox(
height: remainingSize / 6,
child: ListItem(gradient: gradients[4], title: 'IT\'S A WONDERFUL LIFE'),
),
SizedBox(
height: remainingSize / 6,
child: ListItem(gradient: gradients[5], title: 'PSYCHO '),
),
SizedBox(
height: remainingSize / 6,
child: ListItem(gradient: gradients[6], title: 'LAWRENCE OF ARABIA'),
),
SizedBox(
height: remainingSize / 6,
child: ListItem(gradient: gradients[7], title: 'SUNSET BOULEVARD'),
),
],
),
Container(
height: remainingSize,
decoration: BoxDecoration(
gradient: gradients[1],
),
child: const Center(
child: Column(
mainAxisSize: MainAxisSize.min,
children: [
Text(
'MENU\nINTERACTION\nCONCEPT',
textAlign: TextAlign.left,
style: TextStyle(fontSize: 20, fontWeight: FontWeight.bold, color: Colors.white),
),
Text(
'By Hamid reza Shakeri',
textAlign: TextAlign.center,
style: TextStyle(fontSize: 16, fontWeight: FontWeight.bold, color: Colors.white),
),
],
),
),
),
],
),
);
}
}
class ListItem extends StatelessWidget {
final String title;
final LinearGradient gradient;
const ListItem({
super.key,
required this.title,
required this.gradient,
});
[@override](/user/override)
Widget build(BuildContext context) {
return Container(
decoration: BoxDecoration(
gradient: gradient,
),
child: Align(
alignment: Alignment.bottomLeft,
child: Padding(
padding: const EdgeInsets.only(bottom: 16, left: 24),
child: Text(
title,
style: const TextStyle(fontSize: 20, fontWeight: FontWeight.bold, color: Colors.white),
),
),
),
);
}
}
更多关于Flutter下拉应用栏插件pull_appbar的使用的实战教程也可以访问 https://www.itying.com/category-92-b0.html

更多关于Flutter下拉应用栏插件pull_appbar的使用的实战系列教程也可以访问 https://www.itying.com/category-92-b0.html
当然,以下是一个关于如何在Flutter中使用pull_to_refresh包中的PullToRefreshNotificationListener和自定义下拉应用栏(类似于pull_appbar效果的示例代码。需要注意的是,pull_appbar并不是一个广泛认可的Flutter插件名称,但我们可以使用pull_to_refresh包实现类似的下拉刷新效果。
首先,确保你的pubspec.yaml文件中包含pull_to_refresh依赖:
dependencies:
  flutter:
    sdk: flutter
  pull_to_refresh: ^2.0.0  # 请检查最新版本号
然后,运行flutter pub get来安装依赖。
接下来是一个完整的示例代码,展示了如何使用pull_to_refresh来实现下拉刷新功能,并自定义下拉应用栏的UI:
import 'package:flutter/material.dart';
import 'package:pull_to_refresh/pull_to_refresh.dart';

void main() {
  runApp(MyApp());
}

class MyApp extends StatelessWidget {
  @override
  Widget build(BuildContext context) {
    return MaterialApp(
      title: 'Pull To Refresh Demo',
      theme: ThemeData(
        primarySwatch: Colors.blue,
      ),
      home: MyHomePage(),
    );
  }
}

class MyHomePage extends StatefulWidget {
  @override
  _MyHomePageState createState() => _MyHomePageState();
}

class _MyHomePageState extends State<MyHomePage> {
  final RefreshController _refreshController = RefreshController();

  @override
  Widget build(BuildContext context) {
    return Scaffold(
      appBar: AppBar(
        title: Text('Pull To Refresh Demo'),
      ),
      body: SmartRefresher(
        controller: _refreshController,
        enablePullDown: true,
        enablePullUp: false,
        header: CustomHeader(),
        onRefresh: () async {
          // 模拟网络请求
          await Future.delayed(Duration(seconds: 2));
          // 结束刷新
          _refreshController.refreshCompleted();
        },
        child: ListView.builder(
          itemCount: 20,
          itemBuilder: (context, index) {
            return ListTile(
              title: Text('Item $index'),
            );
          },
        ),
      ),
    );
  }

  @override
  void dispose() {
    _refreshController.dispose();
    super.dispose();
  }
}

class CustomHeader extends StatefulWidget {
  @override
  _CustomHeaderState createState() => _CustomHeaderState();
}

class _CustomHeaderState extends State<CustomHeader> with SingleTickerProviderStateMixin {
  double _dragOffset = 0.0;
  AnimationController _controller;
  Animation<double> _animation;

  @override
  void initState() {
    super.initState();
    _controller = AnimationController(
      duration: const Duration(milliseconds: 300),
      vsync: this,
    )..repeat(reverse: true);
    _animation = Tween<double>(begin: 0.0, end: 1.0).animate(_controller);
  }

  @override
  Widget build(BuildContext context) {
    return SlideAnimation(
      position: _dragOffset,
      child: Container(
        height: 60.0,
        color: Colors.blue,
        alignment: Alignment.center,
        child: Column(
          mainAxisAlignment: MainAxisAlignment.center,
          children: <Widget>[
            Text(
              'Pull to refresh',
              style: TextStyle(color: Colors.white),
            ),
            SizedBox(height: 8.0),
            Icon(
              Icons.arrow_downward,
              color: Colors.white,
              size: 24.0,
            ),
          ],
        ),
      ),
    );
  }

  void handleDrag(DragUpdateDetails details) {
    setState(() {
      _dragOffset = details.delta.dy;
    });
  }

  void handleDragEnd(DragEndDetails details) {
    // Reset drag offset when drag ends
    setState(() {
      _dragOffset = 0.0;
    });
  }
}

class SlideAnimation extends StatelessWidget {
  const SlideAnimation({Key key, @required this.position, @required this.child}) : super(key: key);

  final double position;
  final Widget child;

  @override
  Widget build(BuildContext context) {
    return SlideTransition(
      position: Tween<Offset>(begin: Offset.zero, end: Offset(0, -1)).animate(
        CurvedAnimation(
          parent: AnimationController(
            duration: const Duration(milliseconds: 300),
            vsync: VsyncNotifier(),
          )..value = position,
          curve: Curves.easeInOut,
        ),
      ),
      child: child,
    );
  }
}
注意:
CustomHeader类中的handleDrag和handleDragEnd方法并未直接使用,因为pull_to_refresh包内部处理了拖动事件。这里仅作为展示如何自定义头部UI的一个基础示例。SlideAnimation类用于展示动画效果,但在这个例子中并没有实际连接到拖动事件,因为SmartRefresher已经处理了这些事件。- 你可以根据需要进一步自定义
CustomHeader的UI和动画效果。
这个示例代码展示了如何使用pull_to_refresh包来实现下拉刷新功能,并自定义了下拉应用栏的UI。希望这对你有所帮助!