


Flutter地理坐标网格绘制插件lat_lon_grid_plugin的使用
Flutter地理坐标网格绘制插件lat_lon_grid_plugin的使用
lat_lon_grid_plugin
lat_lon_grid_plugin 是一个为 flutter_map 添加经纬度网格的插件。
支持的 flutter_map 版本:
- 支持 flutter_map 版本 3.0.0(2022年10月测试)。
- 支持 flutter_map 版本 3.1.0 和 4.0.0(2023年5月测试)。
- 支持 flutter_map 版本 5.0.0(2023年6月测试)。
开始使用
示例应用位于 /example/ 目录下:
使用方法
首先,在 pubspec.yaml 文件中添加依赖项:
dependencies:
  flutter_map: any
  lat_lon_grid_plugin: any
然后在你的代码中使用 FlutterMap 并添加 LatLonGridLayer 插件:
import 'package:flutter/material.dart';
import 'package:flutter_map/flutter_map.dart';
import 'package:lat_lon_grid_plugin/lat_lon_grid_plugin.dart';
import 'package:latlong2/latlong.dart';
void main() => runApp(MyApp());
/// 示例应用程序
class MyApp extends StatelessWidget {
[@override](/user/override)
Widget build(BuildContext context) {
return MaterialApp(
title: 'Lat lon grid example',
theme: ThemeData(
primarySwatch: Colors.blue,
),
home: HomePage(),
);
}
}
/// 显示插件使用的主页
class HomePage extends StatefulWidget {
/// 主页构造函数
HomePage({Key? key}) : super(key: key);
[@override](/user/override)
_HomePageState createState() => _HomePageState();
}
class _HomePageState extends State<HomePage> {
MapController? _mapController;
String _sLatLonZoom = '';
void _resetRotation() {
_mapController!.rotate(0);
setState(_updateLabel);
}
void _updateLabel() {
if (_mapController != null) {
String lat = _mapController!.center.latitude.toStringAsFixed(3);
String lon = _mapController!.center.longitude.toStringAsFixed(3);
String zoom = _mapController!.zoom.toStringAsFixed(2);
String rotation = _mapController!.rotation.toStringAsFixed(2);
// 在构建时不要触发重建
if (_sLatLonZoom == '') {
_sLatLonZoom = 'lat: $lat lon: $lon\nzoom: $zoom rotation: $rotation';
} else {
setState(() {
_sLatLonZoom = 'lat: $lat lon: $lon\nzoom: $zoom rotation: $rotation';
});
}
}
}
[@override](/user/override)
void initState() {
super.initState();
_mapController = MapController();
// 解决方案来自:https://stackoverflow.com/questions/49466556/flutter-run-method-on-widget-build-complete
WidgetsBinding.instance.addPostFrameCallback((_) => _updateLabel());
}
[@override](/user/override)
Widget build(BuildContext context) {
return Scaffold(
appBar: AppBar(
title: Text('Example'),
actions: <Widget>[
SizedBox(
height: 50.0,
width: 250.0,
child: Container(
height: 80.0,
color: Colors.blue,
child: Column(
children: <Widget>[
Text(
_sLatLonZoom,
style: TextStyle(color: Colors.white, fontSize: 17.0),
),
],
),
),
),
],
),
body: Stack(
children: <Widget>[
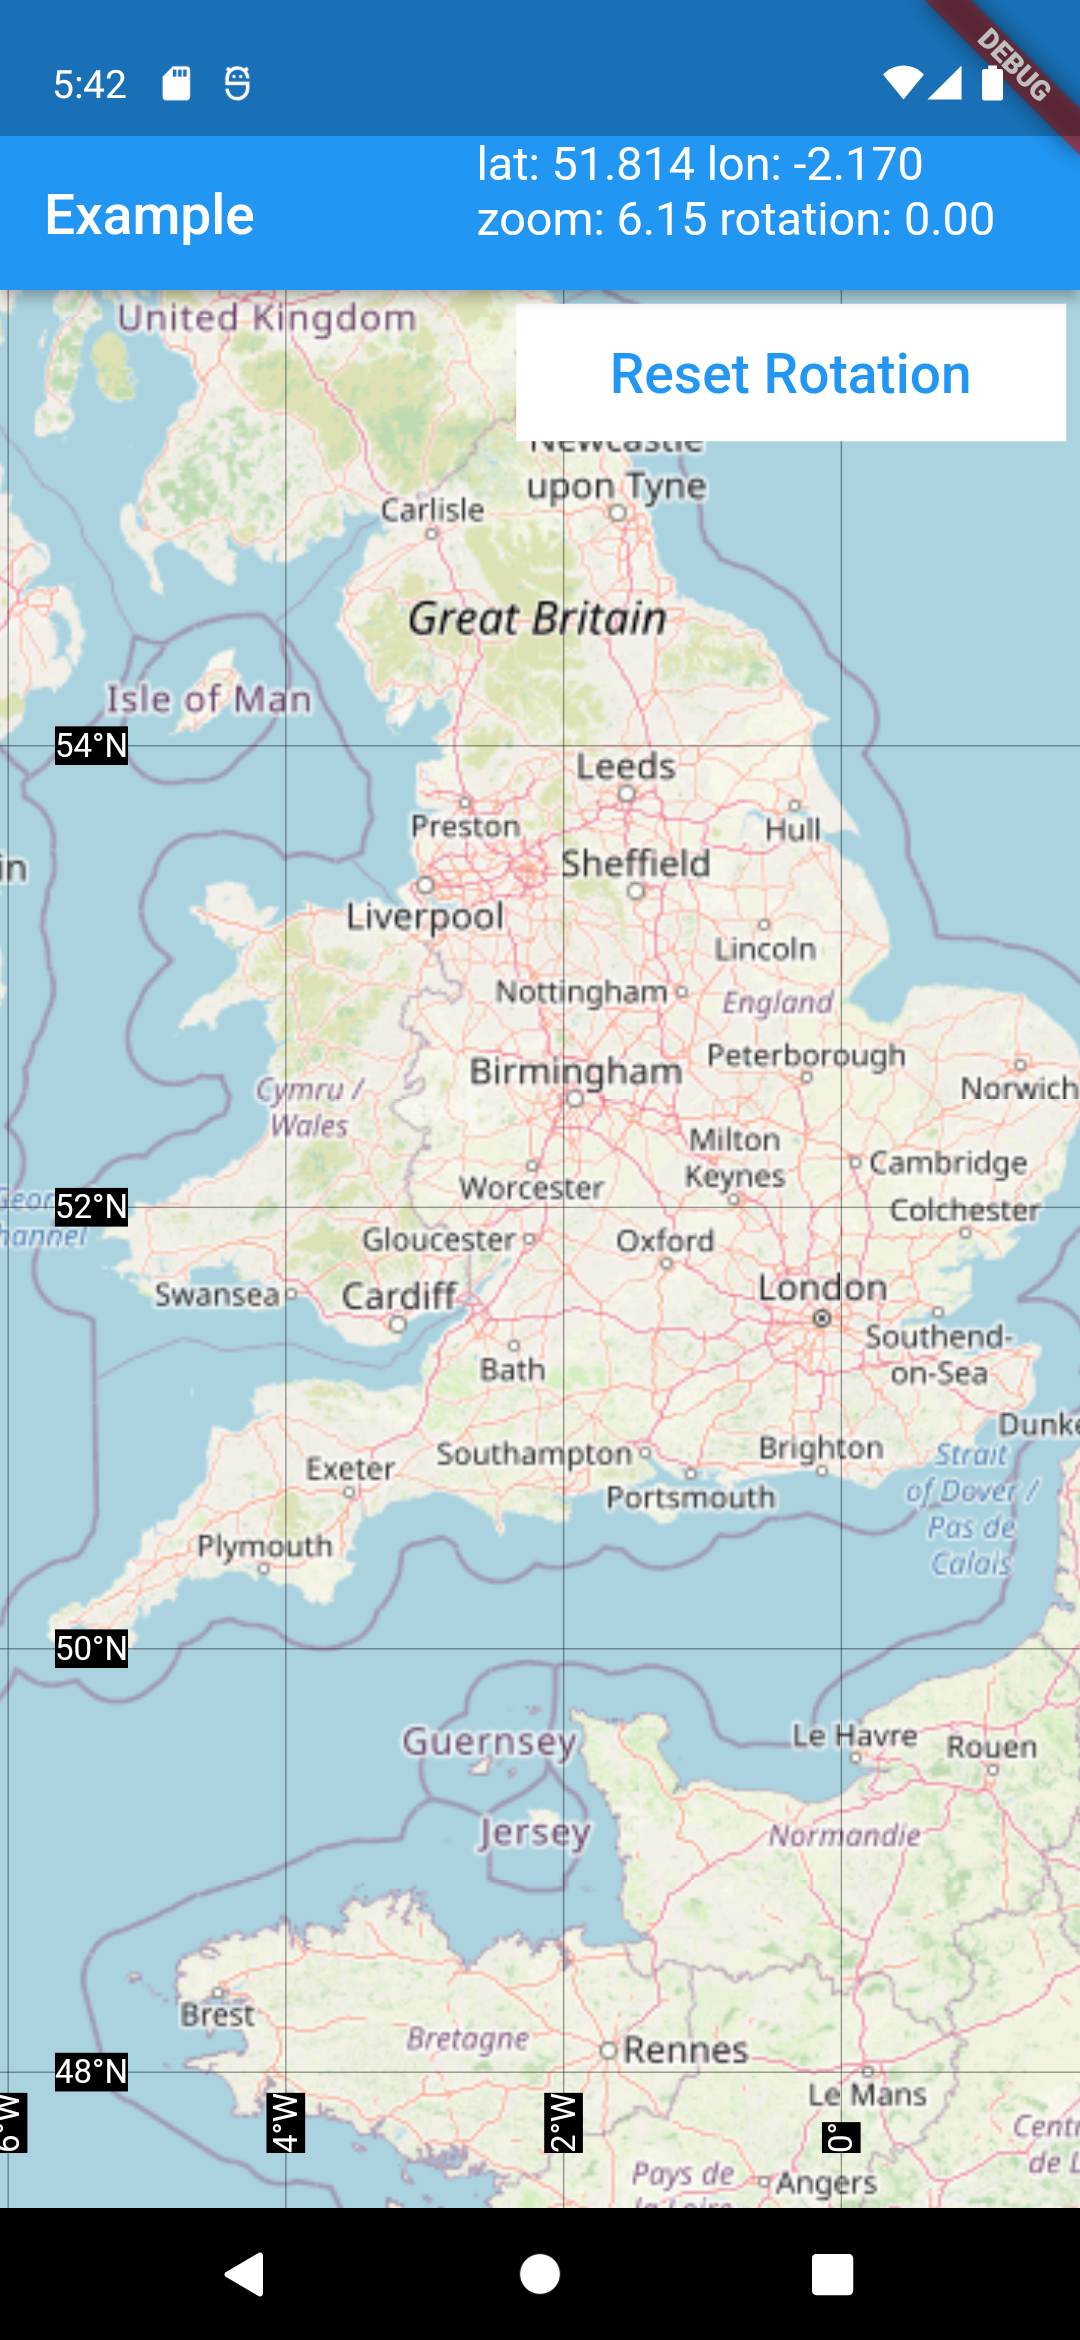
FlutterMap(
mapController: _mapController,
options: MapOptions(
center: LatLng(51.814, -2.170),
zoom: 6.15,
rotation: 0.0,
onPositionChanged: (position, hasGesture) => _updateLabel(),
),
children: [
TileLayer(
urlTemplate:
'https://{s}.tile.openstreetmap.org/{z}/{x}/{y}.png',
subdomains: ['a', 'b', 'c'],
),
LatLonGridLayer(
options: LatLonGridLayerOptions(
lineWidth: 0.5,
// 应用透明度到网格线
lineColor: Color.fromARGB(100, 0, 0, 0),
labelStyle: TextStyle(
color: Colors.white,
backgroundColor: Colors.black,
fontSize: 12.0,
),
showCardinalDirections: true,
showCardinalDirectionsAsPrefix: false,
showLabels: true,
rotateLonLabels: true,
placeLabelsOnLines: true,
offsetLonLabelsBottom: 20.0,
offsetLatLabelsLeft: 20.0,
),
),
],
),
Padding(
padding: EdgeInsets.only(top: 5.0, right: 5.0),
child: Align(
alignment: Alignment.topRight,
child: SizedBox(
height: 50.0,
width: 200.0,
child: Container(
color: Colors.white,
child: TextButton(
child: Text(
'重置旋转',
style: TextStyle(fontSize: 20.0),
),
onPressed: _resetRotation,
),
),
),
),
),
],
),
);
}
}
更多关于Flutter地理坐标网格绘制插件lat_lon_grid_plugin的使用的实战教程也可以访问 https://www.itying.com/category-92-b0.html

更多关于Flutter地理坐标网格绘制插件lat_lon_grid_plugin的使用的实战系列教程也可以访问 https://www.itying.com/category-92-b0.html
当然,下面是一个关于如何使用 lat_lon_grid_plugin 插件在 Flutter 应用中绘制地理坐标网格的示例代码。这个示例假设你已经将 lat_lon_grid_plugin 添加到了你的 pubspec.yaml 文件中,并且已经运行了 flutter pub get。
首先,确保你的 pubspec.yaml 文件中包含以下依赖项:
dependencies:
  flutter:
    sdk: flutter
  lat_lon_grid_plugin: ^最新版本号  # 请替换为实际的最新版本号
然后,你可以在你的 Flutter 应用中使用这个插件。以下是一个完整的示例代码:
import 'package:flutter/material.dart';
import 'package:lat_lon_grid_plugin/lat_lon_grid_plugin.dart';

void main() {
  runApp(MyApp());
}

class MyApp extends StatelessWidget {
  @override
  Widget build(BuildContext context) {
    return MaterialApp(
      title: 'Flutter Geo Grid Demo',
      theme: ThemeData(
        primarySwatch: Colors.blue,
      ),
      home: GeoGridScreen(),
    );
  }
}

class GeoGridScreen extends StatefulWidget {
  @override
  _GeoGridScreenState createState() => _GeoGridScreenState();
}

class _GeoGridScreenState extends State<GeoGridScreen> {
  final double _initialLatitude = 37.7749; // 旧金山纬度
  final double _initialLongitude = -122.4194; // 旧金山经度
  final double _zoomLevel = 10.0; // 缩放级别

  @override
  Widget build(BuildContext context) {
    return Scaffold(
      appBar: AppBar(
        title: Text('Flutter Geo Grid Demo'),
      ),
      body: Center(
        child: LatLonGrid(
          latitude: _initialLatitude,
          longitude: _initialLongitude,
          zoomLevel: _zoomLevel,
          gridColor: Colors.grey.withOpacity(0.5),
          gridLineWidth: 1.0,
          child: CustomPaint(
            size: Size.infinite, // 确保覆盖整个屏幕
            painter: MapPainter(
              latitude: _initialLatitude,
              longitude: _initialLongitude,
              zoomLevel: _zoomLevel,
            ),
          ),
        ),
      ),
    );
  }
}

class MapPainter extends CustomPainter {
  final double latitude;
  final double longitude;
  final double zoomLevel;

  MapPainter({required this.latitude, required this.longitude, required this.zoomLevel});

  @override
  void paint(Canvas canvas, Size size) {
    // 在这里可以添加绘制地图的代码,例如使用地图瓦片或其他地图绘制库
    // 这里仅作为示例,我们仅绘制一个简单的矩形背景
    Paint paint = Paint()
      ..color = Colors.white
      ..style = PaintingStyle.fill;
    canvas.drawRect(Rect.fromLTWH(0, 0, size.width, size.height), paint);

    // 注意:实际的地图绘制需要借助其他地图服务或库来完成
  }

  @override
  bool shouldRepaint(covariant CustomPainter oldDelegate) {
    // 如果经纬度或缩放级别发生变化,则返回 true 以触发重绘
    if (oldDelegate is MapPainter) {
      return oldDelegate.latitude != latitude ||
             oldDelegate.longitude != longitude ||
             oldDelegate.zoomLevel != zoomLevel;
    }
    return true;
  }
}
在这个示例中,我们创建了一个简单的 Flutter 应用,其中包含一个 LatLonGrid 组件,用于在地图上绘制地理坐标网格。我们还创建了一个自定义的 MapPainter 类,用于绘制地图背景(在这个例子中只是一个简单的白色矩形)。需要注意的是,实际的地图绘制通常需要借助其他地图服务或库来完成,这里仅作为示例展示如何使用 LatLonGrid 插件。
请根据你的实际需求调整代码,例如添加地图瓦片绘制逻辑,或者根据用户交互更新经纬度或缩放级别等。希望这个示例对你有帮助!