


Flutter支付集成插件paypal_payment的使用
Flutter支付集成插件paypal_payment的使用
在您的Flutter应用中集成PayPal支付从未如此简单!此插件支持订阅和订单支付,并适用于所有平台。采用最新的PayPal API,让我们直接进入主题吧!
关键特性:
- 易于使用:使用为用户预定义的PayPal订阅/订单小部件,即可见证奇迹。
- 即时支持:如果遇到任何问题,只需发送消息,我将为您提供帮助:
- 跨平台支持:无需担心平台问题,iOS、Android和Web都将完美运行。
- 最新PayPal API:包使用了PayPal的最新API,因此不用担心过时的问题。
- 更多自定义代码:通过更多的PayPal订单/订阅方法,根据您的需求进行定制。
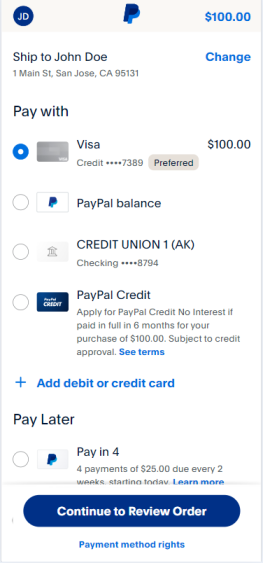
PayPal支付示例:


安装
要安装PayPal支付插件,请遵循以下步骤:
- 在项目的
pubspec.yaml文件中添加插件依赖项:
dependencies:
  paypal_payment: ^1.0.0
- 运行以下命令以获取插件:
flutter pub get
使用
订单支付
- 导入插件到您的Dart文件中:
import 'package:paypal_payment/paypal_payment.dart';
- 跳转到PayPal支付视图并设置所需配置:
final String url = "http://localhost:63329/app/example";
final String clientId = "*****";
final String secretKey = "*****";
final String currencyCode = "USD";
final String? amount = "100";

// 监听设备上的回调,不包括web
void onSuccessCallback(value) => print("Paypal success callback $value");
void onErrorCallback(error) => print("Paypal error callback $error");
void onCancelCallback() => print("Paypal cancel callback");

ElevatedButton(
  onPressed: () {
    Navigator.of(context).push(MaterialPageRoute(
      builder: (BuildContext context) => PaypalOrderPayment(
        sandboxMode: true,
        // returnURL: url, 必须在web上
        // cancelURL: url, 必须在web上
        clientId: clientId,
        secretKey: secretKey,
        currencyCode: currencyCode,
        amount: amount,
        onSuccess: onSuccessCallback,
        onError: onErrorCallback,
        onCancel: onCancelCallback,
      ),
    ));
  },
  child: const Text("Paypal Payment (Order)"),
)
订阅支付
- 跳转到PayPal支付视图并设置所需配置:
final String url = "http://localhost:63329/app/example";
final String clientId = "*****";
final String secretKey = "*****";
final String currencyCode = "USD";
final String? amount = "100";

// 监听设备上的回调,不包括web
void onSuccessCallback(value) => print("Paypal success callback $value");
void onErrorCallback(error) => print("Paypal error callback $error");
void onCancelCallback() => print("Paypal cancel callback");

ElevatedButton(
  onPressed: () {
    Navigator.of(context).push(MaterialPageRoute(
      builder: (BuildContext context) => PaypalSubscriptionPayment(
        sandboxMode: true,
        clientId: clientId,
        secretKey: secretKey,
        productName: 'T-Shirt',
        type: "PHYSICAL",
        planName: 'T-shirt plan',
        billingCycles: [
          {
            'tenure_type': 'REGULAR',
            'sequence': 1,
            "total_cycles": 12,
            'pricing_scheme': {
              'fixed_price': {
                'currency_code': currencyCode,
                'value': amount
              }
            },
            'frequency': {
              "interval_unit": "MONTH",
              "interval_count": 1
            }
          }
        ],
        paymentPreferences: const {
          "auto_bill_outstanding": true
        },
        returnURL: url,
        cancelURL: url,
        onSuccess: onSuccessCallback,
        onError: onErrorCallback,
        onCancel: onCancelCallback,
      ),
    ));
  },
  child: const Text("Paypal Payment (Subscription)"),
)
自定义方法调用
await PaypalOrderService.captureOrder(
    "v2/checkout/orders/${Uri.base.queryParameters['PayerID']}/capture",
    clientId: clientId,
    sandboxMode: true,
    secretKey: secretKey);
PaypalSubscriptionService.createPlan();
PaypalSubscriptionService.createProduct();
更多关于Flutter支付集成插件paypal_payment的使用的实战教程也可以访问 https://www.itying.com/category-92-b0.html

更多关于Flutter支付集成插件paypal_payment的使用的实战系列教程也可以访问 https://www.itying.com/category-92-b0.html
在Flutter项目中集成PayPal支付,你可以使用paypal_payment插件。以下是一个基本的代码示例,展示了如何在Flutter应用中集成并使用PayPal支付。
首先,确保你已经在pubspec.yaml文件中添加了paypal_payment依赖:
dependencies:
  flutter:
    sdk: flutter
  paypal_payment: ^x.y.z  # 请替换为最新版本号
然后,运行flutter pub get来安装依赖。
接下来,你需要配置PayPal的客户端ID。这通常在PayPal开发者网站上创建应用时获得。确保你已经注册了一个PayPal开发者账号,并创建了一个应用来获取客户端ID。
以下是一个完整的Flutter应用示例,展示了如何使用paypal_payment插件进行支付:
import 'package:flutter/material.dart';
import 'package:paypal_payment/paypal_payment.dart';

void main() {
  runApp(MyApp());
}

class MyApp extends StatelessWidget {
  @override
  Widget build(BuildContext context) {
    return MaterialApp(
      title: 'PayPal Payment Demo',
      theme: ThemeData(
        primarySwatch: Colors.blue,
      ),
      home: MyHomePage(),
    );
  }
}

class MyHomePage extends StatefulWidget {
  @override
  _MyHomePageState createState() => _MyHomePageState();
}

class _MyHomePageState extends State<MyHomePage> {
  final String clientId = 'YOUR_PAYPAL_CLIENT_ID'; // 替换为你的PayPal客户端ID

  @override
  Widget build(BuildContext context) {
    return Scaffold(
      appBar: AppBar(
        title: Text('PayPal Payment Demo'),
      ),
      body: Center(
        child: ElevatedButton(
          onPressed: () {
            _initPayPalPayment();
          },
          child: Text('Pay with PayPal'),
        ),
      ),
    );
  }

  Future<void> _initPayPalPayment() async {
    final PayPalPayment payment = PayPalPayment(
      amount: '10.00',
      currencyCode: 'USD',
      shortDescription: 'Test Payment',
      intent: 'sale',
    );

    try {
      await PayPalPayment.start(
        context: context,
        payment: payment,
        config: PayPalConfiguration(
          clientId: clientId,
          environment: PayPalEnvironment.sandbox, // 使用sandbox进行测试,生产环境中使用PayPalEnvironment.production
          returnUrl: 'your_return_url', // 设置你的返回URL
        ),
        styles: PayPalPaymentStyles(
          // 可选:自定义PayPal支付页面的样式
          labelColor: Colors.black,
          textColor: Colors.black,
          backgroundColor: Colors.white,
        ),
        merchant: PayPalMerchantConfiguration(
          // 可选:商家配置
          merchantName: 'Your Merchant Name',
          merchantPrivacyPolicyUrl: Uri.parse('https://your-privacy-policy-url.com'),
          merchantUserAgreementUrl: Uri.parse('https://your-user-agreement-url.com'),
        ),
      ).then((result) {
        if (result.status == PaymentStatus.completed) {
          // 支付成功处理逻辑
          print('Payment successful!');
        } else if (result.status == PaymentStatus.canceled) {
          // 支付取消处理逻辑
          print('Payment canceled!');
        } else if (result.status == PaymentStatus.failed) {
          // 支付失败处理逻辑
          print('Payment failed!');
        }
      }).catchError((error) {
        // 错误处理逻辑
        print('Error: $error');
      });
    } catch (e) {
      // 异常处理逻辑
      print('Exception: $e');
    }
  }
}
在这个示例中,当用户点击“Pay with PayPal”按钮时,会触发_initPayPalPayment函数。这个函数创建了一个PayPalPayment对象,并调用PayPalPayment.start方法来启动PayPal支付流程。支付完成后,根据支付结果的状态(完成、取消或失败),你可以执行相应的处理逻辑。
请确保将YOUR_PAYPAL_CLIENT_ID替换为你从PayPal开发者网站获得的客户端ID,并根据需要调整其他配置参数。
这个示例提供了一个基本的集成框架,你可以根据需要进一步自定义和扩展。