


Flutter标签处理插件hashtagable的使用
Flutter标签处理插件hashtagable的使用
hashtagable 是一个用于实现带有标签装饰文本的 Flutter 插件。它可以检测以 # 开头的单词,类似于 Twitter 的标签功能。
功能展示

使用方法
作为TextField
你可以使用 HashTagTextField 来装饰输入的文本。
HashTagTextField(
  decoratedStyle: TextStyle(fontSize: 14, color: Colors.blue),
  basicStyle: TextStyle(fontSize: 14, color: Colors.black),
)
decoratedStyle是标签文本的样式。basicStyle是普通文本的样式。- 其他参数与
material中的TextField类似。
作为ReadOnlyText
如果你只想装饰文本以供显示,可以使用 HashTagText。
HashTagText(
  text: "#Welcome to #hashtagable \n This is #ReadOnlyText",
  decoratedStyle: TextStyle(fontSize: 22, color: Colors.red),
  basicStyle: TextStyle(fontSize: 22, color: Colors.black),
  onTap: (text) {
    print(text);
  },
)
onTap(String)回调会在用户点击标签时被调用。- 你可以在回调中添加一些动作。

自定义函数
检查文本是否包含标签
print(hasHashtags("Hello #World")); // true
print(hasHashtags("Hello World")); // false
提取文本中的标签
final List<String> hashTags = extractHashTags("#Hello World #Flutter Dart #Thank you");
// ["#Hello", "#Flutter", "#Thank"]
提示
- 如果你还想装饰
@符号,可以通过添加参数decorateAtSign: true来实现。
HashTagText(
  text: "#Hello World @flutter_developers",
  decoratedStyle: TextStyle(fontSize: 14, color: Colors.red),
  basicStyle: TextStyle(fontSize: 14, color: Colors.black),
  onTap: (text) {
    print(text);
  },
  decorateAtSign: true,
)
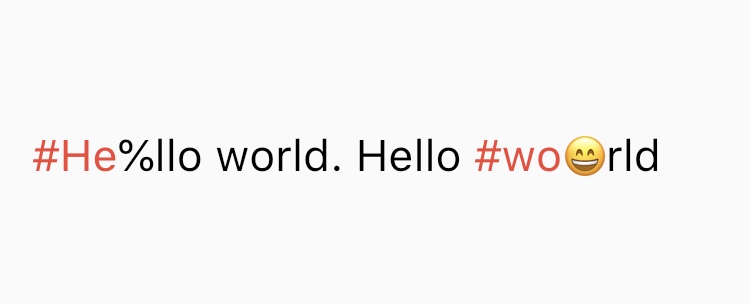
- 装饰规则类似于 Twitter。它不会装饰包含表情符号或符号的标签。标签前必须有空格才能被装饰。
- 支持的语言包括英语、日语、韩语、西班牙语、阿拉伯语、泰语、挪威语和德语。
如果你有任何请求或问题,请随时在 GitHub 上提出。
完整示例Demo
import 'package:flutter/material.dart';
import 'package:hashtagable/hashtagable.dart';

void main() {
  runApp(MyApp());
}

class MyApp extends StatefulWidget {
  [@override](/user/override)
  _MyAppState createState() => _MyAppState();
}

class _MyAppState extends State<MyApp> {
  [@override](/user/override)
  Widget build(BuildContext context) {
    return MaterialApp(
      home: Scaffold(
        body: Padding(
          padding: EdgeInsets.symmetric(horizontal: 16),
          child: Center(
            child: Column(
              crossAxisAlignment: CrossAxisAlignment.center,
              mainAxisAlignment: MainAxisAlignment.center,
              children: <Widget>[
                /// Tagged text only to be shown
                HashTagText(
                  text: "#Welcome to #hashtagable\n This is #ReadOnlyText",
                  basicStyle: TextStyle(fontSize: 22, color: Colors.black),
                  decoratedStyle: TextStyle(fontSize: 22, color: Colors.red),
                  textAlign: TextAlign.center,
                  onTap: (text) {
                    print(text);
                  },
                ),
                HashTagTextField(
                  basicStyle: TextStyle(fontSize: 15, color: Colors.black),
                  decoratedStyle: TextStyle(fontSize: 15, color: Colors.blue),
                  keyboardType: TextInputType.multiline,

                  /// Called when detection (word starts with #, or # and @) is being typed
                  onDetectionTyped: (text) {
                    print(text);
                  },

                  /// Called when detection is fully typed
                  onDetectionFinished: () {
                    print("detection finished");
                  },
                  maxLines: null,
                ),
              ],
            ),
          ),
        ),
      ),
    );
  }
}
更多关于Flutter标签处理插件hashtagable的使用的实战教程也可以访问 https://www.itying.com/category-92-b0.html
1 回复

更多关于Flutter标签处理插件hashtagable的使用的实战系列教程也可以访问 https://www.itying.com/category-92-b0.html
当然,下面是一个关于如何在Flutter中使用hashtagable插件来处理标签(Hashtags)的示例代码。hashtagable插件允许你轻松地在文本中识别和处理哈希标签。
首先,确保你已经在pubspec.yaml文件中添加了hashtagable依赖:
dependencies:
  flutter:
    sdk: flutter
  hashtagable: ^x.y.z  # 请将x.y.z替换为最新的版本号
然后运行flutter pub get来获取依赖。
以下是一个简单的示例代码,展示了如何使用hashtagable插件来识别和处理文本中的哈希标签:
import 'package:flutter/material.dart';
import 'package:hashtagable/hashtagable.dart';

void main() {
  runApp(MyApp());
}

class MyApp extends StatelessWidget {
  @override
  Widget build(BuildContext context) {
    return MaterialApp(
      title: 'Hashtagable Demo',
      theme: ThemeData(
        primarySwatch: Colors.blue,
      ),
      home: HashtagScreen(),
    );
  }
}

class HashtagScreen extends StatefulWidget {
  @override
  _HashtagScreenState createState() => _HashtagScreenState();
}

class _HashtagScreenState extends State<HashtagScreen> {
  final String textWithHashtags = "This is a demo of #hashtagable plugin. Try using #multiple #hashtags!";

  @override
  Widget build(BuildContext context) {
    return Scaffold(
      appBar: AppBar(
        title: Text('Hashtagable Demo'),
      ),
      body: Padding(
        padding: const EdgeInsets.all(16.0),
        child: Column(
          crossAxisAlignment: CrossAxisAlignment.start,
          children: [
            Text(
              'Original Text:',
              style: TextStyle(fontSize: 18, fontWeight: FontWeight.bold),
            ),
            SizedBox(height: 8),
            Text(textWithHashtags, style: TextStyle(fontSize: 16)),
            SizedBox(height: 24),
            Text(
              'Hashtags:',
              style: TextStyle(fontSize: 18, fontWeight: FontWeight.bold),
            ),
            SizedBox(height: 8),
            _buildHashtagList(),
          ],
        ),
      ),
    );
  }

  Widget _buildHashtagList() {
    final List<String> hashtags = extractHashtags(textWithHashtags);
    return Wrap(
      spacing: 8,
      runSpacing: 8,
      children: ListTile.divideTiles(
        context: context,
        tiles: hashtags.map((hashtag) {
          return ListTile(
            leading: Icon(Icons.hashtag, color: Colors.blue),
            title: Text(
              hashtag,
              style: TextStyle(color: Colors.blue),
            ),
          );
        }).toList(),
      ).toList(),
    );
  }
}

// Helper function to extract hashtags from a given text
List<String> extractHashtags(String text) {
  final HashtagParser parser = HashtagParser();
  return parser.parse(text).toList();
}
在这个示例中,我们创建了一个简单的Flutter应用,其中包含一个文本字段,显示包含哈希标签的原始文本,以及一个使用Wrap和ListTile小部件显示的哈希标签列表。
HashtagParser类来自hashtagable插件,用于解析文本中的哈希标签。extractHashtags函数是一个辅助函数,它接受一个字符串并返回该字符串中所有哈希标签的列表。HashtagScreen小部件展示了如何使用这些哈希标签,将它们显示为一个列表。
这个示例应该能帮助你理解如何在Flutter应用中使用hashtagable插件来处理哈希标签。如果你有任何进一步的问题或需要更详细的信息,请随时告诉我!