


Flutter自适应导航视图插件adaptive_navigation_view的使用
Flutter自适应导航视图插件adaptive_navigation_view的使用
这个包为Flutter应用程序提供了自适应导航视图。导航视图能够适应不同的平台和设备,提供一致且可定制的用户体验。
特性
- 平台适应性: 能够无缝地适应Android、iOS、macOS、Linux和Windows等不同平台。
- 响应式设计: 提供响应式设计,适用于各种屏幕尺寸和方向。
- 可定制性: 轻松定制导航视图的外观和行为以满足应用需求。
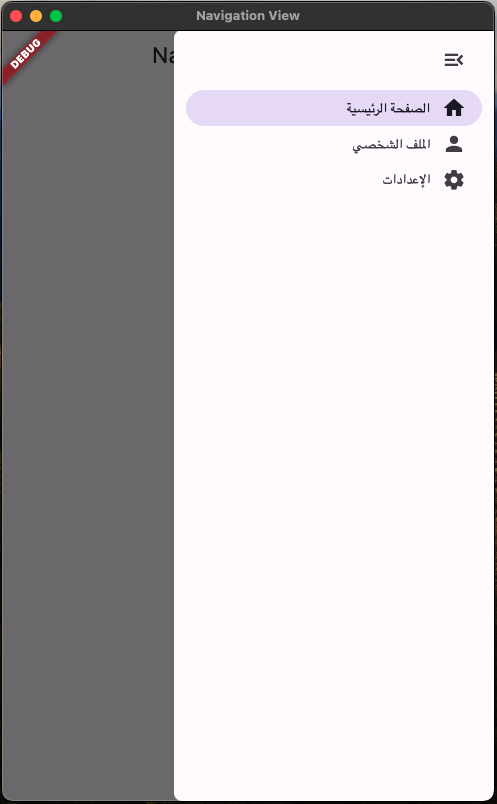
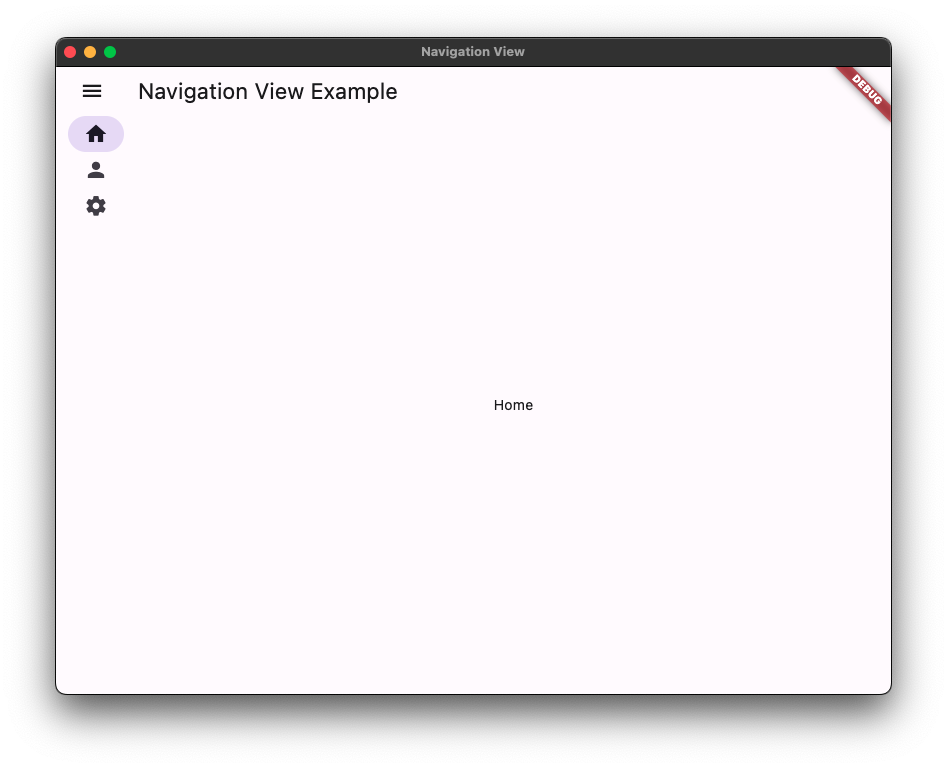
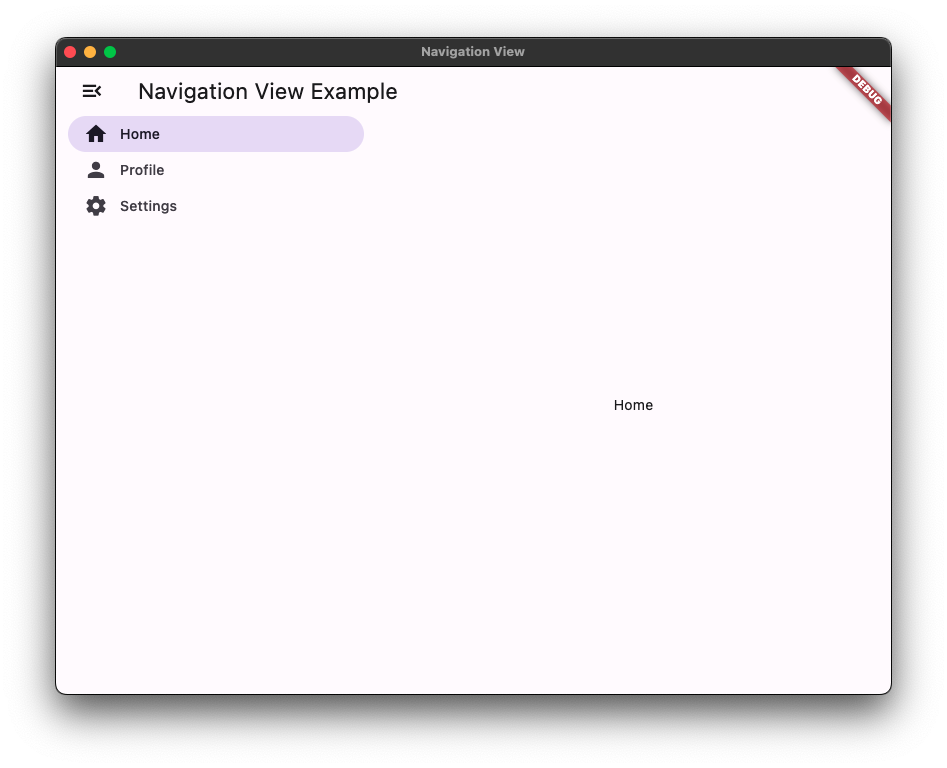
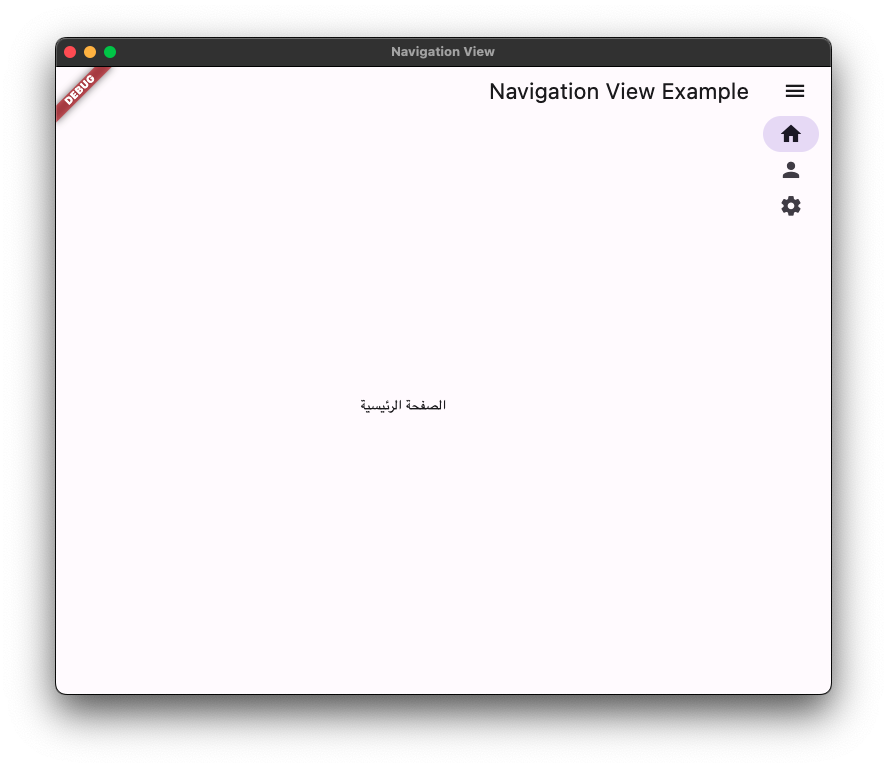
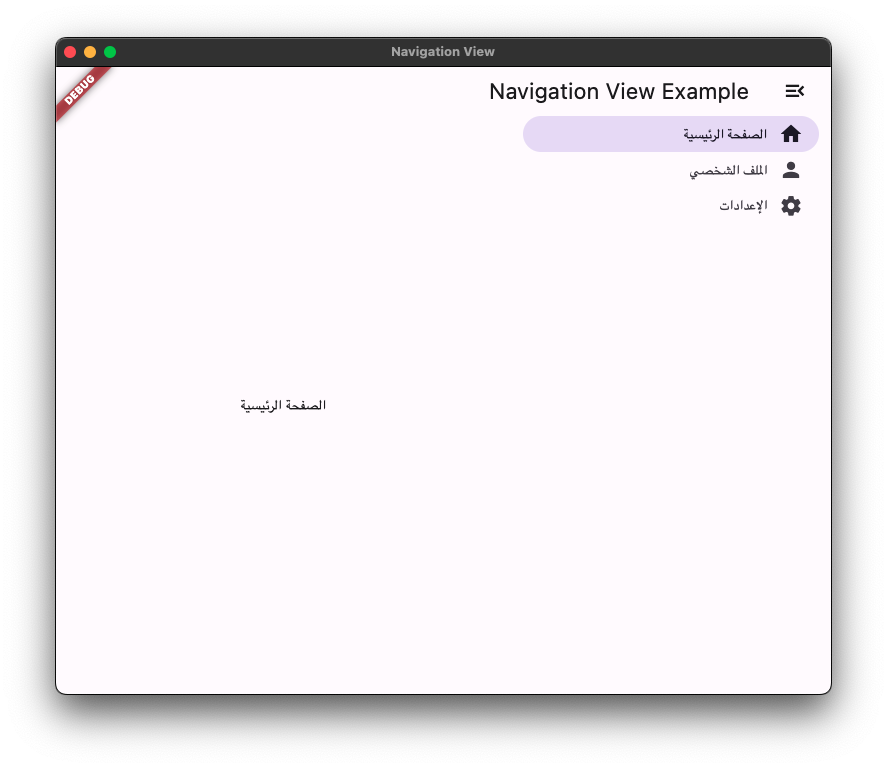
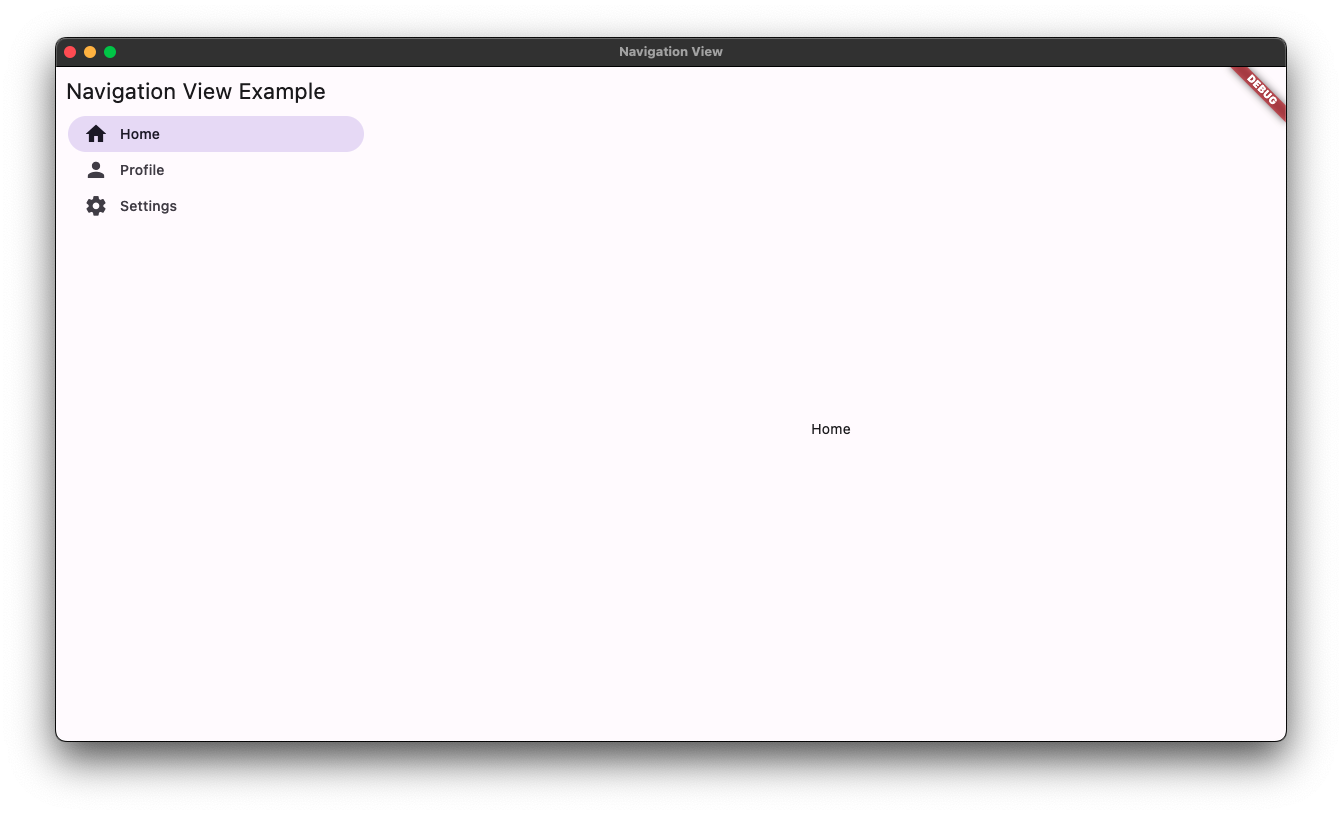
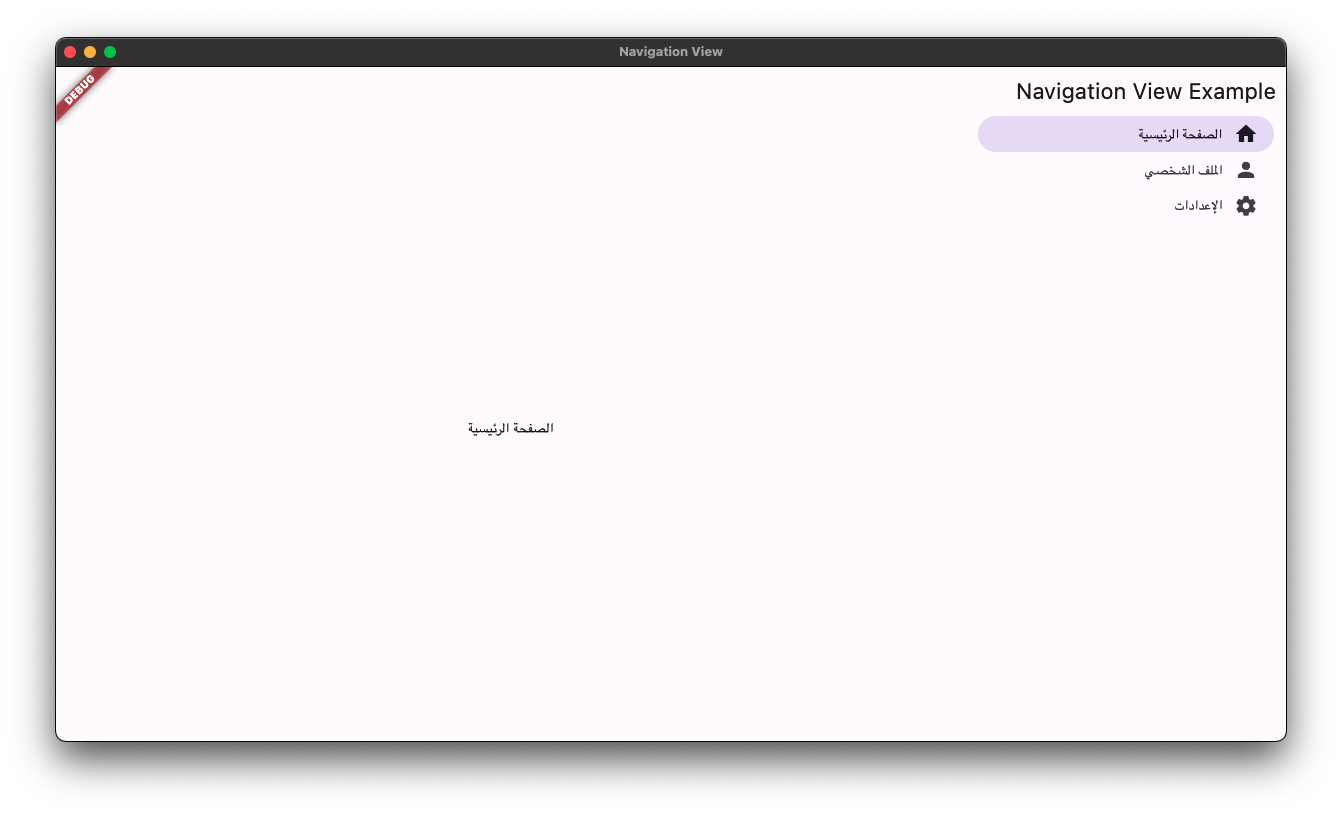
预览图

安装
要开始使用adaptive_navigation_view,请按照以下步骤操作:
-
在你的
pubspec.yaml文件中添加包:dependencies: adaptive_navigation_view: ^version_number或者从GitHub获取最新版本:
dependencies: adaptive_navigation_view: git: url: https://github.com/GenildoNogueira/adaptive_navigation_view.git -
在终端运行
flutter pub get。 -
在你的Dart代码中导入包:
import 'package:adaptive_navigation_view/adaptive_navigation_view.dart'; -
开始在你的应用中使用自适应导航视图!
使用示例
下面是一个快速示例,展示如何将AdaptiveNavigationView集成到你的Flutter应用中:
import 'package:flutter/material.dart';
import 'package:adaptive_navigation_view/adaptive_navigation_view.dart';

void main() {
  runApp(MyApp());
}

class MyApp extends StatelessWidget {
  @override
  Widget build(BuildContext context) {
    return MaterialApp(
      home: NavigationView(
        appBar: NavigationAppBar(
          title: const Text('Navigation View Example'),
        ),
        pane: NavigationPane(
          onDestinationSelected: (value) => setState(() {
            _selectedIndex = value;
          }),
          selectedIndex: _selectedIndex,
          children: const [
            PaneItemDestination(
              icon: Icon(Icons.home),
              label: Text('Home'),
            ),
            PaneItemDestination(
              icon: Icon(Icons.person),
              label: Text('Profile'),
            ),
          ],
        ),
        body: [
          const Center(
            child: Text('Home'),
          ),
          const Center(
            child: Text('Profile'),
          ),
        ][_selectedIndex],
      ),
    );
  }
}
主题
导航面板主题
PaneThemeData类定义了后代NavigationPane小部件的默认属性值。它包括用于自定义PaneItemDestination元素外观的各种属性。
例如,创建一个PaneThemeData:
PaneThemeData myPaneTheme = const PaneThemeData(
  elevation: 0,
  openWidth: 250,
  compactWidth: 60,
  indicatorSize: Size.fromHeight(40.0),
);
右到左语言支持 (RTL)
NavigationView 提供对右到左 (RTL) 语言的支持,确保使用RTL语言的用户获得一致且直观的体验。
启用RTL支持
要在NavigationView中启用RTL语言支持,请遵循这些步骤:
-
确保你的应用文本和资源已准备好RTL语言,并具有适当的布局。
-
在你的Flutter应用中,配置支持的语言以包含RTL语言。例如:
MaterialApp(
  supportedLocales: [
    const Locale('en', 'US'), // 英语(从左到右)
    const Locale('ar', 'AR'), // 阿拉伯语(从右到左)
  ],
)
更多关于Flutter自适应导航视图插件adaptive_navigation_view的使用的实战教程也可以访问 https://www.itying.com/category-92-b0.html

更多关于Flutter自适应导航视图插件adaptive_navigation_view的使用的实战系列教程也可以访问 https://www.itying.com/category-92-b0.html
当然,以下是如何在Flutter项目中使用adaptive_navigation_view插件的一个简单示例。adaptive_navigation_view插件可以帮助你创建自适应的导航视图,尤其适用于桌面和移动设备。
首先,你需要在你的pubspec.yaml文件中添加依赖项:
dependencies:
  flutter:
    sdk: flutter
  adaptive_navigation_view: ^最新版本号  # 请替换为实际最新版本号
然后运行flutter pub get来安装依赖。
接下来,你可以在你的Flutter项目中创建一个自适应导航视图。以下是一个完整的示例代码:
import 'package:flutter/material.dart';
import 'package:adaptive_navigation_view/adaptive_navigation_view.dart';

void main() {
  runApp(MyApp());
}

class MyApp extends StatelessWidget {
  @override
  Widget build(BuildContext context) {
    return MaterialApp(
      title: 'Adaptive Navigation View Demo',
      theme: ThemeData(
        primarySwatch: Colors.blue,
      ),
      home: AdaptiveNavigationScaffold(
        drawer: AdaptiveDrawer(
          header: DrawerHeader(
            decoration: BoxDecoration(
              color: Colors.blue,
            ),
            child: Text('Drawer Header'),
          ),
          drawerItems: [
            AdaptiveDrawerItem(
              icon: Icons.home,
              title: 'Home',
              onTap: () {
                Navigator.push(
                  context,
                  MaterialPageRoute(builder: (context) => HomePage()),
                );
              },
            ),
            AdaptiveDrawerItem(
              icon: Icons.settings,
              title: 'Settings',
              onTap: () {
                // Handle settings tap
              },
            ),
          ],
        ),
        appBar: AppBar(
          title: Text('Adaptive Navigation View'),
        ),
        body: Center(
          child: Text('Select an item from the drawer'),
        ),
        bottomNavigationBar: AdaptiveBottomNavigationBar(
          items: [
            AdaptiveBottomNavigationBarItem(
              icon: Icons.home,
              title: 'Home',
            ),
            AdaptiveBottomNavigationBarItem(
              icon: Icons.search,
              title: 'Search',
            ),
            AdaptiveBottomNavigationBarItem(
              icon: Icons.library_books,
              title: 'Library',
            ),
            AdaptiveBottomNavigationBarItem(
              icon: Icons.person,
              title: 'Profile',
            ),
          ],
          currentIndex: 0,
          onTap: (index) {
            // Handle bottom navigation tap
          },
        ),
      ),
    );
  }
}

class HomePage extends StatelessWidget {
  @override
  Widget build(BuildContext context) {
    return Scaffold(
      appBar: AppBar(
        title: Text('Home Page'),
      ),
      body: Center(
        child: Text('You are on the Home Page'),
      ),
    );
  }
}
在这个示例中,我们创建了一个基本的Flutter应用,使用了AdaptiveNavigationScaffold来包含导航视图。这个支架包含以下几个部分:
- Drawer:使用
AdaptiveDrawer来创建一个抽屉导航菜单,包含两个菜单项。 - AppBar:应用栏显示标题。
- Body:主体内容,这里简单地显示了一些文本。
- BottomNavigationBar:底部导航栏,包含四个导航项。
当用户点击抽屉中的菜单项或底部导航栏中的项时,可以相应地处理导航事件。在这个示例中,点击抽屉中的“Home”项会导航到HomePage。
你可以根据实际需求进一步扩展和自定义这个示例。希望这个示例对你有所帮助!