


Flutter纹理打包插件flame_gdx_texture_packer的使用
Flutter纹理打包插件flame_gdx_texture_packer的使用
本包已不再维护。
请使用由Flame团队维护的官方包 flame_texturepacker。
GdxTexturePacker 和 Code and Web Texture Packer 生成的精灵表导入插件。
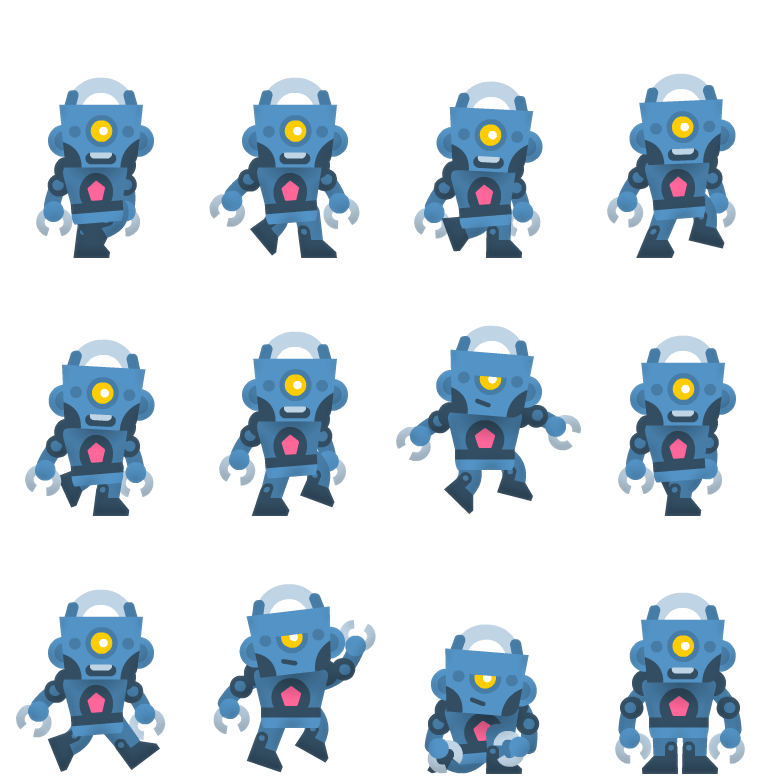
将所有精灵打包到一个图集文件中:
尝试在 Flutter Web 上运行示例。
使用方法
将生成的图集文件和精灵表图像添加到 assets/ 目录,并在 pubspec.yaml 文件中引用这些文件:
assets:
  - assets/atlasMap.atlas
  - assets/atlasMap.png
导入插件:
import 'package:flame_gdx_texture_packer/flame_gdx_texture_packer.dart';
加载图集并传递精灵表图集文件路径:
final atlas = await fromAtlas('atlasMap.atlas');
通过名称获取按索引排序的精灵列表,可以用于生成动画:
final spriteList = atlas.findSpritesByName('robot_walk');

final animation = SpriteAnimation.spriteList(
  spriteList,
  stepTime: 0.1,
  loop: true,
);
通过名称获取单个精灵:
final jumpSprite = atlas.findSpriteByName('robot_jump')!;
final fallSprite = atlas.findSpriteByName('robot_fall')!;
final idleSprite = atlas.findSpriteByName('robot_idle')!;
支持的功能
| 功能 | 支持 |
|---|---|
| 允许旋转 | 是 |
| 多页 | 是 |
| 使用索引 | 是 |
| 删除X轴空白 | 否 |
| 删除Y轴空白 | 否 |
示例
完整的示例可以在 此处 查看。
注意:示例中使用的精灵可以在 这里 找到。
示例代码
import 'package:flame/components.dart';
import 'package:flame/game.dart';
import 'package:flame_gdx_texture_packer/flame_gdx_texture_packer.dart';
import 'package:flutter/material.dart';

void main() {
  runApp(
    GameWidget(
      game: MyGame(),
    ),
  );
}

class MyGame extends FlameGame {
  [@override](/user/override)
  Future<void> onLoad() async {
    super.onLoad();

    // 加载精灵表
    final atlas = await fromAtlas('atlasMap.atlas');

    // 获取按索引排序的精灵列表
    final walkingSprites = atlas.findSpritesByName('robot_walk');

    // 创建动画
    final walkingAnimation = SpriteAnimation.spriteList(
      walkingSprites,
      stepTime: 0.1,
      loop: true,
    );

    // 通过名称获取单个精灵
    final jumpSprite = atlas.findSpriteByName('robot_jump')!;
    final fallSprite = atlas.findSpriteByName('robot_fall')!;
    final idleSprite = atlas.findSpriteByName('robot_idle')!;

    // 添加精灵组件
    add(
      SpriteComponent(
        sprite: jumpSprite,
        position: Vector2(200, 100),
        size: Vector2(72, 96),
      ),
    );

    add(
      SpriteComponent(
        sprite: fallSprite,
        position: Vector2(300, 100),
        size: Vector2(72, 96),
      ),
    );

    add(
      SpriteComponent(
        sprite: idleSprite,
        position: Vector2(400, 100),
        size: Vector2(72, 96),
      ),
    );

    // 添加动画组件
    add(
      SpriteAnimationComponent(
        animation: walkingAnimation,
        position: Vector2(300, 200),
        size: Vector2(72, 96),
      ),
    );
  }
}
更多关于Flutter纹理打包插件flame_gdx_texture_packer的使用的实战教程也可以访问 https://www.itying.com/category-92-b0.html

更多关于Flutter纹理打包插件flame_gdx_texture_packer的使用的实战系列教程也可以访问 https://www.itying.com/category-92-b0.html
当然,关于Flutter纹理打包插件flame_gdx_texture_packer的使用,这里提供一个基本的代码案例来展示如何使用该插件进行纹理打包。flame_gdx_texture_packer通常用于将多个图像打包到一个纹理图集中,以提高游戏或应用的性能。
首先,确保你已经在pubspec.yaml文件中添加了flame_gdx_texture_packer依赖:
dependencies:
  flutter:
    sdk: flutter
  flame_gdx_texture_packer: ^最新版本号  # 请替换为实际最新版本号
然后,运行flutter pub get来安装依赖。
以下是一个简单的代码示例,展示了如何使用flame_gdx_texture_packer来打包纹理:
import 'package:flutter/material.dart';
import 'package:flame_gdx_texture_packer/flame_gdx_texture_packer.dart';
import 'dart:io';

void main() {
  runApp(MyApp());
}

class MyApp extends StatelessWidget {
  @override
  Widget build(BuildContext context) {
    return MaterialApp(
      home: Scaffold(
        appBar: AppBar(
          title: Text('Flutter Texture Packer Example'),
        ),
        body: Center(
          child: ElevatedButton(
            onPressed: _packTextures,
            child: Text('Pack Textures'),
          ),
        ),
      ),
    );
  }

  Future<void> _packTextures() async {
    // 设置输入和输出目录
    final inputDirectory = Directory('path/to/your/input/images');  // 替换为你的输入图像目录路径
    final outputDirectory = Directory('path/to/your/output/packed_textures');  // 替换为你的输出目录路径
    outputDirectory.createSync(recursive: true);

    // 创建TexturePacker实例
    final packer = TexturePacker(inputDirectory.path, outputDirectory.path);

    // 设置打包选项(可选)
    final options = TexturePackerOptions()
      ..padding = 4  // 图像之间的填充
      ..maxWidth = 2048  // 最大宽度
      ..maxHeight = 2048;  // 最大高度

    // 执行打包操作
    try {
      await packer.pack(options: options);
      print('Textures packed successfully!');
    } catch (e) {
      print('Error packing textures: $e');
    }
  }
}
在这个示例中,我们创建了一个简单的Flutter应用,其中包含一个按钮。点击按钮时,会调用_packTextures函数来执行纹理打包操作。
inputDirectory是包含要打包的图像的目录。outputDirectory是打包后的纹理图集将保存的目录。TexturePacker类用于执行打包操作。TexturePackerOptions类允许你设置一些打包选项,比如图像之间的填充、最大宽度和最大高度。
请注意,你需要将path/to/your/input/images和path/to/your/output/packed_textures替换为实际的路径。
此外,flame_gdx_texture_packer插件背后使用的是LibGDX的纹理打包工具,因此它支持LibGDX的打包格式(.atlas和.png)。打包完成后,你可以在指定的输出目录中找到生成的图集文件。
这个示例提供了一个基本的框架,你可以根据需要进行扩展和自定义。