


Flutter支付集成插件nexi_payment的使用
Flutter支付集成插件nexi_payment的使用
概述
Flutter插件用于集成Nexi支付。
开始使用
初始化Nexi
首先,你需要初始化NexiPayment对象,并传入你的secretKey和环境类型(测试或生产)。
[@override](/user/override)
void initState() {
  super.initState();
  _nexiPayment = new NexiPayment(secretKey: "_yourSecretKey_", environment: EnvironmentUtils.TEST);
}
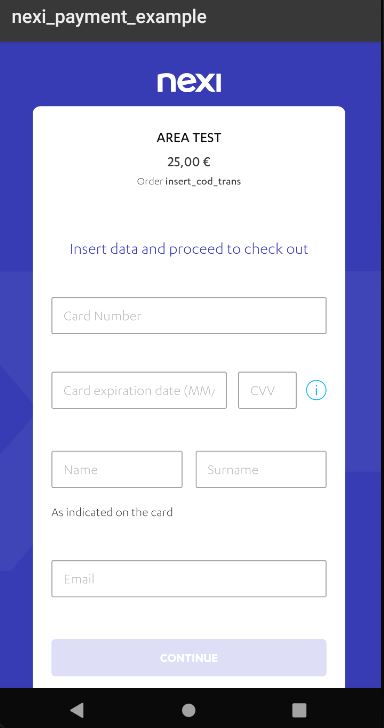
要开始支付过程,只需调用xPayFrontOfficePaga方法。
var res = await _nexiPayment.xPayFrontOfficePagaNonce("YOUR_ALIAS", "codTrans", CurrencyUtilsQP.EUR, amount);
//处理响应
支持的功能
WebView支付
xPayFrontOfficePaga
依赖项
Android & iOS
- 创建一个Nexi账户和项目(或者在测试后台创建一个测试后端,此处)
- 从后端获取secretKey
常见错误
iOS
在某些情况下,可能需要在Podfile中添加以下几行(位于flutter_app/ios/Podfile):
platform :ios, '10.0'
use_frameworks!
特别感谢
 感谢CRILUMATECH对插件初始实现的支持和测试。
完整示例代码
import 'package:flutter/material.dart';
import 'package:nexi_payment/nexi_payment.dart';
import 'package:nexi_payment/models/currency_utils_qp.dart';
import 'package:nexi_payment/models/environment_utils.dart';
import 'package:nexi_payment_example/second_page.dart';
void main() {
runApp(MyApp());
}
class MyApp extends StatefulWidget {
[@override](/user/override)
_MyAppState createState() => _MyAppState();
}
class _MyAppState extends State<MyApp> {
[@override](/user/override)
Widget build(BuildContext context) {
return MaterialApp(
home: TestPage(),
);
}
}
class TestPage extends StatefulWidget {
[@override](/user/override)
State<StatefulWidget> createState() => TestPageState();
}
class TestPageState extends State<TestPage> {
late NexiPayment _nexiPayment;
[@override](/user/override)
void initState() {
super.initState();
///domain不是必须的,如果为空则默认设置为https://ecommerce.nexi.it
_nexiPayment = NexiPayment(
secretKey: "_your_key",
environment: EnvironmentUtils.TEST,
domain: "https://ecommerce.nexi.it");
}
[@override](/user/override)
Widget build(BuildContext context) {
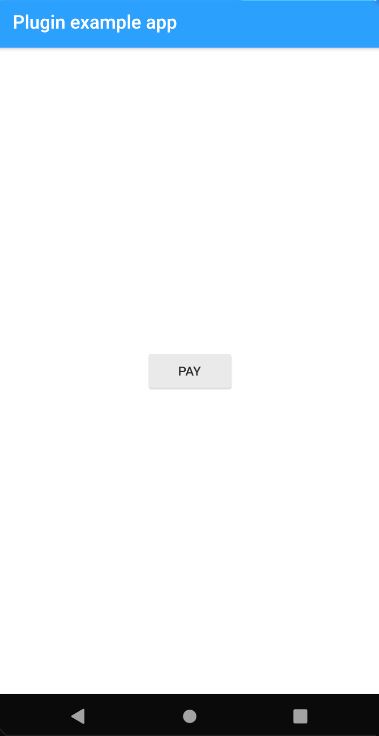
return Scaffold(
appBar: AppBar(
title: const Text('Plugin example app'),
),
body: Center(
child: Column(
mainAxisAlignment: MainAxisAlignment.center,
crossAxisAlignment: CrossAxisAlignment.center,
children: <Widget>[
ElevatedButton(
child: Text("PAY"),
onPressed: () => _paga("pagamento-ios test-domain")),
ElevatedButton(
child: Text("GO to A SECOND PAGE"),
onPressed: () => Navigator.push<Widget>(
context,
MaterialPageRoute(
builder: (context) => SecondPage(),
),
)),
])),
);
}
void _paga(String codTrans) async {
var res = await _nexiPayment.xPayFrontOfficePaga(
"_your_alias", codTrans, CurrencyUtilsQP.EUR, 2500);
openEndPaymentDialog(res);
}
openEndPaymentDialog(String response) async {
await showDialog(
barrierDismissible: false,
context: context,
builder: (BuildContext c2) {
return AlertDialog(
title: Container(
margin: EdgeInsets.only(bottom: 10),
child: Stack(
children: <Widget>[
Positioned(
bottom: -12,
left: -15,
child: IconButton(
icon: Icon(Icons.arrow_back),
color: Colors.blueAccent,
onPressed: () => Navigator.of(context).pop()),
),
Row(
mainAxisAlignment: MainAxisAlignment.center,
children: <Widget>[
Container(
margin: EdgeInsets.only(right: 5),
child: Icon(
Icons.euro_symbol,
color: Colors.black38,
size: 25,
),
),
Text(
"Response",
style: TextStyle(
fontSize: 22,
color: Colors.black38,
fontWeight: FontWeight.bold),
),
],
)
],
)),
content: Column(
mainAxisSize: MainAxisSize.min,
crossAxisAlignment: CrossAxisAlignment.center,
children: <Widget>[
Text(response,
style: TextStyle(
color: response == "OK" ? Colors.green : Colors.red))
],
),
);
},
);
}
}
更多关于Flutter支付集成插件nexi_payment的使用的实战教程也可以访问 https://www.itying.com/category-92-b0.html

更多关于Flutter支付集成插件nexi_payment的使用的实战系列教程也可以访问 https://www.itying.com/category-92-b0.html
当然,以下是如何在Flutter项目中集成并使用nexi_payment插件的示例代码。nexi_payment插件用于处理支付集成,尤其是与Nexi支付网关的集成。请注意,具体实现可能需要根据实际的业务需求进行调整,并且需要确保你已经按照插件的官方文档完成了必要的配置,如获取API密钥等。
1. 添加依赖
首先,在你的pubspec.yaml文件中添加nexi_payment依赖:
dependencies:
  flutter:
    sdk: flutter
  nexi_payment: ^latest_version  # 请替换为最新的版本号
然后运行flutter pub get来安装依赖。
2. 配置Android和iOS
根据nexi_payment插件的官方文档,你可能需要在AndroidManifest.xml和Info.plist中添加一些配置。由于这些配置可能涉及敏感信息(如API密钥),因此这里不给出具体示例。请查阅官方文档以获取详细的配置步骤。
3. 使用nexi_payment插件
以下是一个简单的示例,展示了如何在Flutter中使用nexi_payment插件来发起支付请求:
import 'package:flutter/material.dart';
import 'package:nexi_payment/nexi_payment.dart';

void main() {
  runApp(MyApp());
}

class MyApp extends StatelessWidget {
  @override
  Widget build(BuildContext context) {
    return MaterialApp(
      home: Scaffold(
        appBar: AppBar(
          title: Text('Nexi Payment Integration'),
        ),
        body: Center(
          child: ElevatedButton(
            onPressed: () async {
              // 配置支付参数
              final paymentParameters = PaymentParameters(
                environment: Environment.sandbox, // 或 Environment.production
                merchantId: 'your_merchant_id',
                apiKey: 'your_api_key',
                amount: 1000, // 金额,单位:最小货币单位(例如,对于欧元是100表示1欧元)
                currency: 'EUR',
                returnUrl: 'your_return_url', // 支付完成后重定向的URL
                notificationUrl: 'your_notification_url', // 异步通知URL
              );

              // 发起支付请求
              try {
                final paymentResult = await NexiPayment.startPayment(
                  context: context,
                  parameters: paymentParameters,
                );

                // 处理支付结果
                if (paymentResult.success) {
                  // 支付成功
                  print('Payment successful: ${paymentResult.data}');
                } else {
                  // 支付失败
                  print('Payment failed: ${paymentResult.error?.message}');
                }
              } catch (e) {
                // 处理异常
                print('An error occurred: $e');
              }
            },
            child: Text('Start Payment'),
          ),
        ),
      ),
    );
  }
}

// PaymentParameters 和 NexiPayment 类是从 nexi_payment 插件中导入的
// 请确保你已经正确导入了所需的类
注意事项
- 环境配置:确保你已经根据文档配置了正确的支付环境(sandbox或production)。
- 敏感信息:不要在代码中硬编码敏感信息(如API密钥)。考虑使用环境变量或安全存储来管理这些信息。
- 错误处理:在实际应用中,应该添加更详细的错误处理逻辑,以便更好地处理各种异常情况。
- UI/UX:根据实际需求调整UI/UX设计,提供更好的用户体验。
这个示例代码提供了一个基本的框架,你可以根据具体需求进行扩展和修改。务必查阅nexi_payment插件的官方文档以获取最新的使用指南和API参考。