


Flutter谷歌地点搜索插件neom_google_places的使用
Flutter谷歌地点搜索插件neom_google_places的使用
neom_google_places
此库为Flutter提供了Google地点自动完成小部件。它使用了google_maps_webservice库,该库直接参照官方文档来实现Google地图Web服务。
根据StackOverflow,即使你只使用免费配额,你也需要在你的账户上启用账单功能。
安装
在你的pubspec.yaml文件的dependencies:部分添加以下行:
dependencies:
  neom_google_places: <latest_version>
使用
const kGoogleApiKey = "API_KEY";

Prediction p = await PlacesAutocomplete.show(
  context: context,
  apiKey: kGoogleApiKey,
  mode: Mode.overlay, // Mode.fullscreen
  language: "fr",
  components: [new Component(Component.country, "fr")],
);
示例
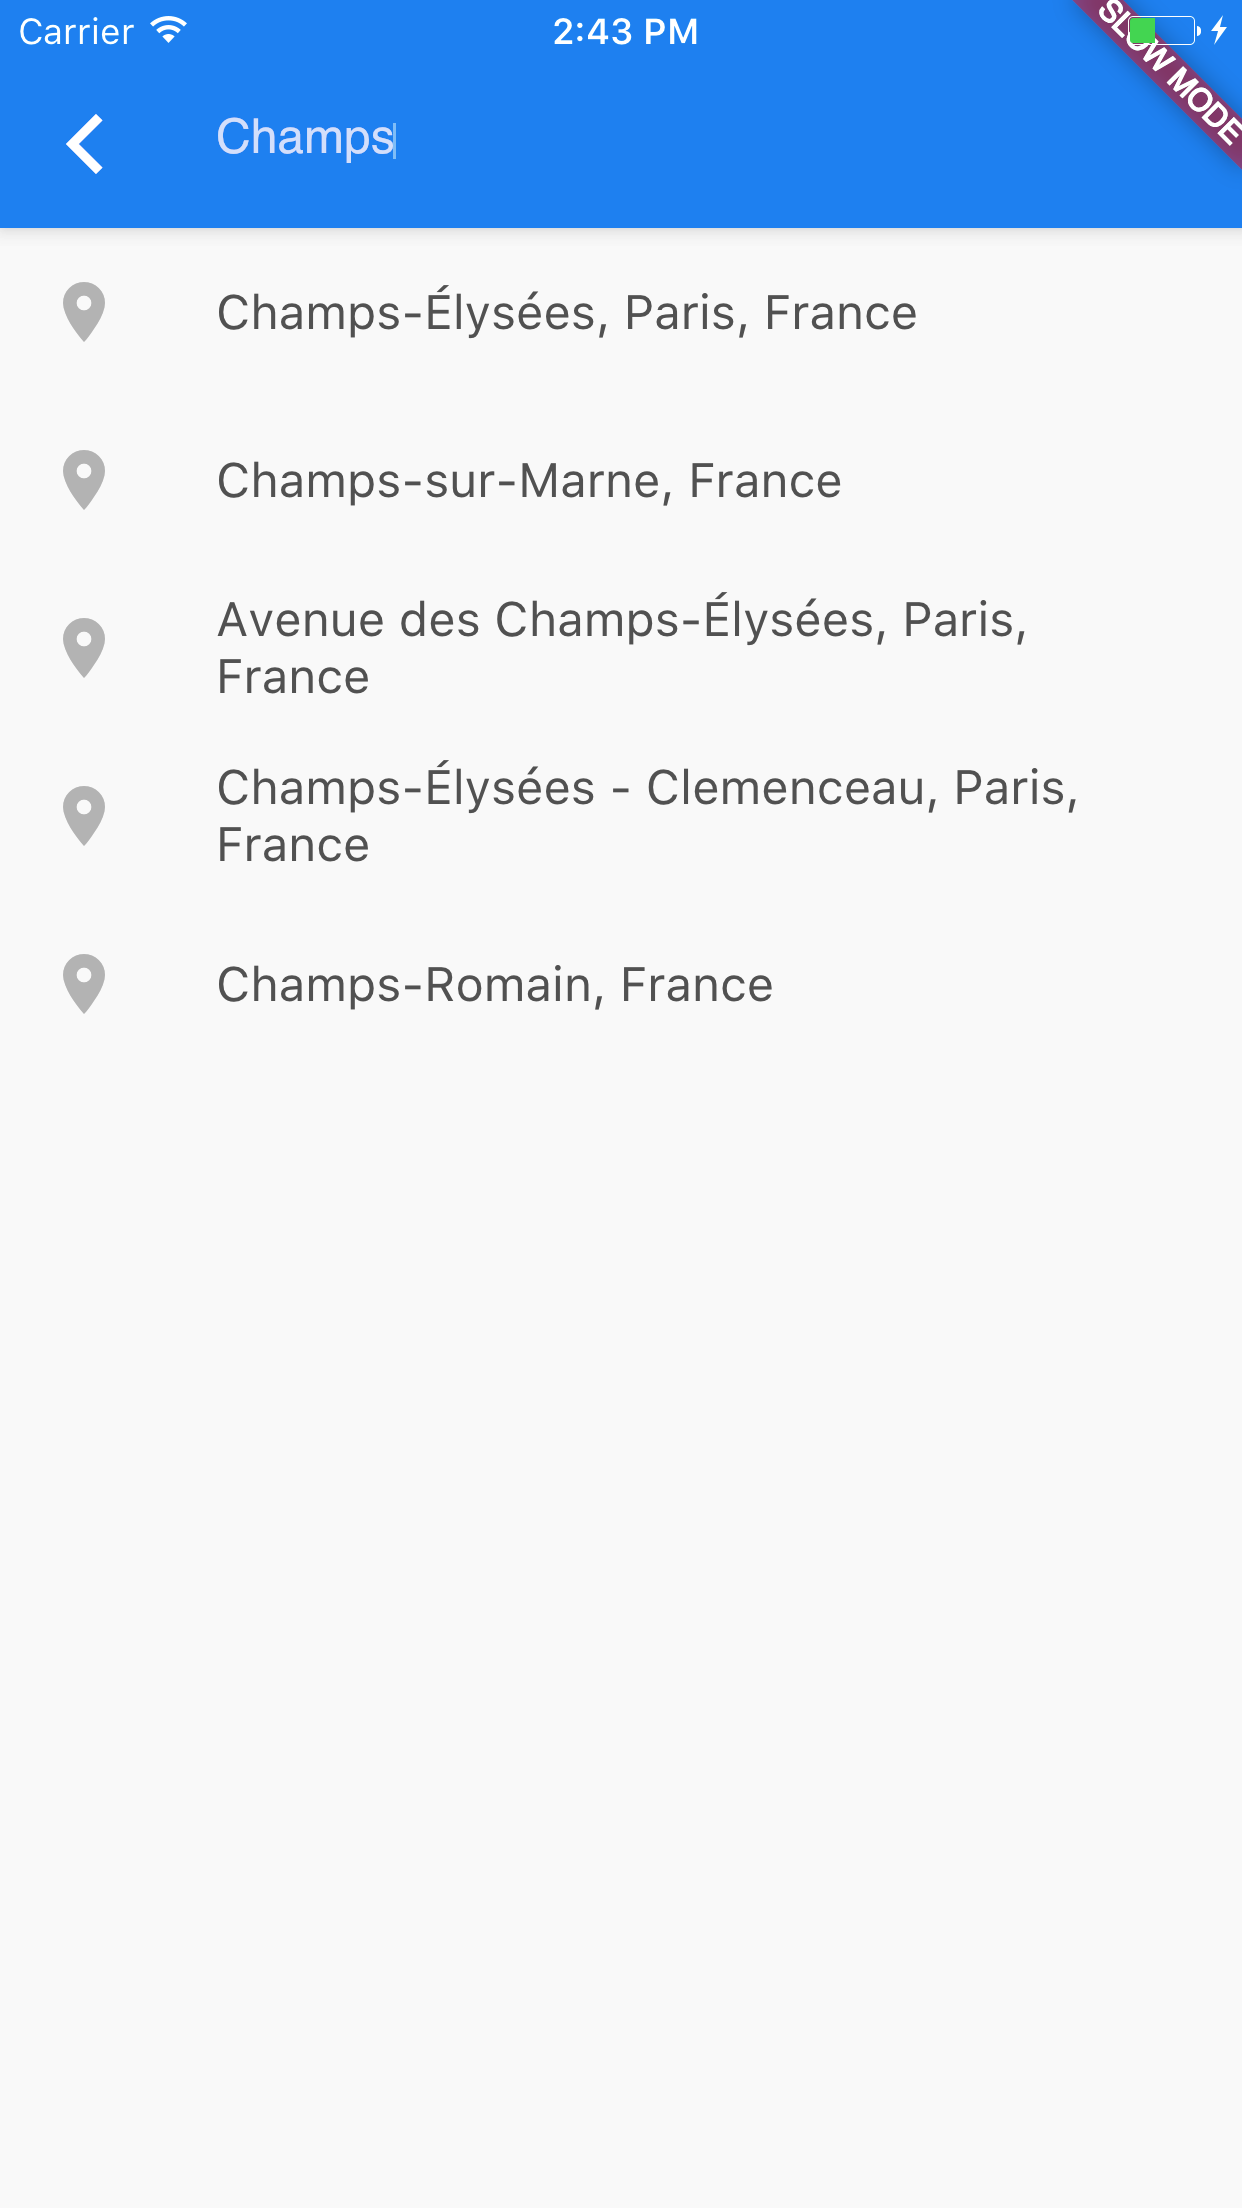
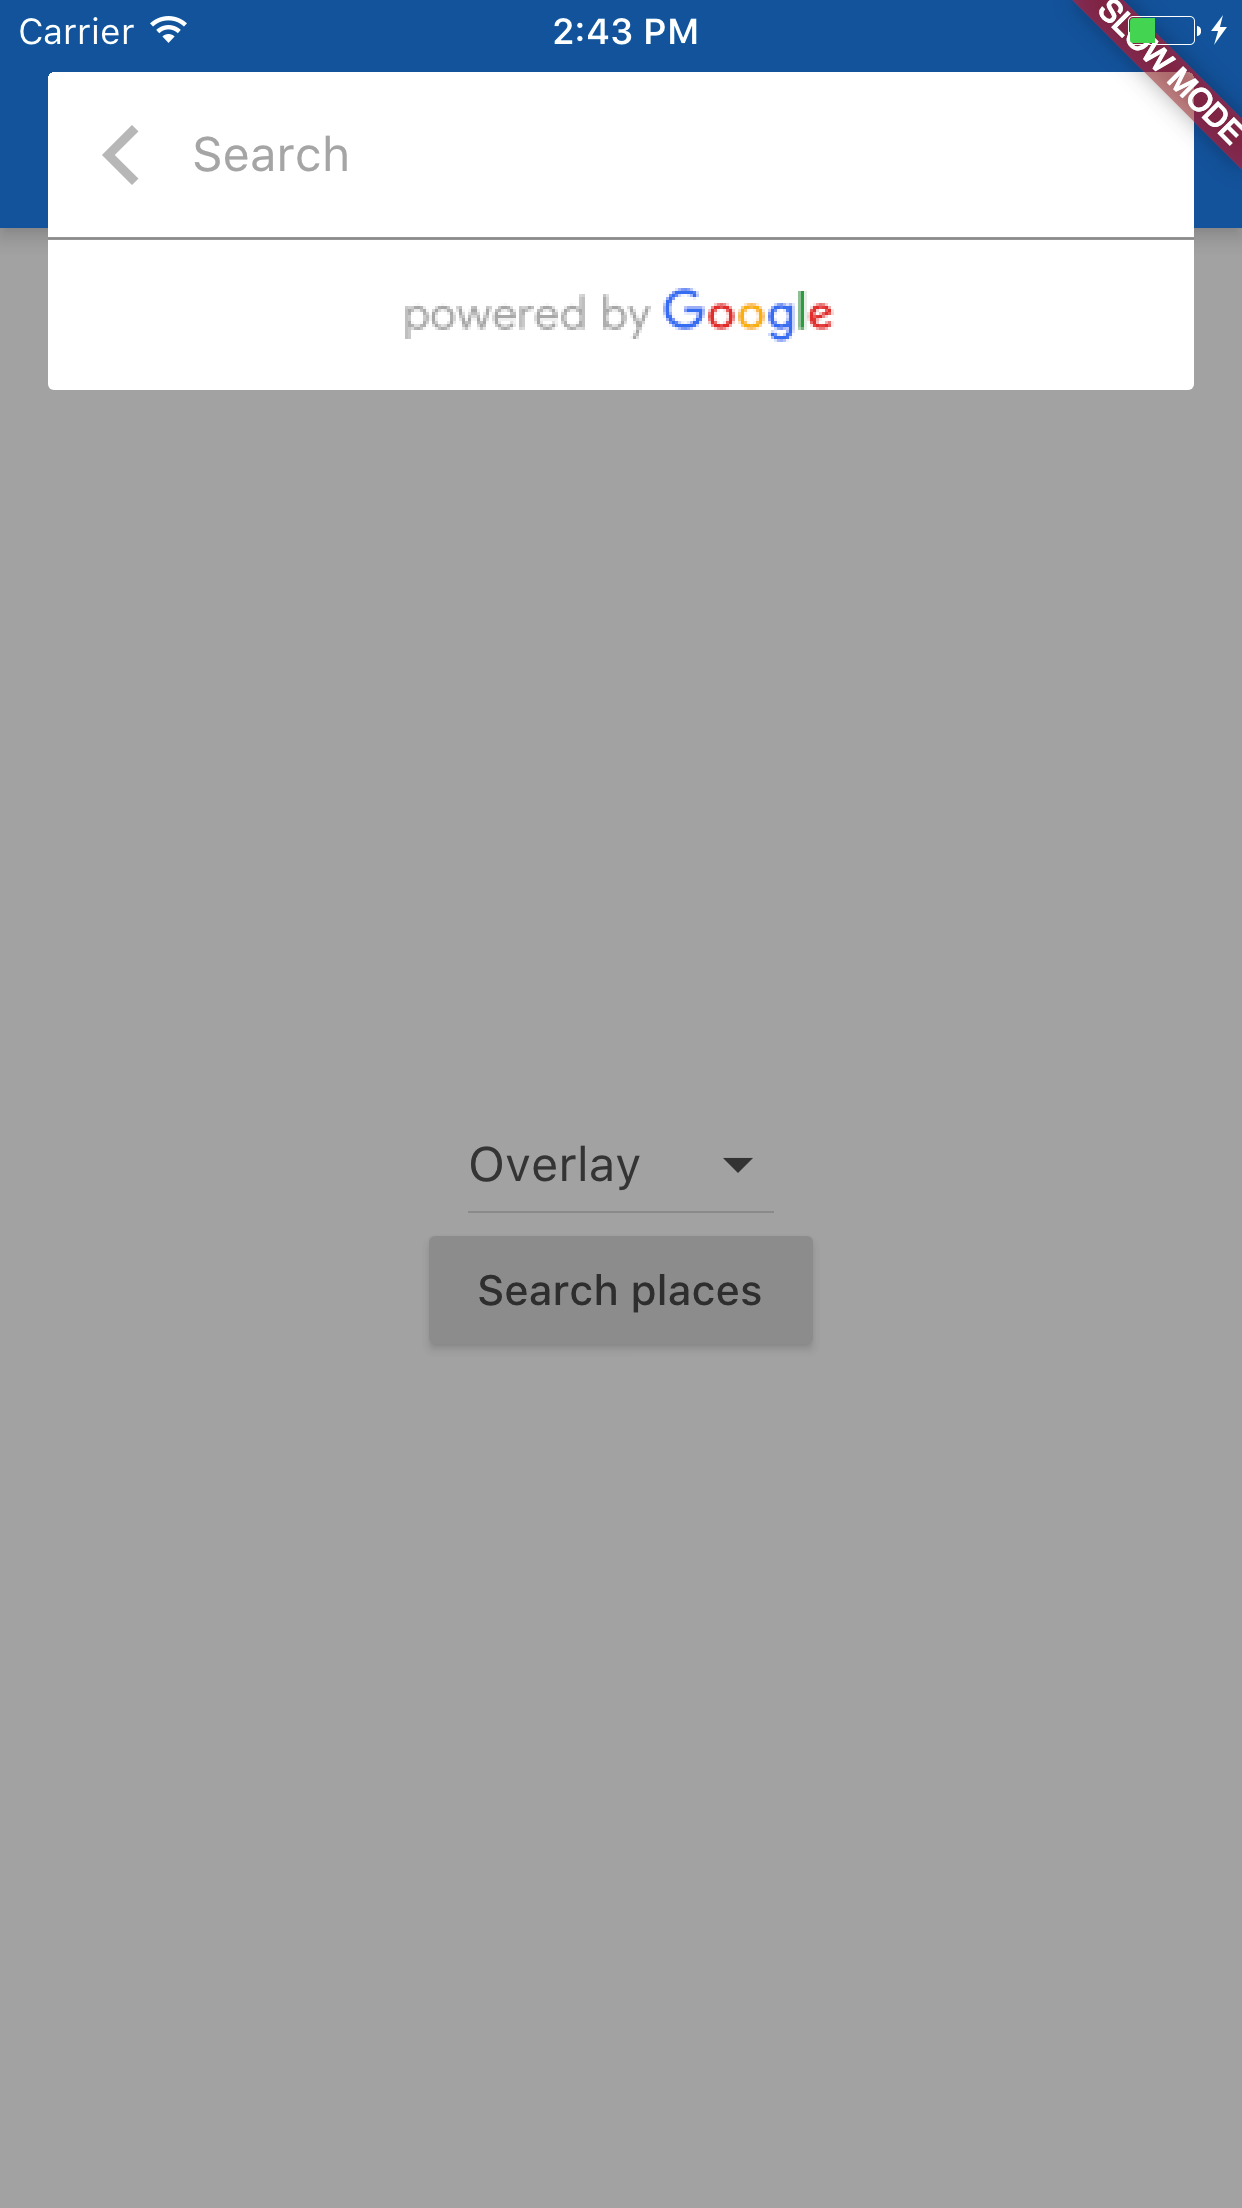
示例应用
查看example目录下的Flutter应用。
以下是完整的示例代码:
import 'dart:async';
import 'dart:math';

import 'package:google_api_headers/google_api_headers.dart';
import 'package:flutter/material.dart';
import 'package:neom_google_places/neom_google_places.dart';
import 'package:neom_maps_services/places.dart';

const kGoogleApiKey = "API_KEY";

main() {
  runApp(const RoutesWidget());
}

final customTheme = ThemeData(
  brightness: Brightness.dark,
  inputDecorationTheme: const InputDecorationTheme(
    border: OutlineInputBorder(
      borderRadius: BorderRadius.all(Radius.circular(4.00)),
    ),
    contentPadding: EdgeInsets.symmetric(
      vertical: 12.50,
      horizontal: 10.00,
    ),
  ),
);

class RoutesWidget extends StatelessWidget {
  const RoutesWidget({Key? key}) : super(key: key);

  [@override](/user/override)
  Widget build(BuildContext context) => MaterialApp(
        title: "My App",
        darkTheme: customTheme,
        themeMode: ThemeMode.dark,
        routes: {
          "/": (_) => const MyApp(),
          "/search": (_) => CustomSearchScaffold(),
        },
      );
}

class MyApp extends StatefulWidget {
  const MyApp({Key? key}) : super(key: key);

  [@override](/user/override)
  _MyAppState createState() => _MyAppState();
}

final homeScaffoldKey = GlobalKey<ScaffoldState>();
final searchScaffoldKey = GlobalKey<ScaffoldState>();

class _MyAppState extends State<MyApp> {
  Mode? _mode = Mode.overlay;

  [@override](/user/override)
  Widget build(BuildContext context) {
    return Scaffold(
      key: homeScaffoldKey,
      appBar: AppBar(
        title: const Text("My App"),
      ),
      body: Center(
          child: Column(
        mainAxisAlignment: MainAxisAlignment.center,
        children: <Widget>[
          _buildDropdownMenu(),
          ElevatedButton(
            onPressed: _handlePressButton,
            child: const Text("Search places"),
          ),
          ElevatedButton(
            child: const Text("Custom"),
            onPressed: () {
              Navigator.of(context).pushNamed("/search");
            },
          ),
        ],
      )),
    );
  }

  Widget _buildDropdownMenu() => DropdownButton(
        value: _mode,
        items: const <DropdownMenuItem<Mode>>[
          DropdownMenuItem<Mode>(
            child: Text("Overlay"),
            value: Mode.overlay,
          ),
          DropdownMenuItem<Mode>(
            child: Text("Fullscreen"),
            value: Mode.fullscreen,
          ),
        ],
        onChanged: (dynamic m) {
          setState(() {
            _mode = m;
          });
        },
      );

  void onError(PlacesAutocompleteResponse response) {
    ScaffoldMessenger.of(context).showSnackBar(
      SnackBar(content: Text(response.errorMessage!)),
    );
  }

  Future<void> _handlePressButton() async {
    // 显示输入自动完成功能并选择模式
    // 然后获取选定的预测结果
    Prediction? p = await PlacesAutocomplete.show(
      context: context,
      apiKey: kGoogleApiKey,
      onError: onError,
      mode: _mode!,
      language: "fr",
      decoration: InputDecoration(
        hintText: 'Search',
        focusedBorder: OutlineInputBorder(
          borderRadius: BorderRadius.circular(20),
          borderSide: const BorderSide(
            color: Colors.white,
          ),
        ),
      ),
      components: [Component(Component.country, "fr")],
    );

    displayPrediction(p, context);
  }
}

Future<void> displayPrediction(Prediction? p, BuildContext context) async {
  if (p != null) {
    // 获取详细信息(经纬度)
    GoogleMapsPlaces _places = GoogleMapsPlaces(
      apiKey: kGoogleApiKey,
      apiHeaders: await const GoogleApiHeaders().getHeaders(),
    );
    PlacesDetailsResponse detail = await _places.getDetailsByPlaceId(p.placeId!);
    final lat = detail.result.geometry!.location.lat;
    final lng = detail.result.geometry!.location.lng;

    ScaffoldMessenger.of(context).showSnackBar(
      SnackBar(content: Text("${p.description} - $lat/$lng")),
    );
  }
}

// 自定义搜索支架,处理搜索功能
// 基本上你的组件需要继承 [GooglePlacesAutocompleteWidget]
// 和其状态 [GooglePlacesAutocompleteState]
class CustomSearchScaffold extends PlacesAutocompleteWidget {
  CustomSearchScaffold({Key? key})
      : super(
          key: key,
          apiKey: kGoogleApiKey,
          sessionToken: Uuid().generateV4(),
          language: "en",
          components: [Component(Component.country, "uk")],
        );

  [@override](/user/override)
  _CustomSearchScaffoldState createState() => _CustomSearchScaffoldState();
}

class _CustomSearchScaffoldState extends PlacesAutocompleteState {
  [@override](/user/override)
  Widget build(BuildContext context) {
    final appBar = AppBar(title: const AppBarPlacesAutoCompleteTextField());
    final body = PlacesAutocompleteResult(
      onTap: (p) {
        displayPrediction(p, context);
      },
      logo: const Row(
        children: [FlutterLogo()],
        mainAxisAlignment: MainAxisAlignment.center,
      ),
    );
    return Scaffold(key: searchScaffoldKey, appBar: appBar, body: body);
  }

  [@override](/user/override)
  void onResponseError(PlacesAutocompleteResponse response) {
    super.onResponseError(response);
    ScaffoldMessenger.of(context).showSnackBar(
      SnackBar(content: Text(response.errorMessage!)),
    );
  }

  [@override](/user/override)
  void onResponse(PlacesAutocompleteResponse? response) {
    super.onResponse(response);
    if (response != null && response.predictions.isNotEmpty) {
      ScaffoldMessenger.of(context).showSnackBar(
        const SnackBar(content: Text("Got answer")),
      );
    }
  }
}

class Uuid {
  final Random _random = Random();

  String generateV4() {
    // 生成 xxxxxxxx-xxxx-4xxx-yxxx-xxxxxxxxxxxx / 8-4-4-4-12。
    final int special = 8 + _random.nextInt(4);

    return '${_bitsDigits(16, 4)}${_bitsDigits(16, 4)}-'
        '${_bitsDigits(16, 4)}-'
        '4${_bitsDigits(12, 3)}-'
        '${_printDigits(special, 1)}${_bitsDigits(12, 3)}-'
        '${_bitsDigits(16, 4)}${_bitsDigits(16, 4)}${_bitsDigits(16, 4)}';
  }

  String _bitsDigits(int bitCount, int digitCount) =>
      _printDigits(_generateBits(bitCount), digitCount);

  int _generateBits(int bitCount) => _random.nextInt(1 << bitCount);

  String _printDigits(int value, int count) =>
      value.toRadixString(16).padLeft(count, '0');
}
更多关于Flutter谷歌地点搜索插件neom_google_places的使用的实战教程也可以访问 https://www.itying.com/category-92-b0.html

更多关于Flutter谷歌地点搜索插件neom_google_places的使用的实战系列教程也可以访问 https://www.itying.com/category-92-b0.html
当然,以下是如何在Flutter应用中使用neom_google_places插件进行谷歌地点搜索的示例代码。这个插件允许你访问谷歌地点API,搜索附近的地点,并获取相关信息。
首先,你需要在pubspec.yaml文件中添加neom_google_places依赖:
dependencies:
  flutter:
    sdk: flutter
  neom_google_places: ^latest_version  # 请替换为最新版本号
然后,运行flutter pub get来获取依赖。
接下来,你需要在Android和iOS项目中配置谷歌API密钥。
Android配置
- 在
android/app/src/main/AndroidManifest.xml中添加以下权限:
<uses-permission android:name="android.permission.ACCESS_FINE_LOCATION" />
<uses-permission android:name="android.permission.ACCESS_COARSE_LOCATION" />
<uses-permission android:name="android.permission.INTERNET" />
- 在
android/app/build.gradle文件中添加以下代码以配置API密钥:
android {
    ...
    defaultConfig {
        ...
        buildConfigField "String", "GOOGLE_PLACES_API_KEY", "\"YOUR_API_KEY\""
    }
}
将YOUR_API_KEY替换为你的谷歌API密钥。
iOS配置
- 在
Info.plist中添加定位权限请求:
<key>NSLocationWhenInUseUsageDescription</key>
<string>We need your location to find nearby places</string>
- 在
AppDelegate.swift或AppDelegate.m中配置API密钥(通常通过环境变量或其他方式,这里简单起见直接在代码中写,但不建议这样做):
import UIKit
import Flutter

@UIApplicationMain
@objc class AppDelegate: FlutterAppDelegate {
  override func application(
    _ application: UIApplication,
    didFinishLaunchingWithOptions launchOptions: [UIApplication.LaunchOptionsKey: Any]?
  ) -> Bool {
    let controller : FlutterViewController = window?.rootViewController as! FlutterViewController
    let channel = FlutterMethodChannel(name: "your_channel_name", binaryMessenger: controller)
    channel.invokeMethod("setApiKey", arguments: ["YOUR_API_KEY"])
    GeneratedPluginRegistrant.register(with: self)
    return super.application(application, didFinishLaunchingWithOptions: launchOptions)
  }
}
注意:在iOS上更安全的做法是通过环境变量或其他安全方式来存储和访问API密钥。
Flutter代码示例
在你的Flutter项目中,你可以按照以下方式使用neom_google_places插件:
import 'package:flutter/material.dart';
import 'package:neom_google_places/neom_google_places.dart';

void main() {
  runApp(MyApp());
}

class MyApp extends StatelessWidget {
  @override
  Widget build(BuildContext context) {
    return MaterialApp(
      home: PlaceSearchScreen(),
    );
  }
}

class PlaceSearchScreen extends StatefulWidget {
  @override
  _PlaceSearchScreenState createState() => _PlaceSearchScreenState();
}

class _PlaceSearchScreenState extends State<PlaceSearchScreen> {
  final GooglePlaces _places = GooglePlaces();
  Prediction? _selectedPlace;

  Future<void> _searchPlaces(String query) async {
    List<Prediction> predictions = await _places.autocomplete.get(query);

    // For simplicity, we'll just print the predictions
    predictions.forEach((prediction) {
      print(prediction.description);
    });

    // Optionally, you can set the selected place for further action
    setState(() {
      _selectedPlace = predictions.isNotEmpty ? predictions.first : null;
    });
  }

  @override
  Widget build(BuildContext context) {
    return Scaffold(
      appBar: AppBar(
        title: Text('Google Places Search'),
      ),
      body: Padding(
        padding: const EdgeInsets.all(16.0),
        child: Column(
          crossAxisAlignment: CrossAxisAlignment.start,
          children: <Widget>[
            TextField(
              decoration: InputDecoration(
                labelText: 'Search for a place',
                border: OutlineInputBorder(),
              ),
              onChanged: (query) {
                _searchPlaces(query);
              },
            ),
            SizedBox(height: 16),
            if (_selectedPlace != null)
              Text(
                'Selected Place: ${_selectedPlace!.description}',
                style: TextStyle(fontSize: 18),
              ),
          ],
        ),
      ),
    );
  }
}
这个示例展示了如何使用neom_google_places插件进行地点搜索,并在用户输入时显示搜索结果。注意,这个示例只是简单地打印搜索结果,你可以根据需要进一步处理,比如显示搜索结果列表或获取详细地点信息。
请确保你已经正确配置了谷歌API密钥,并且API密钥具有访问谷歌地点API的权限。