


Flutter活体检测插件livelyness_detection的使用
Flutter活体检测插件livelyness_detection的使用
活体检测(Liveness Detection)


索引
什么是活体检测?
活体检测在生物识别面部识别技术中是一种算法,用于检测摄像头前的人是否真实存在。该算法能够从呈现攻击(presentation attack)中区分出真实的人。呈现攻击是指欺诈者使用他人的物理特征或生物识别数据(称为“欺骗物”)进行冒充。
尝试使用打印照片、录音、深度伪造图片和3D面具进行欺骗行为构成了严重的威胁。面部活体检测技术包含了专门的功能来识别生物识别欺骗攻击,这些功能可以识别模仿某人独特生物特征的数据,以欺骗或绕过系统提供的身份验证步骤。尽管面部识别可以可靠地回答“这是正确的人吗?”但无法回答“这是一个真人吗?”这正是活体检测技术在欺诈检测和缓解中发挥重要作用的地方。面部生物特征匹配必须能够检测到欺骗行为,以保持生物识别数据的完整性。
平台支持
| iOS | Android | MacOS | Web | Linux | Windows |
|---|---|---|---|---|---|
| ✔️ | ✔️ |
安装
首先,我们需要在Flutter项目中安装插件。
Flutter设置
将 livelyness_detection 添加到你的 pubspec.yaml 文件依赖项中。
使用命令行
flutter pub add livelyness_detection
原生设置
接下来是在Android和iOS平台上进行原生设置。
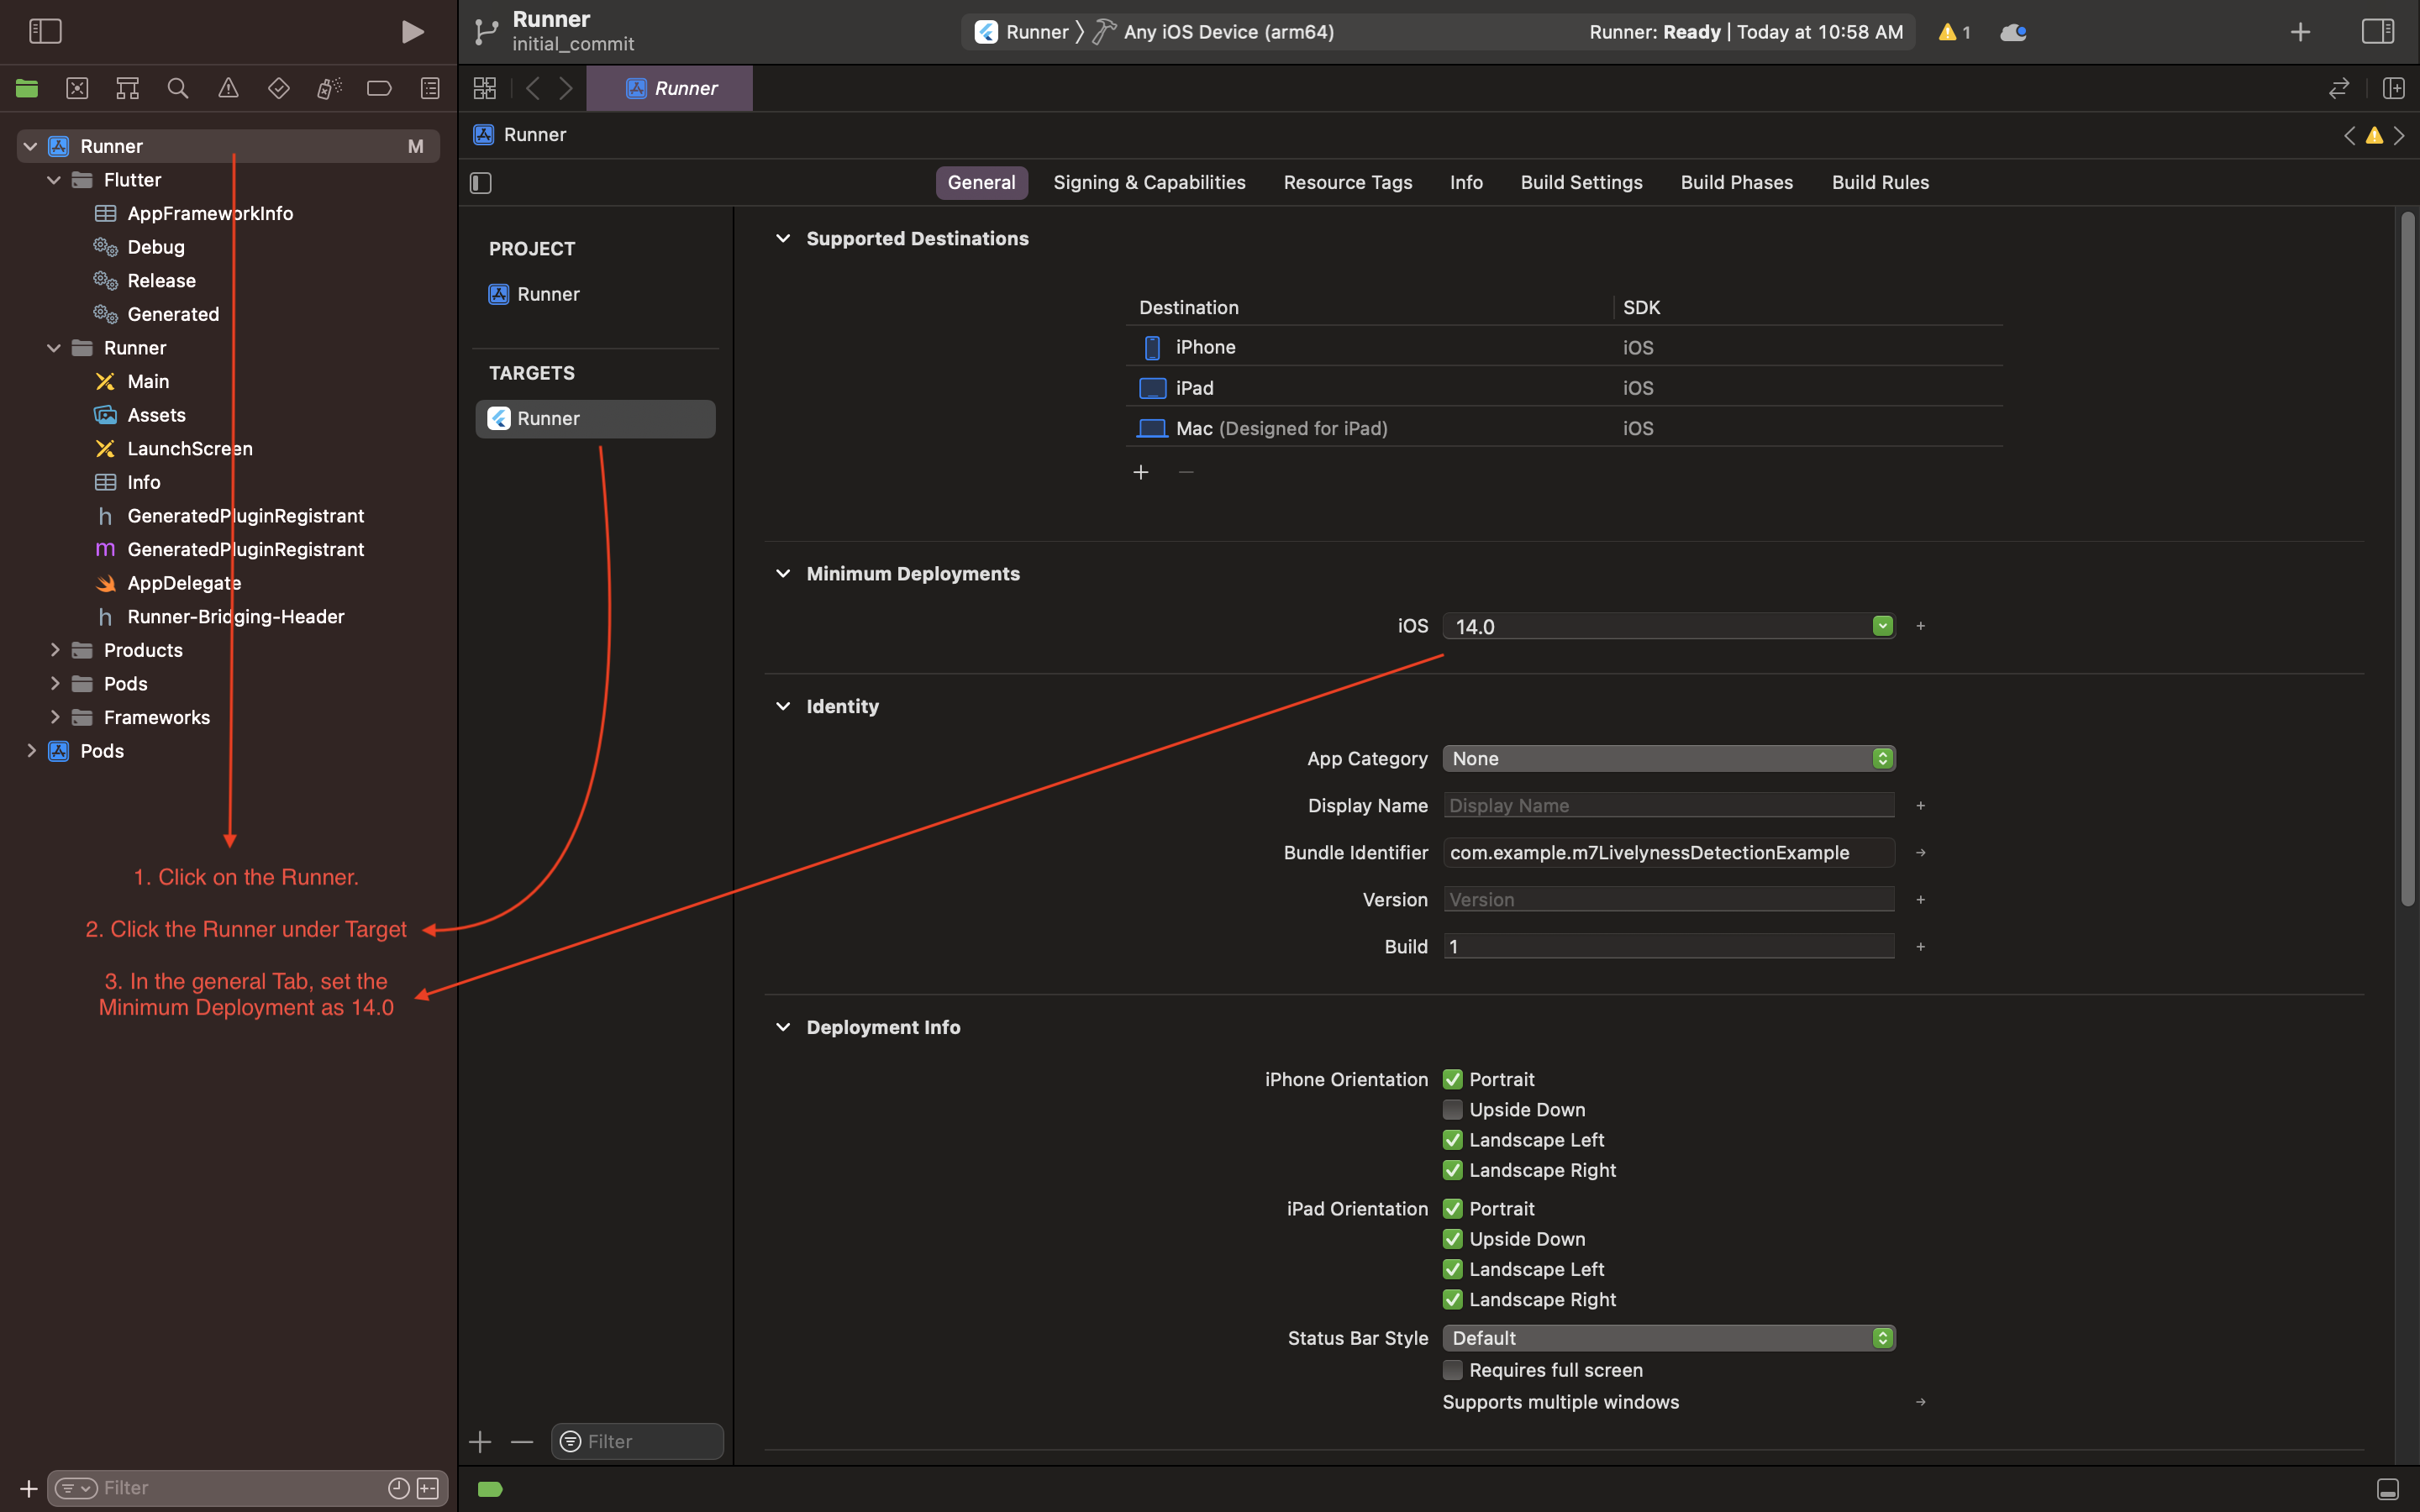
iOS
- 在Xcode中打开项目并设置部署目标。
- 打开
ios/Runner/Info.plist文件并以源代码模式打开。 - 在
<dict>标签内添加以下代码:
  <key>NSCameraUsageDescription</key>
  <string>Camera Access for Scanning</string>
  <key>NSMicrophoneUsageDescription</key>
  <string>Microphone for playing instructions audio.</string>
- 打开
ios/Runner/Podfile文件并取消注释第二行:
platform :ios, '14.0' # <---------- Uncomment this line
- 在Xcode项目中设置部署目标
Android
- 打开
example/android/app/build.gradle文件并将minSdkVersion设置为21。
minSdkVersion 21
示例
调用单行函数即可返回捕获图像的临时路径。
代码
final String? response =
    await LivelynessDetection.instance.detectLivelyness(
  context,
  config: DetectionConfig(
    steps: [
      LivelynessStepItem(
        step: LivelynessStep.blink,
        title: "Blink",
        isCompleted: false,
      ),
      LivelynessStepItem(
        step: LivelynessStep.smile,
        title: "Smile",
        isCompleted: false,
      ),
    ],
    startWithInfoScreen: true,
  ),
);
更多关于Flutter活体检测插件livelyness_detection的使用的实战教程也可以访问 https://www.itying.com/category-92-b0.html

更多关于Flutter活体检测插件livelyness_detection的使用的实战系列教程也可以访问 https://www.itying.com/category-92-b0.html
liveness_detection 是一个用于 Flutter 的插件,旨在通过手机摄像头进行活体检测,以确保用户是真实存在的而不是使用照片或视频进行欺骗。这个插件通常用于身份验证、安全登录等场景。
以下是如何在 Flutter 项目中使用 liveness_detection 插件的基本步骤:
1. 添加依赖
首先,你需要在 pubspec.yaml 文件中添加 liveness_detection 插件的依赖:
dependencies:
  flutter:
    sdk: flutter
  livelyness_detection: ^版本号
请将 ^版本号 替换为最新的 livelyness_detection 插件的版本号。
2. 获取插件
运行以下命令以获取插件:
flutter pub get
3. 导入插件
在需要使用活体检测功能的 Dart 文件中,导入插件:
import 'package:livelyness_detection/livelyness_detection.dart';
4. 初始化活体检测
在需要使用活体检测的地方,初始化 LivelynessDetection 对象:
LivelynessDetection livelynessDetection = LivelynessDetection();
5. 开始检测
调用 startDetection 方法来开始活体检测:
void startLivelynessDetection() async {
  try {
    bool isLive = await livelynessDetection.startDetection();
    if (isLive) {
      // 活体检测成功
      print("活体检测成功");
    } else {
      // 活体检测失败
      print("活体检测失败");
    }
  } catch (e) {
    // 处理异常
    print("检测过程中出现错误: $e");
  }
}
6. 处理结果
startDetection 方法返回一个布尔值,表示检测是否成功。如果返回 true,则表示检测到活体;如果返回 false,则表示未检测到活体。
7. 自定义配置(可选)
你可以根据需要自定义活体检测的配置,例如检测时间、动作等。具体配置方式可以参考插件的文档或源代码。
8. 注意事项
- 确保在调用
startDetection之前,用户已经授予了相机权限。 - 插件的功能和性能可能会因设备而异,建议在实际设备上进行测试。
9. 示例代码
以下是一个完整的示例代码:
import 'package:flutter/material.dart';
import 'package:livelyness_detection/livelyness_detection.dart';

void main() {
  runApp(MyApp());
}

class MyApp extends StatelessWidget {
  [@override](/user/override)
  Widget build(BuildContext context) {
    return MaterialApp(
      home: Scaffold(
        appBar: AppBar(
          title: Text('Liveness Detection Example'),
        ),
        body: Center(
          child: ElevatedButton(
            onPressed: startLivelynessDetection,
            child: Text('Start Liveness Detection'),
          ),
        ),
      ),
    );
  }
}

void startLivelynessDetection() async {
  LivelynessDetection livelynessDetection = LivelynessDetection();
  try {
    bool isLive = await livelynessDetection.startDetection();
    if (isLive) {
      // 活体检测成功
      print("活体检测成功");
    } else {
      // 活体检测失败
      print("活体检测失败");
    }
  } catch (e) {
    // 处理异常
    print("检测过程中出现错误: $e");
  }
}