


Flutter气泡动画插件awesome_bubble的使用
Flutter气泡动画插件awesome_bubble的使用
简介
awesome_bubble 是一个用于在所有其他应用程序之上显示消息气泡的 Flutter 插件。该插件可以显示覆盖层气泡和通知。
支持平台
Android
关于
awesome_bubble 提供了快速且简便地显示消息气泡的功能。只需按照以下步骤操作即可。
该插件完全依赖于在所有应用之上显示气泡,因此它仅适用于 Android 系统,因为 iOS 不提供此功能。
使用方法
-
首先,在
pubspec.yaml文件中添加插件:awesome_bubble: ^updated_version -
转到
AndroidManifest.xml文件以添加应用程序所需的权限:<uses-permission android:name="android.permission.FOREGROUND_SERVICE" /> <uses-permission android:name="android.permission.SYSTEM_ALERT_WINDOW" /> <uses-permission android:name="android.permission.POST_NOTIFICATIONS"/> -
现在你可以快速使用该插件,并可以查看 示例项目 以轻松发现所有优点。
插件功能
initService
必须在开始时使用,以便能够使用插件。它需要一组属性来设置气泡。
| 参数 | 必填 | 描述 |
|---|---|---|
screenHeight |
是 | 需要从 MediaQuery 发送逻辑像素屏幕高度 |
chatHeadIcon |
否 | 如果需要更改聊天头图标,可以在 drawable 文件夹中添加新图标,并传递图像名称(不带格式)。如果未传递图标,默认图标为插件内部的 android chat head icon。 |
notificationIcon |
否 | 与 chatHeadIcon 相同当未传递图标时,默认图标为插件内部的 android notification icon。 |
notificationTitle |
否 | 当关闭聊天头时,会显示包含标题和正文的通知。如果不发送任何标题,默认通知标题为 App Name |
notificationBody |
否 | 与 notificationTitle 相同,但默认通知正文为 Your Service is still working |
notificationCircleHexColor |
否 | 在 Android 13 及以上版本,系统会将通知图标置于圆圈内。可以通过此参数更改圆圈颜色。 但在 Android 10 及以下版本,此参数用于更改通知图标 |
checkPermission
用于检查应用程序是否具有显示在所有应用之上的权限。此函数返回布尔值。
true表示已允许权限,因此可以启动气泡。false表示未允许权限,因此需要首先使用askPermission函数。
askPermission
通过使用此函数,你将被自动引导至系统设置,具体是在与显示在其他应用之上的部分相关的区域,以便给你的应用授予此权限。
startService
通过此函数可以启动服务以显示气泡。
| 参数 | 必填 | 描述 |
|---|---|---|
notificationTitle |
否 | 如果要在启动服务之前更改通知标题,可以通过传递新的通知标题来实现,否则如果在 initService 中使用了通知标题,则服务将使用它。 |
stopService
通过此函数可以停止服务以关闭气泡。
clearNotificationService
通过此函数可以清除状态栏中的气泡通知。
示例代码
以下是完整的示例代码,展示了如何使用 awesome_bubble 插件。
import 'dart:async';
import 'dart:developer';
import 'dart:math' as math;
import 'package:awesome_bubble/awesome_bubble.dart';
import 'package:device_info_plus/device_info_plus.dart';
import 'package:flutter/material.dart';
import 'package:flutter/services.dart';
import 'package:flutter_local_notifications/flutter_local_notifications.dart';
void main() {
runApp(const MyApp());
}
class MyApp extends StatefulWidget {
const MyApp({super.key});
[@override](/user/override)
State<MyApp> createState() => _MyAppState();
}
class _MyAppState extends State<MyApp> with WidgetsBindingObserver {
String msg = 'Unknown';
final _bubblePlugin = BubbleService.I;
final FlutterLocalNotificationsPlugin flutterLocalNotificationsPlugin =
FlutterLocalNotificationsPlugin();
bool inTrip = false;
bool serviceStarted = true;
[@override](/user/override)
void didChangeAppLifecycleState(AppLifecycleState state) {
log(state.name, name: 'APP STATE');
log(inTrip.toString(), name: 'IS SERVICE WORKING?');
if (!inTrip) return;
switch (state) {
case AppLifecycleState.resumed:
clearNotificationService();
stopService();
break;
case AppLifecycleState.paused:
startService();
break;
default:
break;
}
}
[@override](/user/override)
void initState() {
clearNotificationService();
WidgetsBinding.instance.addObserver(this);
// 请求 Android 13 及以上的通知权限
flutterLocalNotificationsPlugin
.resolvePlatformSpecificImplementation<AndroidFlutterLocalNotificationsPlugin>()?
.requestPermission();
// 初始化服务,不初始化服务则无法启动
WidgetsBinding.instance.addPostFrameCallback((timeStamp) {
_bubblePlugin
.initService(
screenHeight: MediaQuery.sizeOf(context).height,
)
.then((value) {
serviceStarted = value ?? false;
setState(() {});
});
});
super.initState();
}
[@override](/user/override)
void didChangeMetrics() {
stopService();
super.didChangeMetrics();
}
[@override](/user/override)
void dispose() {
WidgetsBinding.instance.removeObserver(this);
super.dispose();
}
Future<void> startService() async {
bool serviceWorks;
try {
final double navigationBar = await getNavHeight();
if (!mounted) return;
final double density = MediaQuery.of(context).devicePixelRatio;
final double screenHeight = MediaQuery.of(context).size.height;
final double screenWidth = MediaQuery.of(context).size.width * density;
log(
{
'screenWidth-P.P': screenWidth,
'screenHeight-L.P': screenHeight,
'density-DPR': density,
'navigationBarHeight': navigationBar,
}.toString(),
name: 'From Flutter Side'.toUpperCase(),
);
int randomNum = math.Random().nextInt(500);
serviceWorks = await _bubblePlugin.startService() ?? false;
if (!serviceWorks) return;
} on PlatformException catch (e) {
serviceWorks = false;
log(e.message.toString(), name: 'START SERVICE ERROR');
}
if (!mounted) return;
setState(() {
msg = (serviceWorks
? "Success starting chat head service"
: "Error when starting chat head service");
});
}
Future<void> stopService() async {
bool serviceStop;
try {
serviceStop = await _bubblePlugin.stopService() ?? false;
} on PlatformException catch (e) {
log(e.message.toString(), name: 'START SERVICE ERROR');
serviceStop = false;
}
if (!mounted) return;
setState(() {
msg = (serviceStop
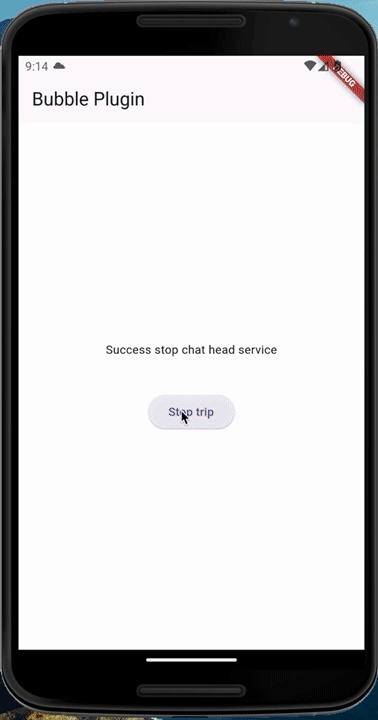
? "Success stop chat head service"
: "Error when stop hat head service");
});
}
Future<void> clearNotificationService() async =>
_bubblePlugin.clearNotificationService();
Future<double> getNavHeight() async {
final devicePixelRatio = MediaQuery.of(context).devicePixelRatio;
final screenHeight = MediaQuery.of(context).size.height;
final DeviceInfoPlugin deviceInfoPlugin = DeviceInfoPlugin();
final AndroidDeviceInfo androidInfo = await deviceInfoPlugin.androidInfo;
final deviceHeight = androidInfo.displayMetrics.heightPx;
final androidNavHeight = deviceHeight / devicePixelRatio - screenHeight;
return androidNavHeight;
}
[@override](/user/override)
Widget build(BuildContext context) {
return MaterialApp(
theme: ThemeData(
useMaterial3: true,
),
home: Scaffold(
backgroundColor: Colors.white,
appBar: AppBar(
title: const Text('Bubble Plugin'),
),
body: SizedBox(
width: MediaQuery.of(context).size.width,
child: Column(
mainAxisAlignment: MainAxisAlignment.center,
children: [
Text('$msg\n'),
if (serviceStarted) ...[
const SizedBox(height: 20),
ElevatedButton(
onPressed: () async {
if (!inTrip) {
final hasAPermission =
await _bubblePlugin.checkPermission();
if (!(hasAPermission ?? true)) {
await _bubblePlugin.askPermission();
return;
}
}
inTrip = !inTrip;
log(inTrip.toString(), name: 'bubbleIsWorking');
setState(() {});
},
child: Text(inTrip ? 'Stop trip' : 'Start trip'),
),
]
],
),
),
),
);
}
}
class BubbleService {
BubbleService._();
static BubbleService I = BubbleService._();
final AwesomeBubble _bubble = AwesomeBubble.I;
Future<bool?> initService({
required double screenHeight,
String? chatHeadIcon,
String? notificationIcon,
String? notificationTitle,
int? notificationCircleHexColor,
String? notificationBody,
}) =>
_bubble.initService(
screenHeight: screenHeight,
chatHeadIcon: chatHeadIcon,
notificationIcon: notificationIcon,
notificationTitle: notificationTitle,
notificationCircleHexColor: notificationCircleHexColor,
notificationBody: notificationBody,
);
Future<bool?> startService({String? notificationTitle}) =>
_bubble.startService(
notificationTitle: notificationTitle,
);
Future<bool?> stopService() => _bubble.stopService();
Future<bool?> checkPermission() => _bubble.checkPermission();
Future<bool?> askPermission() => _bubble.askPermission();
Future<bool?> clearNotificationService() =>
_bubble.clearServiceNotification();
}
更多关于Flutter气泡动画插件awesome_bubble的使用的实战教程也可以访问 https://www.itying.com/category-92-b0.html

更多关于Flutter气泡动画插件awesome_bubble的使用的实战系列教程也可以访问 https://www.itying.com/category-92-b0.html
awesome_bubble 是一个用于在 Flutter 应用中创建气泡动画效果的插件。它可以帮助你轻松地在应用中添加动态的气泡效果,通常用于背景装饰或增强用户体验。
安装
首先,你需要在 pubspec.yaml 文件中添加 awesome_bubble 依赖:
dependencies:
  flutter:
    sdk: flutter
  awesome_bubble: ^1.0.0  # 确保使用最新的版本
然后运行 flutter pub get 来安装依赖。
基本用法
awesome_bubble 提供了 Bubble 小部件,你可以将它添加到你的 UI 中。以下是一个简单的示例,展示如何在应用中使用气泡动画:
import 'package:flutter/material.dart';
import 'package:awesome_bubble/awesome_bubble.dart';

class BubbleExample extends StatelessWidget {
  [@override](/user/override)
  Widget build(BuildContext context) {
    return Scaffold(
      appBar: AppBar(
        title: Text('Bubble Animation Example'),
      ),
      body: Center(
        child: Container(
          width: 300,
          height: 300,
          child: Bubble(
            child: Center(
              child: Text(
                'Hello, Bubble!',
                style: TextStyle(fontSize: 24, color: Colors.white),
              ),
            ),
            color: Colors.blue,
            radius: 100,
            duration: Duration(seconds: 3),
            repeat: true,
          ),
        ),
      ),
    );
  }
}

void main() {
  runApp(MaterialApp(
    home: BubbleExample(),
  ));
}
参数说明
child: 气泡内部的子组件,通常是你想要显示的文本或图标。color: 气泡的颜色。radius: 气泡的半径。duration: 气泡动画的持续时间。repeat: 是否重复播放动画。
自定义气泡动画
你还可以通过 BubbleController 来控制气泡的动画。例如,你可以手动启动、停止或重置动画:
import 'package:flutter/material.dart';
import 'package:awesome_bubble/awesome_bubble.dart';

class CustomBubbleExample extends StatefulWidget {
  [@override](/user/override)
  _CustomBubbleExampleState createState() => _CustomBubbleExampleState();
}

class _CustomBubbleExampleState extends State<CustomBubbleExample> {
  BubbleController _bubbleController = BubbleController();

  [@override](/user/override)
  Widget build(BuildContext context) {
    return Scaffold(
      appBar: AppBar(
        title: Text('Custom Bubble Animation'),
      ),
      body: Center(
        child: Column(
          mainAxisAlignment: MainAxisAlignment.center,
          children: [
            Container(
              width: 200,
              height: 200,
              child: Bubble(
                controller: _bubbleController,
                child: Center(
                  child: Text(
                    'Custom Bubble',
                    style: TextStyle(fontSize: 24, color: Colors.white),
                  ),
                ),
                color: Colors.green,
                radius: 80,
                duration: Duration(seconds: 2),
                repeat: false,
              ),
            ),
            SizedBox(height: 20),
            ElevatedButton(
              onPressed: () {
                _bubbleController.start();
              },
              child: Text('Start Animation'),
            ),
            ElevatedButton(
              onPressed: () {
                _bubbleController.stop();
              },
              child: Text('Stop Animation'),
            ),
            ElevatedButton(
              onPressed: () {
                _bubbleController.reset();
              },
              child: Text('Reset Animation'),
            ),
          ],
        ),
      ),
    );
  }
}

void main() {
  runApp(MaterialApp(
    home: CustomBubbleExample(),
  ));
}