


HarmonyOS 鸿蒙Next 如何创新玩转端云一体化开发 计算十二生肖-云函数
HarmonyOS 鸿蒙Next 如何创新玩转端云一体化开发 计算十二生肖-云函数
- 前言
之前帖子介绍过用不同方式计算十二生肖,也用过Serverless云函数计算,但那时是用Java调用云函数,这次直接使用端云一体化开发,方便了很多,不用手工集成云函数SDK, 而且在DevEco Studio 就可以完成端侧代码开发和云侧代码开发,一键部署云函数和云数据库,下面先来看一下效果。
- 效果
- 讲解
创建端云一体化项目,这里就不介绍的,可以移步到官方详细教程创建端云一体化开发工程-端云一体化开发-应用/服务开发-DevEco Studio使用指南(HarmonyOS)-工具-HarmonyOS应用开发 端云一体化项目结构和之前不一样,多了CloudProgram模块, 下面介绍项目开发,先从云侧开发开始,再到端侧开发。
- 云侧开发
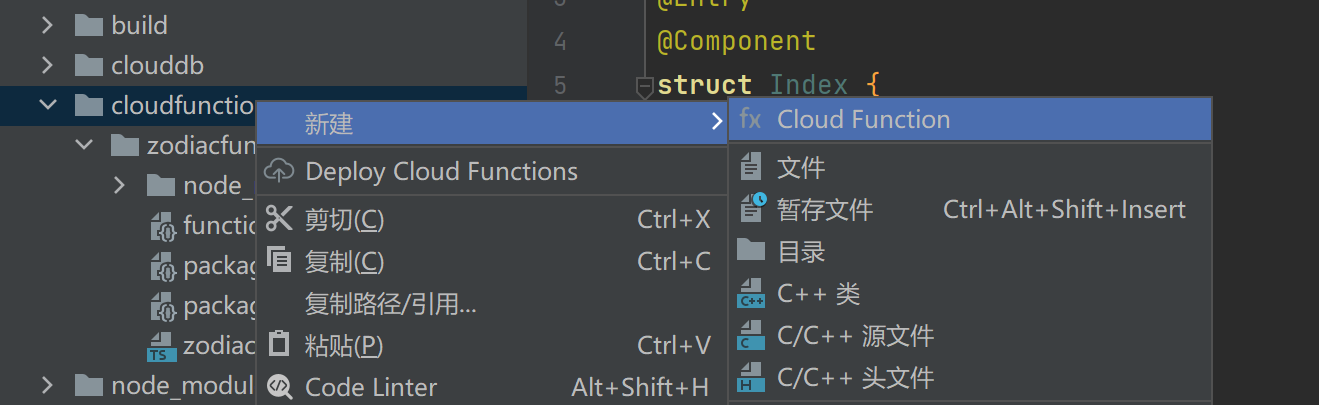
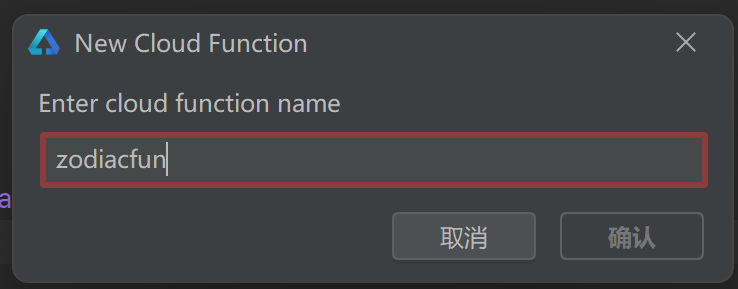
4.1 展开CloudProgram模块,右击cloudfunctions目录,创建自定义云函数:
4.2 打开function-config.json文件,记录修改authType为apigw-client
{
  "handler": "zodiacFun.myHandler",
  "triggers": [
    {
      "type": "http",
      "properties": {
        "enableUriDecode": true,
        "authFlag": "true",
        "authAlgor": "HDA-SYSTEM",
        "authType": "apigw-client"
      }
    }
  ]
}
4.3 打开zodiacFun.ts文件,编写自定云函数逻辑,计算十二生肖方法就是写在这里,同时把结果返回端侧.
let myHandler = async function(event, context, callback, logger) {
  // 打印参数
  logger.info("**event: "+JSON.stringify(event))
  // 定义十二生肖
  let zodiac = ["猴", "鸡", "狗", "猪", "鼠", "牛", "虎", "兔", "龙", "蛇", "马", "羊"];
  // 转化参数为对象参数
  event.body = JSON.parse(event.body);
  // 根据年份计算生肖下标
  let idx = parseInt(event.body.year)%12;
  // 获取生肖
  let sx = zodiac[idx];
  // 生成HTTP响应对象
  let res = new context.HTTPResponse({"zodiac": sx}, {
    "faas-content-type": "json"
  }, "application/json", "200");
  // 回调
  callback(res);
};
export { myHandler };
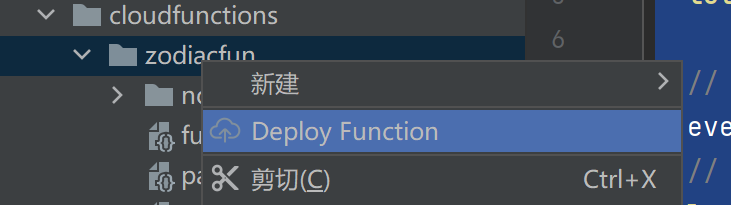
4.4 部署云侧代码到AGC上,右击自定义云函数目录,选择Deploy Function, 自动部署到Serverless上,如果提示没有登录,登录成功后,再操作一次部署。
4.5 到这里云侧开发就完成了,可以登录到AGC->云函数,找到刚才部署的云函数,测试一下自定义云函数。
- 端侧开发
5.1 先看一下端侧模块结构:
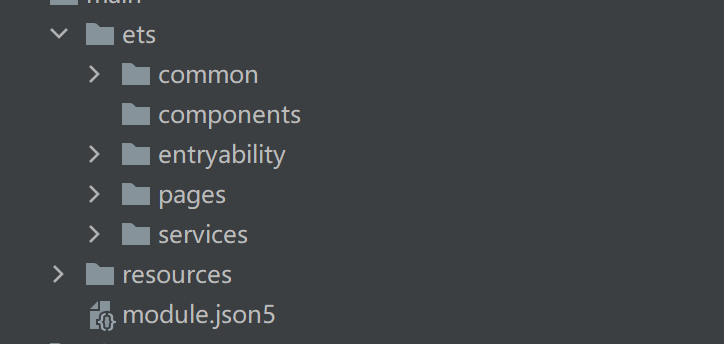
5.2 common目录放一些公共的封装类,比如Log类; components目录放自定义组件;entryability是自动生成的,里面有一个EntryAbility类,包含生命周期;pages目录放UI布局页面;services目录放业务逻辑类,比如调用云侧接口。
5.3 这里只介绍services目录和pages目录下的工作,先介绍如何和AGC连接上的,这里使用一个单独的文件来处理:
5.3.1 services目录下AgcConfig.ts
import agconnect from '@hw-agconnect/api-ohos';
import "@hw-agconnect/core-ohos";
import "@hw-agconnect/auth-ohos";
import '@hw-agconnect/auth-types-ohos';
import { Log } from '../common/Log';
const TAG = "[AGCConfig]";
export function getAGConnect(context) {
  try {
    agconnect.instance().init(context);
    Log.info(TAG, "xx init AGC SDK success");
    return agconnect;
  }
  catch (err) {
    Log.error(TAG, "xx initAgcSDK failed" + err);
  }
}
5.3.2 services目录下Function.ts
import agconnect from '@hw-agconnect/api-ohos';
import "@hw-agconnect/function-ohos";
import { Log } from '../common/Log';
import { getAGConnect } from './AgcConfig';
const TAG = "[AGCFunction]";
export function zodiac(context, params: any): Promise<string> {
  console.info('xx Function Params: ' + JSON.stringify(params))
  return new Promise((resolve, reject) => {
    // 获取AGC连接
    getAGConnect(context);
    let functionResult;
    // 获取云函数回调
    let functionCallable = agconnect.function().wrap("zodiacfun-$latest");
    // 传递参数调用云函数
    functionCallable.call(params).then((ret: any) => {
      Log.info(TAG,'xx Zodiac Function Sucess')
      // 获取成功返回结果集
      functionResult = ret.getValue();
      Log.info(TAG, "xx Zodiac Function Called, Returned Value: " + JSON.stringify(ret.getValue()));
      // 返回结果集给界面
      resolve(functionResult.zodiac);
    }).catch((error: any) => {
      Log.error(TAG, "xx Error - could not obtain zodiac function result. " );
      Log.error(TAG, "xx Error Detail: " + JSON.stringify(error));
      reject(error);
    });
  });
}
5.3.3 pages目录 Index.ts 这里是页面布局,上面看到的效果,就是这里实现的。
import { zodiac } from '../services/Function';
@Entry
@Componentstruct
class Index {
  // 存储选择年份
  @State year: number = 2022
  // 计算出来生肖
  @State born: string = "?"
  // 是否在计算中
  @State flag: boolean = false
  // 计算生肖
  getBorn() {
    // 标识为计算中
    this.flag = true;
    console.info('xx Page year: ' + this.year)
    // 封装参数
    let params = {
      "year": this.year
    }
    // 调用函数
    zodiac(getContext(this), params).then((res) => {
      // 计算完成
      this.flag = false;
      // 结果赋值给生肖变量
      this.born = res;
    }).catch((err) => {
      // 计算完成
      this.flag = false;
      console.error('xx error: ', err && err.message);
    });
  }
  build() {
    Stack() {
      if (!this.flag) {
        Column({space: 20}) {
          Text('请选择年份')
            .fontSize(20)
            .fontWeight(FontWeight.Bold)
          // 选择年份
          Column() {
            Text(this.year + '')
              .fontSize(20)
              .fontWeight(FontWeight.Bold)
              .padding(10)
              .width(100)
              .border({ width: 1, radius: 8 })
          }
          .bindMenu([
            { value: '2006', action: () => {this.year = 2006; this.born = '?'} },
            { value: '2007', action: () => {this.year = 2007; this.born = '?'} },
            { value: '2008', action: () => {this.year = 2008; this.born = '?'} },
            { value: '2009', action: () => {this.year = 2009; this.born = '?'} },
            { value: '2010', action: () => {this.year = 2010; this.born = '?'} },
            { value: '2011', action: () => {this.year = 2011; this.born = '?'} },
            { value: '2012', action: () => {this.year = 2012; this.born = '?'} },
            { value: '2013', action: () => {this.year = 2013; this.born = '?'} },
            { value: '2014', action: () => {this.year = 2014; this.born = '?'} },
            { value: '2015', action: () => {this.year = 2015; this.born = '?'} },
            { value: '2016', action: () => {this.year = 2016; this.born = '?'} },
            { value: '2017', action: () => {this.year = 2017; this.born = '?'} },
            { value: '2018', action: () => {this.year = 2018; this.born = '?'} },
            { value: '2019', action: () => {this.year = 2019; this.born = '?'} },
            { value: '2020', action: () => {this.year = 2020; this.born = '?'} },
            { value: '2021', action: () => {this.year = 2021; this.born = '?'} },
            { value: '2022', action: () => {this.year = 2022; this.born = '?'} },
            { value: '2023', action: () => {this.year = 2023; this.born = '?'} },
            { value: '2024', action: () => {this.year = 2024; this.born = '?'} },
            { value: '2025', action: () => {this.year = 2025; this.born = '?'} }
          ])
          // 计算按钮操作
          Button('计算', {type: ButtonType.Normal, stateEffect: true})
            .fontSize(18)
            .borderRadius(8)
            .width(100)
            .margin({bottom: 20})
            .onClick(() => {
              // 根据年份计算生肖
              this.getBorn()
            })
            // 显示计算结果
            Text(`${this.year} 年生肖是  ${this.born}`)
              .fontSize(20)
              .fontWeight(FontWeight.Bold)
        }
        .width('100%')
        .height('100%')
        .padding({top: '33%'})
      } else {
        // 计算中
        LoadingProgress().color(Color.Blue)
          .backgroundColor(Color.Transparent)
      }
    }
  }
}
- 总结
由于调用云侧云函数是异步的,不能马上返回结果,这里添加LoadingProgress组件,让用户知道在运行中,效果看得不是很明显,可能录制时,网速很快,LoadingProgress组件闪一下就不见了,如果遇到网络慢时,LoadingProgress就会一直转,直到云函数返回响应时,再消失LoadingProgress。
更多关于HarmonyOS 鸿蒙Next 如何创新玩转端云一体化开发 计算十二生肖-云函数的实战教程也可以访问 https://www.itying.com/category-93-b0.html

帖子里的代码就是源码,根据步骤操作就可以运行起来,感兴趣的小伙伴,尝试一下端云一体化开的便捷吧
更多关于HarmonyOS 鸿蒙Next 如何创新玩转端云一体化开发 计算十二生肖-云函数的实战系列教程也可以访问 https://www.itying.com/category-93-b0.html


针对帖子标题“HarmonyOS 鸿蒙Next 如何创新玩转端云一体化开发 计算十二生肖-云函数”的问题,以下是一个简洁且专业的回答:
HarmonyOS 鸿蒙Next在端云一体化开发方面,为开发者提供了丰富的工具和框架,以实现高效、无缝的端云协同。在计算十二生肖的云函数应用中,开发者可以利用鸿蒙的分布式技术,将复杂的计算任务卸载到云端执行,同时保持终端设备的响应性和用户体验。
具体来说,开发者可以遵循以下步骤进行开发:
-
设计云函数:根据十二生肖的计算逻辑,设计并编写相应的云函数。这些函数将部署在鸿蒙云的服务器上,负责处理终端发起的计算请求。
-
端侧调用:在鸿蒙终端设备(如手机、平板等)上,通过鸿蒙提供的API调用云端函数。这通常涉及到网络请求和数据处理等步骤。
-
结果展示:云端函数执行完毕后,将结果返回给终端设备。开发者可以在终端设备上设计用户界面,以直观的方式展示计算结果。
通过这种端云一体化的开发模式,开发者可以充分利用云端的计算资源和存储能力,同时保持终端设备的轻量级和灵活性。这不仅提升了应用的性能,还为用户带来了更加流畅和丰富的体验。
如果问题依旧没法解决请联系官网客服,官网地址是:https://www.itying.com/category-93-b0.html,