


Flutter动画效果插件piu_animation的使用
Flutter动画效果插件piu_animation的使用
PiuAnimation简介
PiuAnimation,piu~~~的一下,可用作加入购物车、保存截屏等动画特效。
查看效果
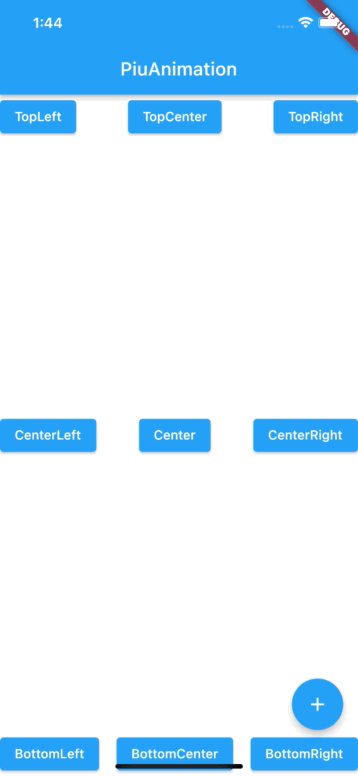
悬停动画一:异步任务返回true
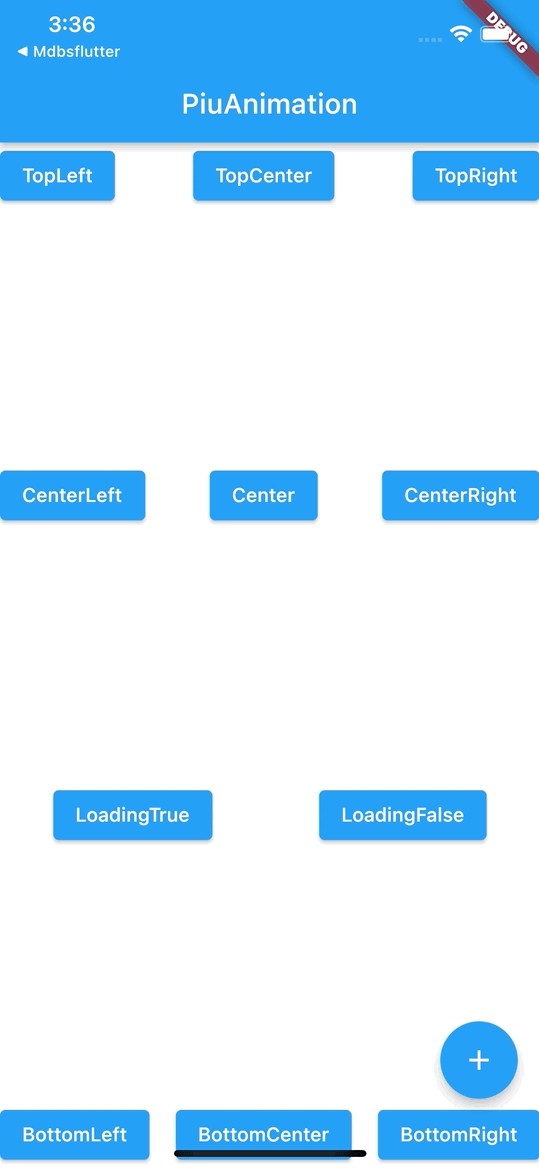
悬停动画二:异步任务返回false

添加方法一:普通的缩放piu动画
PiuAnimation.addAnimation(
    rootKey,   // 主Widget GlobalKey
    piuWidget, // Child
    endOffset, // 终点坐标
    maxWidth: MediaQuery.of(context).size.width, // Child最大宽度
    doSomethingBeginCallBack: () { // 动画开始回调
        print("动画开始");
    },
    doSomethingFinishCallBack: () { // 动画结束回调
        print("动画结束");
    }
);
添加方法二:悬停loading动画
PiuAnimation.addAnimation(
    rootKey,
    piuWidget,
    endOffset,
    maxWidth: MediaQuery.of(context).size.width,
    loadingCallback: loadingCallBack,
    doSomethingBeginCallBack: () {
        print("动画开始");
    },
    doSomethingFinishCallBack: (success) {
        if(success){
            print("loading 成功 动画结束");
        } else {
            print("loading 失败 动画结束");
        }
    }
);

// 异步方法定义,demo先通过delayed使用,正常业务逻辑中可以通过接口回调控制true和false
Future<bool> loadingSuccessFunction() {
    return Future.delayed(const Duration(milliseconds: 2000), () {
        return true;
    });
}

Future<bool> loadingFieldFunction() {
    return Future.delayed(const Duration(milliseconds: 2000), () {
        return false;
    });
}
使用方式详见main.dart
// 通过GlobalKey获取终点坐标,及大小等
// demo终点坐标为按钮的中心点
RenderBox box = key.currentContext!.findRenderObject() as RenderBox;
var offset = box.localToGlobal(Offset.zero);
Offset endOffset = Offset(offset.dx + box.size.width / 2, offset.dy + box.size.height / 2);
完整示例代码
import 'package:flutter/material.dart';
import 'dart:async';

import 'package:flutter/services.dart';
import 'package:piu_animation/piu_animation.dart';
import 'package:piu_animation/piu_loading_animation_widget.dart';

void main() {
  runApp(const MyApp());
}

class MyApp extends StatefulWidget {
  const MyApp({Key? key}) : super(key: key);

  [@override](/user/override)
  State<MyApp> createState() => _MyAppState();
}

class _MyAppState extends State<MyApp> {
  [@override](/user/override)
  void initState() {
    super.initState();
  }

  [@override](/user/override)
  Widget build(BuildContext context) {
    return MaterialApp(
      home: Scaffold(
        appBar: AppBar(
          title: const Text('PiuAnimation'),
        ),
        body: const PiuAnimationDemo(),
      ),
    );
  }
}

class PiuAnimationDemo extends StatefulWidget {
  const PiuAnimationDemo({Key? key}) : super(key: key);

  [@override](/user/override)
  State<PiuAnimationDemo> createState() => _PiuAnimationDemoState();
}

class _PiuAnimationDemoState extends State<PiuAnimationDemo> {
  GlobalKey rootKey = GlobalKey();

  GlobalKey topLeftKey = GlobalKey();
  GlobalKey topCenterKey = GlobalKey();
  GlobalKey topRightKey = GlobalKey();
  GlobalKey centerLeftKey = GlobalKey();
  GlobalKey centerKey = GlobalKey();
  GlobalKey centerRightKey = GlobalKey();
  GlobalKey bottomLeftKey = GlobalKey();
  GlobalKey bottomCenterKey = GlobalKey();
  GlobalKey bottomRightKey = GlobalKey();

  GlobalKey loadingTrueKey = GlobalKey();
  GlobalKey loadingFalseKey = GlobalKey();

  GlobalKey floatingKey = GlobalKey();

  [@override](/user/override)
  Widget build(BuildContext context) {
    return Scaffold(
      body: Container(
        key: rootKey,
        padding: EdgeInsets.zero,
        child: Column(
          mainAxisAlignment: MainAxisAlignment.spaceBetween,
          children: [
            Row(
              mainAxisAlignment: MainAxisAlignment.spaceBetween,
              children: [
                ElevatedButton(
                  key: topLeftKey,
                  onPressed: () {
                    addCart(topLeftKey);
                  },
                  child: const Text("TopLeft"),
                ),
                ElevatedButton(
                  key: topCenterKey,
                  onPressed: () {
                    addCart(topCenterKey);
                  },
                  child: const Text("TopCenter"),
                ),
                ElevatedButton(
                  key: topRightKey,
                  onPressed: () {
                    addCart(topRightKey);
                  },
                  child: const Text("TopRight"),
                ),
              ],
            ),
            Row(
              mainAxisAlignment: MainAxisAlignment.spaceBetween,
              children: [
                ElevatedButton(
                  key: centerLeftKey,
                  onPressed: () {
                    addCart(centerLeftKey);
                  },
                  child: const Text("CenterLeft"),
                ),
                ElevatedButton(
                  key: centerKey,
                  onPressed: () {
                    addCart(centerKey);
                  },
                  child: const Text("Center"),
                ),
                ElevatedButton(
                  key: centerRightKey,
                  onPressed: () {
                    addCart(centerRightKey);
                  },
                  child: const Text("CenterRight"),
                ),
              ],
            ),
            Row(
              mainAxisAlignment: MainAxisAlignment.spaceAround,
              children: [
                ElevatedButton(
                  key: loadingTrueKey,
                  onPressed: () {
                    addCart(loadingTrueKey, loadingCallBack: loadingSuccessFunction);
                  },
                  child: const Text("LoadingTrue"),
                ),
                ElevatedButton(
                  key: loadingFalseKey,
                  onPressed: () {
                    addCart(loadingFalseKey, loadingCallBack: loadingFieldFunction);
                  },
                  child: const Text("LoadingFalse"),
                ),
              ],
            ),
            Row(
              mainAxisAlignment: MainAxisAlignment.spaceBetween,
              children: [
                ElevatedButton(
                  key: bottomLeftKey,
                  onPressed: () {
                    addCart(bottomLeftKey);
                  },
                  child: const Text("BottomLeft"),
                ),
                ElevatedButton(
                  key: bottomCenterKey,
                  onPressed: () {
                    addCart(bottomCenterKey);
                  },
                  child: const Text("BottomCenter"),
                ),
                ElevatedButton(
                  key: bottomRightKey,
                  onPressed: () {
                    addCart(bottomRightKey);
                  },
                  child: const Text("BottomRight"),
                ),
              ],
            )
          ],
        ),
      ),
      floatingActionButton: FloatingActionButton(
        key: floatingKey,
        onPressed: () {
          addCart(floatingKey);
        },
        child: const Icon(Icons.add),
      ),
    );
  }

  // 任务成功
  Future<bool> loadingSuccessFunction() {
    return Future.delayed(const Duration(milliseconds: 2000), () {
      return true;
    });
  }

  // 任务失败
  Future<bool> loadingFieldFunction() {
    return Future.delayed(const Duration(milliseconds: 2000), () {
      return false;
    });
  }

  void addCart(GlobalKey key, {LoadingCallback? loadingCallBack}) {
    // 显示的widget
    Widget piuWidget = Container(
      color: Colors.redAccent,
      child: const FlutterLogo(),
    );

    // 动画终点坐标
    RenderBox box = key.currentContext!.findRenderObject() as RenderBox;
    var offset = box.localToGlobal(Offset.zero);
    Offset endOffset = Offset(offset.dx + box.size.width / 2, offset.dy + box.size.height / 2);

    PiuAnimation.addAnimation(
      rootKey,
      piuWidget,
      endOffset,
      maxWidth: MediaQuery.of(context).size.width,
      loadingCallback: loadingCallBack,
      doSomethingBeginCallBack: () {
        print("动画开始");
      },
      doSomethingFinishCallBack: (success) {
        if (success) {
          print("loading 成功 动画结束");
        } else {
          print("loading 失败 动画结束");
        }
      },
    );
  }
}
更多关于Flutter动画效果插件piu_animation的使用的实战教程也可以访问 https://www.itying.com/category-92-b0.html
1 回复

更多关于Flutter动画效果插件piu_animation的使用的实战系列教程也可以访问 https://www.itying.com/category-92-b0.html
piu_animation 是一个 Flutter 插件,用于创建复杂的动画效果。它提供了一种简单的方式来定义和管理动画,特别是在需要多个动画相互交互或嵌套时。以下是关于如何使用 piu_animation 的基本指南。
安装
首先,你需要在 pubspec.yaml 文件中添加 piu_animation 依赖:
dependencies:
  flutter:
    sdk: flutter
  piu_animation: ^1.0.0  # 请确保使用最新版本
然后运行 flutter pub get 来安装依赖。
基本使用
以下是一个简单的示例,展示如何使用 piu_animation 来创建一个基本动画:
import 'package:flutter/material.dart';
import 'package:piu_animation/piu_animation.dart';

class MyAnimatedWidget extends StatefulWidget {
  [@override](/user/override)
  _MyAnimatedWidgetState createState() => _MyAnimatedWidgetState();
}

class _MyAnimatedWidgetState extends State<MyAnimatedWidget> with SingleTickerProviderStateMixin {
  late AnimationController _controller;
  late Animation<double> _animation;

  [@override](/user/override)
  void initState() {
    super.initState();

    // 创建AnimationController
    _controller = AnimationController(
      duration: const Duration(seconds: 2),
      vsync: this,
    );

    // 使用PiuAnimation创建动画
    _animation = PiuAnimation(
      begin: 0.0,
      end: 1.0,
      curve: Curves.easeInOut,
    ).animate(_controller);

    // 启动动画
    _controller.forward();
  }

  [@override](/user/override)
  void dispose() {
    _controller.dispose();
    super.dispose();
  }

  [@override](/user/override)
  Widget build(BuildContext context) {
    return Scaffold(
      appBar: AppBar(
        title: Text('PiuAnimation Example'),
      ),
      body: Center(
        child: AnimatedBuilder(
          animation: _animation,
          builder: (context, child) {
            return Transform.scale(
              scale: _animation.value,
              child: Container(
                width: 200,
                height: 200,
                color: Colors.blue,
              ),
            );
          },
        ),
      ),
    );
  }
}

void main() {
  runApp(MaterialApp(
    home: MyAnimatedWidget(),
  ));
}