


HarmonyOS 鸿蒙Next OpenHarmony多设备分布式组网认证
HarmonyOS 鸿蒙Next OpenHarmony多设备分布式组网认证 OpenHarmony多设备分布式组网认证
前提
安装好DevEco Studio,新建项目,选择API9版本,stage模型
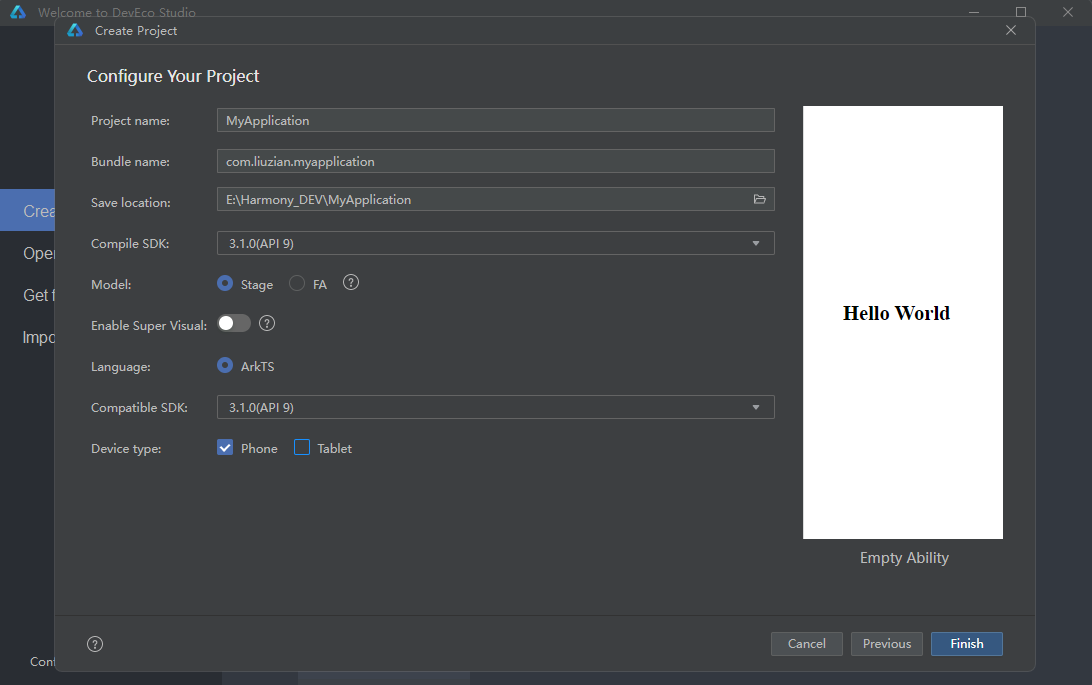
点击Finish,此时,咱们的API9项目就算创建成功啦~
替换Full-SDK
参考https://docs.openharmony.cn/pages/v3.2/zh-cn/application-dev/quick-start/full-sdk-switch-guide.md/
必要权限
ohos.permission.DISTRIBUTED_DATASYNC
允许不同设备间的数据交换。
- 权限级别:normal
- 授权方式:user_grant
- ACL使能:TRUE
ohos.permission.DISTRIBUTED_SOFTBUS_CENTER
允许不同设备之间进行组网处理。
- 权限级别:system_basic
- 授权方式:system_grant
- ACL使能:FALSE
权限申明
首先,在项目的模块级目录下找到并打开module.json5文件,在module下的对象里添加如下申明:
{
  "requestPermissions": [
    {
      "name": "ohos.permission.DISTRIBUTED_DATASYNC",
      "reason": "$string:DataSync",
      "usedScene": {
        "abilities": [
          "EntryAbility"
        ]
      }
    },
    {
      "name": "ohos.permission.DISTRIBUTED_SOFTBUS_CENTER"
    }
  ]
}
此时,配置文件中的权限申明就完成了,但是,此时我们还不能获得这些权限。由于ohos.permission.DISTRIBUTED_DATASYNC权限是ACL使能为TRUE的权限,我们需要在签名工具文件中说明一下。如何找到对应的签名工具文件呢?我们在安装DevEco Studio的时候是下载好了OpenHarmony的SDK的,此时在OpenHarmony文件夹中,打开 “你的SDK版本\toolchains\lib” 该路径,此时在lib文件夹中,我们可以找到两个json文件,分别为UnsgnedDebugProfileTemplate.json和UnsgnedReleasedProfileTemplate.json,点击并打开这两个文件,添加如下权限:
"acls":{
  "allowed-acls":[
    "ohos.permission.DISTRIBUTED_DATASYNC"
  ]
}
此时咱们不着急关闭这两个文件,因为在我们申请的权限中,有一个权限是允许我们使用系统能力的,也就是说,我们申请的这个权限是一个系统权限,
ohos.permission.DISTRIBUTED_SOFTBUS_CENTER是一个系统权限,其权限级别为system_basic,授权方式为system_grant,此时,我们需要再次修改刚刚打开的文件,找到"bundle-info"标签,修改“apl”标签内容和“app-feature”标签内容如下:
"apl":"system_basic",
"app-feature":"hos_system_app"
OK,接下来开始编码了
在申请ohos.permission.DISTRIBUTED_DATASYNC权限时,其文档中将其标注为用户手动授权的权限,此时需要我们动态申请权限,在项目中,我们新建一个ets文件,我这里取名为RequestPermission.ets
首先,导入以下包:
import abilityAccessCtrl, { Permissions } from '@ohos.abilityAccessCtrl';
import bundleManager from '@ohos.bundle.bundleManager';
import common from '@ohos.app.ability.common';
获取访问控制模块对象实例:
let atManager = abilityAccessCtrl.createAtManager();
编写如下方法(这里我使用的是异步函数):
export async function checkAccessTokenID(permission: Array) {
  // 获取应用程序的accessTokenID
  let tokenId: number;
  let grantStatus: Array<abilityAccessCtrl.GrantStatus> = []
  try {
    let bundleInfo: bundleManager.BundleInfo = await bundleManager.getBundleInfoForSelf(bundleManager.BundleFlag.GET_BUNDLE_INFO_WITH_APPLICATION);
    let appInfo: bundleManager.ApplicationInfo = bundleInfo.appInfo;
    tokenId = appInfo.accessTokenId;
  } catch (err) {
    console.error(`getBundleInfoForSelf failed, code is ${err.code}, message is ${err.message}`);
  }
  // 校验应用是否被授予权限,若申请多个权限,建议循环检查多个权限
  for (let index = 0;index < permission.length; index++) {
    try {
      grantStatus.push(await atManager.checkAccessToken(tokenId, permission[index]))
    } catch (err) {
      console.error(`checkAccessToken failed, code is ${err.code}, message is ${err.message}`);
    }
  }
  return grantStatus;
}

export async function checkPermission(context: common.UIAbilityContext, permissions: Array) {
  let grantStatus: Array<abilityAccessCtrl.GrantStatus> = await checkAccessTokenID(permissions)
  for (let i = 0; i < grantStatus.length; i++) {
    if (grantStatus[i] === abilityAccessCtrl.GrantStatus.PERMISSION_GRANTED) {
      console.info(`${permissions[i].toString()} 已授权`)
    } else {
      //申请权限
      console.info('开始向用户申请权限')
      requestPermissionFromUser(context, permissions)
    }
  }
}

export async function requestPermissionFromUser(context: common.UIAbilityContext, permissions: Array) {
  // requestPermissionsFromUser会判断权限的授权状态来决定是否唤起弹窗
  atManager.requestPermissionsFromUser(context, permissions).then((data) => {
    let grantStatus: Array = data.authResults
    let length: number = grantStatus.length
    for (let i = 0;i < length; i++) {
      if (grantStatus[i] === 0) {
        // 用户授权,可以继续访问目标操作
        console.info(`${permissions[i].toString()} 权限申请成功`)
      } else {
        // 用户拒绝授权,提示用户必须授权才能访问当前页面的功能,并引导用户到系统设置中打开相应的权限
        console.info(`${permissions[i].toString()} 权限申请被用户拒绝`)
      }
    }
    // 授权成功
  })
}
此时,我们申请权限的方法就算编写完成了,在应用入口,即EntryAbility.ts文件中的onCreate(want: Want, launchParam: AbilityConstant.LaunchParam)方法中回调权限申请函数:
requestPermissionFromUser(this.context, PERMISSIONS)
其中,PERMISSIONS定义如下:
const PERMISSIONS: Array = ['ohos.permission.DISTRIBUTED_DATASYNC']
到此,我们的权限申请就算完完全全完成啦,当用户第一次安装并打开应用的时候,应用会向用户通过弹窗形式申请权限,用户点击授权即可赋予应用相应的权限啦~
多设备组网认证
在开始编码之前,新建一个ets文件,我给它命名为DistributedDeviceManagerFunctions.ets
首先,导入所需包:
import deviceManager from '@ohos.distributedHardware.deviceManager'
由于咱们多设备组网认证功能中需要使用到一些共享对象,所以我的设计方法是设计一个类,并将方法和对象封装到该类中,方便调用:
export class DistributedDeviceManageFunc {
}
定义类中对象:
static mDeviceManager: deviceManager.DeviceManager
static subscribeId: number
static publishId: number
static distributedDeviceList: Array<deviceManager.DeviceInfo> = []
初始化类
static init() {
  deviceManager.createDeviceManager(globalThis.context.abilityInfo.bundleName, (error, data) => {
    if (error) {
      console.error(`create device manager failed,error:${JSON.stringify(error)}`)
      return
    }
    this.mDeviceManager = data
    console.info('create device manager successfully')
    try {
      this.publishId = Math.floor(Math.random() * 10000 + 1000)
      data.publishDeviceDiscovery({
        publishId: this.publishId,
        mode: deviceManager.DiscoverMode.DISCOVER_MODE_ACTIVE,
        freq: deviceManager.ExchangeFreq.HIGH,
        ranging: false
      })
      console.info('publishDeviceDiscovery successfully')
    } catch (error) {
      console.error(`publishDeviceDiscovery failed,error:${JSON.stringify(error)}`)
    }
    try {
      data.on('publishSuccess', (data) => {
        console.info("publishSuccess:" + JSON.stringify(data))
      })
      console.info('publishSuccess on successfully')
    } catch (error) {
      console.error(`publishSuccess failed,error:${JSON.stringify(error)}`)
    }
    try {
      data.on('publishFail', (error) => {
        console.info("publishFail on:" + JSON.stringify(error))
      })
      console.info('publishFail on successfully')
    } catch (error) {
      console.error(`publishFail failed,error:${JSON.stringify(error)}`)
    }
    try {
      data.on('deviceStateChange', (data) => {
        console.info("deviceStateChange on:" + JSON.stringify(data))
        if (data.action == deviceManager.DeviceStateChangeAction.READY) {
          AppStorage.Set('statusColor', '#ff4fc100')
        } else if (data.action == deviceManager.DeviceStateChangeAction.OFFLINE) {
          AppStorage.Set('statusColor', '#ffff0000')
        } else if (data.action == deviceManager.DeviceStateChangeAction.ONLINE) {
          AppStorage.Set('statusColor', '#ffffd500')
        }
      })
      console.info('deviceStateChange on successfully')
    } catch (error) {
      console.error(`deviceStateChange failed,error:${JSON.stringify(error)}`)
    }
  })
}
在该方法中,我们通过createDeviceManager(bundleName: string, callback: AsyncCallback): void函数创建了一个设备管理器实例,并将回调函数中得到的DeviceManager对象传递给先前定义的mDeviceManager.
以上操作完成后,使用publishDeviceDiscovery(publishInfo: PublishInfo): void函数发布周边设备发现,即调用该函数,主设备可以主动让周边(同一网络环境下)的设备发现识别:
try {
  this.publishId = Math.floor(Math.random() * 10000 + 1000)
  data.publishDeviceDiscovery({
    publishId: this.publishId,
    mode: deviceManager.DiscoverMode.DISCOVER_MODE_ACTIVE,
    freq: deviceManager.ExchangeFreq.HIGH,
    ranging: false
  })
  console.info('publishDeviceDiscovery successfully')
} catch (error) {
  console.error(`publishDeviceDiscovery failed,error:${JSON.stringify(error)}`)
}
注册设备状态回调,当设备状态发生改变时,可以通过on(type: ‘deviceStateChange’, callback: Callback<{ action: DeviceStateChangeAction, device: DeviceInfo }>): void获取设备状态改变后的第一状态:
try {
  data.on('deviceStateChange', (data) => {
    console.info("deviceStateChange on:" + JSON.stringify(data))
    if (data.action == deviceManager.DeviceStateChangeAction.READY) {
      AppStorage.Set('statusColor', '#ff4fc100')
    } else if (data.action == deviceManager.DeviceStateChangeAction.OFFLINE) {
      AppStorage.Set('statusColor', '#ffff0000')
    } else if (data.action == deviceManager.DeviceStateChangeAction.ONLINE) {
      AppStorage.Set('statusColor', '#ffffd500')
    }
  })
  console.info('deviceStateChange on successfully')
} catch (error) {
  console.error(`deviceStateChange failed,error:${JSON.stringify(error)}`)
}
开始发现周边设备
使用startDeviceDiscovery(subscribeInfo: SubscribeInfo, filterOptions?: string): void函数可以使本设备暂时具有发现周边发布设备发现的设备的能力,即本设备可以识别周边设备:
static startDeviceDiscovery() {
  try {
    this.subscribeId = Math.floor(Math.random() * 10000 + 1000)
    this.mDeviceManager.startDeviceDiscovery({
      subscribeId: this.subscribeId,
      mode: deviceManager.DiscoverMode.DISCOVER_MODE_ACTIVE,
      medium: deviceManager.ExchangeMedium.AUTO,
      freq: deviceManager.ExchangeFreq.HIGH,
      isWakeRemote: false,
      isSameAccount: false,
      capability: deviceManager.SubscribeCap.SUBSCRIBE_CAPABILITY_OSD
    })
    this.mDeviceManager.on('deviceFound', (data) => {
      console.info('device found')
      console.info("deviceFound:" + JSON.stringify(data))
      this.distributedDeviceList = []
      if (this.distributedDeviceList.length == 0) {
        this.distributedDeviceList.push(data.device)
        AppStorage.Set('distributedDeviceList', this.distributedDeviceList)
      } else {
        var length = 0
        this.distributedDeviceList.forEach(element => {
          if (element.deviceId == data.device.deviceId) {
            return
          }
          length++
        })
        if (length == this.length) {
          this.distributedDeviceList.push(data.device)
          AppStorage.Set('distributedDeviceList', this.distributedDeviceList)
        }
      }
    })
  } catch (error) {
    console.error(`startDeviceDiscovery failed,error:${JSON.stringify(error)}`)
  }
}
在该函数中,我们注册发现设备回调监听,当周边有可认证设备被发现时,该回调函数会返回 DeviceInfo类型的对象,其中为发现设备的部分设备信息:
this.mDeviceManager.on('deviceFound', (data) => {
  console.info('device found')
  console.info("deviceFound:" + JSON.stringify(data))
  this.distributedDeviceList = []
  if (this.distributedDeviceList.length == 0) {
    this.distributedDeviceList.push(data.device)
    AppStorage.Set('distributedDeviceList', this.distributedDeviceList)
  } else {
    var length = 0
    this.distributedDeviceList.forEach(element => {
      if (element.deviceId == data.device.deviceId) {
        return
      }
      length++
    })
    if (length == this.length) {
      this.distributedDeviceList.push(data.device)
      AppStorage.Set('distributedDeviceList', this.distributedDeviceList)
    }
  }
})
获取设备认证
在authenticateDevice(deviceInfo: DeviceInfo, authParam: AuthParam, callback: AsyncCallback<{deviceId: string, pinToken ?: number}>): void函数中,我们将所需配对的设备信息(DeviceInfo类型)作为参数传入即可触发设备认证,当两个设备没有相互认证时,回调该函数,对端设备上会弹出PIN码,在请求认证设备(本设备)中输入对端设备生成的PIN码即可完成设备认证
static authenticateDevice(deviceInformation: deviceManager.DeviceInfo) {
  try {
    this.mDeviceManager.authenticateDevice(deviceInformation, {
      authType: 1,
      extraInfo: undefined
    }, (error, data) => {
      if (error) {
        console.error("authenticateDevice error:" + JSON.stringify(error))
        return
      }
      console.info("authenticateDevice result:" + JSON.stringify(data))
    })
  } catch (error) {
    console.error(`authenticateDevice error:${JSON.stringify(error)}`)
  }
}
终止发现周边设备
static stopDeviceDiscovery() {
  try {
    this.mDeviceManager.stopDeviceDiscovery(this.subscribeId)
  } catch (error) {
    console.error(`stopDeviceDiscovery failed,error:${JSON.stringify(error)}`)
  }
}
获取可信任设备列表
当多个设备间完成相互认证时,调用该方法会获取完成认证的设备列表(deviceManager.DeviceInfo[]):
static getTrustedDeviceListSync() {
  return this.mDeviceManager.getTrustedDeviceListSync()
}
解除设备认证
static unAuthenticateDevice(deviceInformation: deviceManager.DeviceInfo) {
  this.mDeviceManager.unAuthenticateDevice(deviceInformation)
}
释放资源
static release() {
  this.mDeviceManager.release()
}
以上便是openHarmony中的多设备分布式组网认证过程,怎么样,你get到了吗
更多关于HarmonyOS 鸿蒙Next OpenHarmony多设备分布式组网认证的实战教程也可以访问 https://www.itying.com/category-93-b0.html

更多关于HarmonyOS 鸿蒙Next OpenHarmony多设备分布式组网认证的实战系列教程也可以访问 https://www.itying.com/category-93-b0.html
HarmonyOS 鸿蒙Next 和 OpenHarmony 多设备分布式组网认证主要涉及设备间的安全认证和通信机制。鸿蒙系统通过分布式软总线技术实现设备间的高效通信,而组网认证则是确保设备在分布式网络中安全连接的关键步骤。
在鸿蒙Next和OpenHarmony中,多设备分布式组网认证通常包括以下几个步骤:
-
设备发现与配对:通过蓝牙、Wi-Fi或其他通信协议,设备能够自动发现附近的鸿蒙设备,并通过安全协议进行配对。
-
身份认证:设备在组网前需要进行身份认证,确保参与组网的设备是可信的。鸿蒙系统采用基于数字证书的认证机制,确保设备身份的合法性。
-
安全通信:设备间通信采用加密技术,如TLS/SSL,确保数据在传输过程中不被窃听或篡改。
-
权限管理:鸿蒙系统提供细粒度的权限管理机制,设备在组网后只能访问被授权的资源,防止未经授权的访问。
-
动态组网:鸿蒙系统支持设备的动态加入和退出,组网认证机制能够实时更新设备状态,确保网络的安全性和稳定性。
鸿蒙Next和OpenHarmony的分布式组网认证机制在设计上考虑了安全性、高效性和易用性,适用于智能家居、智能办公、车载系统等多种场景。